Border OptionsHugging border, circle, square, or rectangle — with a 3mm satin stitch.
Backing OptionsAvailable with iron-on, sew-on, or velcro backing.
Fast ShippingShipped quickly from the USA.
Free Online Tools
Powerful embroidery utilities that save time and prevent costly mistakes.
Stitch AssistantRECOMMENDED
Get the exact stabilizer, machine settings, needle, and thread color sequence for every embroidery design you purchase — based on that design's stitch density, dimensions, and color count.
Proper hooping technique can make or break your embroidery - here are a few tips to remember when getting ready to start your embroidery project.
Many readers tell me the hardest part of the embroidery process is hooping. If the item is not hooped properly, disappointment is waiting in the wings. And many times, you feel you did everything right. The fabric was “square” in the hoop and tight as a drum, and yet, when the item was released, puckers appeared! Yikes - what went wrong?
I’ll bet that you hooped the item, tightened the screw (maybe even with a screwdriver!), tugged on the fabric for a snug fit and stitched away. Well, it’s not that simple - there’s another step and an absolute "don't" to take into consideration. The extra step is setting the proper hoop tension and the don't is never tug on the fabric once it's hooped.
Setting Proper Hoop Tension
Loosen the screw of the outer hoop. Place the outer hoop on a flat, hard surface. Place the stabilizer(s) and fabric on the outer hoop. Place the inner hoop on the fabric making sure the alignment marks on both the outer and inner hoops line up. Press the end opposite the screw into the outer hoop with the palm of your hand. Work both palms around the hoop until the entire inner hoop is in position.
Tighten the screw by hand (no need for a screwdriver) until it becomes difficult to turn. Do not pull on the fabric. Remove the inner hoop. Now that the inner hoop is removed, the tension is evenly distributed around the entire hoop, not concentrated at the location of the screw.
Hooping
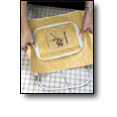
Be sure to apply even pressure to the hoop with tthe palms of your hands.
Lay the template of the embroidery design in the desired location on the fabric. Tape the template in osition.
Place the inner hoop on the fabric aligning the hoop’s horizontal and vertical centering marks with the crosshair on the template.
Pick up the fabric and hoop with both hands, holding the hoop in position. Place one end of the inner hoop into the outer hoop, hold in place and insert the other end of the hoop. Press firmly on both ends of the hoop with the palms of your hands.
Gently press the inner hoop slightly deeper than the outer hoop. This technique is called countersinking and allows the fabric to sit on the machine bed and not float above the surface.
Tips
Spray adhesive on the bottom of the inner hoop
If the fabric and hoop slip while moving to the outer hoop, consider using temporary spray adhesive on the bottom of the inner hoop. Place the inner hoop, bottom side up, in a box and spray with temporary spray adhesive. The hoop will be tacky and stick to the fabric.
Purchase an additional hoop to use with spray adhesive and sticky stabilizers. Reserve one hoop for delicate fabrics.
Always use the strongest part of your hand, the palm, to push the inner hoop into the outer hoop.
Eileen is the editor of Designs in Machine Embroidery and a regular contributor to freeEmbroiderystuff.com. Editor Eileen Roche shares her wealth of embroidery and sewing experience in this project based magazine. Her talent, creativity and enthusiasm distinguish her from others in the industry and are the driving force behind the magazine’s success.