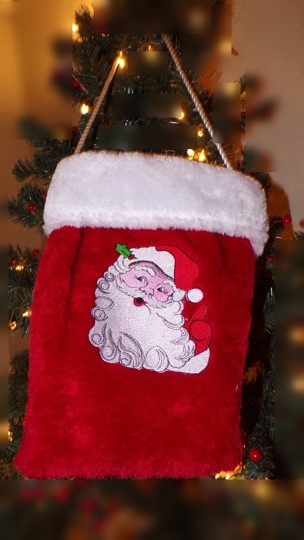
Santa Stocking Bag for Kids

Santa Stocking Bag for Kids Embroidery Project

By   Ramona Baird   on   November 06, 2018
  • SKILL LEVELIntermediate
  • TIME REQUIRED04:30
Description

This fuzzy Santa stocking transforms into a charming bag, perfect for a special little girl. Ideal for holiday festivities, it adds a touch of Christmas magic. Step-by-step instructions are included.

Step of

Materials

Project Preview Video

Materials
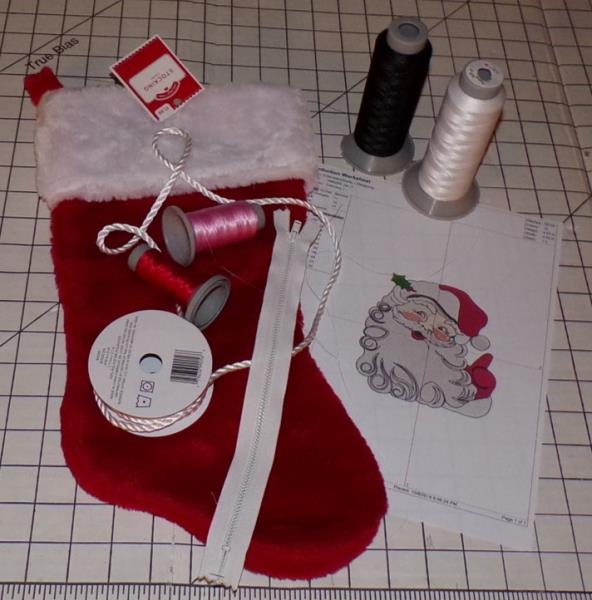
  • Purchased fur stocking
  • Cord for handle
  • Embroidery thread as stated in embroidery sequence
  • Adhesive tearaway stabilizer
  • Water soluble topper
  • Optional: zipper (insertion not shown in instructions)

  • Designs used in this project


    Step 1:
    Gather the materials and read through the instructions before beginning. Print out a paper template of the design.

    (Click Image to Enlarge)


    Step 2:
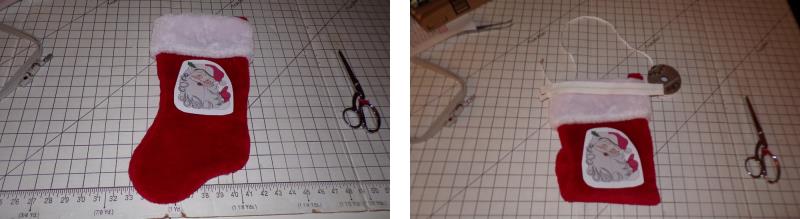
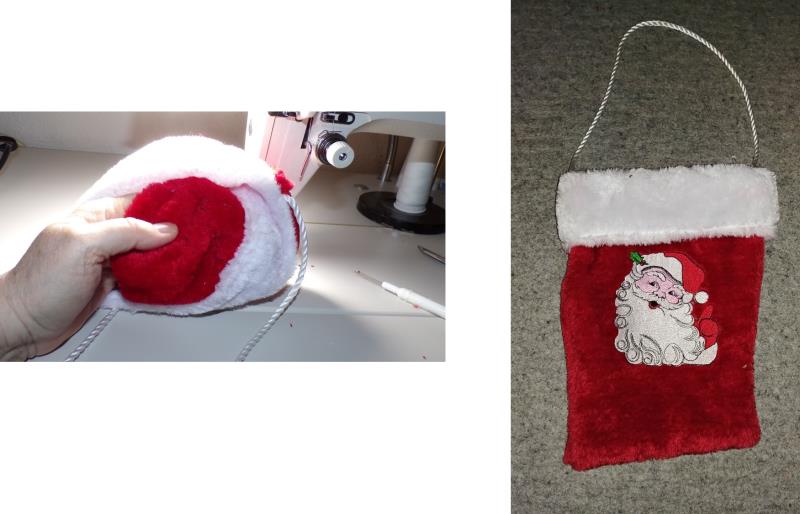
    Once embroidered, the stocking will be cut down to size with a cord-strap added. The photo on the right shows how the purse will look once finished.

    (Click Image to Enlarge)


    Step 3:
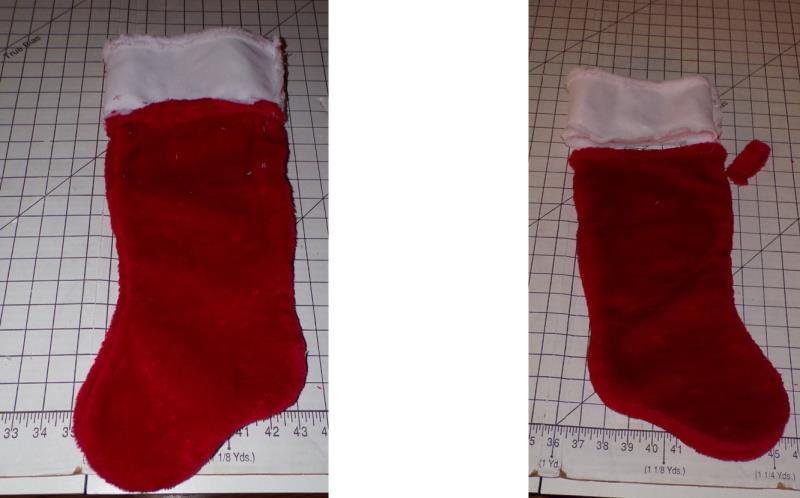
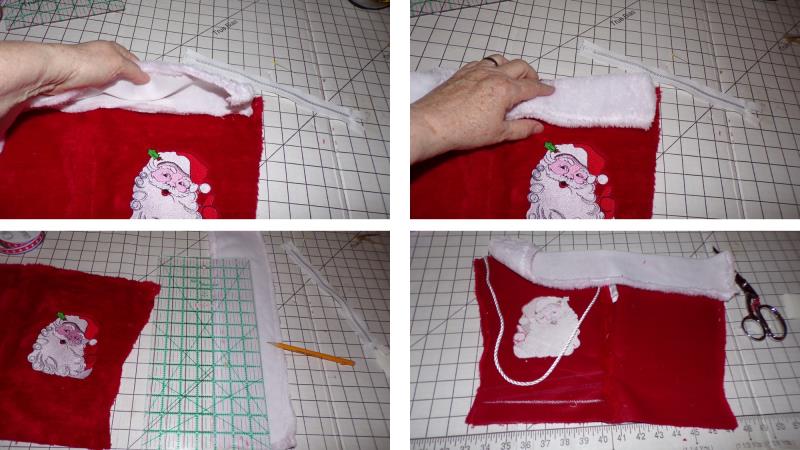
    Open up the cuff of the stocking. All stockings vary, so these instructions will be given for this stocking. You’ll have to adjust the instructions to fit the stocking you are working with. The cuff on this stocking is one layer with one end hemmed. Some stockings will have a double cuff. Use a seam ripper and undo all the stitching to separate all the pieces—the seam along the heel need only be undone to allow the stocking to lie flat.

    (Click Image to Enlarge)


    Step 4:
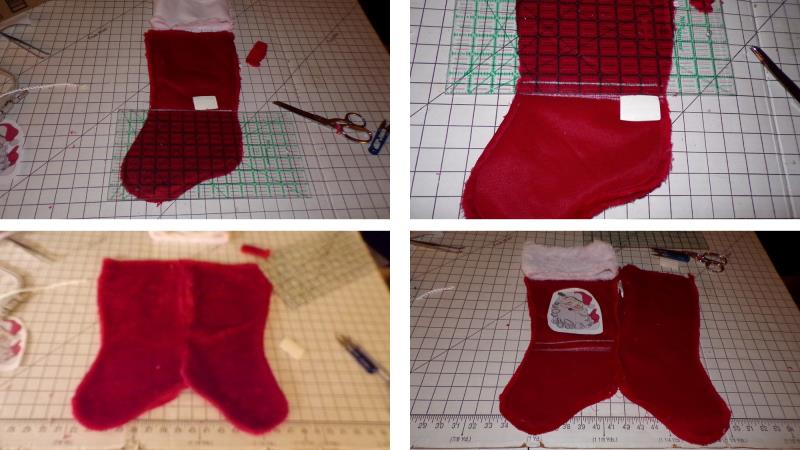
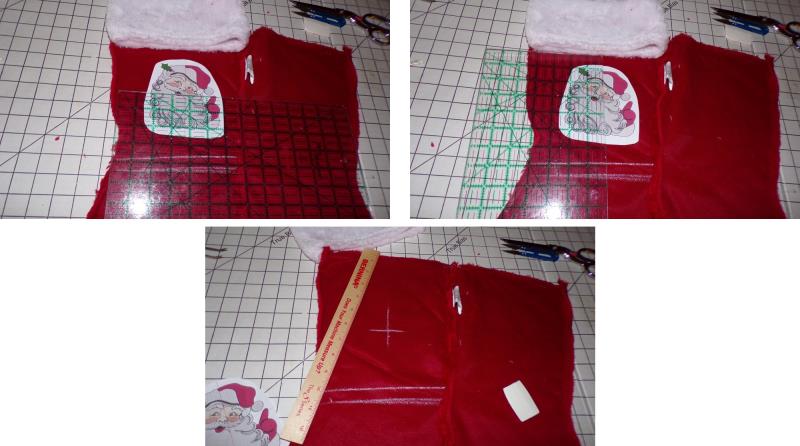
    Determine the length of the bag (where the curve of the toe and heel start). Use a ruler and chalk to mark the length and add a ½” seam allowance. Lay the stocking out flat. Cut out the paper template of the design. Place the design in the center of marked bag; be sure to keep the depth of the fur cuff in mind when deciding where to place the design.

    (Click Image to Enlarge)


    Step 5:
    Measure and center the template to mark the center on the stocking.

    (Click Image to Enlarge)


    Step 6:
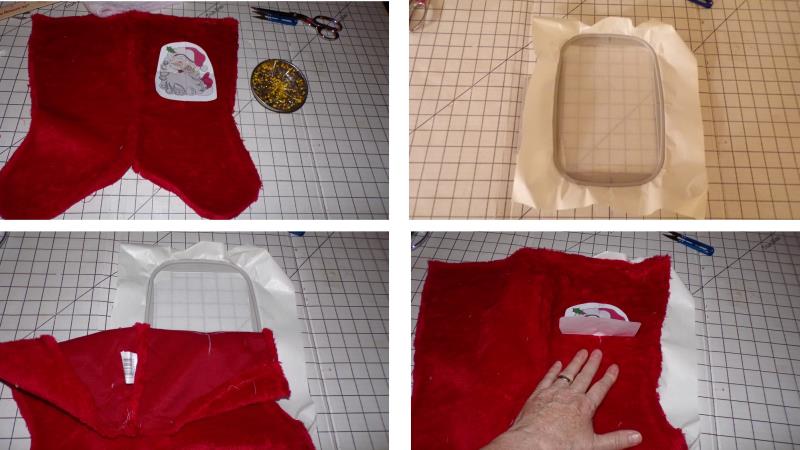
    Hoop a piece of tearaway adhesive stabilizer in the hoop and remove the protective paper. Squarely place the stocking in the hoop and press it down to stick to the stabilizer.

    (Click Image to Enlarge)


    Step 7:
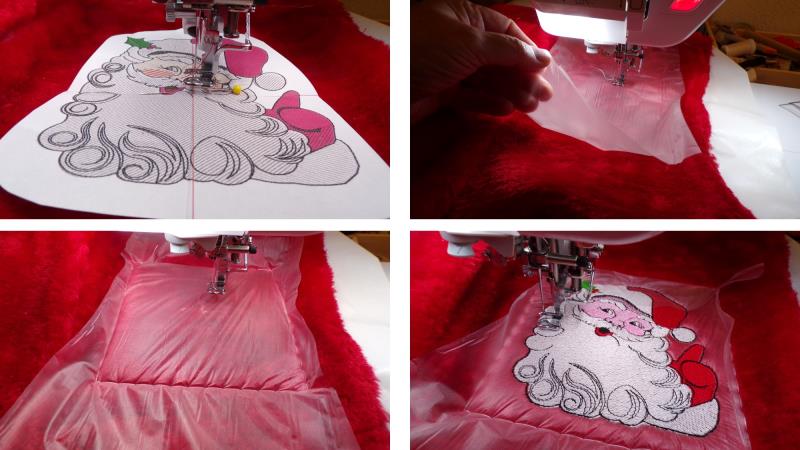
    Load the design on the machine and align the needle to the center of the template. Remove the template and place down a piece of water-soluble stabilizer. If your machine has a basting feature, use it to baste down the stabilizer to the stocking. Stitch the design following the color sequence.

    (Click Image to Enlarge)


    Step 8:
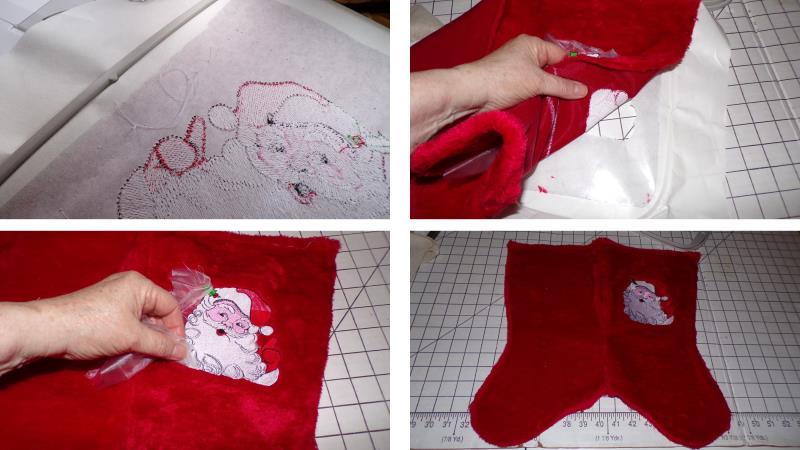
    After the design has finished stitching, remove the basting stitches and then remove the stocking from the hoop. Remove the excess stabilizers.

    (Click Image to Enlarge)


    Step 9:
    Now determine if the cuff needs to be cut down. This cuff had to be trimmed 2”. Also cut a length of cord as you determine (for the project it was cut 18”). Also cut off the bottom of the stocking along the cut line. Note: if you wish to insert a zipper, it should be done when the cuff is being sewn to the top of the bag, with the zipper tape sandwiched between the stocking and cuff seam.

    (Click Image to Enlarge)


    Step 10:
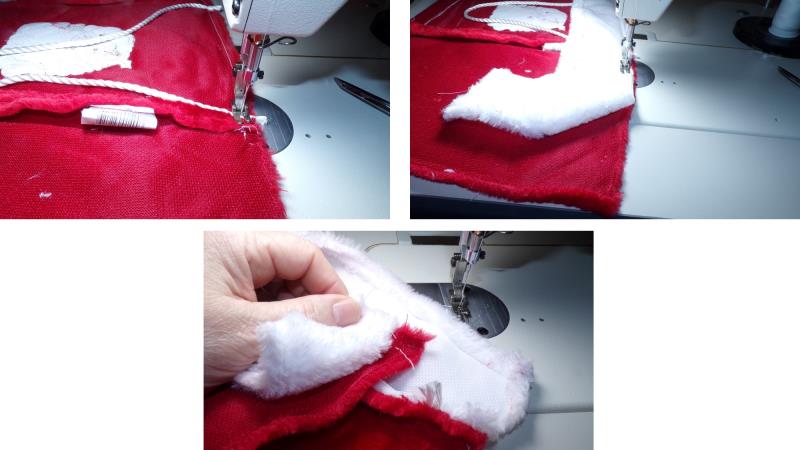
    Baste the ends of the cord in place as shown, on the wrong side of the embroidered side of the stocking. Place the cuff, fur side down to the wrong side of the top of the stocking, matching cut edges. Sew the fur in place from edge to edge, leaving about 1” on each edge unsewn until the side is sewn.

    (Click Image to Enlarge)


    Step 11:
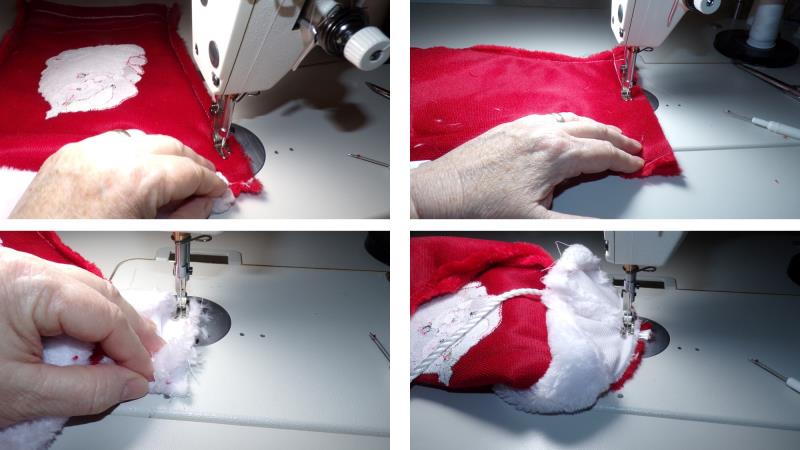
    Sew up the stocking from the heel around the toe to the top. Sew across the bottom of the stocking. Finish sewing the remaining 2” of the cuff to the top of the stocking.

    (Click Image to Enlarge)


    Step 12:
    Turn the bag right side out, forming the corners well. Turn the cuff down over the top and pull out the cord.

    (Click Image to Enlarge)


    Step 13:
    (Click Image to Enlarge)
    Congratulations on creating a sweet little bag. Here’s a warning though, this is so cute you’ll have all the little girls in your life asking for one!
    Meet the Author: Ramona Baird
    Ramona Baird
    Ramona Baird has been in the embroidery industry for over 23 years. She and her husband owned a commercial and retail embroidery store in Arizona for many years. She is an experienced digitizer having been mentored by award-winners Pat Williams and Lindee Goodall. Ramona is a contributor to “Creative Machine Embroidery” magazine having 5 covers to her credit. Ramona has worked for Wilcom America and served many years as Education Director for the American Sewing Guild. With a degree in fashion design, she is able to design and execute patterns which Pat Williams says are “out of the box” in creativity and application. Ramona likes to challenge the boundaries of embroidery and bring new and exciting designs, ideas, and projects to EmbroideryDesigns.com. She wants embroiderers of all levels to increase their skills and enjoyment in using their embroidery machine for gift-making and personal pleasure.
    More From This Author
    Link is Broken, Please check the URL
    Exclusive Embroidery Offers!
    Copyright © {{ currentDate | date:'yyyy'}} - EmbroideryDesigns.com
    GET 50% OFF! ×