{{superHeaderAds.title}}
Live Chat
Embroidery Designs
Welcome, Embroiderer
Login
Nativity Christmas Card
{{mainImageAlt || (productInfo._source && productInfo._source.name) || ''}}

Nativity Christmas Card Embroidery Project

By   Ramona Baird   on   November 02, 2018

PROJECT DETAILS

SKILL LEVEL
Some Experience
TIME REQUIRED
02:30
Description

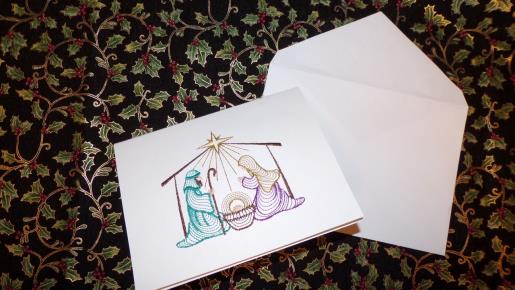
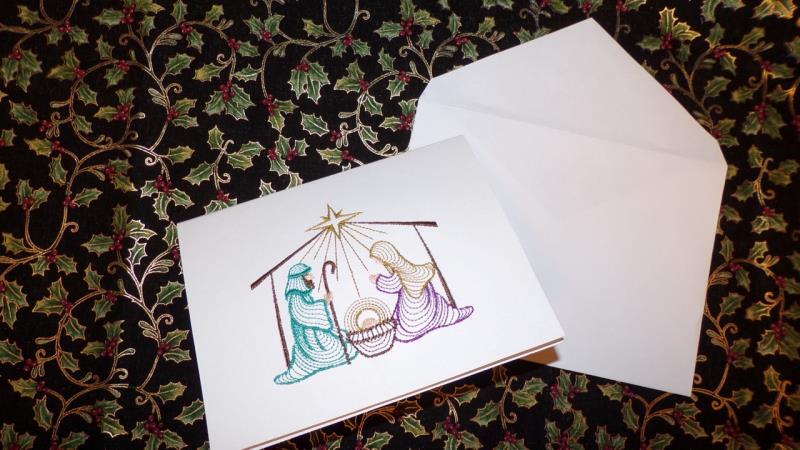
A card that will be saved from year to year is one that is done with embroidery and a personal message.

Project Preview Video

Materials
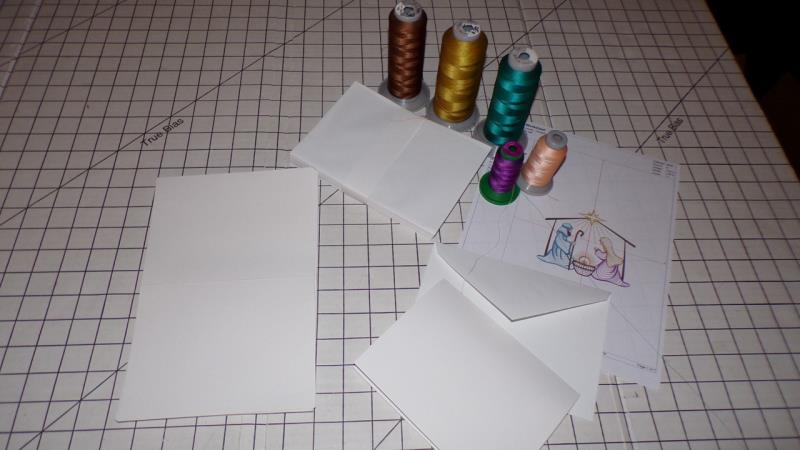
  • 2-half-fold cards
  • 1 envelope
  • Poly mesh stabilizer
  • Embroidery thread as stated in color sequence
  • Temporary spray adhesive
  • Optional: printer and software
  • Spray glue

  • Designs used in this project

    Final Product: What You Will Create

    Preface:
    When stitching on card stock, look for a design with light density.


    Step 1:
    Gather the materials and read through the instructions before beginning. Print out a paper template of the design. One piece of cardstock will be for the outside of the card and one for the inside (to cover the back of the embroidery) and also to find the center of the card front.

    (Click Image to Enlarge)


    Step 2:
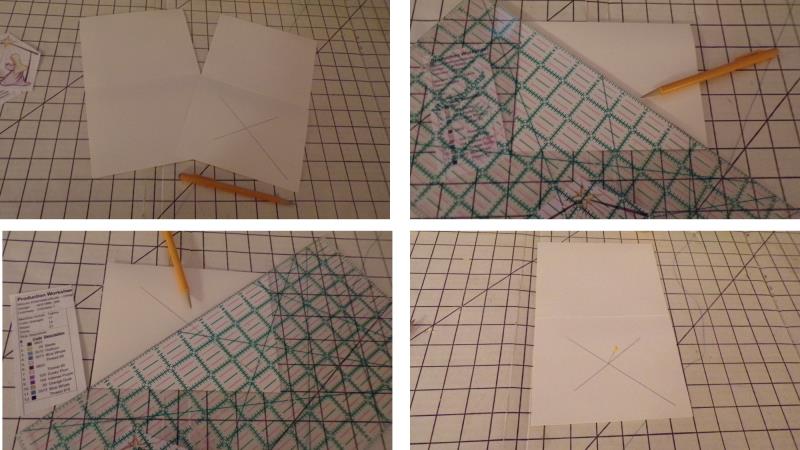
    Fold one piece of cardstock in half. Use a ruler to mark very lightly from corner to corner as shown. The marks are shown darker and longer than needed so it would show up in the photos. You are looking to just mark the center point of the card front.

    (Click Image to Enlarge)


    Step 3:
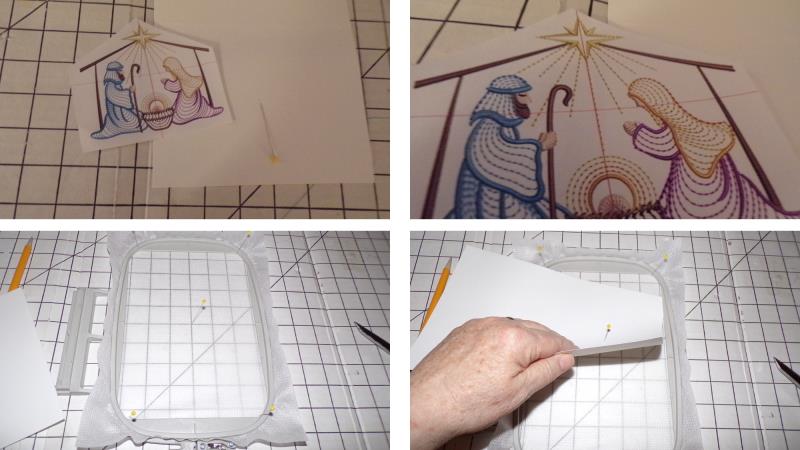
    Cut out the paper template of the design. Locate the crosshair. You will notice the vertical line follows the center stitching line under the star, which will hide the center point as you will see.

    (Click Image to Enlarge)


    Step 4:
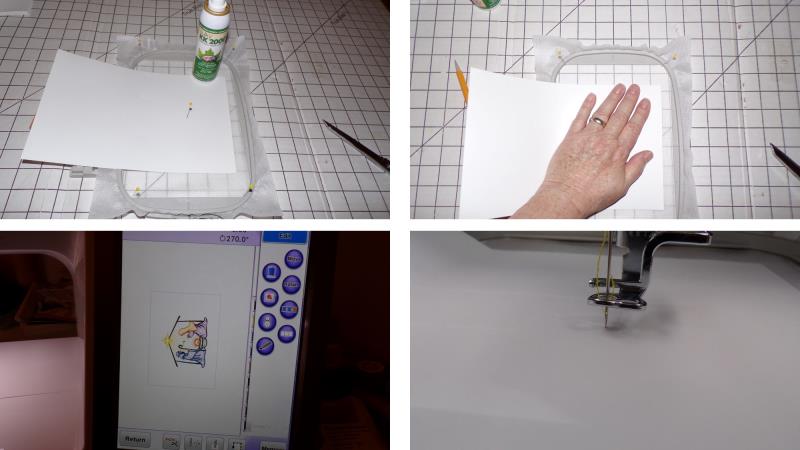
    Hoop one layer of poly mesh stabilizer. Align the hoop to a grid and place a pin in the center. Place a pin through the center mark that was drawn on the front of the card and align it to the center pin on the stabilizer-remove the stabilizer pin. Lightly spray the back of the card with a temporary spray adhesive, align the card in the hoop, and press in place. Load the design on the machine and rotate it. Align the needle to the tiny pinhole.

    (Click Image to Enlarge)


    Step 5:
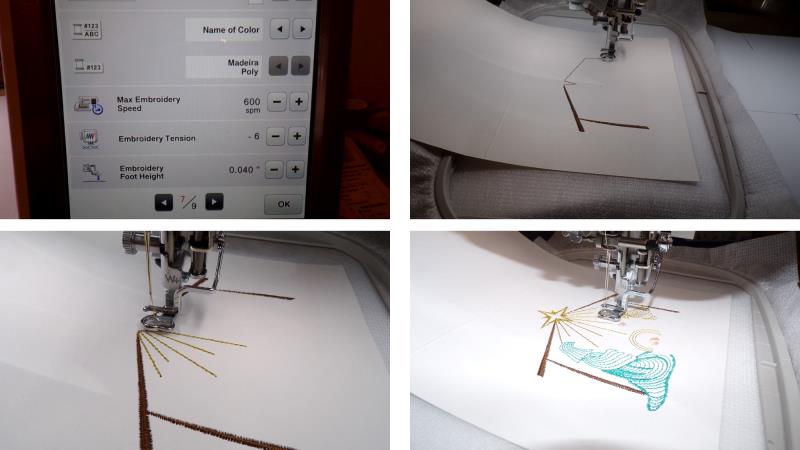
    When stitching on paper, slow the machine down. Press start and stitch the design following the color sequence.

    (Click Image to Enlarge)


    Step 6:
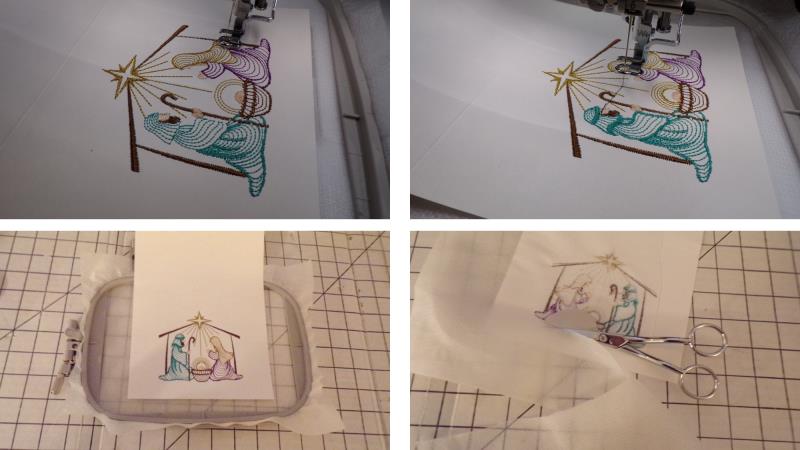
    After the design finish stitching, unscrew the hoop and remove the project. Trim away the excess stabilizer

    (Click Image to Enlarge)


    Step 7:
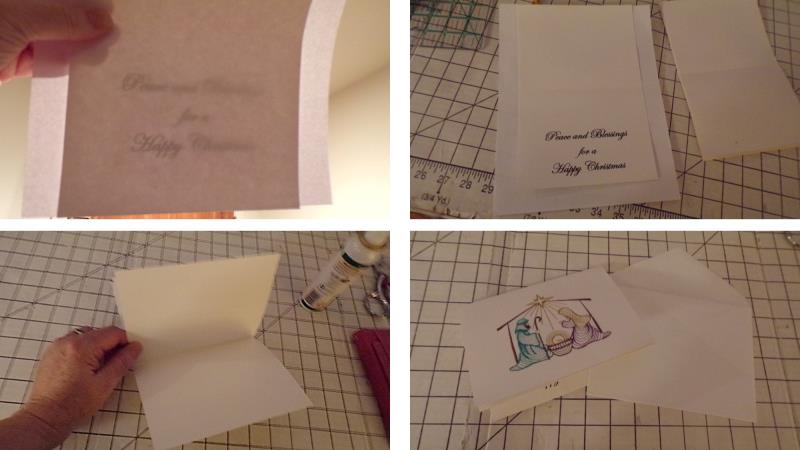
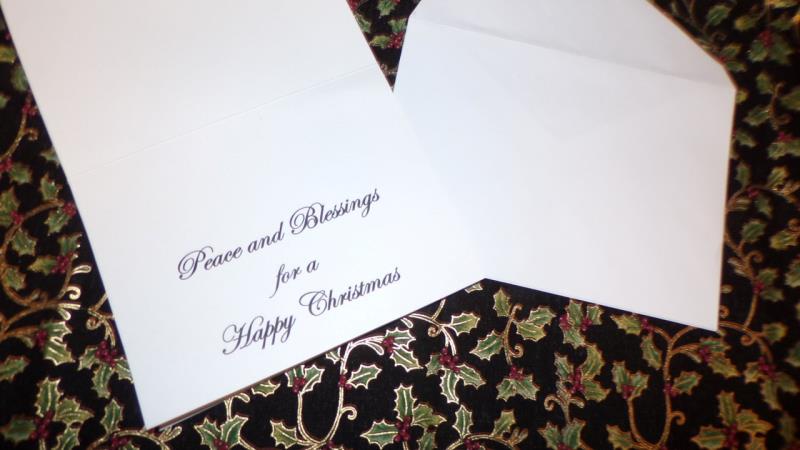
    Use a word processing program or card software to create text and print out a test piece. Hold it up to light to see if it will fit on the card. Use the second card for printing the text, following your printer’s instructions. Fold and insert the printed card inside the embroidered card, using spray glue to hold the two cards together; let the glue dry.
    8. Edwardian Script was the font used for this card.

    (Click Image to Enlarge)


    Step 8:
    Edwardian Script was the font used for this card.

    (Click Image to Enlarge)


    Step 9:
    These cards will be cherished from year to year. It would even be a nice gift for someone to print and embroider several and give as a hostess gift or gift for a shut-in who is unable to get out to shop for and mail cards. Please note, additional postage may be needed to mail the card.

    (Click Image to Enlarge)

    Meet the Author: Ramona Baird
    Ramona Baird
    Ramona Baird has been in the embroidery industry for over 23 years. She and her husband owned a commercial and retail embroidery store in Arizona for many years. She is an experienced digitizer having been mentored by award-winners Pat Williams and Lindee Goodall. Ramona is a contributor to “Creative Machine Embroidery” magazine having 5 covers to her credit. Ramona has worked for Wilcom America and served many years as Education Director for the American Sewing Guild. With a degree in fashion design, she is able to design and execute patterns which Pat Williams says are “out of the box” in creativity and application. Ramona likes to challenge the boundaries of embroidery and bring new and exciting designs, ideas, and projects to EmbroideryDesigns.com. She wants embroiderers of all levels to increase their skills and enjoyment in using their embroidery machine for gift-making and personal pleasure.
    More From This Author
    Link is Broken, Please check the URL
    Exclusive Embroidery Offers!
    Copyright © {{ currentDate | date:'yyyy'}} - EmbroideryDesigns.com
    GET 50% OFF! ×