Border OptionsHugging border, circle, square, or rectangle — with a 3mm satin stitch.
Backing OptionsAvailable with iron-on, sew-on, or velcro backing.
Fast ShippingShipped quickly from the USA.
Free Online Tools
Powerful embroidery utilities that save time and prevent costly mistakes.
Stitch AssistantRECOMMENDED
Get the exact stabilizer, machine settings, needle, and thread color sequence for every embroidery design you purchase — based on that design's stitch density, dimensions, and color count.
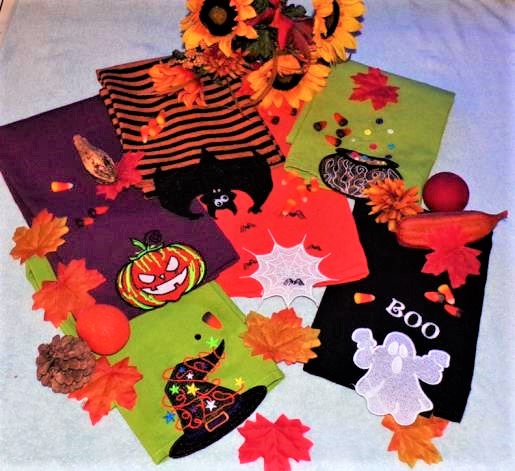
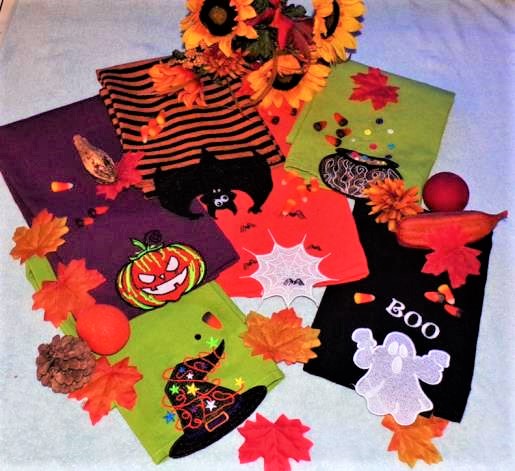
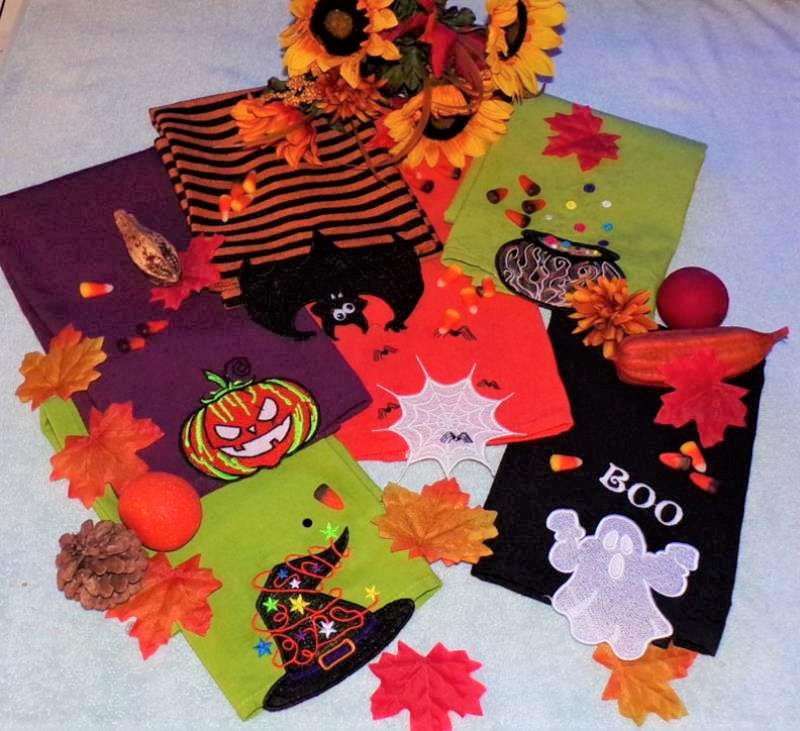
Create a spooky atmosphere with this FSL Halloween decor set. Perfect for adding seasonal flair to your home, these freestanding lace designs feature classic Halloween motifs like ghosts, pumpkins, and witches' hats. Step-by-step instructions are included.
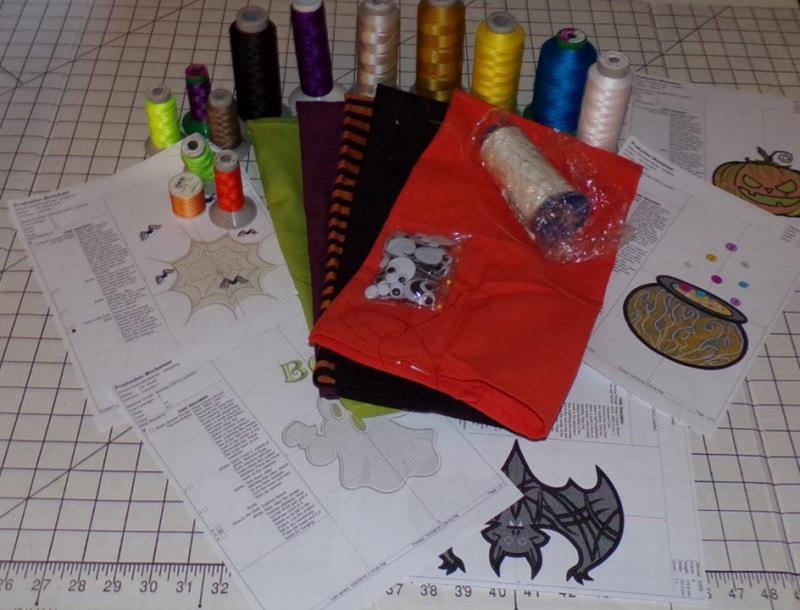
Embroidery thread as stated in color sequence (For ghost, pumpkin, spider web glow-in-the-dark thread is used but white thread may be substituted. For the cauldron, a variegated thread is used for the flame, but an orange or yellow may be substituted.)
The great thing about these towels is that they are fast to do--just over an hour or so to stitch! Allow time for drying (not included in the time stated to do the project). Even those brand new to embroidery will enjoy doing these towels and have a clever gift to give or Halloween decoration for the home that kids of all ages will enjoy. Using glow-in-the-dark thread is another technique which may be new to beginning stitchers, but you will find it runs just like any other embroidery thread--it's just a fun twist to add to projects!
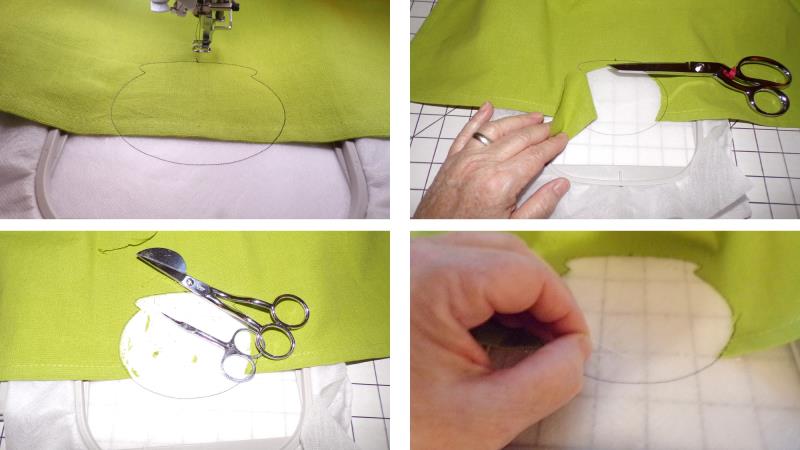
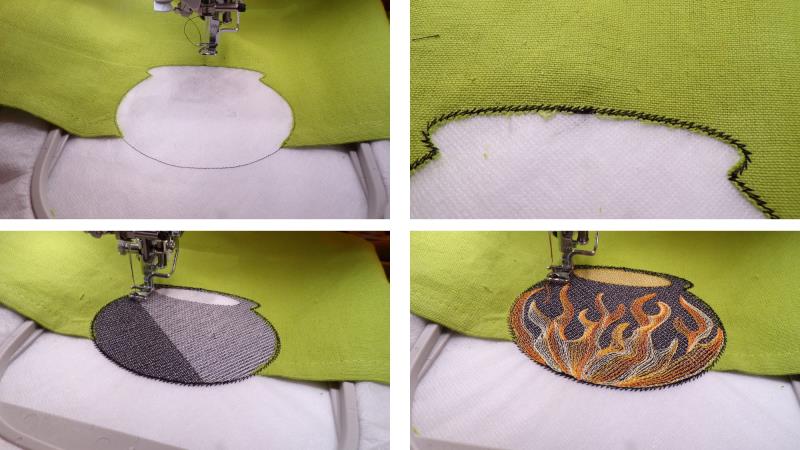
All the FSL Halloween Towel designs follow the same first four steps: stitch the placement line, tack down the towel, trim away the fabric inside the tack down (design) line, and then follow the remainder of the color sequence.
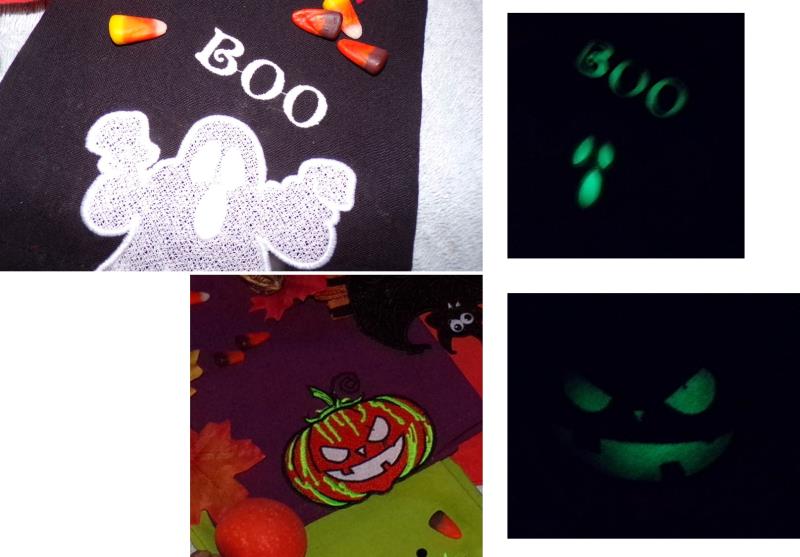
Three of the designs use glow-in-the dark thread, but white thread could be substituted.
The fill area of each design must use 40wt top and bobbin thread as stated in the design sequence.
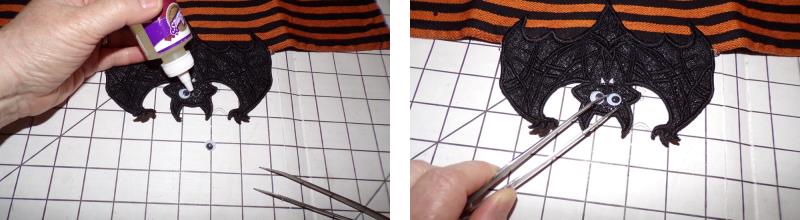
The bat has google eyes glued in place with fabric glue after the WSS has been rinsed out and the design dried.
Step 1:
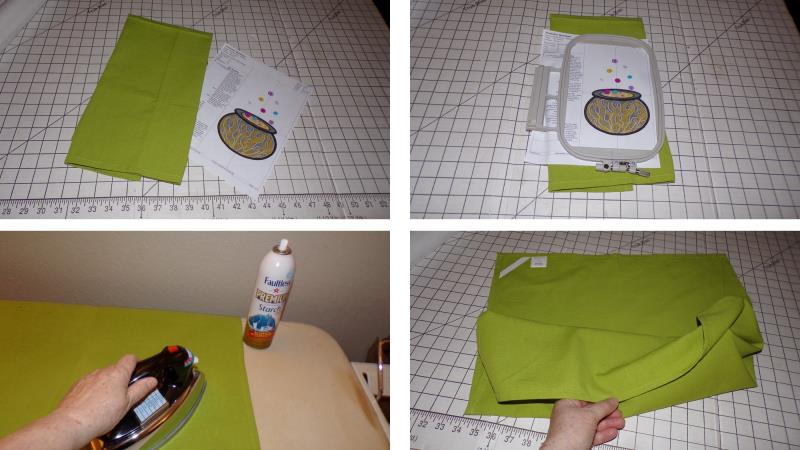
Gather the materials and read through the instructions before beginning. Print out a paper template of the design. Steps one through four are the same for each towel. After that, it is a matter of following the color sequence. Note: Step one is sewing a placement line with water-soluble thread. If water soluble thread is not available in a store near you, it may be ordered online. This thread is used because when the WSS is washed away, the placement line thread will be washed away as well. If you cannot find this thread, then the white thread may be substituted, and the placement line stitching removed after color 2 is sewn and when trimming the towel.
(Click Image to Enlarge)
Step 2:
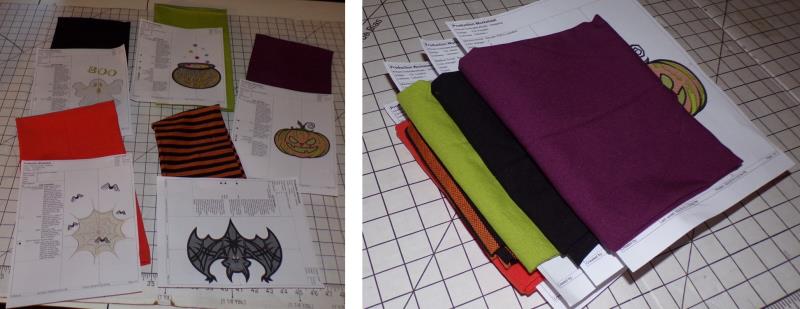
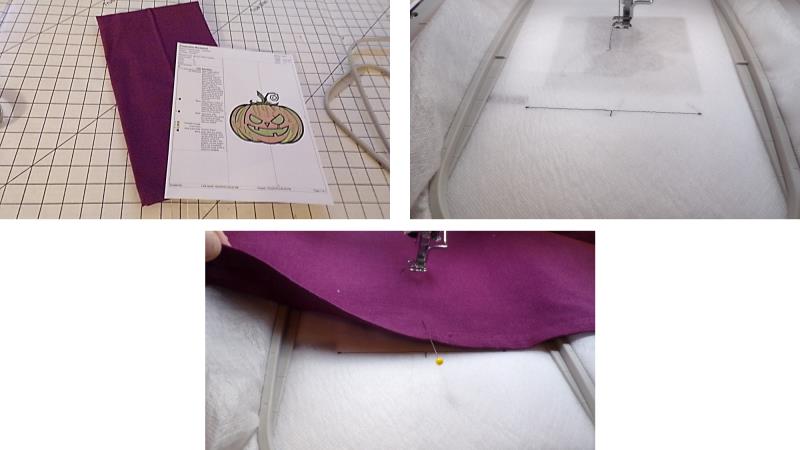
Choose the towel color and design. If you are doing several towels, fold the printout sheet inside each towel to keep the towel and design together.
(Click Image to Enlarge)
Step 3:
Make sure the design will fit within the hoop. Press the towel well using starch. If there is a hanging tag on the towel, make sure to keep it at the top of the towel and the design placed at the bottom hem.
(Click Image to Enlarge)
Step 4:
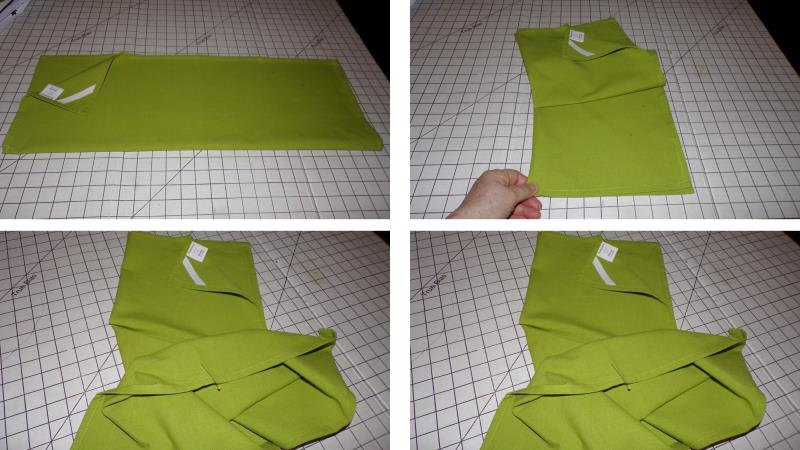
Fold the towel in half lengthwise, crease the bottom center hem and place a pin at the crease.
(Click Image to Enlarge)
Step 5:
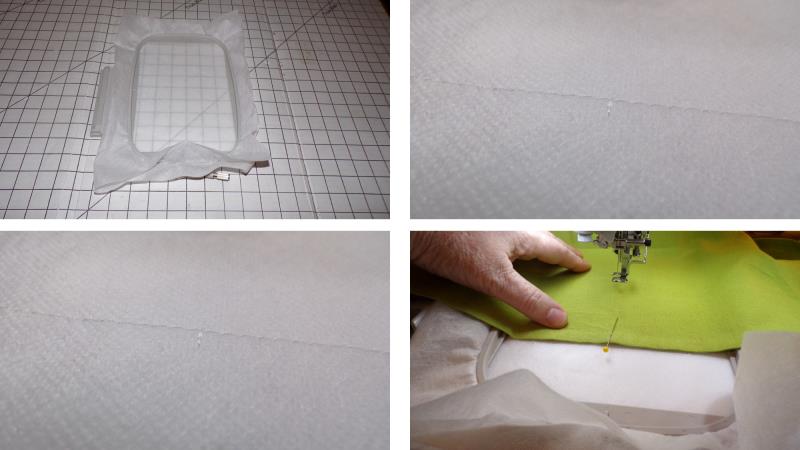
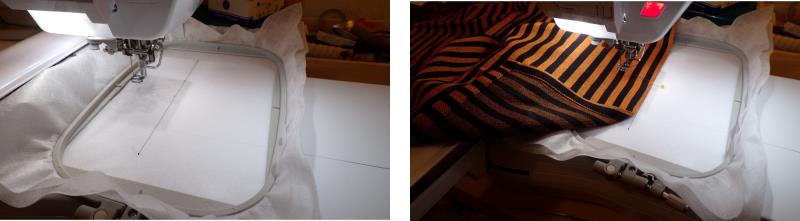
Hoop two layers of fibrous water-soluble stabilizer. Load the design on the machine and stitch Color 1 using water-soluble thread in both the top and bobbin. (Option: stitch in the white thread which will be removed after stitching Color 2.) Place the towel on the hoop aligning the pin at the center vertical tick mark on the placement line, and the bottom hem edge along the horizontal line.
(Click Image to Enlarge)
Step 6:
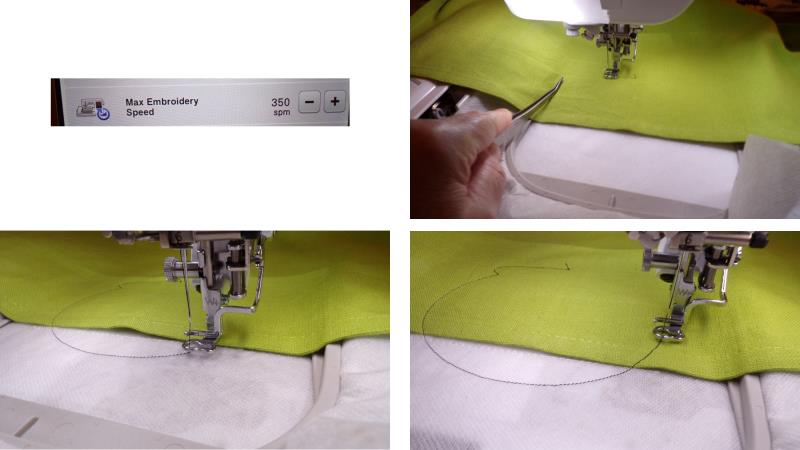
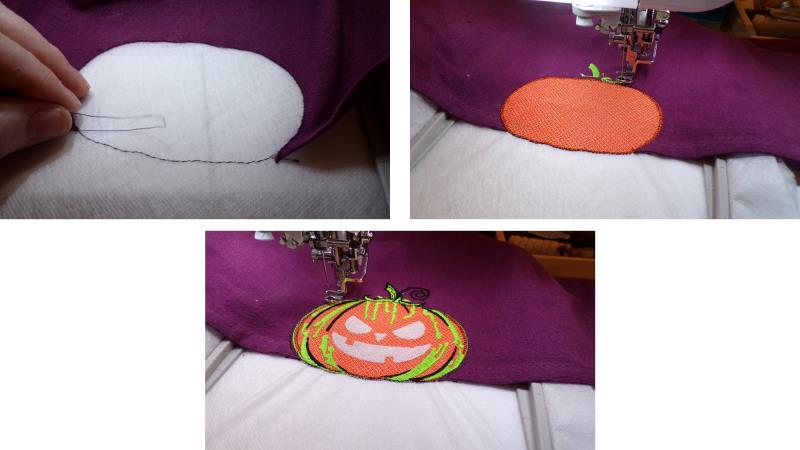
Load the machine with thread color 2 in both the top and bobbin. Slow the machine way down for this step. Stitch Color 2 which will stitch the outline of the design. Use a stylus or tweezers to hold the towel in place as the machine stitches, keeping the hem along the placement line. When the presser foot gets near the hem edge, keep an eye on the presser foot so that it doesn’t lift up the hem edge as it goes over it.
(Click Image to Enlarge)
Step 7:
After the design outline has stitched, remove the hoop from the machine and lay it on a flat surface. Generally cut away the towel fabric from inside the design shape and then use small scissors to trim right next to the stitching line. Note: if the white thread was used for the placement line instead of water soluble, remove the placement stitches now.
(Click Image to Enlarge)
Step 8:
Place the hoop back on the machine and stitch Color 3 which is a tack down stitch. After this color stitches, the machine will stop to allow you to trim any remaining threads from inside the design. Continue stitching following the remainder of the color sequence. Be sure to use the color thread stated when stitching the inside fill area of the design. After that, regular bobbin thread may be used with the remainder of the colors to be stitched.
(Click Image to Enlarge)
Step 9:
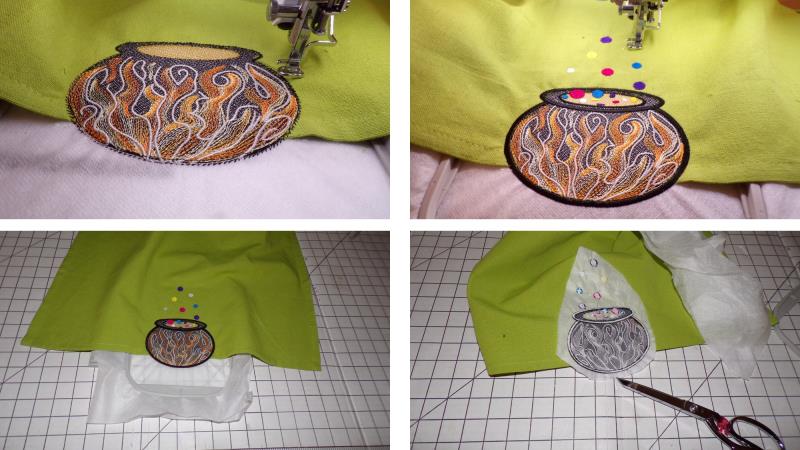
Continue stitching until all the color sequence is completed. Remove the fabric from the hoop and trim away the excess stabilizer.
(Click Image to Enlarge)
Step 10:
Continue stitching the remainder of the towels as you wish, following the color sequence. In the upper right photo, a black thread was used for the placement line so you could see the placement line better. The pin and hem one the towel are aligned to this placement line for each design to be stitched.
(Click Image to Enlarge)
Step 11:
After color 2 stitches and regular embroidery thread was used to stitch the placement line, be sure to remove the placement line stitches an then continue with the color sequence.
(Click Image to Enlarge)
Step 12:
For the bat, the design is rotated within the hoop to accommodate the width. The sequence remains the same.
(Click Image to Enlarge)
Step 13:
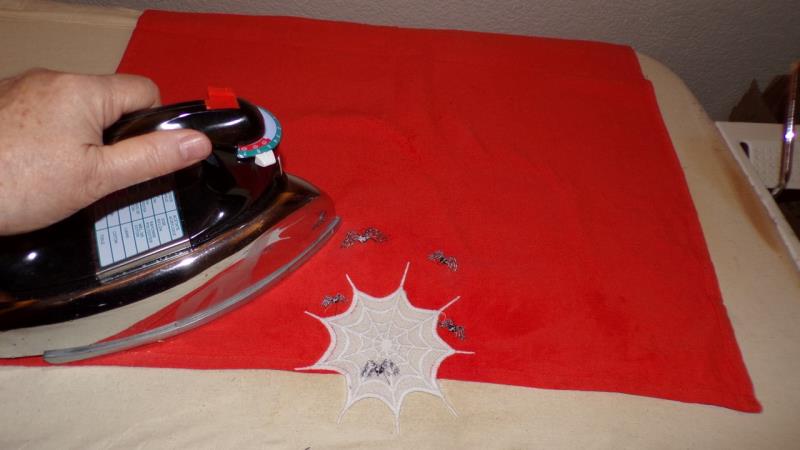
For each towel, all that remains is to follow the manufacturers’ instructions for rinsing out the fibrous water-soluble stabilizer and allowing the towel to dry and press the towel well from the wrong side.
(Click Image to Enlarge)
Step 14:
Children will delight with the glow-in-the-dark thread when used in the designs.
(Click Image to Enlarge)
Step 15:
After the bat design dries, use fabric glue to glue on the google eyes inside the white eye circles and let dry.
(Click Image to Enlarge)
Step 16:
Congratulations! You’ve got new FSL Halloween Towels for your seasonal decorating.
Ramona Baird has been in the embroidery industry for over 23 years. She and her husband owned a commercial and retail embroidery store in Arizona for many years. She is an experienced digitizer having been mentored by award-winners Pat Williams and Lindee Goodall. Ramona is a contributor to “Creative Machine Embroidery” magazine having 5 covers to her credit. Ramona has worked for Wilcom America and served many years as Education Director for the American Sewing Guild. With a degree in fashion design, she is able to design and execute patterns which Pat Williams says are “out of the box” in creativity and application. Ramona likes to challenge the boundaries of embroidery and bring new and exciting designs, ideas, and projects to EmbroideryDesigns.com. She wants embroiderers of all levels to increase their skills and enjoyment in using their embroidery machine for gift-making and personal pleasure.