Border OptionsHugging border, circle, square, or rectangle — with a 3mm satin stitch.
Backing OptionsAvailable with iron-on, sew-on, or velcro backing.
Fast ShippingShipped quickly from the USA.
Free Online Tools
Powerful embroidery utilities that save time and prevent costly mistakes.
Stitch AssistantRECOMMENDED
Get the exact stabilizer, machine settings, needle, and thread color sequence for every embroidery design you purchase — based on that design's stitch density, dimensions, and color count.
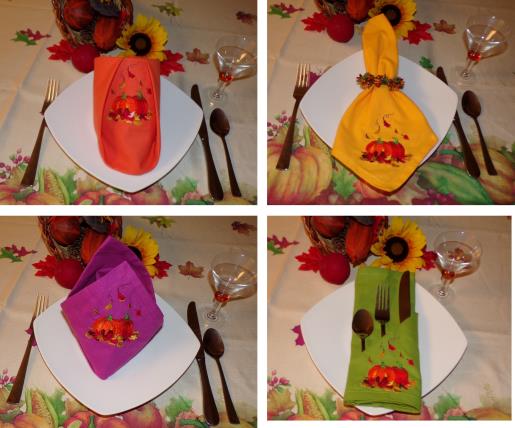
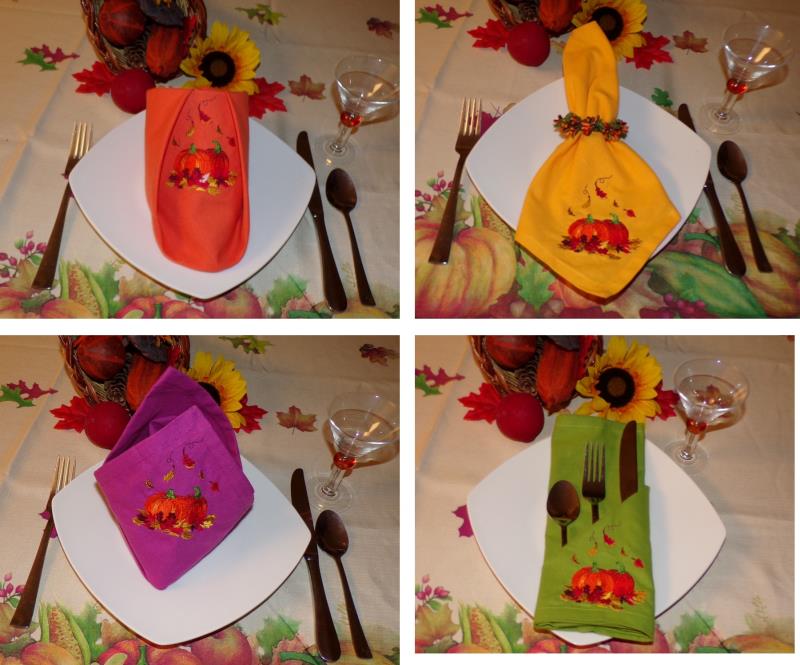
Explore the art of fabric napkin folding with this project, featuring unique shapes and vibrant colors. Ideal for enhancing your table setting with a touch of creativity and elegance. Step-by-step instructions are included.
This project is fun because it teaches you not every design on a napkin needs to be a corner. Learn to fold napkins in a creative way, place the design, stitch the design and re-fold the napkin to showcase the embroidery! Here is an important tip: to help remember how to begin the napkin folding, ALWAYS place the tag in the lower left corner. That way, no matter what style fold you are using, you’ll know to always place the tag in the same position. You’ll also want to keep the napkins labeled with the fold style and in a bundle when they are put away after use because the position of the embroidery varies with each fold style.
Step 1:
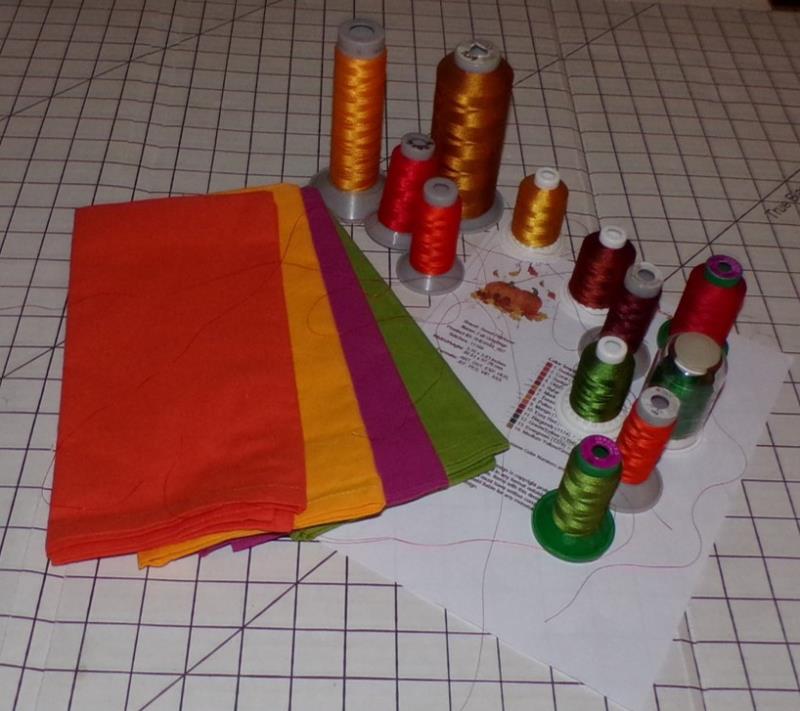
Gather the materials and read through the instructions before beginning. Print out a paper template of the design. There are many websites and YouTube videos that will teach you how to fold napkins. The four styles used in this project are common ones. The website instructions used for this project are shown on “HowToFoldNapkins.org”.
(Click Image to Enlarge)
Step 2:
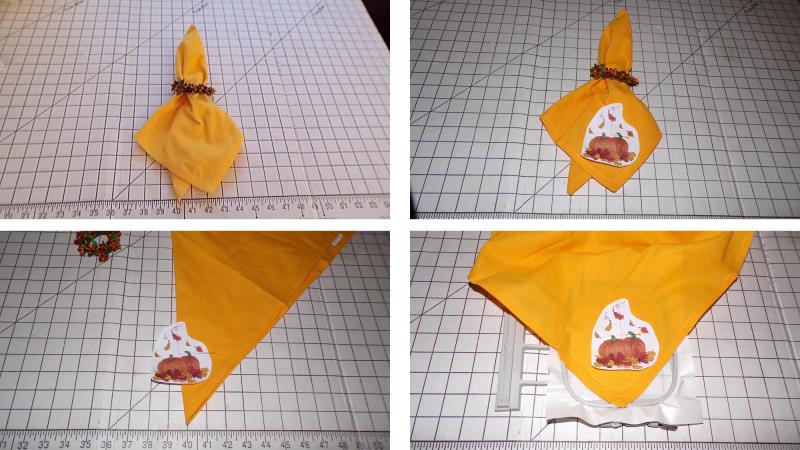
The simplest napkin presentation is to quarter fold the napkin and apply a seasonal napkin ring to coordinate with the design. Fold the napkin, slip on the napkin ring, and then position the paper template in the corner of the top layer of the napkin. Unfold the napkin and fold it from the corner so that the template can be centered along the fold. Hoop one layer of the sticky stabilizer and align the corner of the napkin to the hoop.
(Click Image to Enlarge)
Step 3:
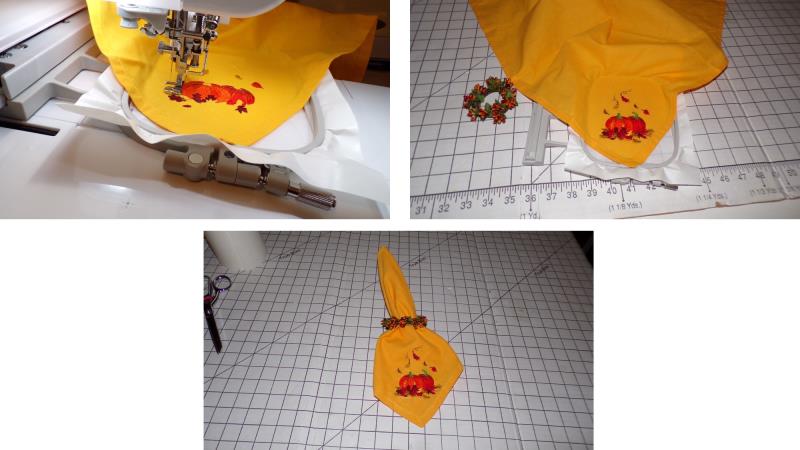
Load the design on the machine and stitch the design following the color sequence. After the design finishes stitching, remove the napkin from the hoop and remove the excess stabilizer. Press the napkin and refold it with the design to the outside; slip on the napkin ring. Repeat for as many napkins as needed.
(Click Image to Enlarge)
Step 4:
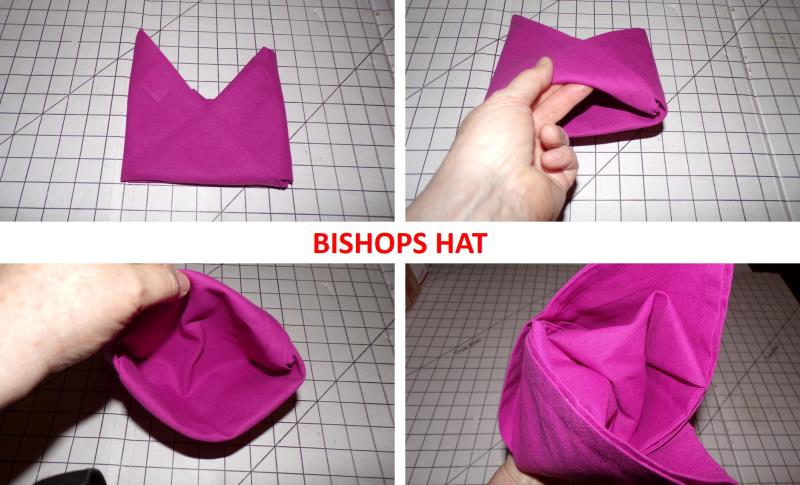
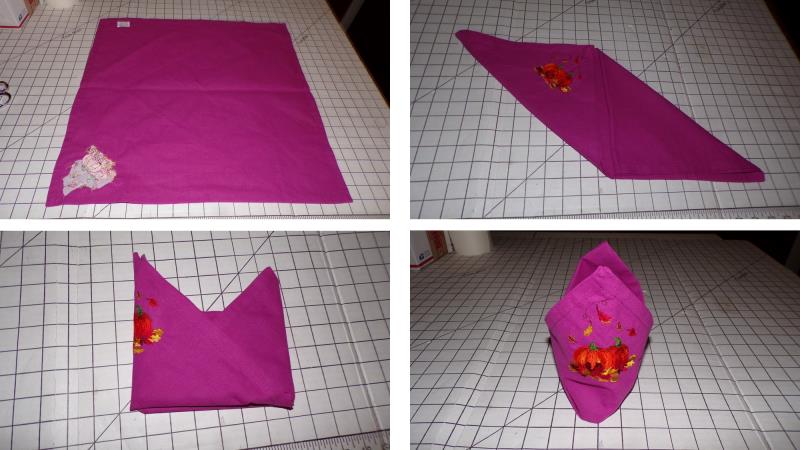
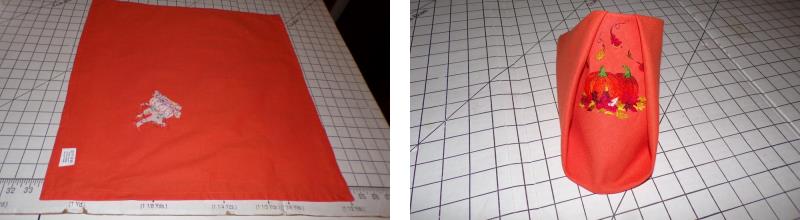
Use the instructions on the website stated in step 1 to fold the “Bishops Hat” style.
(Click Image to Enlarge)
Step 5:
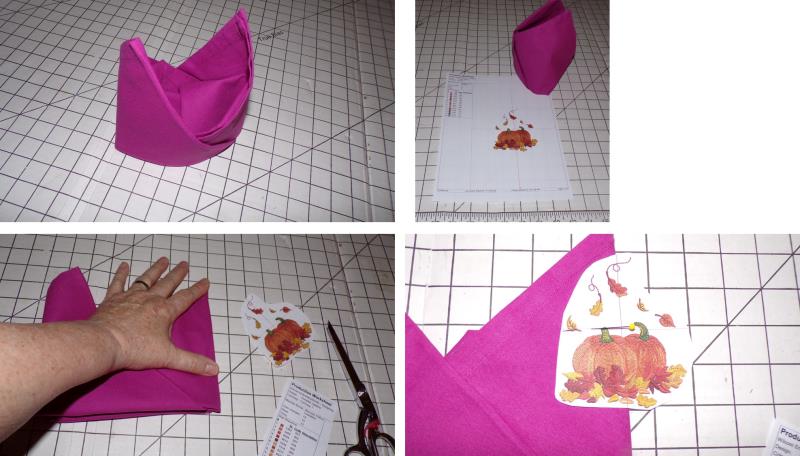
Keeping the hat shape intact, flatten the hat and center the template along the fold as shown.
(Click Image to Enlarge)
Step 6:
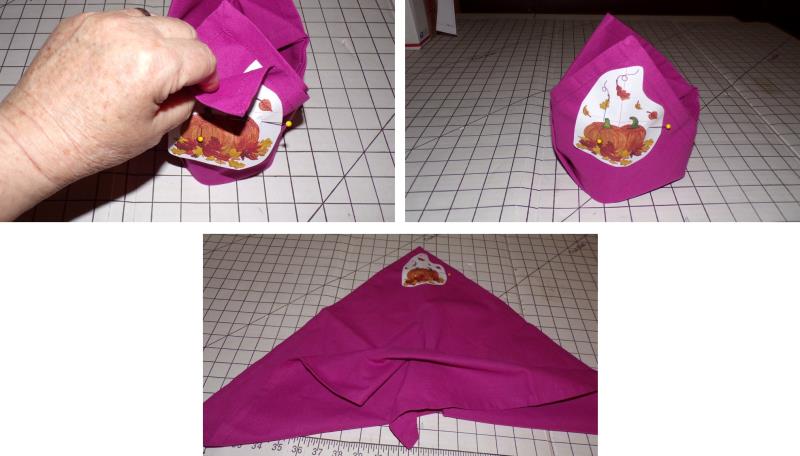
Be sure the template is pinned through the top layer only. Unfold the napkin.
(Click Image to Enlarge)
Step 7:
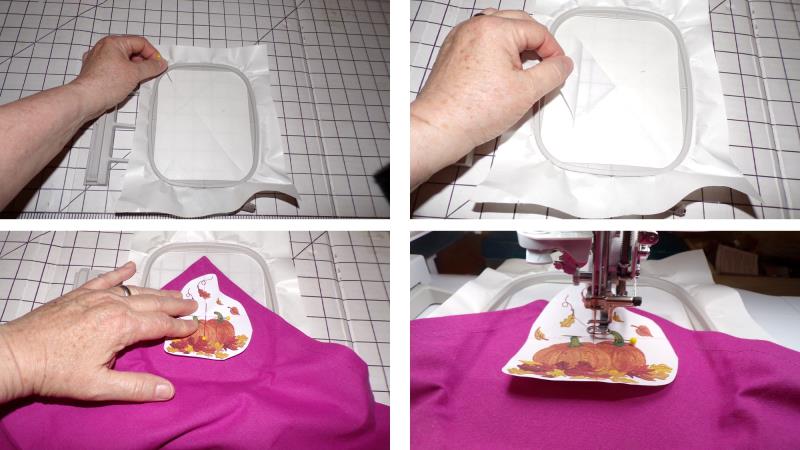
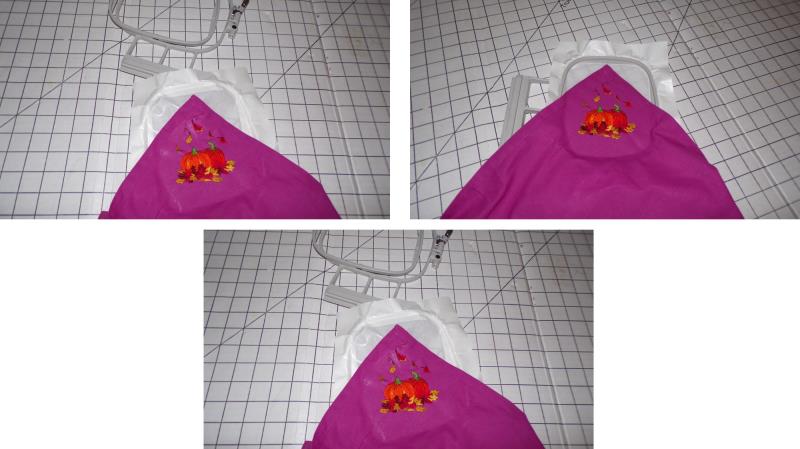
Hoop the napkin with one layer of sticky tearaway stabilizer. Center the template under the needle.
(Click Image to Enlarge)
Step 8:
After the design finishes stitching, remove the napkin from the hoop and remove the excess stabilizer.
(Click Image to Enlarge)
Step 9:
Press the napkin and then refold the napkin into the Bishops Hat. The embroidery is on the front. Repeat for as many napkins as you need.
(Click Image to Enlarge)
Step 10:
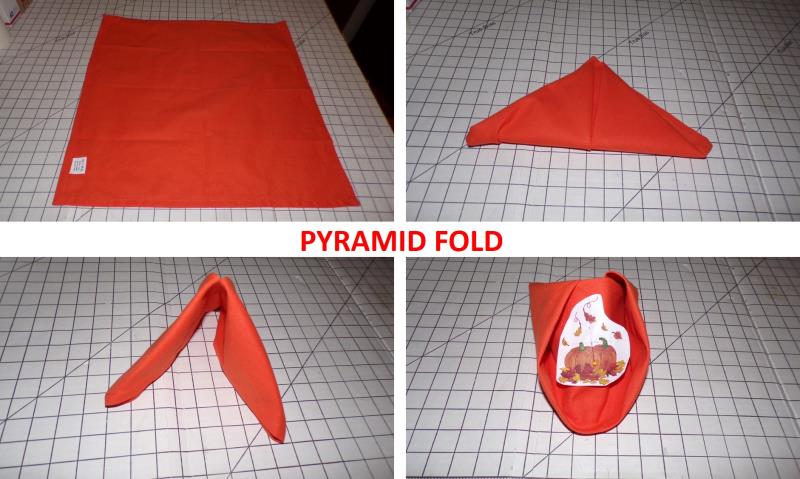
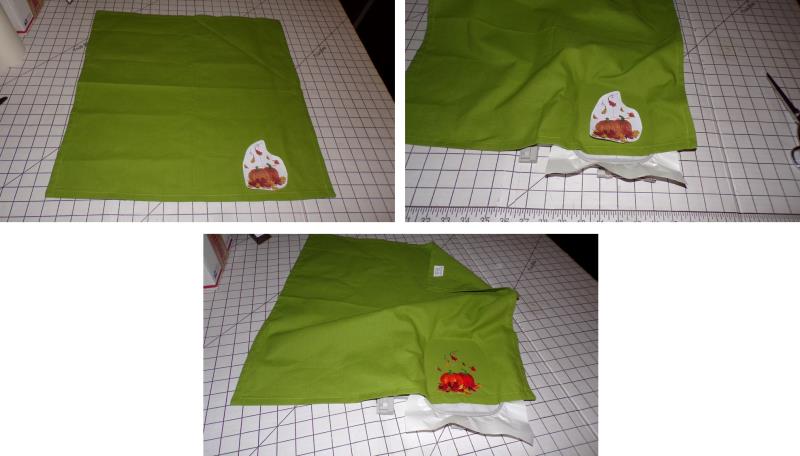
A third style is the “Pyramid Fold”. Use the instructions on the website in step 1 to learn to fold this style of napkin. Pin the template in the center front of the napkin.
(Click Image to Enlarge)
Step 11:
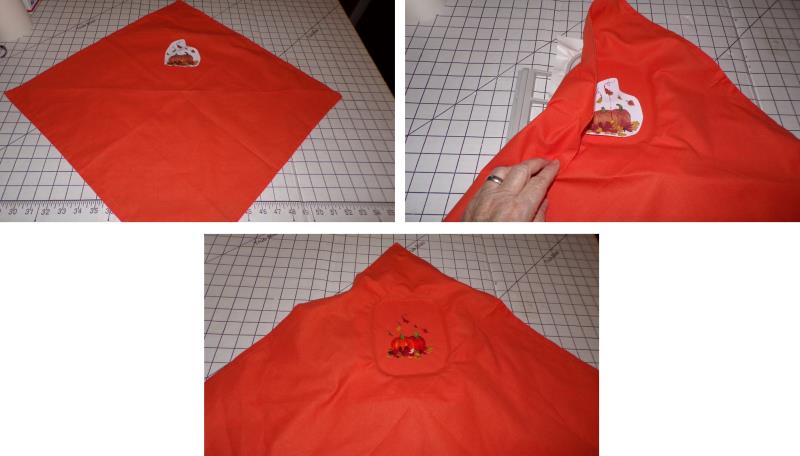
Unfold the napkin. Hoop one layer of sticky tearaway stabilizer in the hoop. Align the center of the template under the machine needle and stitch the design.
(Click Image to Enlarge)
Step 12:
After the design has stitched, remove the napkin from the hoop, remove the excess stabilizer, and refold the napkin. Repeat for as many napkins as needed to set the table.
(Click Image to Enlarge)
Step 13:
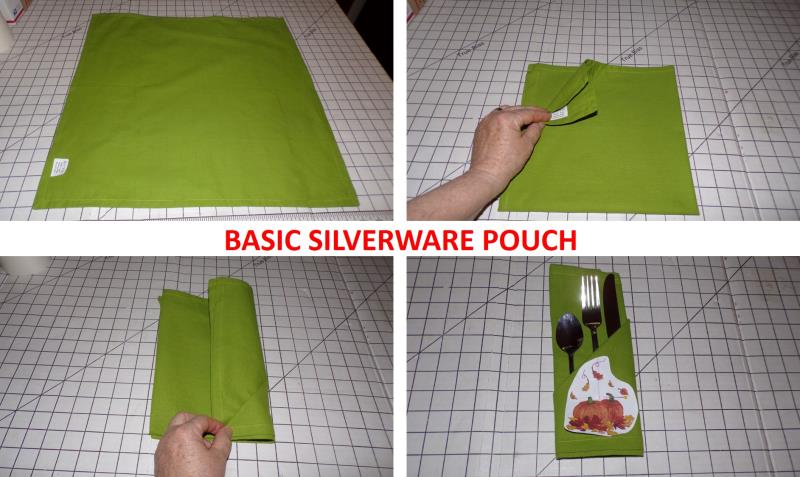
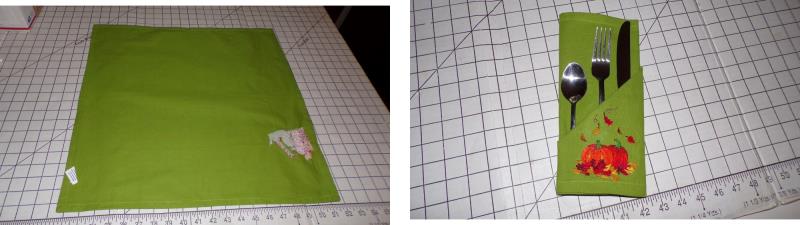
For a buffet, the “Basic Silverware Pouch” is a wonderful folded napkin style. Use the instructions from the website listed in step 1 to learn to fold the napkin. Center and pin the template to the lower center front as shown.
(Click Image to Enlarge)
Step 14:
Unfold the napkin, hoop one piece of sticky tearaway stabilizer, and stitch the design.
(Click Image to Enlarge)
Step 15:
After the design has stitched, remove the napkin from the hoop and remove the excess stabilizer. Press the napkin well and then refold the napkin into the “Basic Silverware Pouch” style.
(Click Image to Enlarge)
Step 16:
Congratulations! You have learned how fun it is to fold and embroidery different napkin styles for your table—use this technique for formal (use a monogram in the same color thread as the napkin) tables to simple buffets. This project can be used over and over again just vary the embroidery design to the celebration or holiday.
Ramona Baird has been in the embroidery industry for over 23 years. She and her husband owned a commercial and retail embroidery store in Arizona for many years. She is an experienced digitizer having been mentored by award-winners Pat Williams and Lindee Goodall. Ramona is a contributor to “Creative Machine Embroidery” magazine having 5 covers to her credit. Ramona has worked for Wilcom America and served many years as Education Director for the American Sewing Guild. With a degree in fashion design, she is able to design and execute patterns which Pat Williams says are “out of the box” in creativity and application. Ramona likes to challenge the boundaries of embroidery and bring new and exciting designs, ideas, and projects to EmbroideryDesigns.com. She wants embroiderers of all levels to increase their skills and enjoyment in using their embroidery machine for gift-making and personal pleasure.