Fall Mantel Decor | Embroidery & SVG

Fall Mantel Decor | Embroidery & SVG Embroidery Project

By   Linda Mills   on   September 10, 2018
  • SKILL LEVELIntermediate
  • TIME REQUIRED02:00
Description

Machine embroidery plus a Silhouette Cameo or Cricut machine is a match made in heaven for this fall mantel decor project.

Step of

Materials

Project Preview Video

Materials
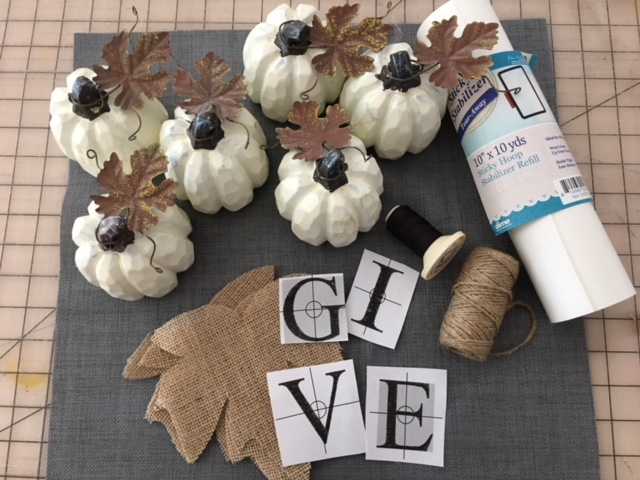
  • Purchased burlap leaves or remnant burlap
  • Twine
  • 6 wooden or ceramic pumpkins
  • Sticky Hoop Stabilizer
  • Water Soluble Stabilizer
  • Embroidery thread ( your choice of color)
  • Silhouette or Cricut Machine
  • Adhesive Vinyl
  • Large Eye Needle
  • Click here to download DXF/SVG files

  • Designs used in this project

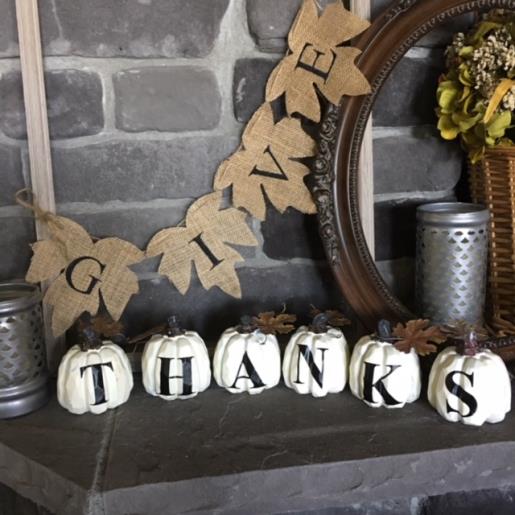
    Final Product: What You Will Create

    Preface:
    Using the Times New Roman embroidery font for your banner and your Silhouette Cameo or Cricut machine for the cutout letters on the pumpkins will reflect an expression of “daily gratitude” when displayed in your home with your seasonal decorations.  Embroider one letter on each flag and create the letters on your Silhouette/Cameo using the SVG file font. 


    Step 1:
    Gather all supplies and review instructions before beginning. This tutorial requires a Silhouette Cameo or Cricut Machine. Print out templates for your machine embroidery letters for the word “GIVE”.

    (Click Image to Enlarge)


    Step 2:
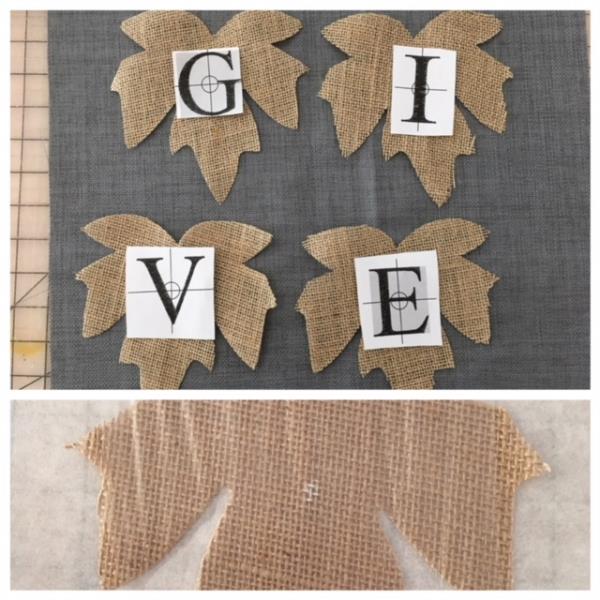
    Using your purchased burlap leaves. ( If you are using remnant burlap cut burlap into leaves or your choice of shapes for flags for the banner). You will need a total of 4 pieces. Using your letter templates. Center each letter and center mark with chalk pen or air erase fabric pen. 

    (Click Image to Enlarge)


    Step 3:
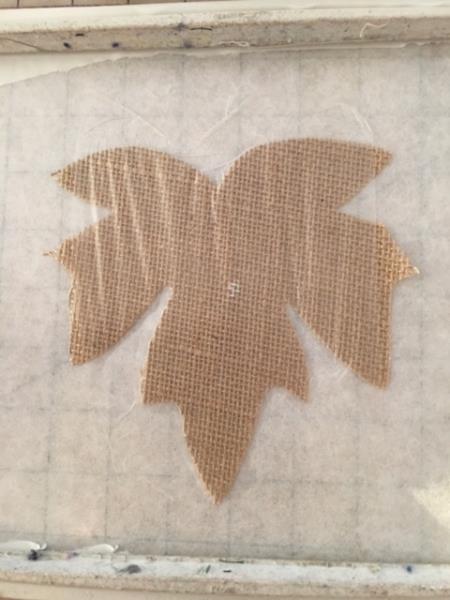
    Hoop your sticky stabilizer. Remove top paper to reveal adhesive. Center mark adhesive with a crosshair. Center one of your cut burlap leaves/flags onto sticky stabilizer and fingertip press to secure.   

    (Click Image to Enlarge)


    Step 4:
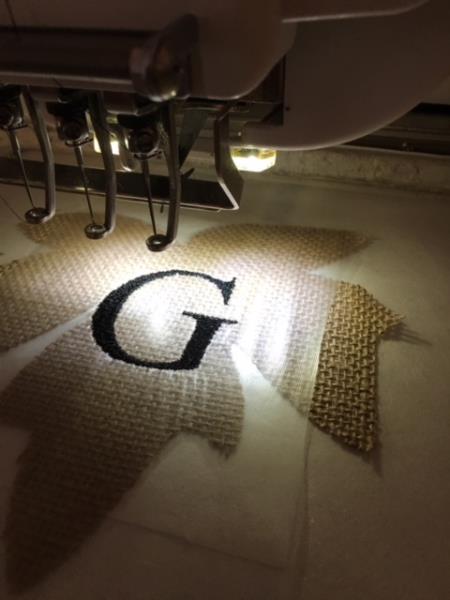
    Cut an oversize piece of water-soluble stabilizer to fit over your letter embroidery. Place on top of burlap and fingertip secure to adhesive as this will help prevent stitches from “sinking” into burlap when embroidering. Load your design into your machine. Attach the hoop to your machine. Trace per your machines instructions to confirm center placement. If necessary make any needed adjustments. Begin the embroidering process. Repeat steps for all letters.

    (Click Image to Enlarge)


    Step 5:
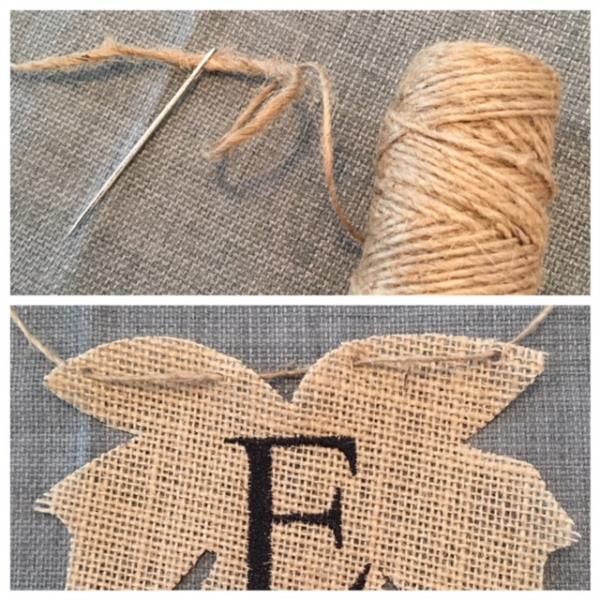
    To create the “banner” . Using your twine, thread a large eye needle. Starting with your “E” leaf/flag. Insert your needle from underneath from right to left and string each letter spelling out the word “GIVE”. Leave excess twine at each end for tying. Your banner is now complete.

    (Click Image to Enlarge)


    Step 6:
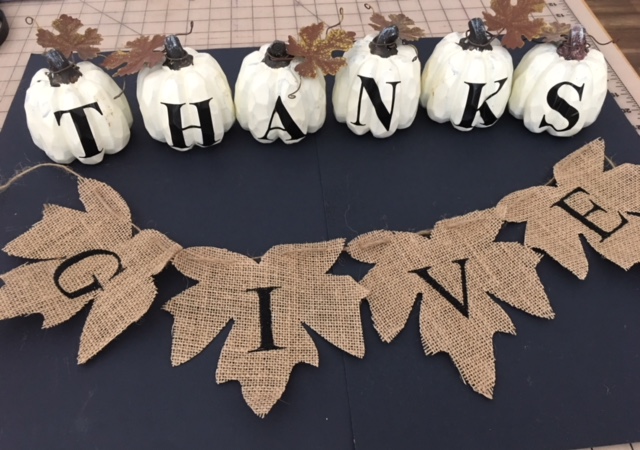
    To create the letters for the word “ Thanks” for the pumpkins. Follow the manufacturer's instructions for your Silhouette or Cricut Machine. Using the SVG file font,  cut your letters onto your adhesive vinyl, to fit the size of the pumpkins purchased. Once cut then place each letter onto your pumpkins. ( My pumpkins were approx 2 1/2" tall so I cut my letters  approx 2 1/8"). 


    Step 7:
    Your “Give Thanks” banner and pumpkins are now complete. Add accent pieces for a full décor look. 

    (Click Image to Enlarge)

    Meet the Author: Linda Mills
    Linda Mills
    Linda loves to create by sharing her different sewing and machine embroidery techniques so others can utilize their machines to the fullest
    More From This Author
    Link is Broken, Please check the URL
    Exclusive Embroidery Offers!
    Copyright © {{ currentDate | date:'yyyy'}} - EmbroideryDesigns.com
    GET 50% OFF! ×