2026 Flash Sale
Live Chat
Embroidery Designs
Welcome, Embroiderer
Login
Back to School Book Bag
{{mainImageAlt || (productInfo._source && productInfo._source.name) || ''}}

Back to School Book Bag Embroidery Project

By   Marisa Littleton   on   July 31, 2018
  • SKILL LEVELSome Experience
  • TIME REQUIRED01:00
Description

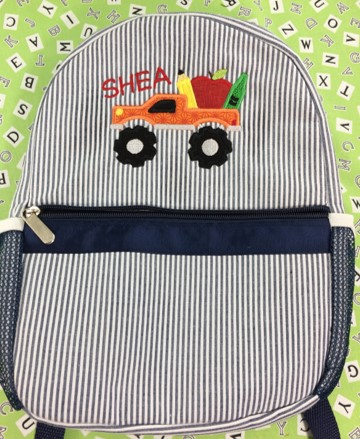
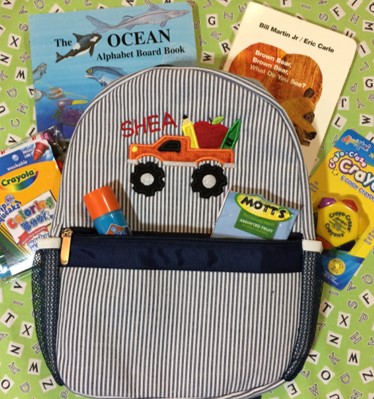
A Back to School Book Bag with an appliqued monster truck and child's name for personalization.

Step of

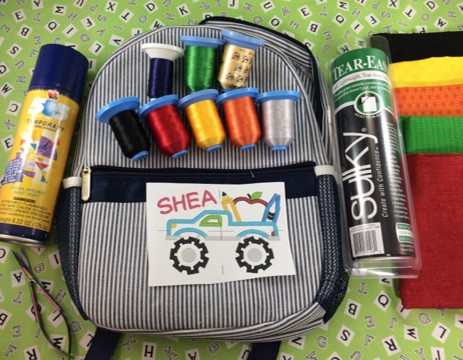
Materials

Project Preview Video

Materials
  • 6” X 6” hoop
  • Design Template & Color Chart
  • 40 wt. Embroidery Thread (Robison-Anton)
  • Tear-away Stabilizer
  • Erasable Fabric Pen
  • 505 Temporary Adhesive Spray
  • Snips/Applique Scissors
  • Preschool/Kindergarten Bookbag
  • Embroidery Software Program (optional)
  • 100% Cotton Fabric scraps for appliqueing
  • Magic Sizing spray starch

  • Designs used in this project

    Preface:
    'Back to School' means a new bookbag for little guys and gals!  Add some excitement for the new school year with a newly personalized bookbag with an appliqued 'Monster Truck'. 


    Step 1:
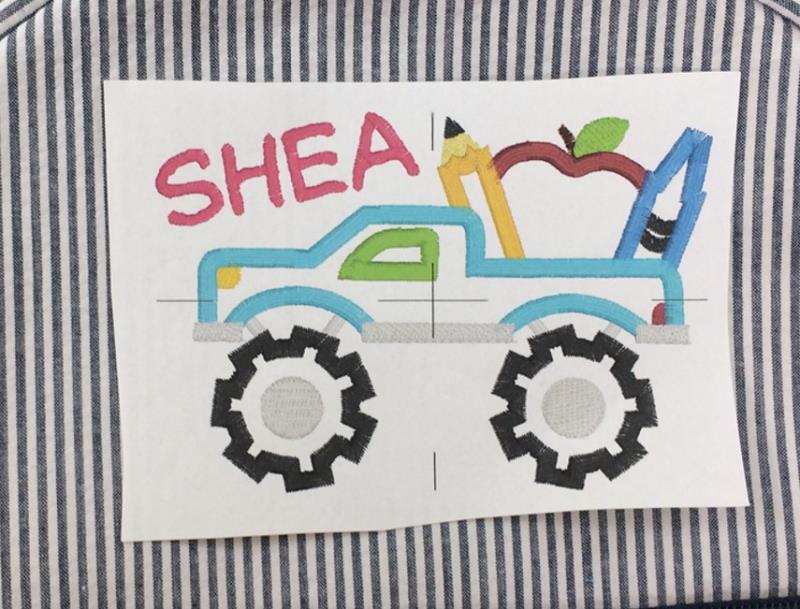
    The bookbag can be personalized by adding a name to the design.  Many embroidery machines have an alphabet feature.  Another option is by adding the name with an embroidery software program.  Embrilliance 'Essentials' software program was used to add the name to the design.

    (Click Image to Enlarge)


    Step 2:
    Read through the instructions before beginning the project.  Gather the materials for the project.  Iron and starch the fabrics.


    Step 3:
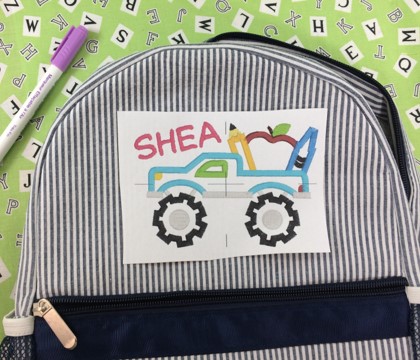
    The next step is determining the placement of the design on the bookbag.  The paper design template is the actual size of the stitch out.  Use the template as a guide for placement and positioning of the design on the bookbag.


    Step 4:
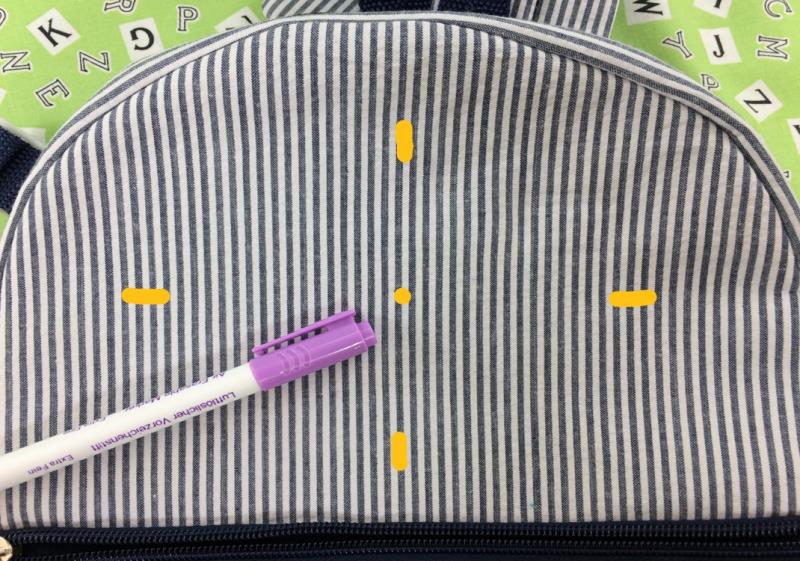
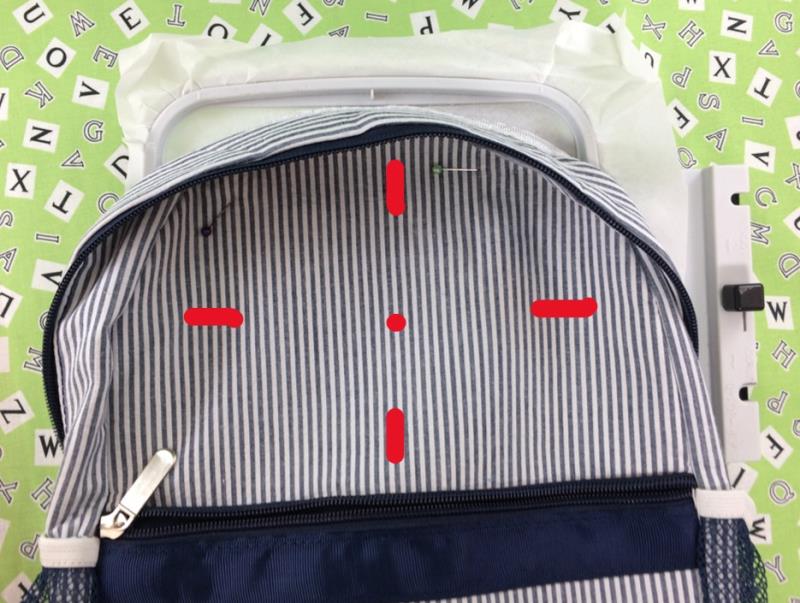
    The axis lines and center points are key to aligning the design on all items.  Mark the center point on the bookbag with an erasable pen.  Mark the vertical and horizontal axis lines on the fabric using an erasable fabric pen on the bookbag.

    (Click Image to Enlarge)


    Step 5:
    Hoop the tear-away stabilizer. Mark the center point on the stabilizer with an erasable pen.  Mark the vertical and horizontal axis lines on the stabilizer using an erasable fabric pen.

    Spray the surface of the stabilizer with temporary adhesive. 
     
    Align the center points and axis lines on the stabilizer and bookbag. Press bookbag gently onto the stabilizer making sure there are no bubbles or ripples on the surface.  Pin the bookbag onto the stabilizer for added
    stability. 
     

    (Click Image to Enlarge)


    Step 6:
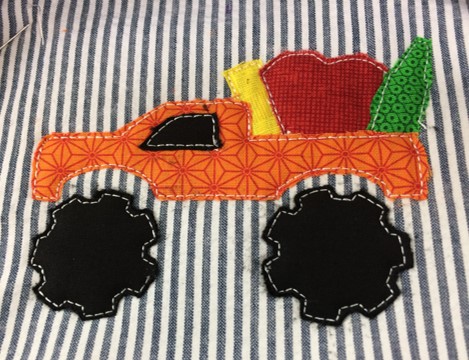
    Applique embroidery decoratively stitches one fabric on top of another.  Applique embroidery designs include a placement stitch, a tack down stitch, and a finishing stitch for each piece of fabric.  These stitches are in different colors on the color chart so that the machine will stop after each step.
     
    Load the design onto the machine.  Embroider Color Change 1.  This is the placement stitch for the applique fabric.  Cut a piece of fabric slightly larger than the stitched area.  Spray the wrong side of the applique fabric and place the fabric over the placement stitches.  Press down gently.  Embroider Color Change 2.  This step is the tack down stitch for the applique fabric.  
     
    Remove the hoop from your machine, but DO NOT REMOVE THE BOOKBAG from the hoop.   Using sharp embroidery scissors, trim the applique fabric around the tack down stitching. Trim close to the stitches but not so close as to cut the stitches themselves.   
     
    Color changes #1-12 repeat these two steps for each area to be appliqued.   


    Step 7:
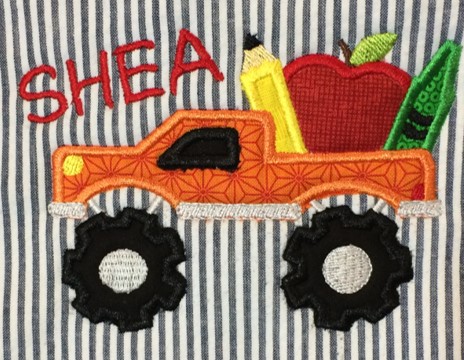
    The finishing stitches begin with color change #13.  Follow the color chart to embroider the  finishing stitches on the design.


    Step 8:
    (Click Image to Enlarge)
    After the design has been embroidered, remove the hoop from the machine.  Remove the bookbag from the embroidery hoop.  Gently tear away the stabilizer.  Trim any threads as needed.


    Step 9:
    (Click Image to Enlarge)
    Congrats!  You did it!  You appliqued a personalized design onto a child's book bag!  Great job!

    Take time to thank a teacher who made a difference in your life!  I thank the kind-hearted, talented neighbor lady that shared a love of embroidery!
     
     Marisa Littleton
    Meet the Author: Marisa Littleton
    Marisa Littleton
    Marisa Littleton is a retired educator with a love for teaching and learning. Interests include machine embroidery, hand embroidery, quilting, cooking, and antiques.
    More From This Author
    Link is Broken, Please check the URL
    Exclusive Embroidery Offers!
    Copyright © {{ currentDate | date:'yyyy'}} - EmbroideryDesigns.com
    GET 50% OFF! ×