Border OptionsHugging border, circle, square, or rectangle — with a 3mm satin stitch.
Backing OptionsAvailable with iron-on, sew-on, or velcro backing.
Fast ShippingShipped quickly from the USA.
Free Online Tools
Powerful embroidery utilities that save time and prevent costly mistakes.
Stitch AssistantRECOMMENDED
Get the exact stabilizer, machine settings, needle, and thread color sequence for every embroidery design you purchase — based on that design's stitch density, dimensions, and color count.
Many readers ask me about proper placement of monogram and single motifs on everyday items. They tell us they love the creative projects in the magazine but often find it’s the simplest embroidery tasks that are the most daunting. And we understand! A
Many readers ask me about proper placement of monogram and single motifs on everyday items. They tell us they love the creative projects in the magazine but often find it’s the simplest embroidery tasks that are the most daunting. And we understand! A misaligned monogram is much more visible than a slightly crooked flower in a field of ten designs.
When I tackle a project such as a set of towels, I think of the end result. If it’s a gift, I envision the towels in a gift box, wrapped in tissue paper. I ‘see’ the recipient opening the box, and peeling back the tissue paper. I then ‘look’ into the box. I know what I want to see – a perfectly matched set of hand and bath towels with monograms perfectly aligned and sized. If it’s for my home, I envision the same towels in the bath. Will they be rolled in a basket or hanging on a rack? Again, the monograms will be front and center and any skewed monogram will be highly visible. So where do I start to get that end result?
Figure 1: Repeating a monogram over and over can be daunting - templates can take away some of that stress. Photo courtesy of Designs in Machine Embroidery.
First, let’s look at the towels – hand and bath (Figure 1). Do they have a woven insert or border? If so, I’ll place the monogram above the band. For the bath towel, the monogram should be at least 3” high. On a hand towel, 2” is appropriate. The monograms should be placed 1 ½” to 2” above the band centered on the towel. The task doesn’t seem so daunting now but the idea of repeating the monogram four, six or eight times looms ahead. I’ve found that templates ensure the perfect placement of embroidery designs, whether they are lettering, monograms or motifs. Templates guarantee the design will stitch in the intended location, over and over again.
Figure 2: Whether your napkins are for formal or casual dining, any skewed monogram will be very visible. Photo courtesy of Designs in Machine Embroidery.
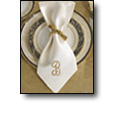
Let’s move onto napkins (Figure 2). Again, a set of four, six or eight is a familiar gift. Let’s envision them on the table in a place setting. Where is the napkin? Is it resting on the plate folded on point (formal setting) or under the fork next to the plate (casual dining)? If the napkin is fine linen and will be displayed in napkin ring, it’s a sure bet it will be used in a formal setting. Therefore, the monogram must be centered on the corner (on point) at least ½" from the stitched hem. Single letter monograms for napkins are usually 2" in height although the corner placement allows for dramatic sizing.
Figure 3: Above band placement on both sheets and pillowcases can help you avoid an over-crowded look, and avoid the possiblity of shifting layers after repeated washings. Photo courtesy of Designs in Machine Embroidery.
Monogrammed sheets and pillows (Figure 3) can be spotted with the design stitched on the band or above the band, both acceptable. When tackling this project, take a good look at the band: is it wide enough to accommodate a suitable size monogram? Audition a few monogram templates on the band. Avoid a crowded, dense look and opt for above band placement. Above band placement also avoids the possibility of shifting layers after repeated washings. And of course, the pillowcases must be stitched in the same manner with a smaller monogram.
Figure 4: Monogram placement on wearables is crucial to the success of the overall design. Photo courtesy of Designs in Machine Embroidery.
Single monogram placement on wearables is crucial to the success of the overall design (Figure 4). On a cuff, the tiny three-letter monogram should be centered on the wearer’s wrist and sit just 1/4” above the topstitching. For left chest placement, the sex and size of the wearer is crucial. Women like their embroidery designs to sit high on the chest avoiding a bull’s eye effect while men are comfortable with a lower and often larger embroidery design. Center front embroidery designs on ladies’ garments are often placed too low, they shouldn’t fall directly on top of the chest area. The top of the monogram (regardless of size) should be placed 2” to 2 ½” below the neckline.
Figure 5: Left Chest Placement
Today, a powerful tool that helps embroiderer’s tackle these difficult tasks is available. Along with embroidery expert Deborah Jones, I’ve developed a kit for placing precision monograms. The Perfect Placement Kit comes with 15 plastic, translucent templates for common household items and wearables. The templates come with a 20-page full color guide that illustrates the step-by-step procedures for successful results. You’ll find information on monogram size, placement and proper stabilization. The PPK ensures repeated success – no more quesswork!
Eileen is the editor of Designs in Machine Embroidery and a regular contributor to freeEmbroiderystuff.com. Editor Eileen Roche shares her wealth of embroidery and sewing experience in this project based magazine. Her talent, creativity and enthusiasm distinguish her from others in the industry and are the driving force behind the magazine’s success.