Border OptionsHugging border, circle, square, or rectangle — with a 3mm satin stitch.
Backing OptionsAvailable with iron-on, sew-on, or velcro backing.
Fast ShippingShipped quickly from the USA.
Free Online Tools
Powerful embroidery utilities that save time and prevent costly mistakes.
Stitch AssistantRECOMMENDED
Get the exact stabilizer, machine settings, needle, and thread color sequence for every embroidery design you purchase — based on that design's stitch density, dimensions, and color count.
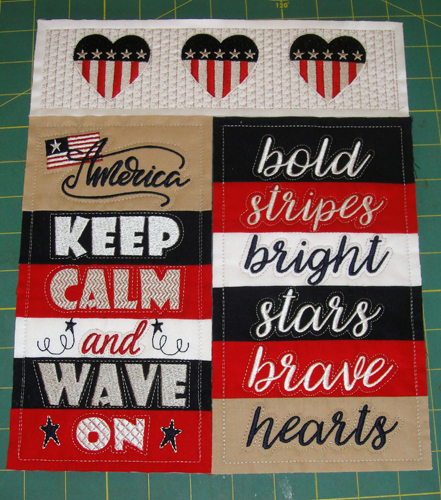
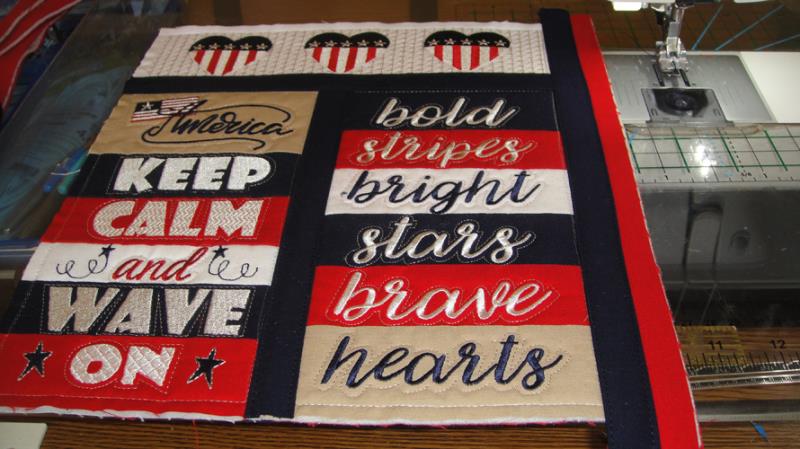
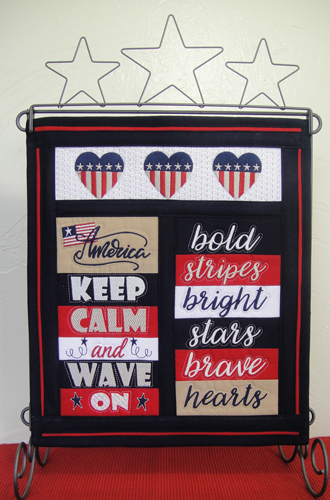
Celebrate patriotic holidays with this Americana mini quilt, featuring pieced and embroidered blocks. Ideal for adding a touch of national pride to your decor. Borders and sashing are completed with your sewing machine. Step-by-step instructions are included.
Due to the number of stitches in the embroidering of these designs it is necessary to use the water soluble thread for the block tack down stitches as well as a strong 2.5 ounce stabilizer. The longer embroidery hoops often do not grip the stabilizer tightly along the sides. It is advised that you wrap sports stretch tape down the long sides of the inner hoop to prevent slippage. Instructions are given for removing the water soluble thread. Pressing your fabrics with Magic Sizing® or spray starch before cutting makes them easier to handle.
Step 1:
(Click Image to Enlarge)
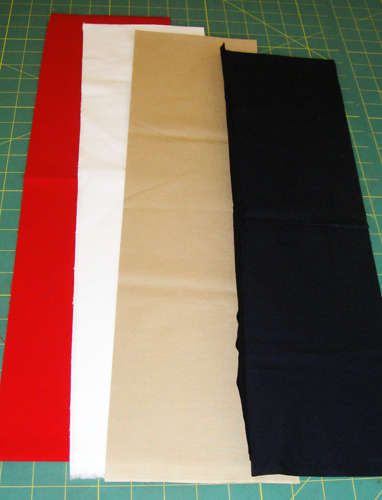
Cut 6” strips of the red, white, tan and navy Kona cloth.
Step 2:
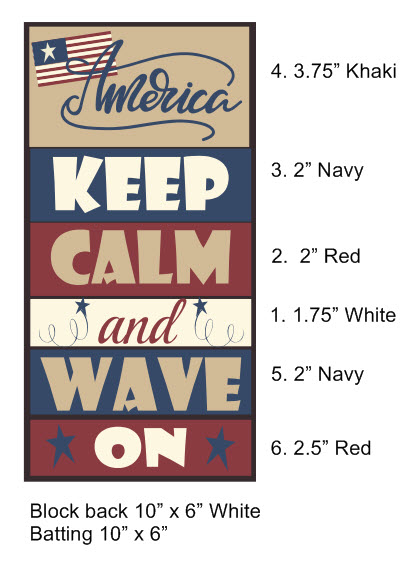
The strips for AMMQ01 will be sub-cut per this diagram. The numbers represent the sewing order of the strips.
(Click Image to Enlarge)
Step 3:
(Click Image to Enlarge)
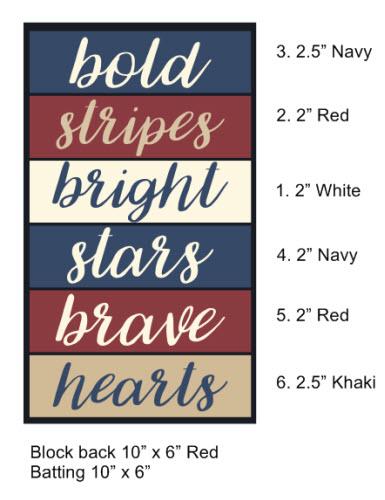
The strips for AMMQ02 will be sub-cut per this diagram. The numbers represent the sewing order of the strips.
Step 4:
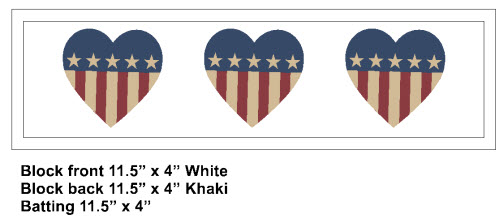
The strips for AMMQ03 will be sub-cut per this diagram.
Step 5:
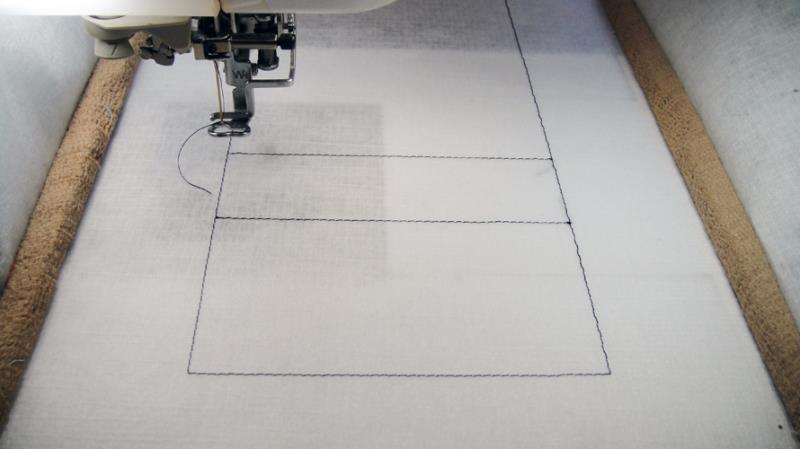
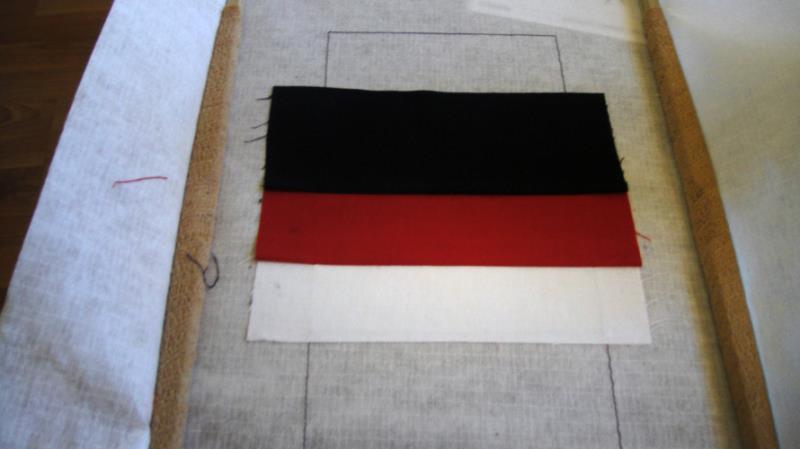
Tautly hoop the cut away stabilizer and run color stop (CS) 1 as an outline of the whole block and as placement lines for the 1st strip of fabric. The white fabric is placed first in both stripped designs and the other strips work out from the white fabric.
(Click Image to Enlarge)
Step 6:
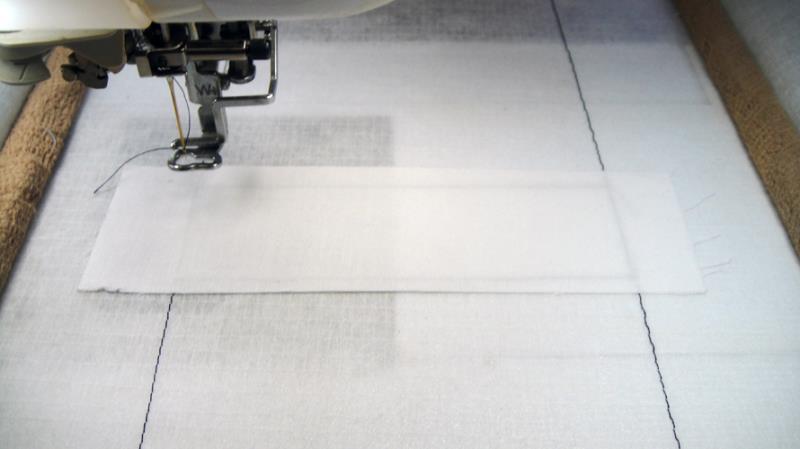
Spray adhesive on the back of the white fabric strip and position it so that about ¼” is above and below the placement lines, have the sides of the fabric extend at least ½” over both sides of the outline.
(Click Image to Enlarge)
Step 7:
Run the next CS to seam the fabrics.
(Click Image to Enlarge)
Step 8:
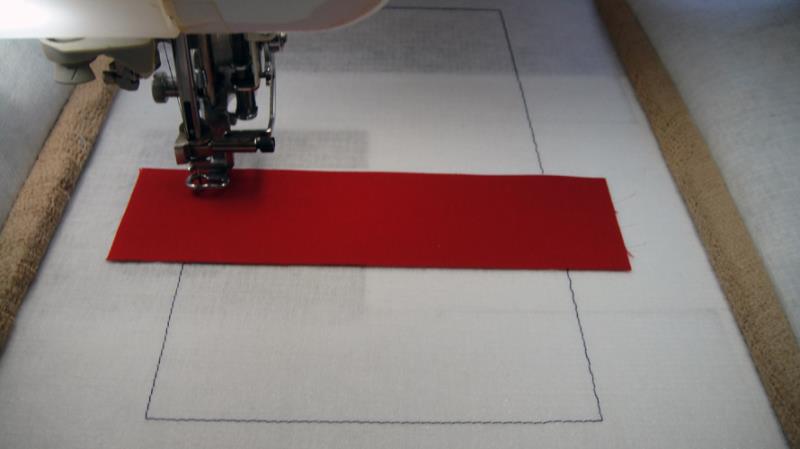
Take the hoop out of the machine, do not unhoop, spray adhesive on the back of the red strip and smooth towards the top of the hoop.
(Click Image to Enlarge)
Step 9:
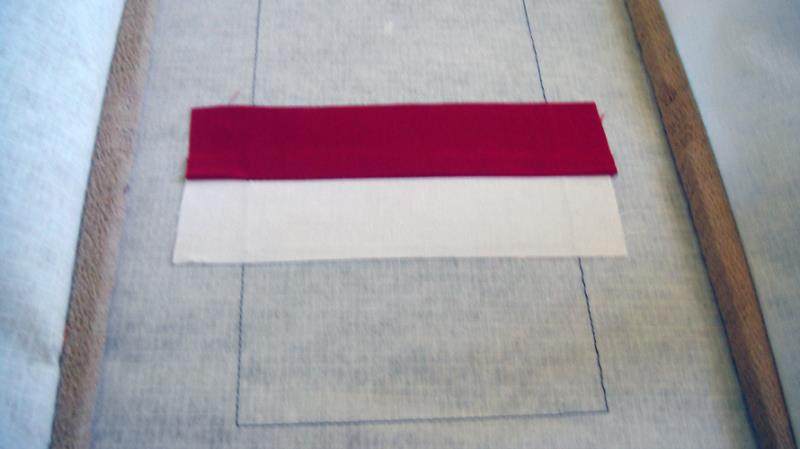
Lay the navy strip over the red strip, top edges even, run the next CS to seam the fabrics, remove the hoop and spray adhesive on the back of the navy strip and smooth up towards the top of the hoop.
(Click Image to Enlarge)
Step 10:
(Click Image to Enlarge)
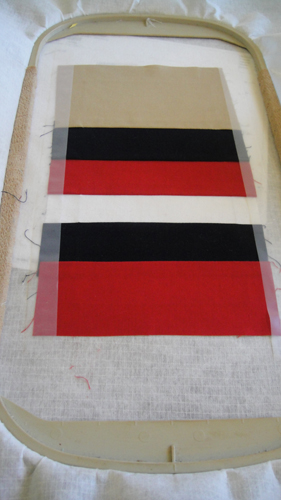
Repeat these steps to stitch the khaki strip to the top of the hoop. Follow the placement charts above to stitch the strips to the below the white strip. After all strips are applied place cellophane tape down both sides of the block to prevent the folds from being caught by your presser foot.
Step 11:
(Click Image to Enlarge)
Run CS 7 in water soluble thread to tack down the edges of the block. Follow the color chart through CS 20 to embroider the block.
Step 12:
(Click Image to Enlarge)
Remove the hoop from the machine, do not unhoop; lay the hoop face down on a flat surface; spray the Battilizer® with adhesive and position it over the block on the back of the hoop; spray adhesive on the back fabric and position it over the Battilizer®.
Step 13:
Return the hoop to the machine and run CS 21 to tack down the Battilizer® and back fabric to the block.
(Click Image to Enlarge)
Step 14:
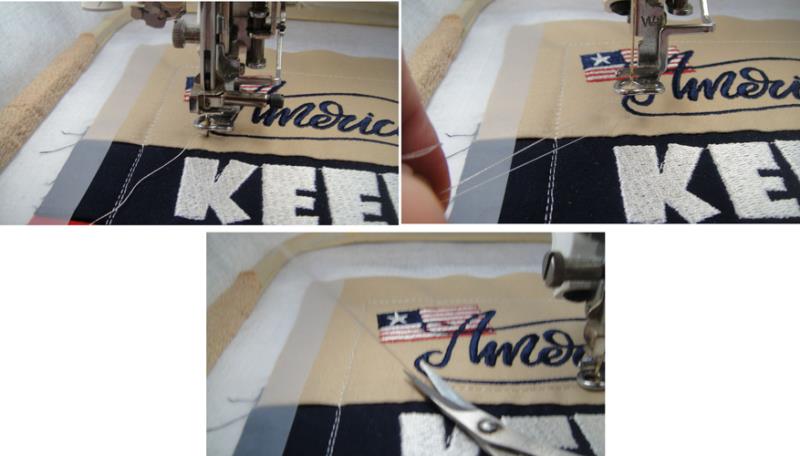
The final five color stops are all run in the same color, but are listed as five color stops as they quilt around the words individually. By having individual color stops you can bring up the bobbin thread to the top of the work as each section starts sewing. To do bring up the bobbin thread, thread the tail of your thread through the presser foot. While holding onto the tail hit the needle up button twice. Pull the bobbin thread out to the length of your top thread tail and while holding on to both of those threads run the quilting for a few stitches. Stop the machine and trim off the thread tails, then complete the quilting. This will keep the back of your work much nicer and you will only have to trim off the tie offs when the block is complete.
(Click Image to Enlarge)
Step 15:
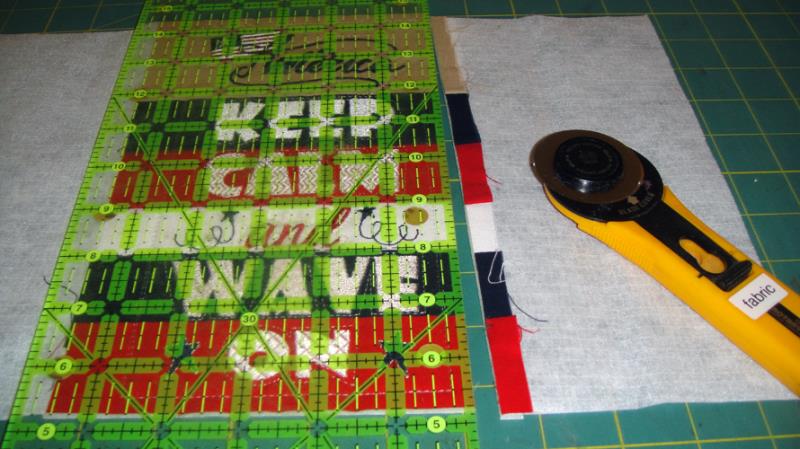
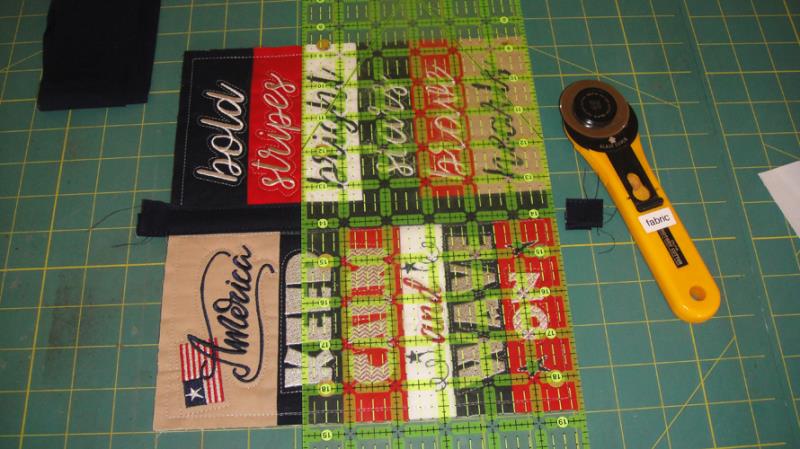
Lay the ¼” marks of a see through ruler along the outside water soluble thread stitching and trim all sides to ¼”.
(Click Image to Enlarge)
Step 16:
(Click Image to Enlarge)
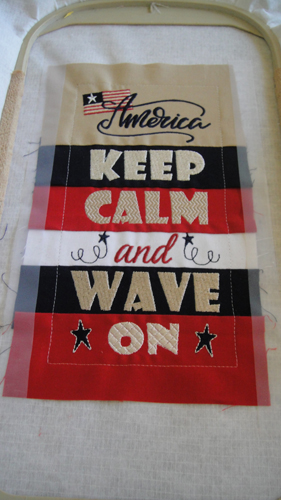
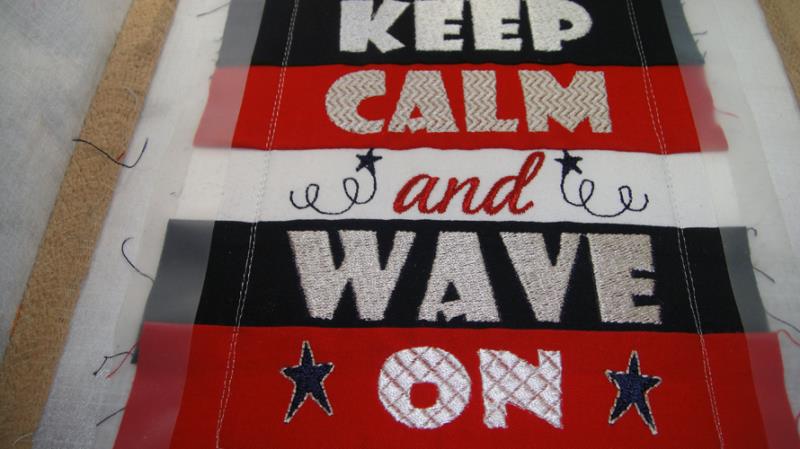
The second block AMMQ02 is made in the same manner as AMMQ01 above starting with placing the white fabric on the placement lines. See Step 3 for colors and widths of the fabrics. This picture was taken just before the words were outlined with the quilting stitches.
Step 17:
(Click Image to Enlarge)
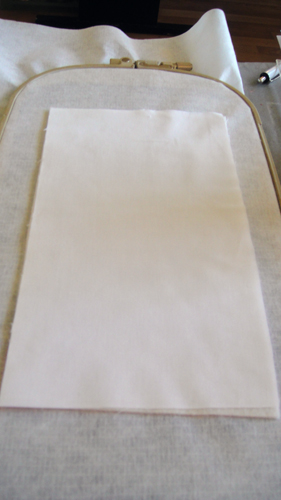
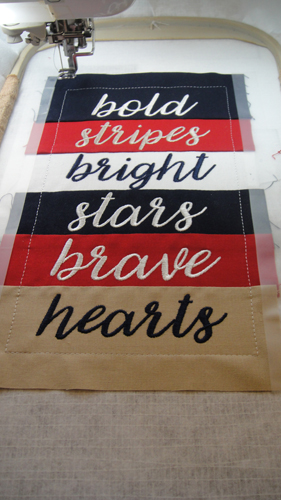
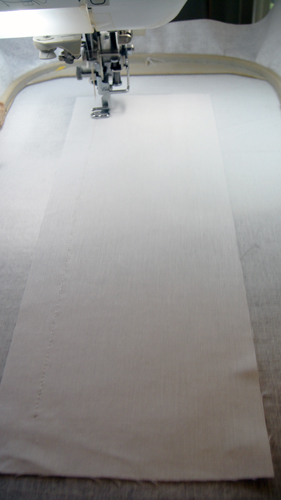
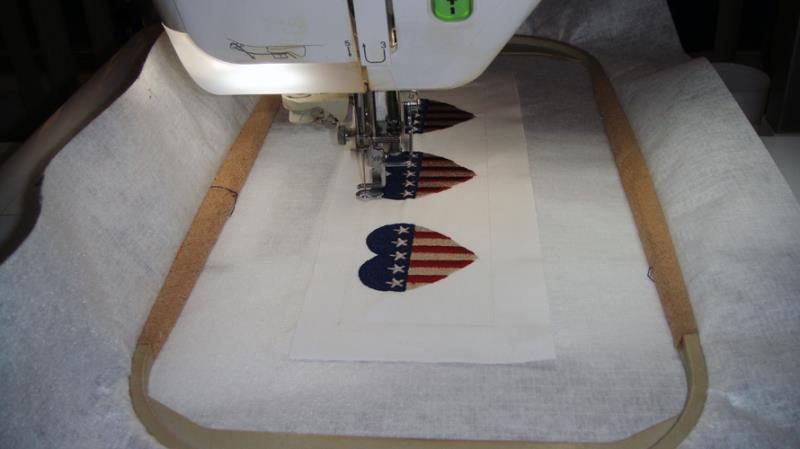
The top quilt block AMMQ03 is made vertically in your hoop. Run the placement line, spray the white 11” x 4” fabric with adhesive and position over the placement lines so that the fabric exceeds the placement lines by ½” on all sides.
Step 18:
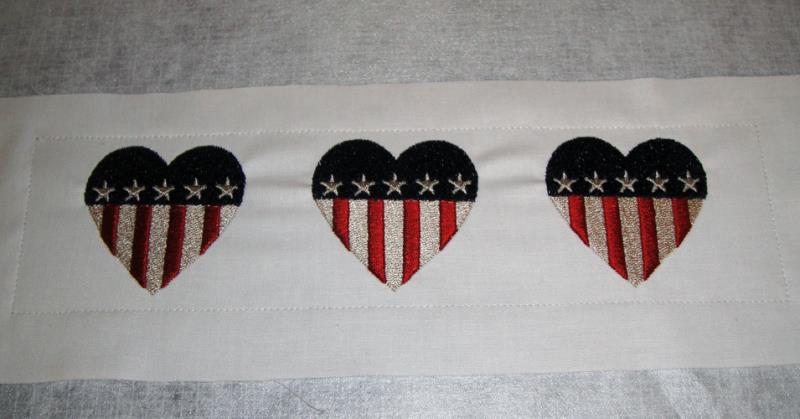
Follow the color chart through CS 6 to stitch the hearts. Remove the hoop from the machine and place face down on a flat surface. Spray adhesive on the Battilizer® and back fabric and position on the back of the block as you did the first two blocks.
(Click Image to Enlarge)
Step 19:
Return the hoop to the machine and run CS 7 in water soluble thread and CS 8 in Pussy Willow to complete the block. Trim the block to ¼” seam allowances on all sides.
(Click Image to Enlarge)
Step 20:
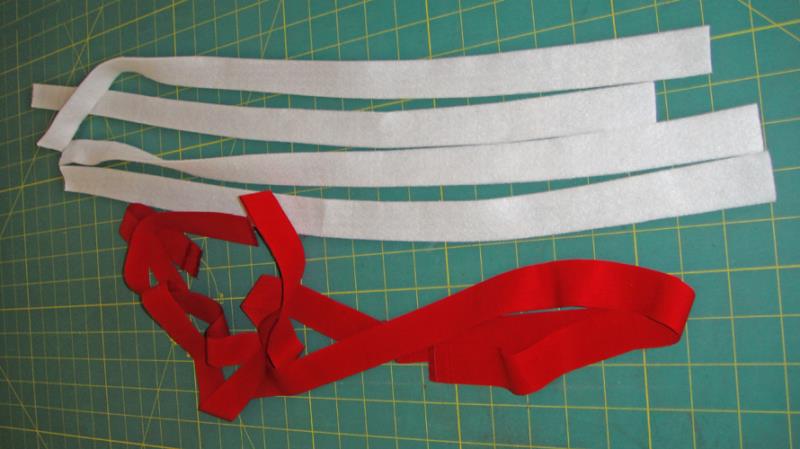
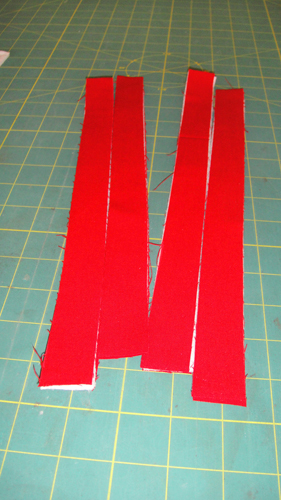
Cut 2 strips of red Kona® cloth 1” wide across the width of the fabric. Sub-cut 8 13” x 1” strips of red Kona® cloth and 4 13” x 1” strips of Battilizer® for the borders. Cut 2 strips of navy fabric 1” wide by the width of the material and 2 strips 2” wide by the width of the material for sashing. Cut 2 2.25” strips of navy for the binding. Spray starch and press the 1” navy strips. Spray starch and press the 2” navy strips then fold in half lengthwise and press.
(Click Image to Enlarge)
Step 21:
(Click Image to Enlarge)
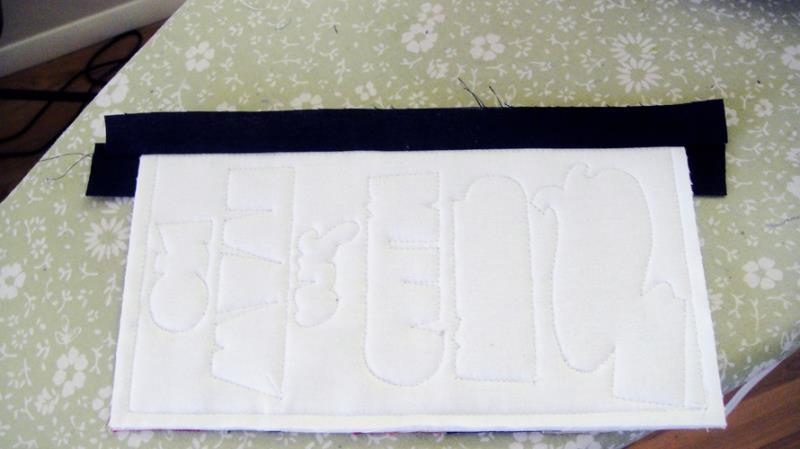
To assemble the border quilt sandwiches spray adhesive on one side of a Battilizer® strip and lay a red strip across it. Spray the other side of the Battilizer® with adhesive and apply the fabric.
Step 22:
Lay out your quilt blocks in the order in which they are going to be assembled making sure that all edges are even.
Step 23:
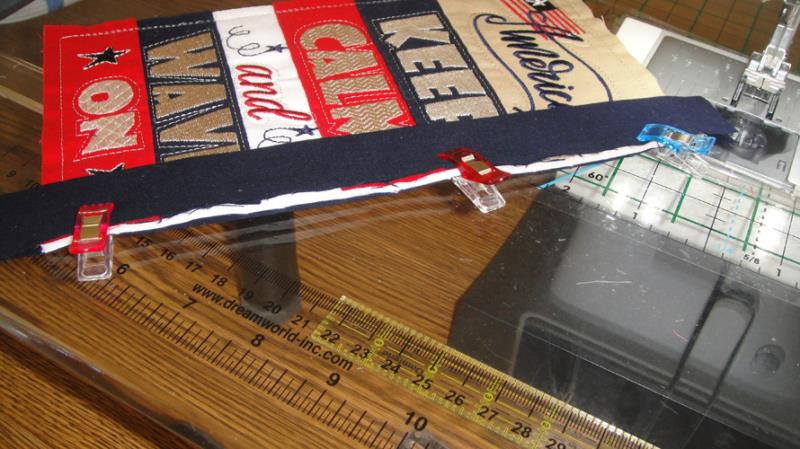
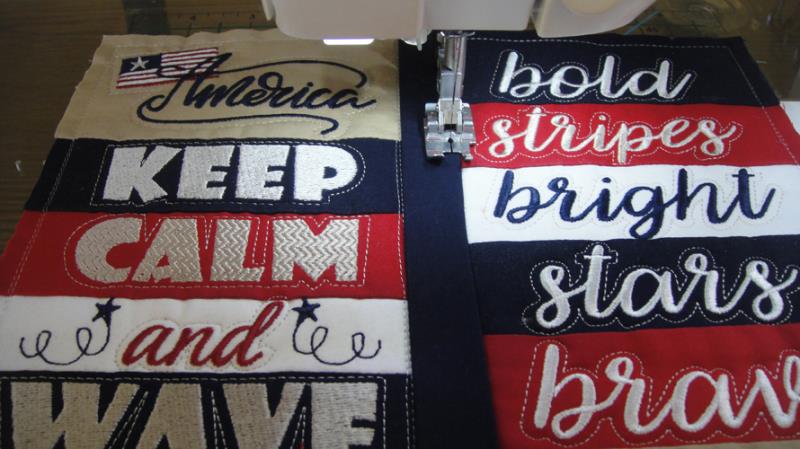
We will now simultaneously attach the back 1” navy sashing and the folded 2” front sashing to the right hand edge of the 1st block. Place a 1” strip of sashing to the back of the right hand edge of the 1st block having the top and bottom of the strip extending ½” above the top and bottom of the block. Clip the top folded 2” sashing with the raw edges meeting the raw edges of the block and having the top and bottom edges extending ½” above and below the block. Make sure all three layers, the back sashing, the quilted block and the top sashing are aligned along the raw edge.
(Click Image to Enlarge)
Step 24:
(Click Image to Enlarge)
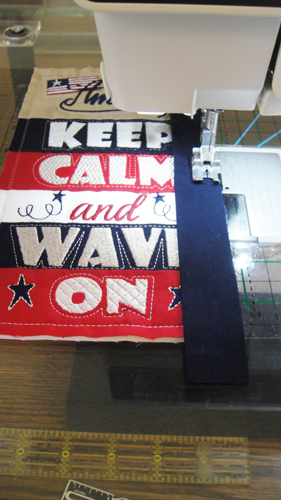
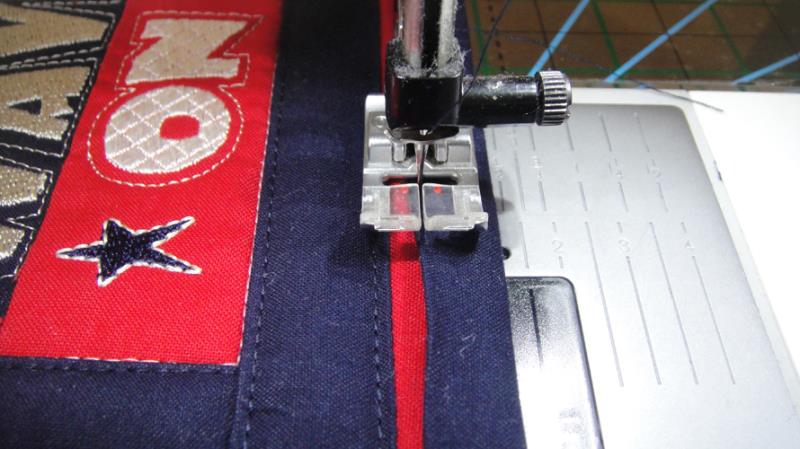
Stitch with an accurate ¼” seam allowance with a 3mm stitch length.
Step 25:
Press just the back sashing out away from the block.
(Click Image to Enlarge)
Step 26:
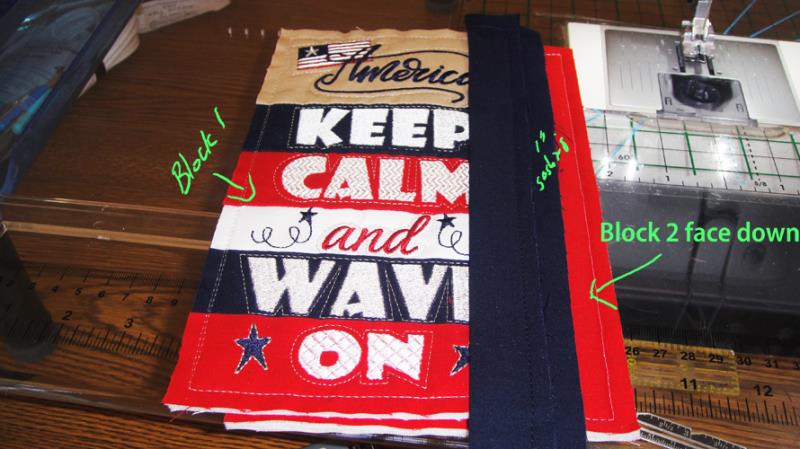
Slide block 2 face down underneath the 1” sashing. Align the 1st and 2nd block so that their top and bottom edges are even. Align the 1” sashing strip with the edge of the bottom block and clip together.
(Click Image to Enlarge)
Step 27:
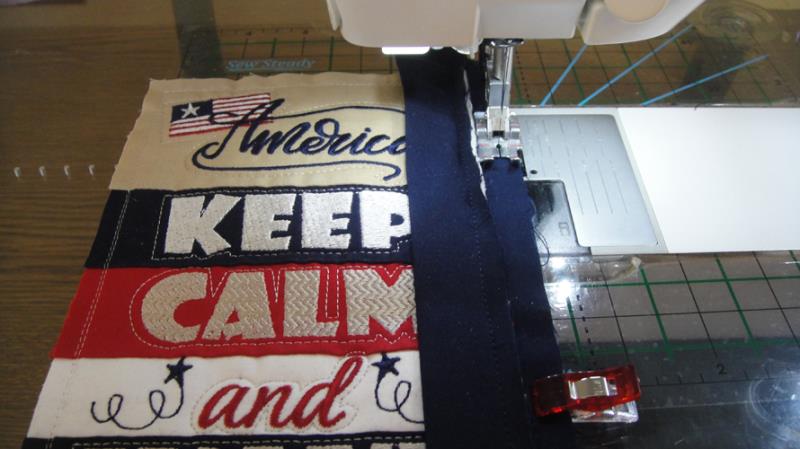
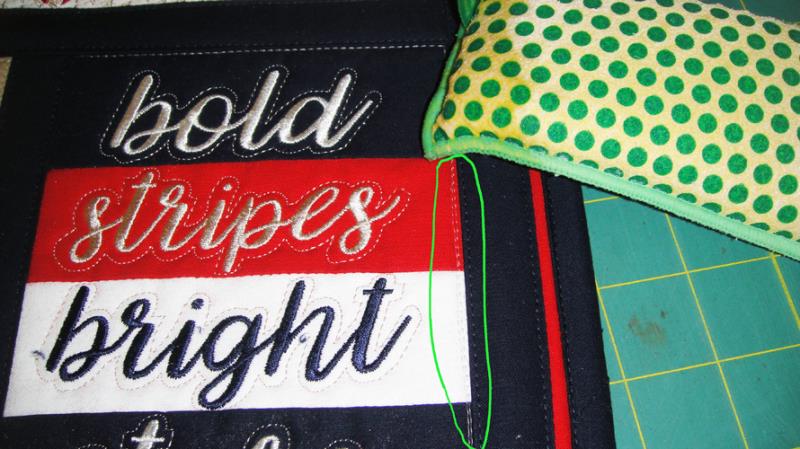
Stitch the back sashing and the 2nd quilt block together with an accurate ¼” seam. Note: the 1st seam may have to be lifted a little to ride over the presser foot to make that 2nd seam an accurate ¼” seam.
(Click Image to Enlarge)
Step 28:
(Click Image to Enlarge)
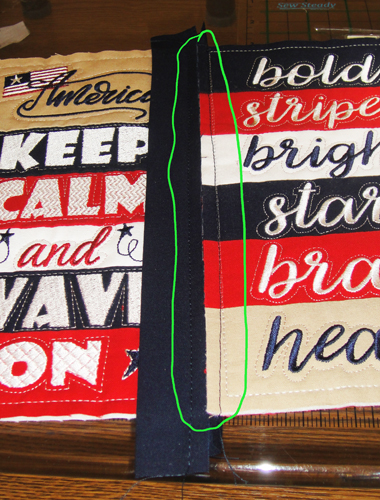
When you open out the bottom block the two seam allowances should meet up without overlaps or gaps. Press the seam allowances down flat. Press the folded top sashing over the seam allowances.
Step 29:
Top stitch down the top sashing down close to both edges of the sashing.
(Click Image to Enlarge)
Step 30:
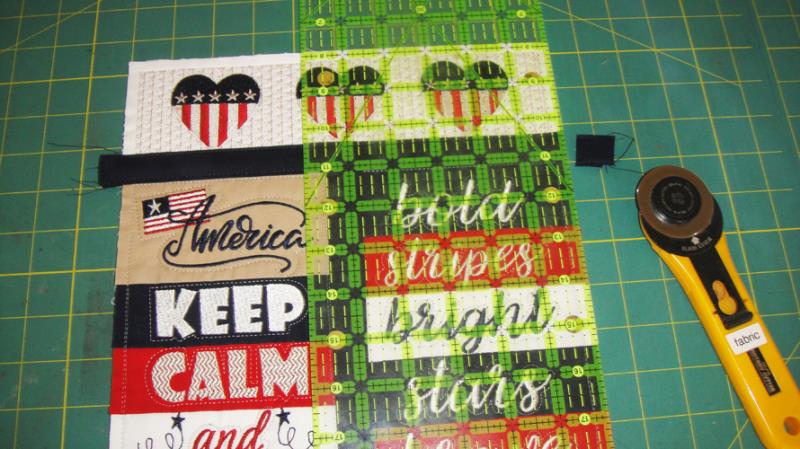
Trim off the excess sashing and the top and the bottom of the joined blocks.
(Click Image to Enlarge)
Step 31:
Stitch the top and bottom sashing strips all the way across the top of the joined blocks, then sew the top block to the back sashing just like you attached the two bottom blocks together. Press the top sashing over the seam allowances and topstitch close to both edges of the sashing. Trim the excess sashing from both sides of the quilt.
(Click Image to Enlarge)
Step 32:
Attach the borders down both sides of the quilt using the same sashing techniques, then attach the top and bottom borders.
(Click Image to Enlarge)
Step 33:
Bind as desired. Two 2 ¼” strips were joined together, pressed in half lengthwise then stitched to the back of this quilt with mitered corners. The binding was brought forward and edged stitched to the front of the quilt. This left a 1/8” stripe of the red border showing which gave an interesting design element to this project.
(Click Image to Enlarge)
Step 34:
Dip the corner of a sponge in water and rub along the water soluble thread tack down stitches to remove the water soluble thread. Turn the quilt over and pull out and clip off the corresponding bobbin thread.
(Click Image to Enlarge)
Step 35:
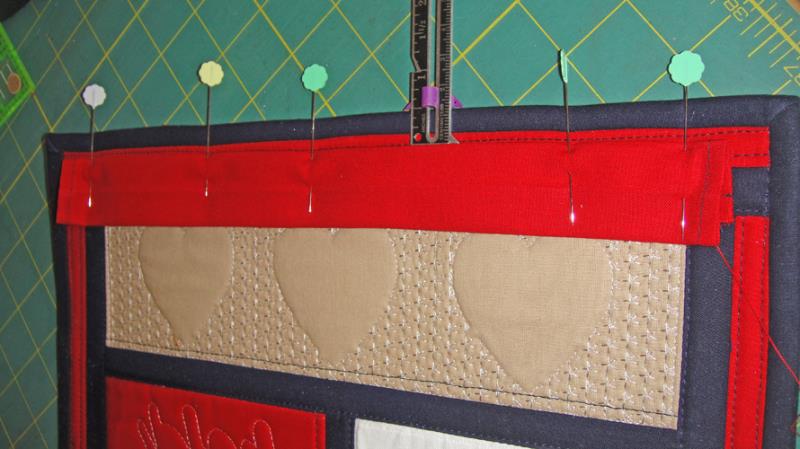
To make a hanging sleeve for the back of the mini quilt cut a piece of fabric the width of the quilt and about 3” deep. Turn under each end ¼” twice and stitch to hem the ends. Fold in half lengthwise and press. Open out the sleeve, bring the long edges into meet the center crease and press. Fold the sleeve wrong sides together and stitch with about a ¼” seam. Place one of the side creases ½” below the top of the quilt and pin in place. Whipstitch or blind stich this crease to the quilt by hand. Pin the bottom crease, not the original center crease, to the quilt back and whip stitch the side edges and across the bottom of the sleeve.
(Click Image to Enlarge)
Step 36:
(Click Image to Enlarge)
Feed the quilt sleeve onto the frame. Congratulations your Americana Mini Quilt is complete. Display it with pride.
Award winning Digitizer, Embroidery Educator, Author and a Consultant to the Industry, Pat Williams has 30 years of experience in the embroidery industry. Pat has won multiple awards for her digitizing expertise including the 2007 Impressions Awards Grand Championship, Best of Show as well as the 1st and 2nd Place Awards. Pat’s love of digitizing has afforded her the opportunity to write numerous articles for Impressions magazine in the United States and Images Magazine in Europe. In 2001 Pat was named “Embroidery Educator of the Year.” For many years Pat taught digitizing seminars at the ISS Shows in Long Beach, CA and for Compucon software. She now resides in Tucson, AZ.