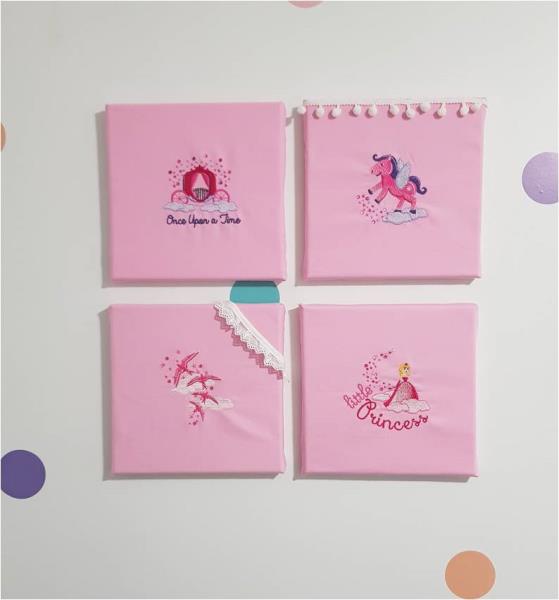
Princess Canvas Art Set

Princess Canvas Art Set Embroidery Project

By   Kylie Burke   on   May 12, 2018
  • SKILL LEVELSome Experience
  • TIME REQUIRED02:00
  • FINISHED SIZE8 x 8 inches
Description

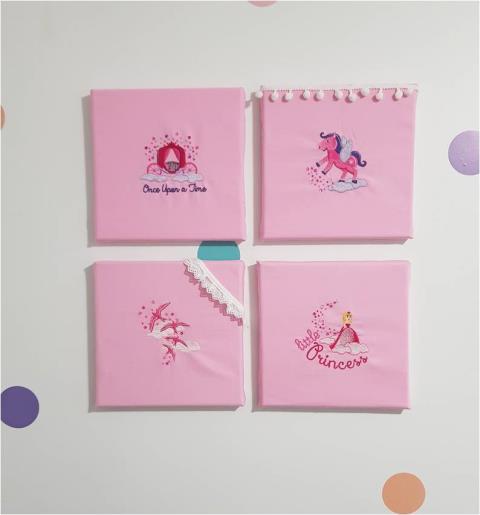
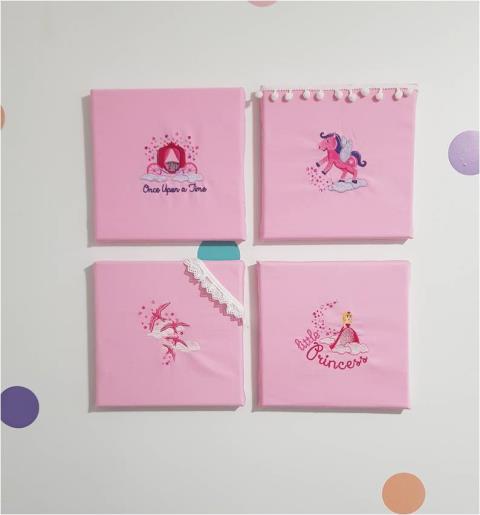
Enhance a girl's room with this charming set of princess-themed canvas art. Each piece features delightful imagery to inspire imagination and add a touch of magic. Perfect for wall decoration to create a whimsical atmosphere. Step-by-step instructions are included.

Step of

Materials

Project Preview Video

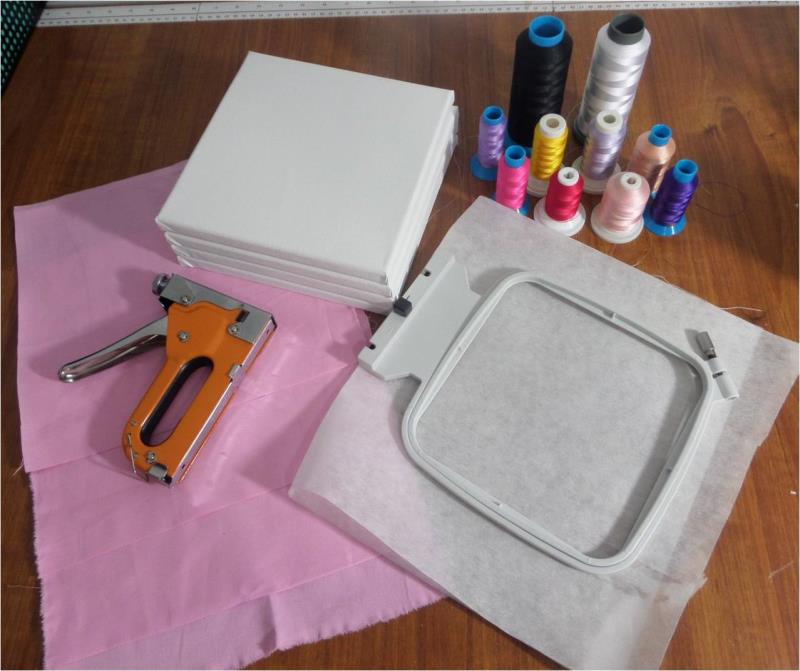
Materials
  • 4 x 8” square canvas
  • 4 x 11” squares of cotton drill
  • Thread colors for each design
  • 4” x 4” hoop
  • Tearaway stabilizer
  • Staple gun and staples

  • Designs used in this project

    Final Product: What You Will Create

    Preface:
    These designs use many shades of pink. If you don't have enough shades of pink, you can repeat some colors in certain areas and still achieve the desired look. I have substituted purple for some areas. I have also added some decorative trims and small rhinestone beads.


    Step 1:
    Gather the materials and read through the instructions before beginning. These designs have many color changes so have a copy of the color char ton hand to refer to for each design.

    (Click Image to Enlarge)


    Step 2:
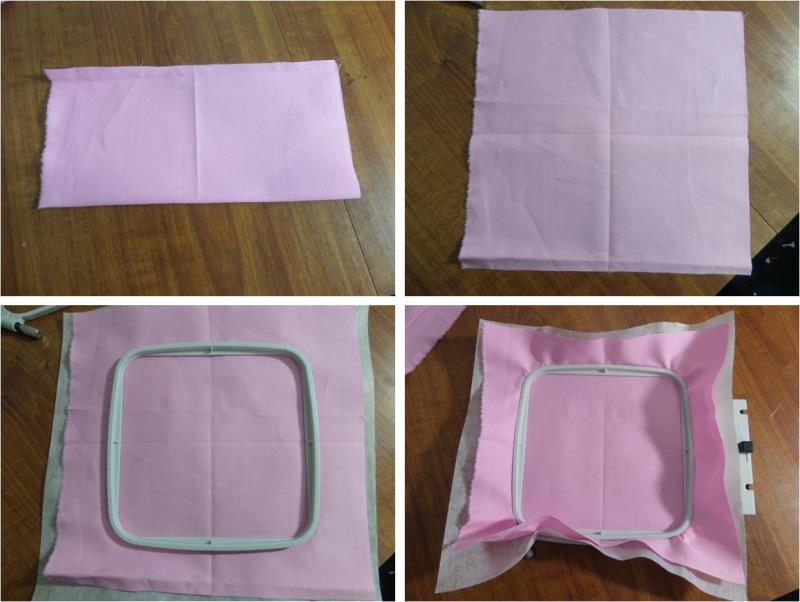
    I found the best way to mark the centre of the fabric square is to fold it in half lengthwise and press along the fold line to form a crease. Then fold in half widthwise and crease. This will help to hoop the fabric evenly and will assist later on when stretching the fabric over the canvas. Hoop your fabric piece.

    (Click Image to Enlarge)


    Step 3:
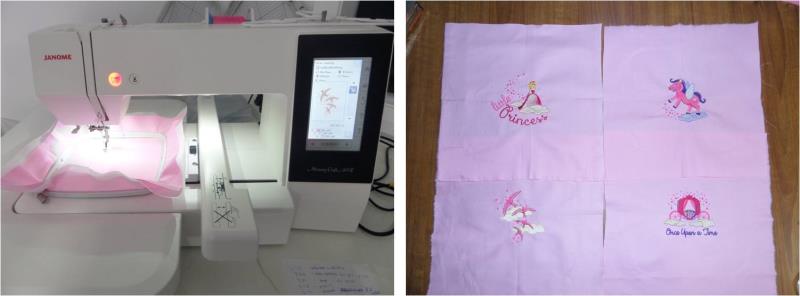
    Load the design on your machine. I have enlarged the designs to 120% to fill up the 8” canvas. Attach the hoop to your machine and stitch out all 4 designs

    (Click Image to Enlarge)


    Step 4:
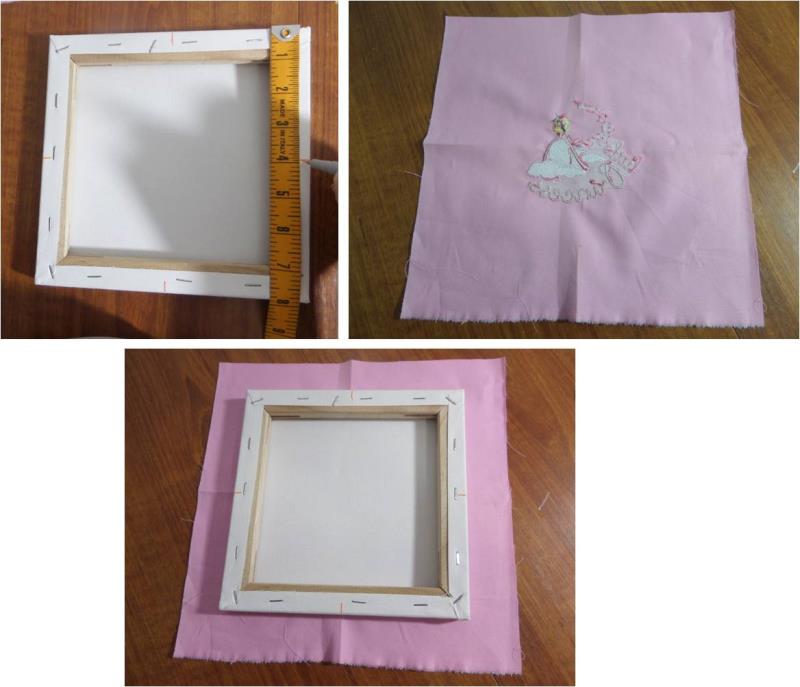
    On the back of the canvas, mark the halfway point on all sides. Then with your fabric right side down place the canvas face down and align the folds of the fabric with the marks on the canvas to ensure it is centered. You will have 1.5” of fabric around the edge of the canvas

    (Click Image to Enlarge)


    Step 5:
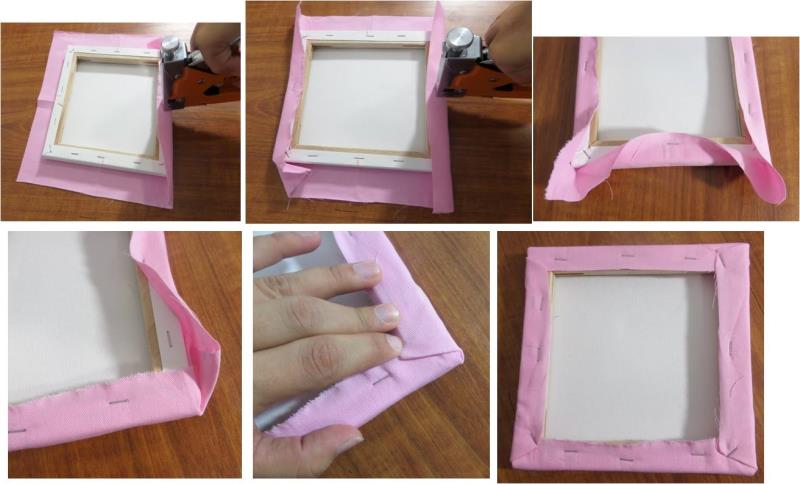
    Using the staple gun, turn the bottom edge up and staple. Repeat around all edges, ensuring you gently pull the fabric around so it is taught on the front. Once you have turned all the edges up, fold in the corners then turn up and staple the corners down. 

    (Click Image to Enlarge)


    Step 6:
    Repeat for all canvases  

    (Click Image to Enlarge)


    Step 7:
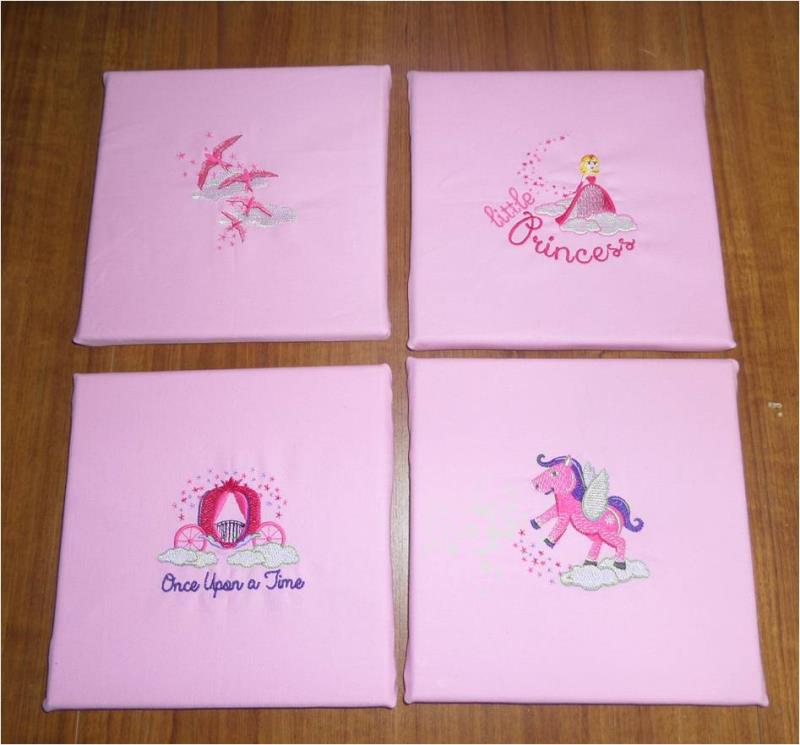
    Well done, your Princess canvas’ are complete and ready to hang, using your hanging preference. I have added some additional trim for decoration. 

    (Click Image to Enlarge)

    Meet the Author: Kylie Burke
    Kylie Burke
    Kylie is based in Australia and loves creating and sharing her unique pieces.
    More From This Author
    Link is Broken, Please check the URL
    Exclusive Embroidery Offers!
    Copyright © {{ currentDate | date:'yyyy'}} - EmbroideryDesigns.com
    GET 50% OFF! ×