Quilt Faith Reminder Wall Art

Quilt Faith Reminder Wall Art Embroidery Project

By   Ramona Baird   on   April 11, 2018
  • SKILL LEVELBeginner
  • TIME REQUIRED03:00
Description

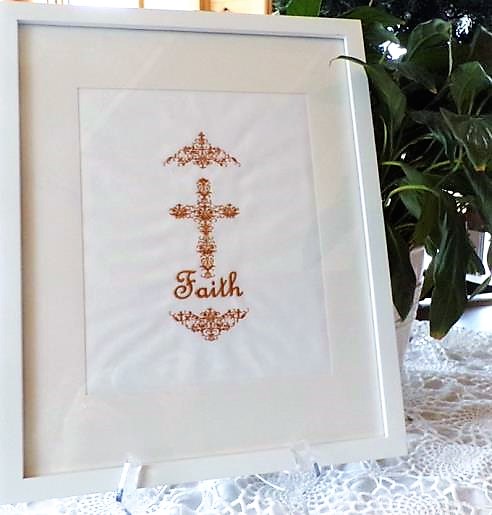
Craft an elegant quilted wall art featuring a cross and the word 'Faith'. Perfect for adding a touch of inspiration to any room. Step-by-step instructions are included.

Step of

Materials

Project Preview Video

Materials
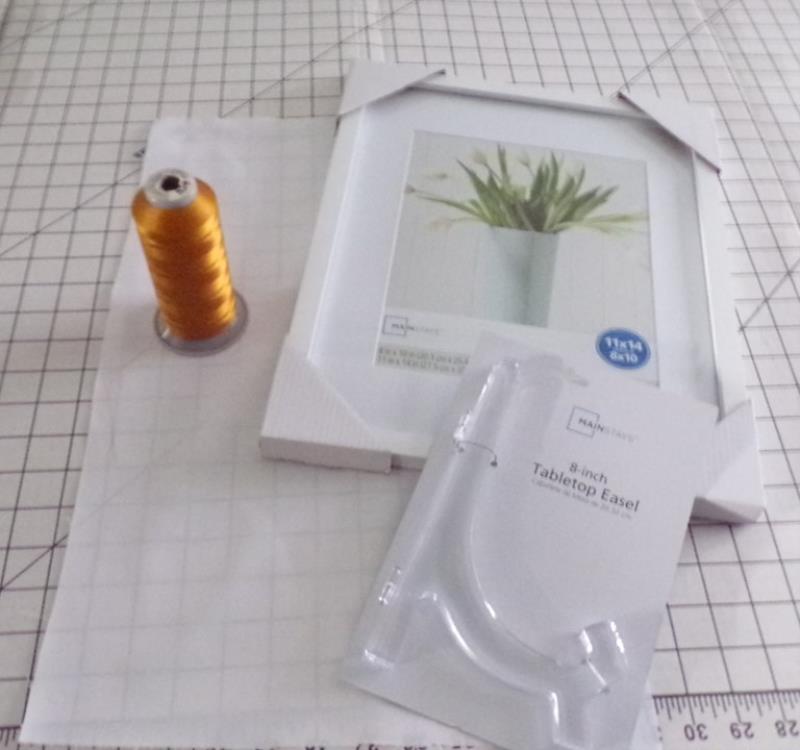
  • White cotton fabric to fill out frame and that will fit hoop
  • Picture frame with a mat insert, 11” x 14”
  • Tabletop Easel
  • Embroidery thread in your choice of color
  • Cutaway stabilizer to fit hoop
  • Tearaway stabilizer to float under hoop
  • Optional: card stock and embroidery software

  • Designs used in this project

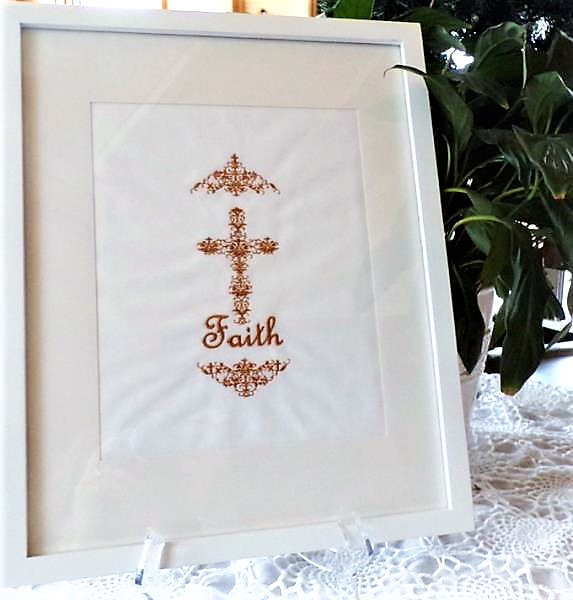
    Final Product: What You Will Create

    Preface:
    This is a great first project to learn to combine two designs in software, align them, and then embroider the design in one color. If you don’t have software, most steps can probably be done at the machine.


    Step 1:
    Gather the materials and read through the instructions before beginning. Print out a paper template of the design. For the project, an “old gold” embroidery thread was chosen for stitching the entire design.

    (Click Image to Enlarge)


    Step 2:
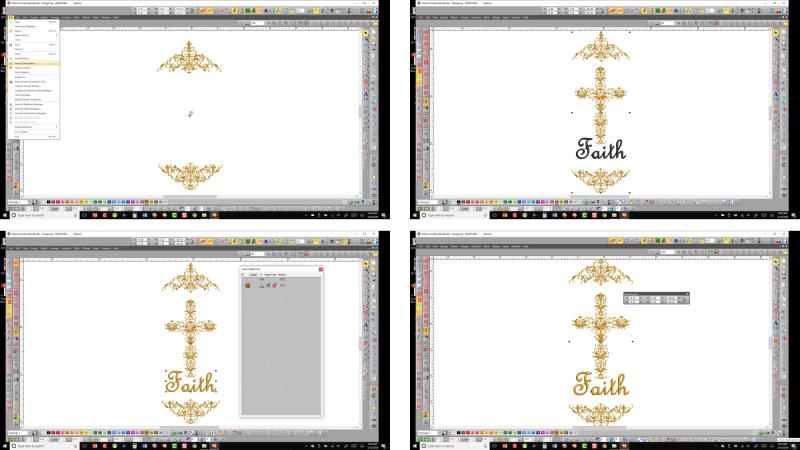
    Prepare the design. Load the “Cross Embellishment” embroidery design in the software. Next, load the “Faith Cross” embroidery design. Select the “faith” text and change it to the same color as the rest of the design. Select each object on the screen and then use the alignment and spacing tools to evenly space and align all the objects. Be sure the design will fit in the hoop.

    (Click Image to Enlarge)


    Step 3:
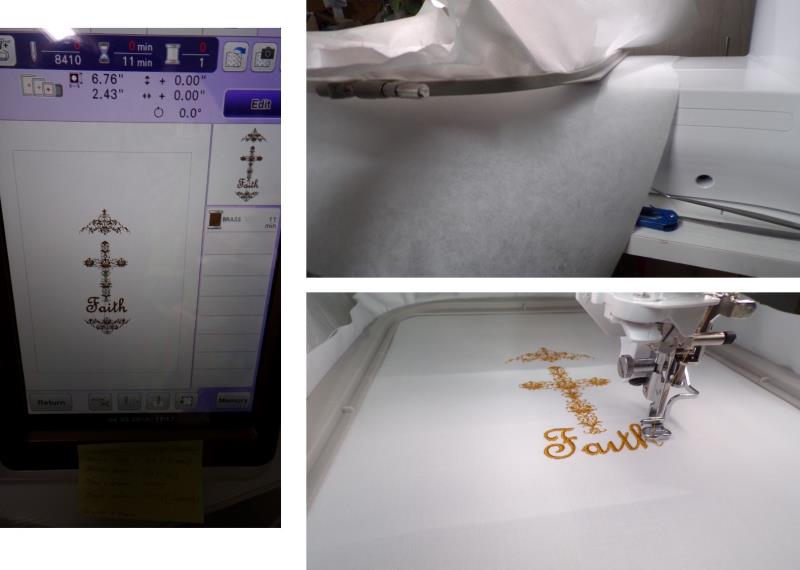
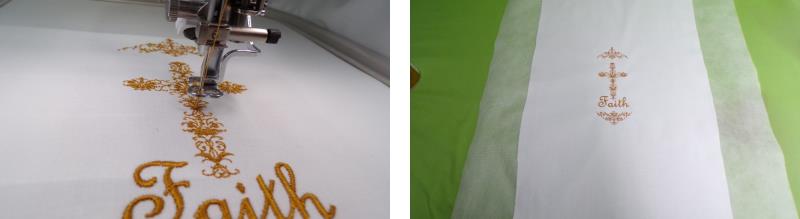
    Load the prepared design on the machine, Hoop the fabric and stabilizer and place the hoop on the machine. Float a piece of tearaway stabilizer under the hoop. Start the machine and stitch the design.

    (Click Image to Enlarge)


    Step 4:
    Before removing the hoop from the machine, lower the needle at the center point of the design so you know where on the design that is. Remove the fabric from the hoop and press the fabric. Do not trim the stabilizer—it will be left on the back of the fabric.

    (Click Image to Enlarge)


    Step 5:
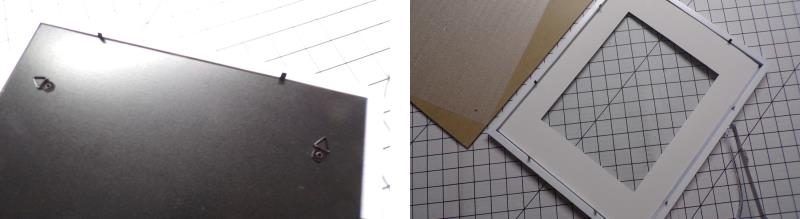
    Remove the back from the frame and remove the mat insert.

    (Click Image to Enlarge)


    Step 6:
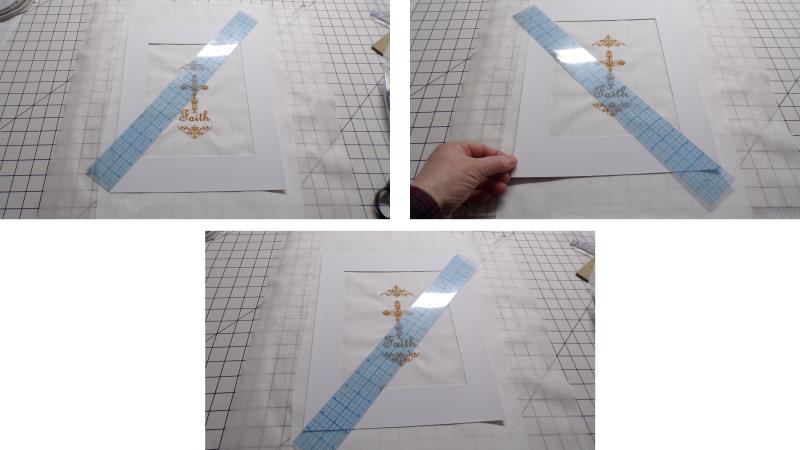
    Lay the prepared embroidery on a flat surface. Now here’s a little trick to get an embroidery project centered in a picture frame mat. Place a pin at the center of the embroidery. Lay the mat on top of the embroidery. Now place a straight edge from corner to corner, making sure the edge of the ruler touches that pin in the center of the embroidery. Switch the ruler so it goes across from the other two corners. Slide the mat into position until the straight edge touches the pin. Double check to be sure nothing shifted from the first alignment by placing the ruler in the first position. Keep checking until the ruler touches the pin from both directions.

    (Click Image to Enlarge)


    Step 7:
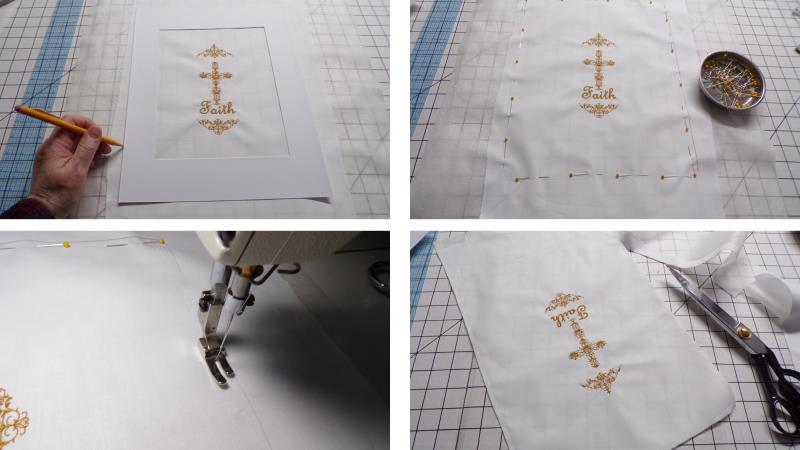
    Carefully draw along the outside of the mat and then pin the fabric and stabilizer together just inside the drawn lines. Baste the stabilizer and fabric together just inside the drawn lines, removing the pins as you sew. Trim away the excess fabric using the drawn lines as a guide.

    (Click Image to Enlarge)


    Step 8:
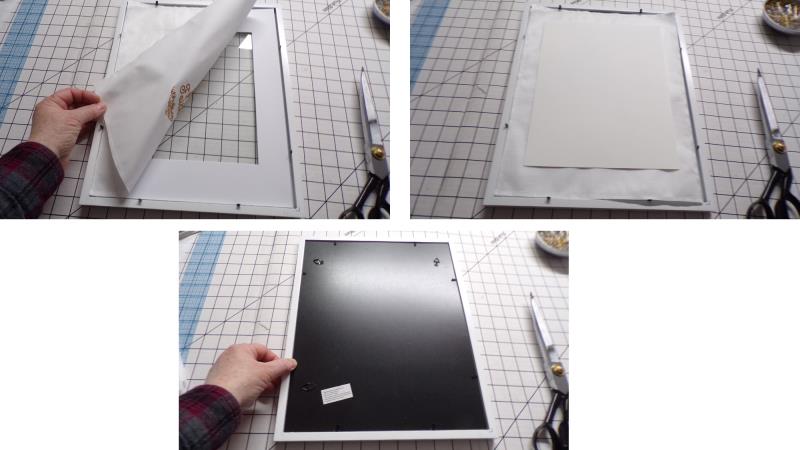
    Place the mat back in the frame and then place the fabric on top of the mat with the embroidery face down. Place and secure the back to the frame in place.

    (Click Image to Enlarge)


    Step 9:
    Place the frame on the stand. Congratulations on creating a beautiful and daily reminder of Faith.

    (Click Image to Enlarge)

    Meet the Author: Ramona Baird
    Ramona Baird
    Ramona Baird has been in the embroidery industry for over 23 years. She and her husband owned a commercial and retail embroidery store in Arizona for many years. She is an experienced digitizer having been mentored by award-winners Pat Williams and Lindee Goodall. Ramona is a contributor to “Creative Machine Embroidery” magazine having 5 covers to her credit. Ramona has worked for Wilcom America and served many years as Education Director for the American Sewing Guild. With a degree in fashion design, she is able to design and execute patterns which Pat Williams says are “out of the box” in creativity and application. Ramona likes to challenge the boundaries of embroidery and bring new and exciting designs, ideas, and projects to EmbroideryDesigns.com. She wants embroiderers of all levels to increase their skills and enjoyment in using their embroidery machine for gift-making and personal pleasure.
    More From This Author
    Link is Broken, Please check the URL
    Exclusive Embroidery Offers!
    Copyright © {{ currentDate | date:'yyyy'}} - EmbroideryDesigns.com
    GET 50% OFF! ×