Border OptionsHugging border, circle, square, or rectangle — with a 3mm satin stitch.
Backing OptionsAvailable with iron-on, sew-on, or velcro backing.
Fast ShippingShipped quickly from the USA.
Free Online Tools
Powerful embroidery utilities that save time and prevent costly mistakes.
Stitch AssistantRECOMMENDED
Get the exact stabilizer, machine settings, needle, and thread color sequence for every embroidery design you purchase — based on that design's stitch density, dimensions, and color count.
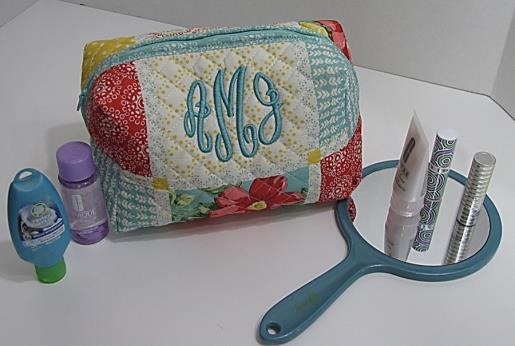
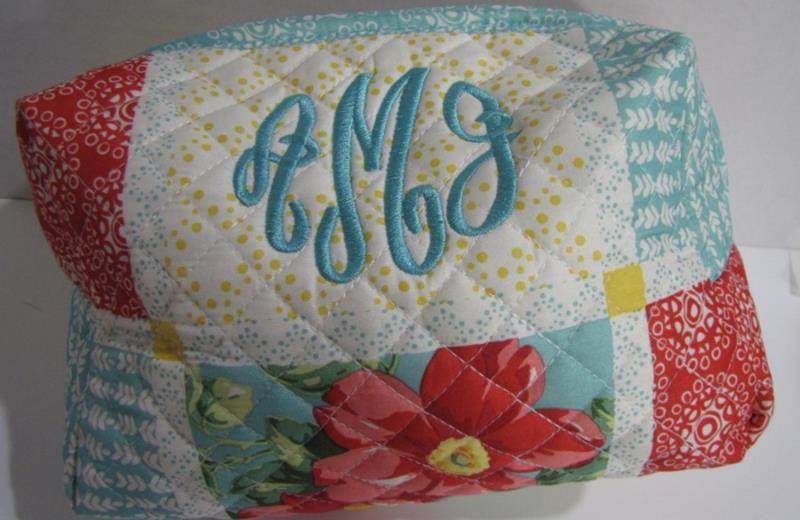
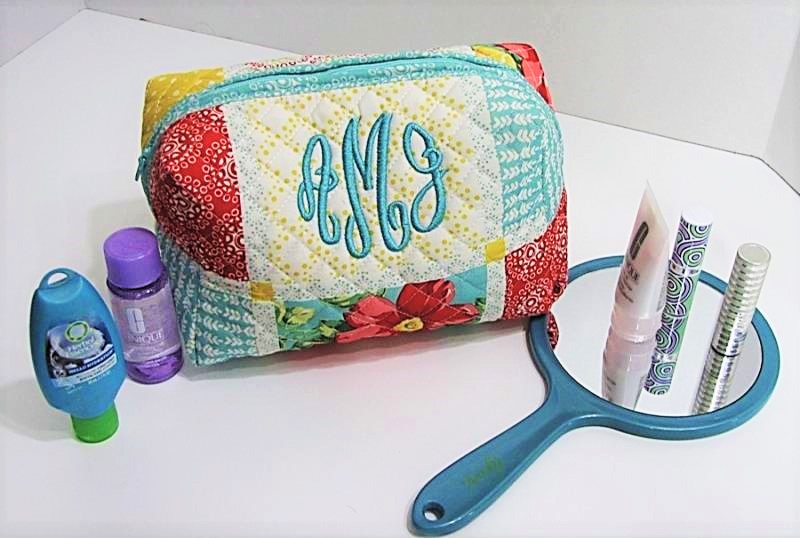
This elegant monogrammed cosmetic bag is perfect for organizing your beauty essentials. Its personalized touch makes it a thoughtful gift for bridesmaids or a special occasion like Mother's Day. Step-by-step instructions are included.
This simple, but elegant cosmetic bag is so easy to make. This project uses one quilted, reversible place mat. The project could be made with any reversible pre-quilted fabric, or you may decide to quilt your own! You can also line it with fusible vinyl lining, if you choose.
This project can also be used to make a nice travel kit for the man in your life by using suitable fabrics.
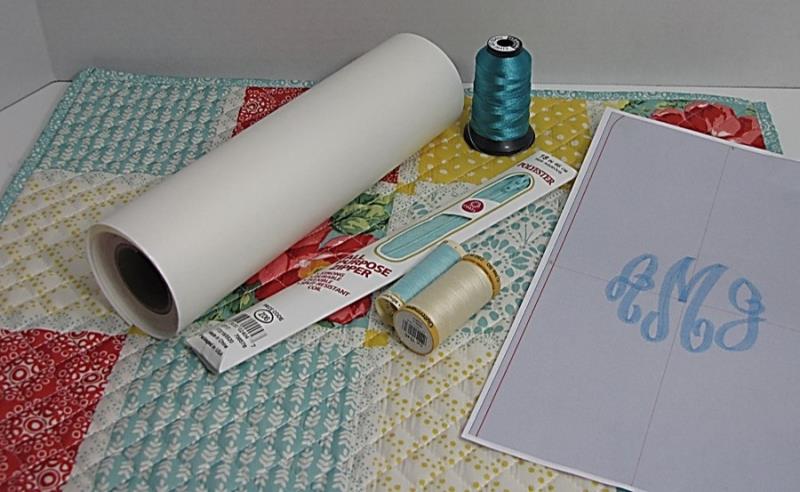
Step 1:
Gather the materials and read through the instructions before beginning. Print out a paper template of the design and color sequence.
(Click Image to Enlarge)
Step 2:
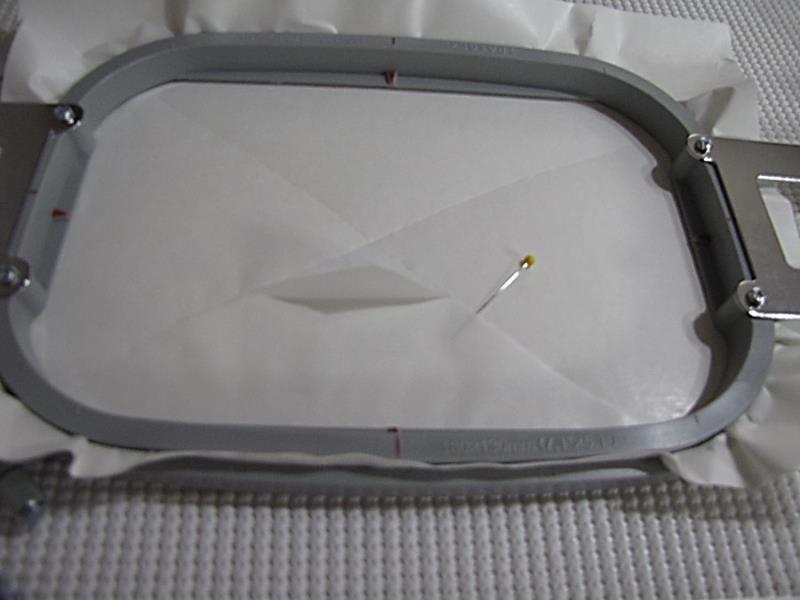
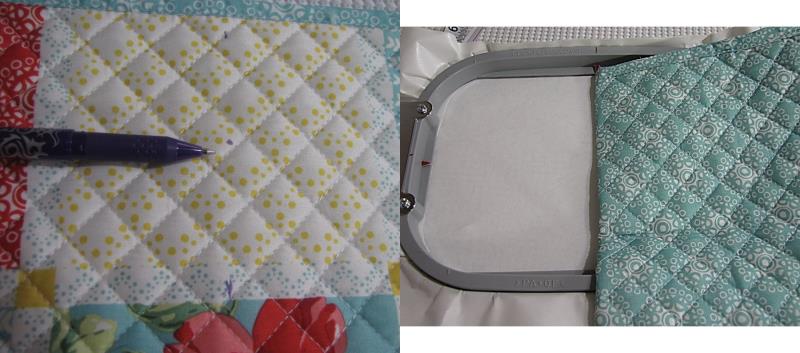
Hoop the sticky stabilizer and removing the paper cover.
(Click Image to Enlarge)
Step 3:
Determine the desired placement for the monogram design and mark the placement on the place mat.
(Click Image to Enlarge)
Step 4:
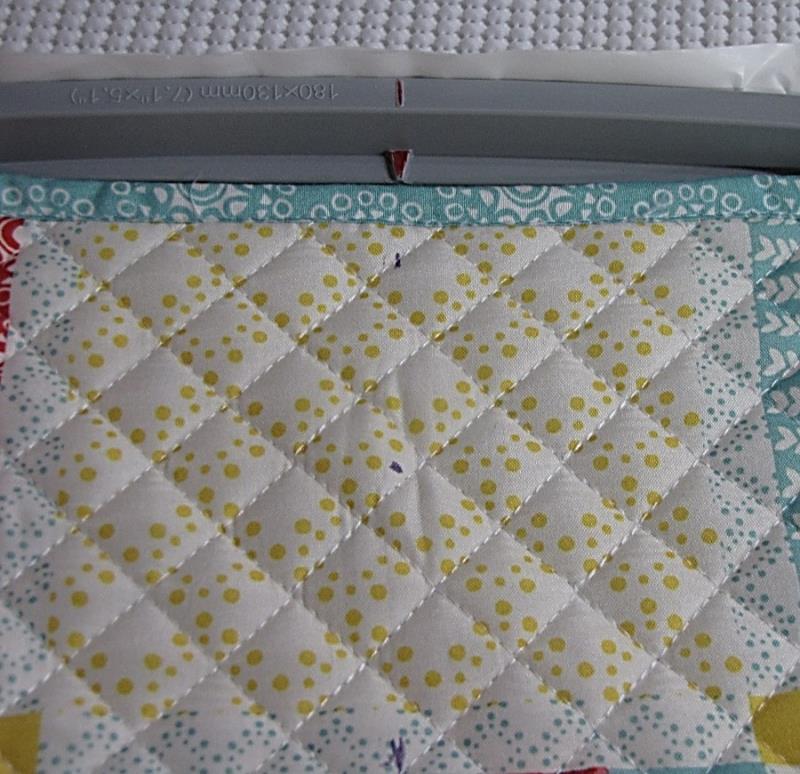
Place marked place mat on sticky stabilizer, matching center points with the hoop markings.
(Click Image to Enlarge)
Step 5:
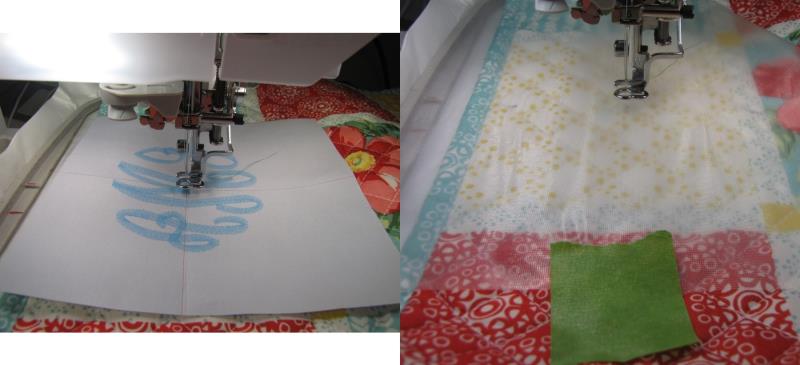
Place the hooped place mat on the embroidery machine, confirming placement with the paper template.
If desired, place water soluble stabilizer on the hooped area prior to stitching.
(Click Image to Enlarge)
Step 6:
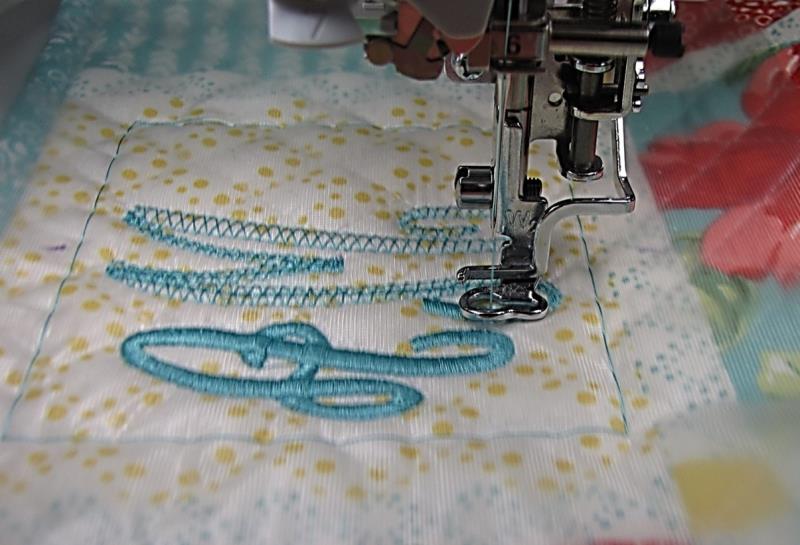
Remove the paper template and stitch the design following color sequence.
(Click Image to Enlarge)
Step 7:
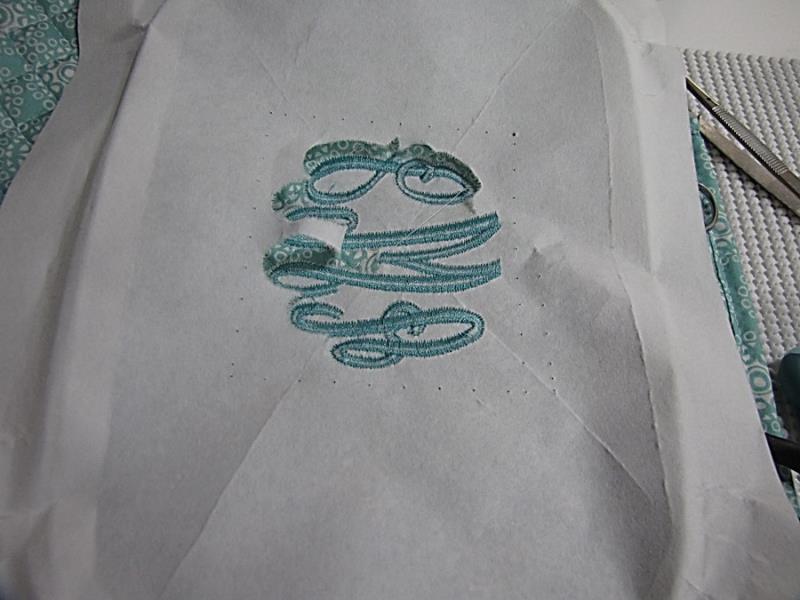
Remove the project from the hoop and trim the excess stabilizer around the design.
(Click Image to Enlarge)
Step 8:
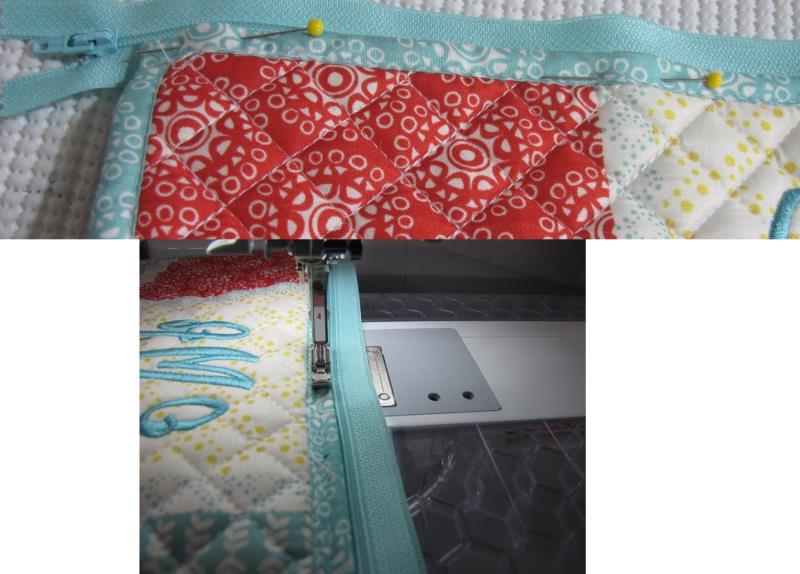
You will now sew the zipper to the short edge of the place mat, being careful to leave enough room for the zipper to slide freely. Pin the zipper edge to the place mat and baste in place to confirm placement before stitching the first edge with the final stitching.
(Click Image to Enlarge)
Step 9:
Open the zipper and pin the other edge to the other short edge of the place mat, basting to confirm placement and then stitching with the final stitching.
(Click Image to Enlarge)
Step 10:
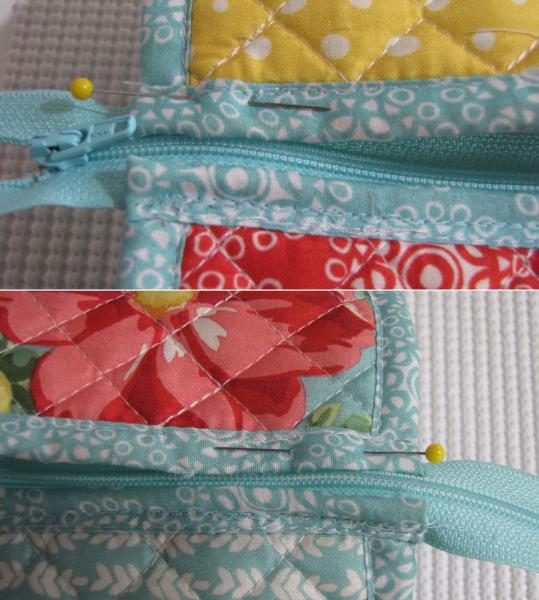
Leaving the zipper open about ¾ of the way, turn the place mat inside out and place a pin on the fold of the stitched place mat. You will then match this center mark to the center of the zipper. Repeat for the other side of the bag.
(Click Image to Enlarge)
Step 11:
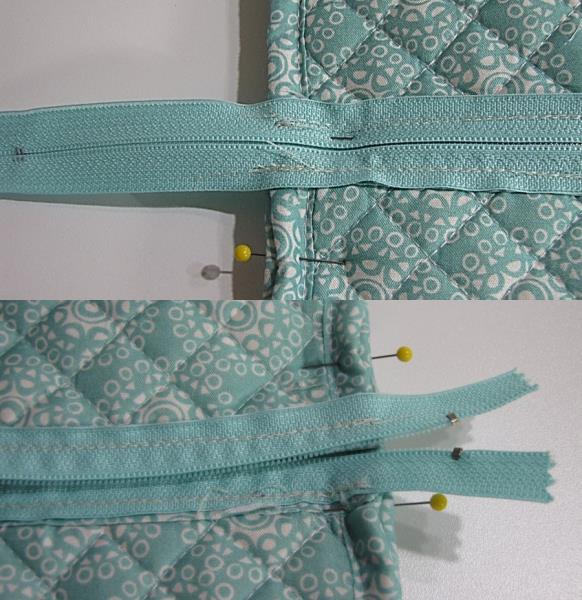
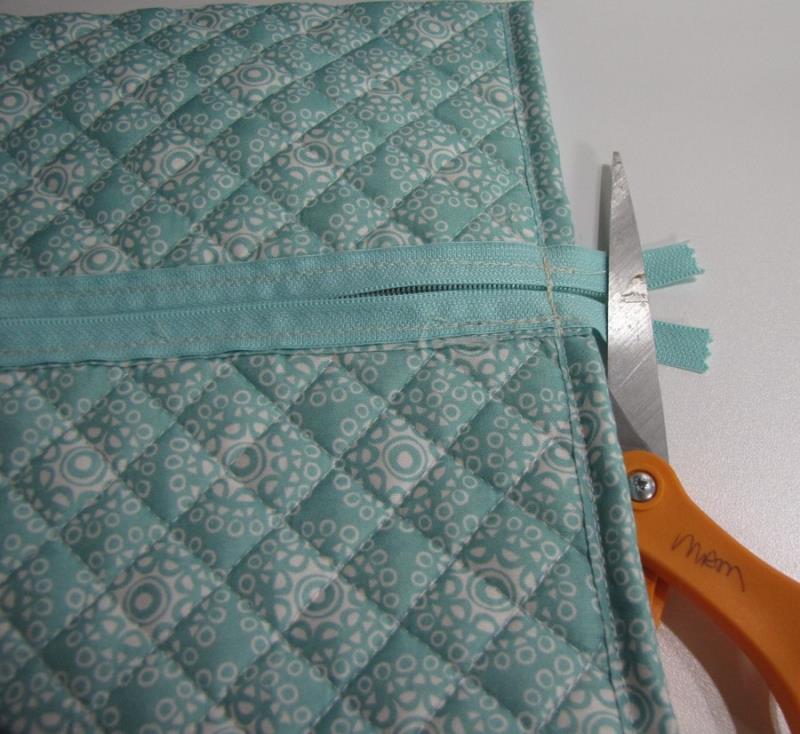
Pin the sides of the bag and stitch each side along the existing seam line (where binding is attached). Back stitch over the zipper teeth a time or two to reinforce it as you will be trimming the ends of the zipper (and the metal stops) from the zipper before you proceed.
TIP:Before you do this stitching, make sure that the zipper is open. Otherwise, you will not be able to turn the bag right side out when stitching is complete.
(Click Image to Enlarge)
Step 12:
Trim the excess zipper even with the edge of the bag. Open the zipper to finish the box corners.
(Click Image to Enlarge)
Step 13:
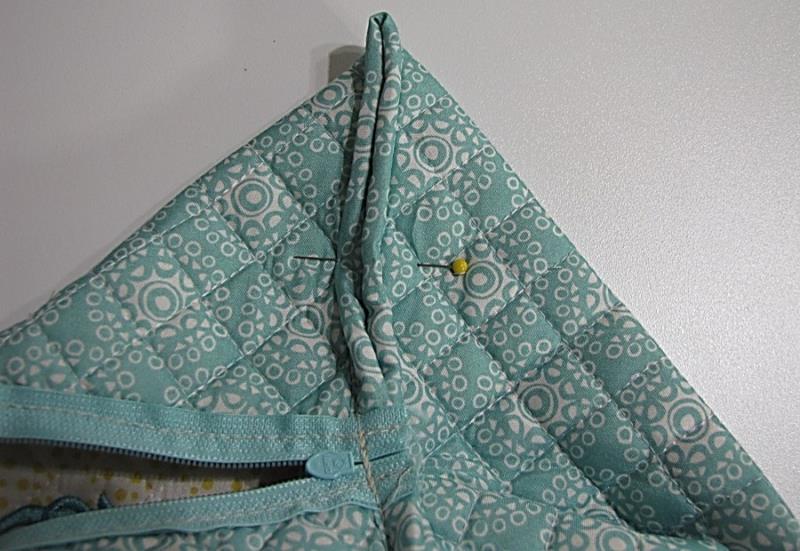
To create the box corners, with the bag still inside out, match the fold of the long edge to the corresponding corner of the bag, lining the fold up with the corner seam.
(Click Image to Enlarge)
Step 14:
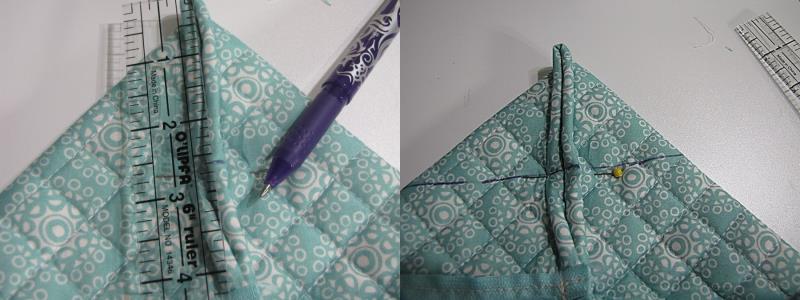
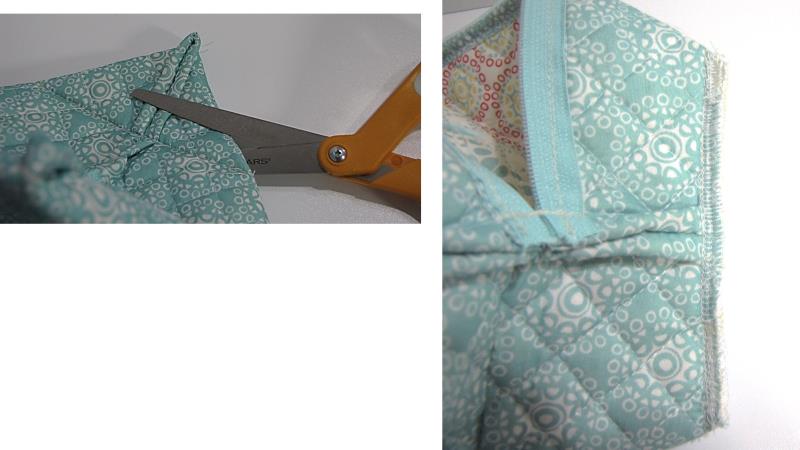
Mark 2.5” from the tip and make a line across the tip as shown. This will be your seam line that will create the box corners. Stitch along this line and repeat this step for each of the remaining three corners. If you have a serger, you can sew this seam on the serger. If you don’t have a serger, you can sew it, trim the excess point to about ¼” of the seam and zig-zag stitch to finish.
(Click Image to Enlarge)
Step 15:
The finished edges of each corner.
(Click Image to Enlarge)
Step 16:
Turn the bag right side out and shape it.
(Click Image to Enlarge)
Step 17:
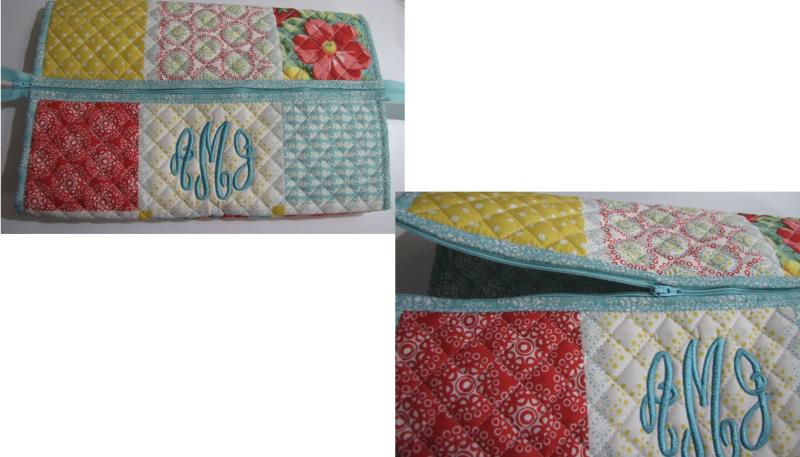
Congratulations! You have just finished sewing a beautiful, monogrammed cosmetic bag for yourself, your bridal party, or any gift occasion.
Martha has been sewing since childhood. She is a maker of garments, quilter and machine embroiderer. Martha loves all things fabric and fabric-related.