
















































Digitizing for Fringe Embroidery Embroidery Project
Fringe embroidery has been around for some time; but like many special effects, it seems to be going through a resurgence right now. In the following article I am going to show you the ins and outs of fringe embroidery, from designing for it, digitizin
Materials
Project Preview Video

Cut Away Stabilizer - 2.5 Oz wt.

Cut Away Stabilizer - 2 oz wt.
Fringe embroidery has been around for some time; but like many special effects, it seems to be going through a resurgence right now. In the following article I am going to show you the ins and outs of fringe embroidery, from designing for it, digitizing it, to finishing it.
Fringe embroidery has been around for some time; but like many special effects, it seems to be going through a resurgence right now. My company exhibits at a lot of shows over the course of the year. When people visit the booth, the first sample they look at and want to feel is a fringe flower design. I have no idea why the piece is so fascinating; we have many other designs that are far more attractive or more challenging from a technical point of view. A prime reason people gravitate to that first is because it looks different, and people always love something different. What exactly is fringe embroidery? Fringe embroidery is sewn just like standard embroidery. No extra materials are needed. After the design is sewn, specific areas of the thread are cut from the back of the garment and then pulled through the front. This technique creates the appearance of fringe and it can be used for hair techniques or any eye catching effect is desired. In the following article I am going to show you the ins and outs of fringe embroidery, from designing for it, digitizing it, to finishing it. Designing for Fringe
When you use any special effect technique, whether it be puff, trapunto, appliqué, or fringe, the most important step is proper design. This begins at the artwork stage. Most standard logos or stock designs will not work for fringe. In order to get the fringe effect, the fringe stitches need to be longer than a “normal” stitch. The minimum length for a fringe stitch is 4 mm; the maximum length is the maximum stitch length your machine can handle. The longer the stitch, the more dramatic the fringe effect will be. So when you design for fringe or alter a logo or character that is already created make sure you draw in the minimum width for the fringe as well. Most of the fringe I see on the market represents hair, whether it is an animal’s tail or tufts of clown hair. Hair is not the only thing you can use fringe for. Try it on lettering or a flag, or any other design element that can use a little pizzazz. Besides the stitch length, overlapping is another technique that must be considered when doing the design. Do not overlap any area that you do not want to fringe, on top of any area that you do want to fringe. This will make finishing the fringe much more difficult. So when you alter your design make sure the fringe is fully exposed, by itself. Can you fringe on top of another area? Yes, you can, but it is a technique that you don’t often see. If you want to add fringe on top of another area of stitching, make sure that the underlying stitches are a fill stitch. That way, you ensure that the fill stitch will sew first, and then the wide satin stitch will be added on top of the fill. When the garment is ready for finishing, you need only cut the bobbin stitching of the wide satin. See figure one for an example of fringe on top of a fill. |

Digitizing for Fringe
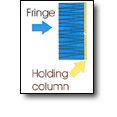
Digitizing for fringe is not that hard to do at all. As long as the logo is set up properly, you need only remember a few key steps during the digitizing process. Fringe looks great when one side of the column stitch is exposed creating that hair like texture; but if both sides become exposed there will be no stitching left, hence no fringe. So how do you get the fringe part of the design to stay securely in place? Figure 2 shows you the two ways to hold down a fringed area. The first way is to use a few layers of running stitches; and the second way is to use a thinner satin stitch, preferably around 2 mm. This way, when you cut the back of the design to expose the fringe it won’t unravel like a loose thread. When digitizing the fringe part of the design I like to add a little more density than usual, say about fifteen percent more. By adding more density, you ensure a nice thick layer of fringe. You can add less density if you only want a few strands of fringe for whiskers or other similar effects. That’s about all there is to the digitizing aspect of it. Now we will move on to the more complicated part of fringe embroidery - the finishing. |

Finishing the Fringe After the design is sewn it is time to flip it over and get to the cutting. There are two ways to cut. The first method is to cut the bobbin only, which will create a closed loop design. The second way is to actually cut the outer edge of the top stitching, which will create a frayed look. Looped Method Look at the back of the stitches you are going to cut: you will see three stripes of thread. The outer two stripes are the top thread being pulled through. The center strip is the bobbin - that is what you are going to cut. After you cut the bobbin, pull the stitches through the garment using a pair of tweezers. What you will end up with will be perfectly formed loops of thread. Topstitch Method The second method is almost the same - instead of cutting the bobbin you will cut the outer edge of the topstitching. Pull it through the shirt the same way, creating a fringe look. You can easily trim the stitches to the desired length. By rubbing your finger on the frayed thread, you will cause the individual strands to separate, creating a frayed look. I prefer this look when the garment is going to be laundered.
|

