Border OptionsHugging border, circle, square, or rectangle — with a 3mm satin stitch.
Backing OptionsAvailable with iron-on, sew-on, or velcro backing.
Fast ShippingShipped quickly from the USA.
Free Online Tools
Powerful embroidery utilities that save time and prevent costly mistakes.
Stitch AssistantRECOMMENDED
Get the exact stabilizer, machine settings, needle, and thread color sequence for every embroidery design you purchase — based on that design's stitch density, dimensions, and color count.
Since all hangers vary in size, general directions will be given for creating the hanger covers. Allow enough extra fabric for the width of the hanger, the length of the cover, and the clothing to cover.
Step 1:
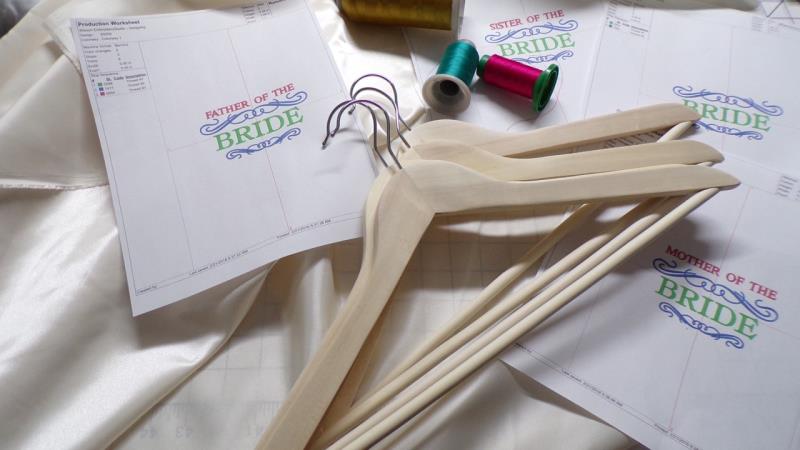
Gather the materials and read through the instructions before beginning. Print out a paper template of each of the designs and color sequence. ¼” seams are used throughout the project. Determine the width of the hanger, the length you’d like the cover to be, and the thickness of the clothing when hung on the hanger. Write down the measurements for the next step.
(Click Image to Enlarge)
Step 2:
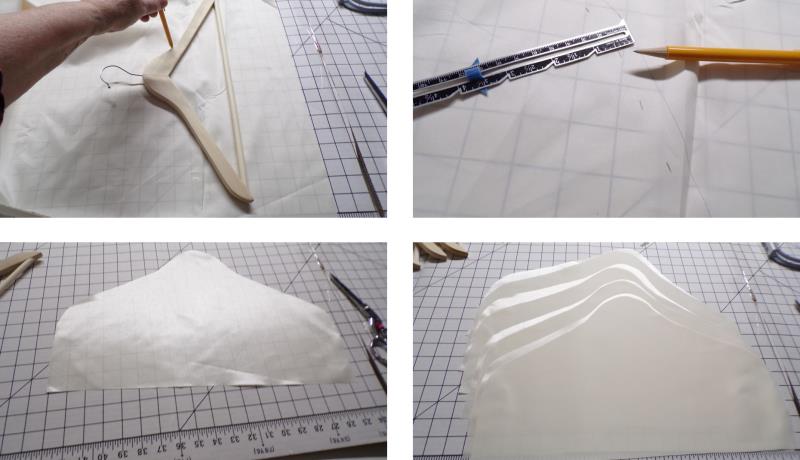
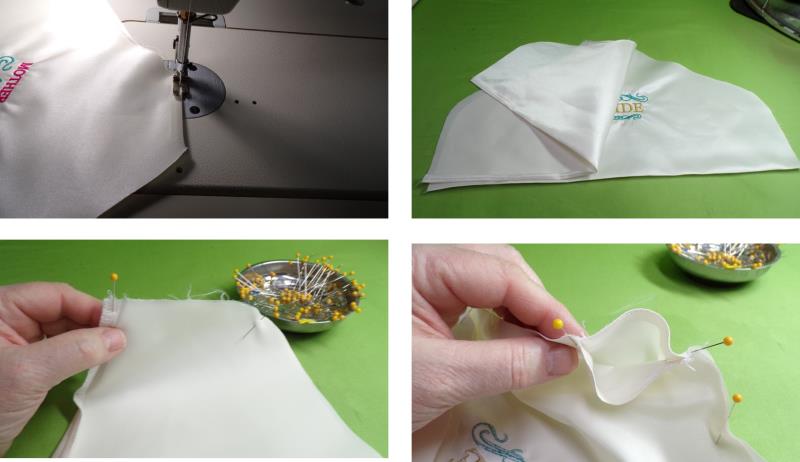
This step can be done directly on the back side of the fabric or use a piece of paper if you’d like to make a pattern to keep for future use. Lay the hanger on the back of the fabric with the bottom of the hanger the distance from the cut edge of the fabric you’d like the depth of the cover, plus seam allowances. For this project, the bottom of the hanger was placed 5” above the cut edge of the fabric. Trace around the hanger and then add the amount needed for the width of the hanger, the clothing depth, and ¼” seam allowance. For the project, ½” additional was allowed—but after doing the project, if this were for a men’s jacket I would probably add an additional two inches or so. Cut out the first piece and then cut a second piece the same size for the cover back. Four pieces were being done for this project, so eight pieces of fabric were cut.
(Click Image to Enlarge)
Step 3:
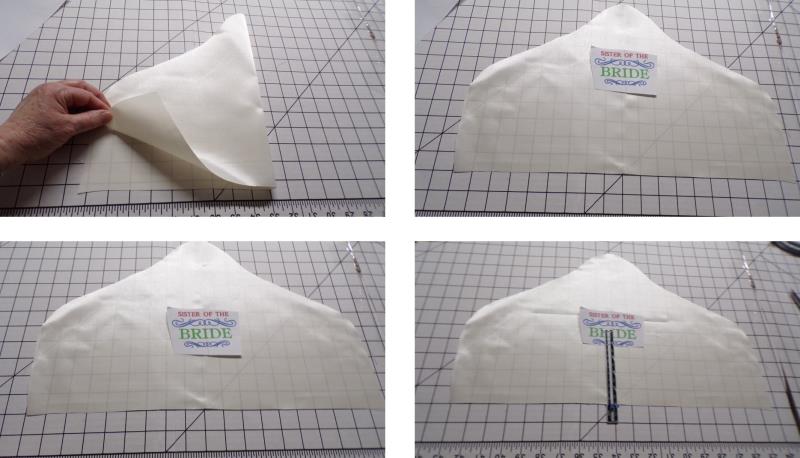
Next will be to determine the placement of the embroidery design. Fold the front cover piece in half to find the center front and lightly finger crease. Cut out the paper template and determine where you’d like the placement. For the project, the center of the design was placed 5” up from the bottom cut edge.
(Click Image to Enlarge)
Step 4:
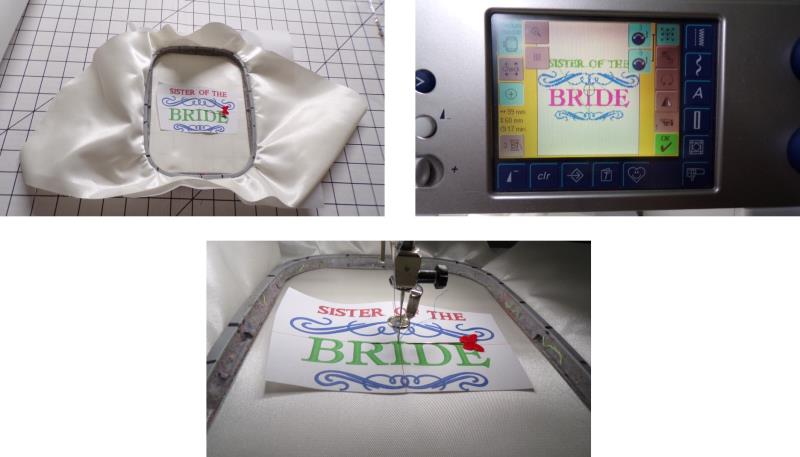
Hoop the fabric with a piece of stabilizer, centering the template in the hoop. Load the design on the machine and center the needle over the center of the printed template. Remove the paper and stitch the design following the color sequence. Repeat hooping and stitching until all the front covers are embroidered.
(Click Image to Enlarge)
Step 5:
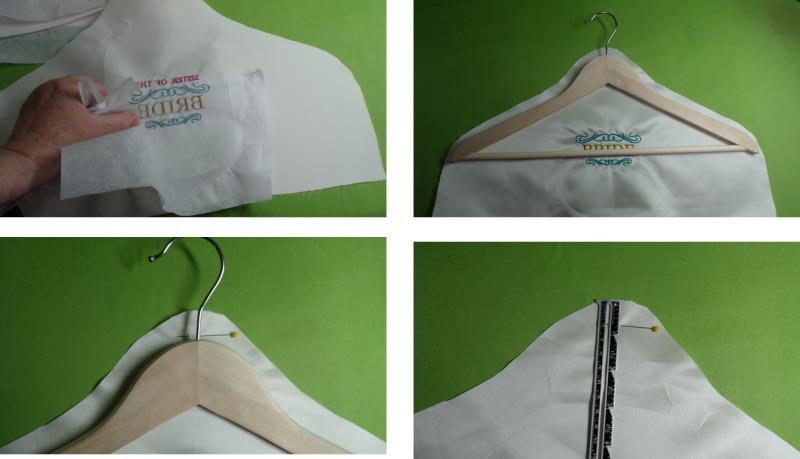
Remove the excess stabilizer from the back of each piece. Next will be to create the opening at the top to insert the hanger hook. Lay the hanger on the embroidered piece and place a pin at the top of the hanger where it meets the hook; measure how far from the top of the fabric that is.
(Click Image to Enlarge)
Step 6:
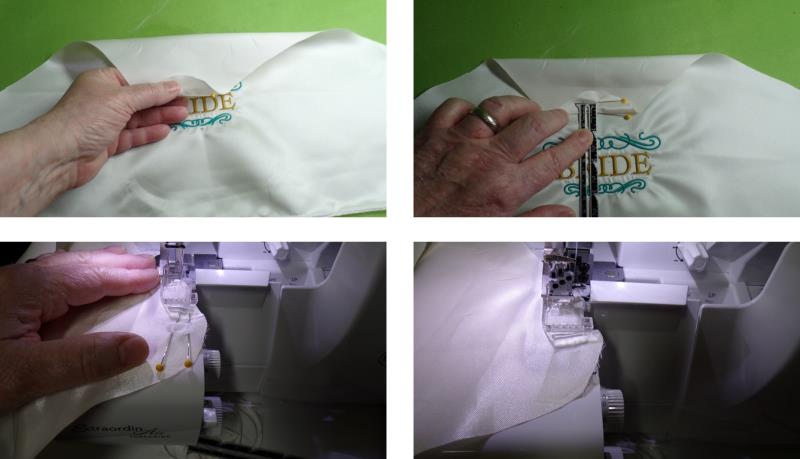
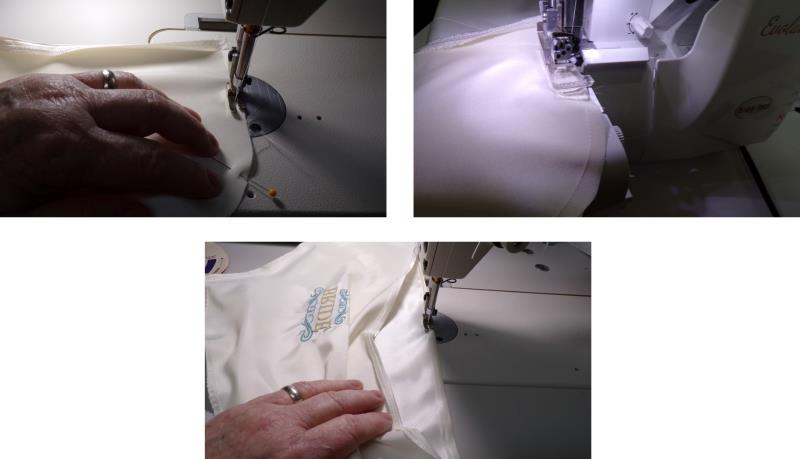
Turn back the fabric along the pin and measure 3/8” from the fold and place a second pin; the fabric will be serged off at this line. Align the blade of the serger to the second pin, remove the pins, and then serge a straight line cutting off the very top edge of the fabric. If you would rather, mark that line with a pencil and then serge along the pencil line. Repeat for all the front and back pieces, cutting off the same amount.
(Click Image to Enlarge)
Step 7:
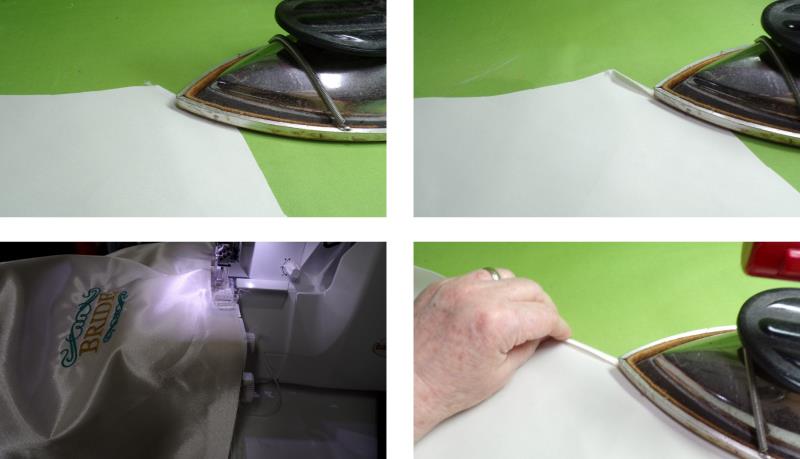
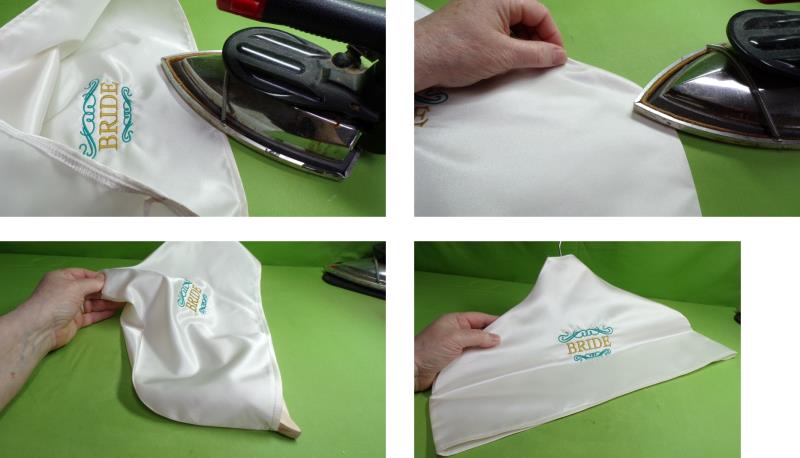
Press to set the serged stitches and then turn and press the serged edge to the back side of the fabric. Now serge all the bottom edges of the covers to finish the edge. Press to set the stitches and then turn and press that edge to the wrong side of each cover piece.
(Click Image to Enlarge)
Step 8:
From the right side, use the sewing machine with the matching thread and edge stitch the top hem in place on each piece. With right sides together, place one cover back to one cover front and pin them together matching the cut edges. Begin at the serged hem edge, pin all along the edge of the cover and up to the top opening.
(Click Image to Enlarge)
Step 9:
Using a ¼” seam allowance, sew from the hem to the top, back stitching at both ends. Use the serger to finish the cut edge. Now turn back the pressed hem edges and top stitch them in place.
(Click Image to Enlarge)
Step 10:
Press the hem and set the stitches on the side seams. Turn the cover right side out and press along the side seams right at the stitching line. Place the hanger into the cover. Repeat for the remaining covers.
(Click Image to Enlarge)
Step 11:
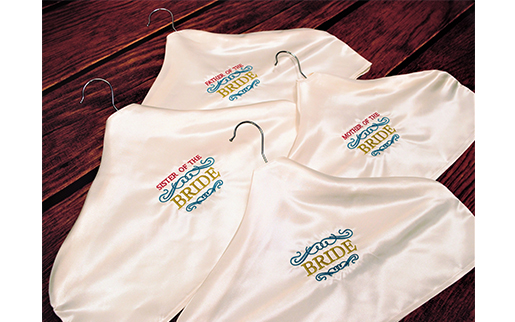
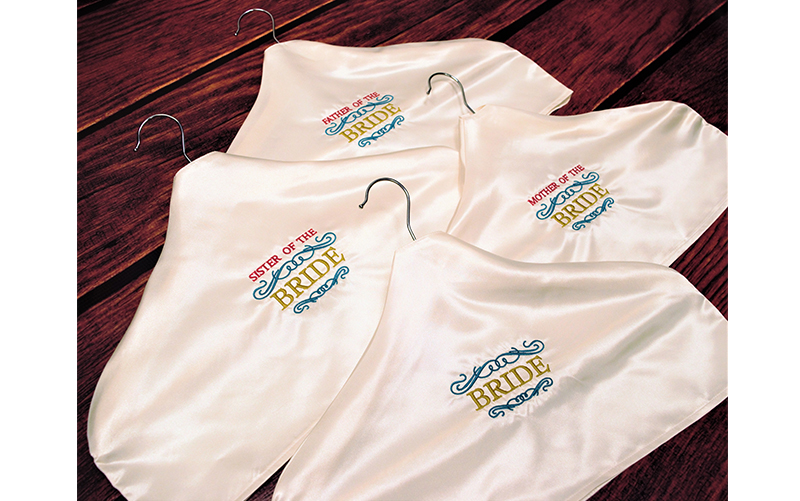
Congratulations! All the covers are complete and ready and waiting for the garments to arrive for the big day. What a pretty way to display the dresses and suits; make one cover for each member of the bridal party. Another option is to personalize the covers with the wedding date below the embroidery design and also, the name of each member of the wedding party could be embroidered on the cover back so everyone knows which garment is theirs.
Ramona Baird has been in the embroidery industry for over 23 years. She and her husband owned a commercial and retail embroidery store in Arizona for many years. She is an experienced digitizer having been mentored by award-winners Pat Williams and Lindee Goodall. Ramona is a contributor to “Creative Machine Embroidery” magazine having 5 covers to her credit. Ramona has worked for Wilcom America and served many years as Education Director for the American Sewing Guild. With a degree in fashion design, she is able to design and execute patterns which Pat Williams says are “out of the box” in creativity and application. Ramona likes to challenge the boundaries of embroidery and bring new and exciting designs, ideas, and projects to EmbroideryDesigns.com. She wants embroiderers of all levels to increase their skills and enjoyment in using their embroidery machine for gift-making and personal pleasure.