Border OptionsHugging border, circle, square, or rectangle — with a 3mm satin stitch.
Backing OptionsAvailable with iron-on, sew-on, or velcro backing.
Fast ShippingShipped quickly from the USA.
Free Online Tools
Powerful embroidery utilities that save time and prevent costly mistakes.
Stitch AssistantRECOMMENDED
Get the exact stabilizer, machine settings, needle, and thread color sequence for every embroidery design you purchase — based on that design's stitch density, dimensions, and color count.
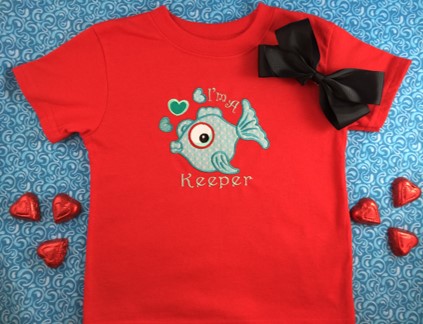
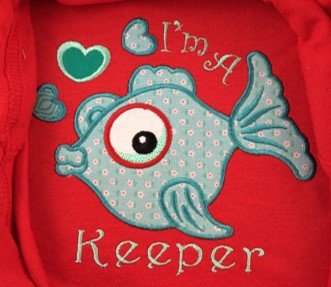
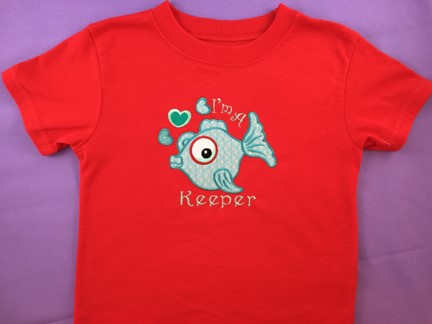
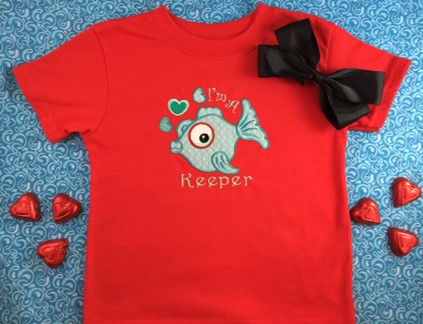
What A Keeper! A multi-fabric applique design on a T-shirt for your ‘catch’ of the day! A size 2T toddler shirt was used in the project. The applique design was reduced to 5 3/8” x 5” using Embrilliance Essentials software program in order for the design to be proportionate with the T-shirt size. Stitch count is 10,655. A single needle embroidery machine with a 6” x 6” hoop was used for this project.
Step 1:
Embroidery designs with open areas work best on T-shirt knits. Heavy designs make shirts sag, stiff and lumpy, often puckering around the edges because the fabric can’t support the dense stitches.
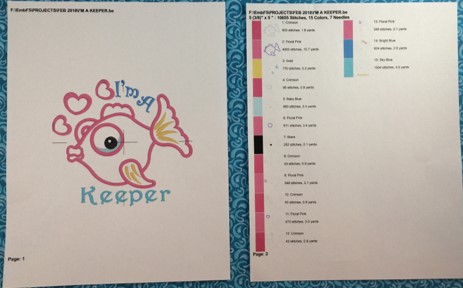
The embroidery designs used in this project is ‘I’m A Keeper’. The dimensions for the design are 7 15/16” x 7 3/8”. The design was resized to 5 3/8” x 5” to be proportionate for a 2T toddler T -shirt. Embrilliance Essentials software program was used to resize the design.
Print out a copy of the design template and color sequence chart.
Step 2:
(Click Image to Enlarge)
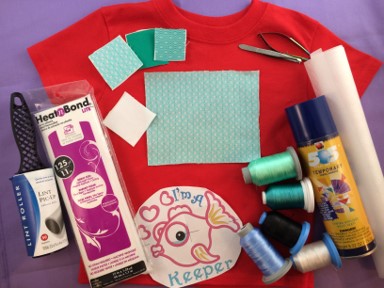
Gather the materials. Read through the instructions before beginning. Iron the T-shirt and fabric pieces.
Step 3:
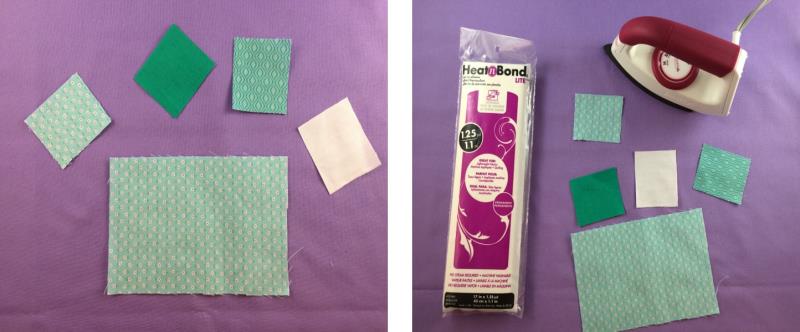
Cut one piece of applique fabric 4” x 6” for the fish. Cut three pieces of applique fabric 2” x 2” for the hearts. Cut one piece of white applique fabric 2” x 2” for the eye. Cut one piece of Heat n Bond lite 4” x 6”. Cut four pieces of Heat n Bond lite 2” x 2”.
Heat n Bond lite is a fusible, sewable iron-on adhesive. Using Heat n Bond lite when appliqueing will bond the fabrics together. Heat n Bond lite has a rough, textured side and a slick, paper side. The rough, textured side is the adhesive.
Place the rough side of the Heat n Bond lite to the wrong side of the fabric being appliqued. Follow the directions on the package to apply Heat n Bond lite to the wrong side of the fabric pieces. A dry iron is recommended when using the Heat n Bond lite. Remove the paper. The wrong side of the fabric will have a slick surface which is the adhesive.
(Click Image to Enlarge)
Step 4:
T-shirts are usually made of cotton or a cotton and polyester blend. T-shirts are stretchy and stitching needs support and stability. The increased strength of cutaway stabilizers means that you'll see less shifting and gapping while stitching, and that it'll hold up better through washing and wearing, too.
The key rule of stabilizing clothing is “If you wear it, don’t tear it”! Use a poly mesh cut-away stabilizer. They keep knits from stretching out of shape and keeps embroidery where it belongs. Because T-shirts are washed and worn often, polyester thread is a good choice since it doesn’t fade and is bleach resistant.
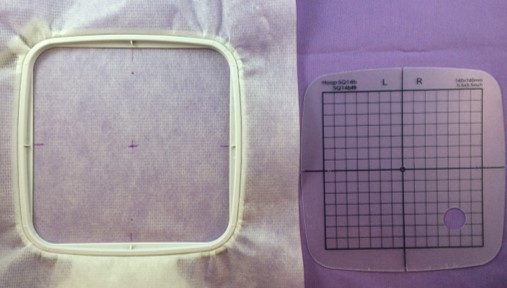
Hoop the poly mesh cut-away stabilizer. Use the grid template to mark the center and the axis on the stabilizer.
Step 5:
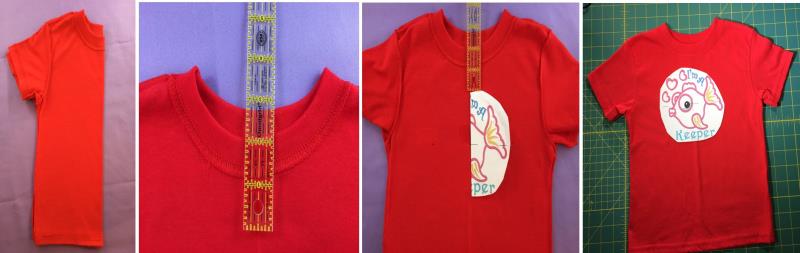
The paper design template is the actual size of the stitch out. Use the template as a guide for placement and positioning of the design on the t-shirt.
Turn the t-shirt wrong side out. Fold the t-shirt in half. Matching shoulder and side seams. Press at the fold to make a crease. Measure 2 inches from the neck and center from the left and right side seams.
Mark the center point and axis on the shirt.
(Click Image to Enlarge)
Step 6:
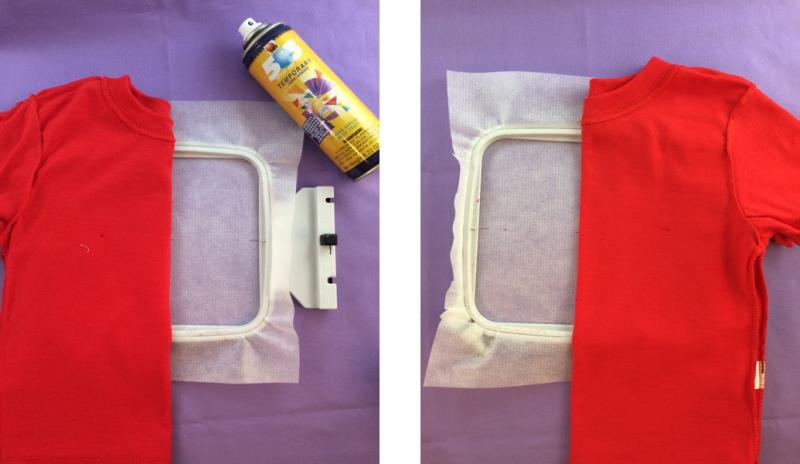
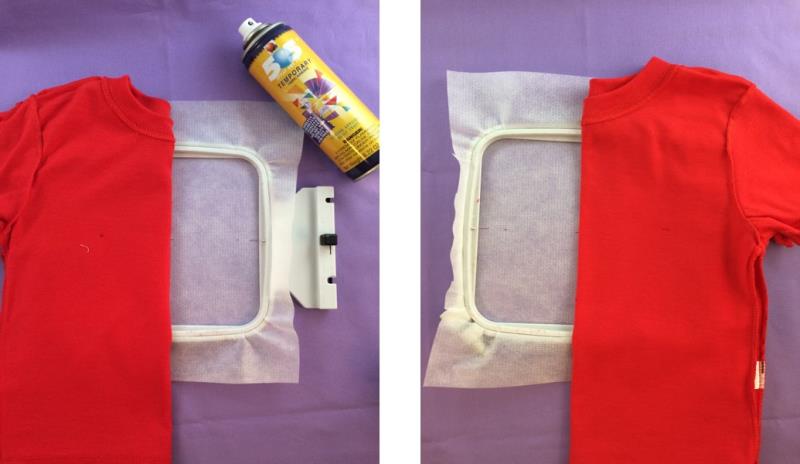
Align the T-shirt with the center point and axis on the stabilizer. Spray the opposite side the stabilizer with a temporary adhesive spray.
Fold T-shirt down onto the stabilizer. Press gently and smooth fabric. Repeat for the other side of the T-shirt.
(Click Image to Enlarge)
Step 7:
(Click Image to Enlarge)
Roll excess shirt up so that it doesn’t get caught during stitching. Use pins or clips to keep excess shirt out of the way.
Step 8:
Applique Embroidery decoratively stitches one fabric on top of another. Applique embroidery designs include a placement stitch, a tack down stitch, and a finishing stitch for each piece of fabric. These stitches are usually in different colors on the color chart so that the machine will stop after each step.
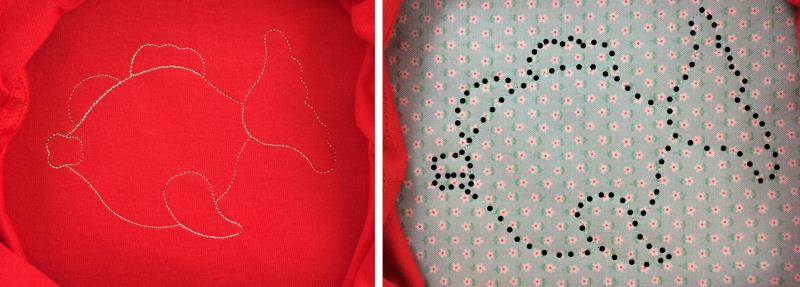
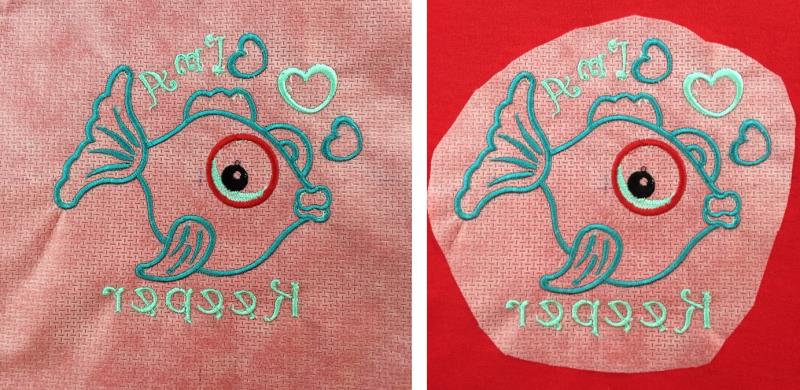
This design does not have a color stop after the tack down stitches. So, this means that you will have to stop the machine after the tack down stitches out. Sew the placement stitches for the fish. (This step works fine.) Place the applique fabric (4” x 6”) on top of the placement stitches. Sew the tack down stitches. (The tack down stitches in the photo have been outlined because the thread color was very light.) As soon as the outline of the fish is complete, stop your machine. Use the placement stitch picture as a visual stopping guide.
(Click Image to Enlarge)
Step 9:
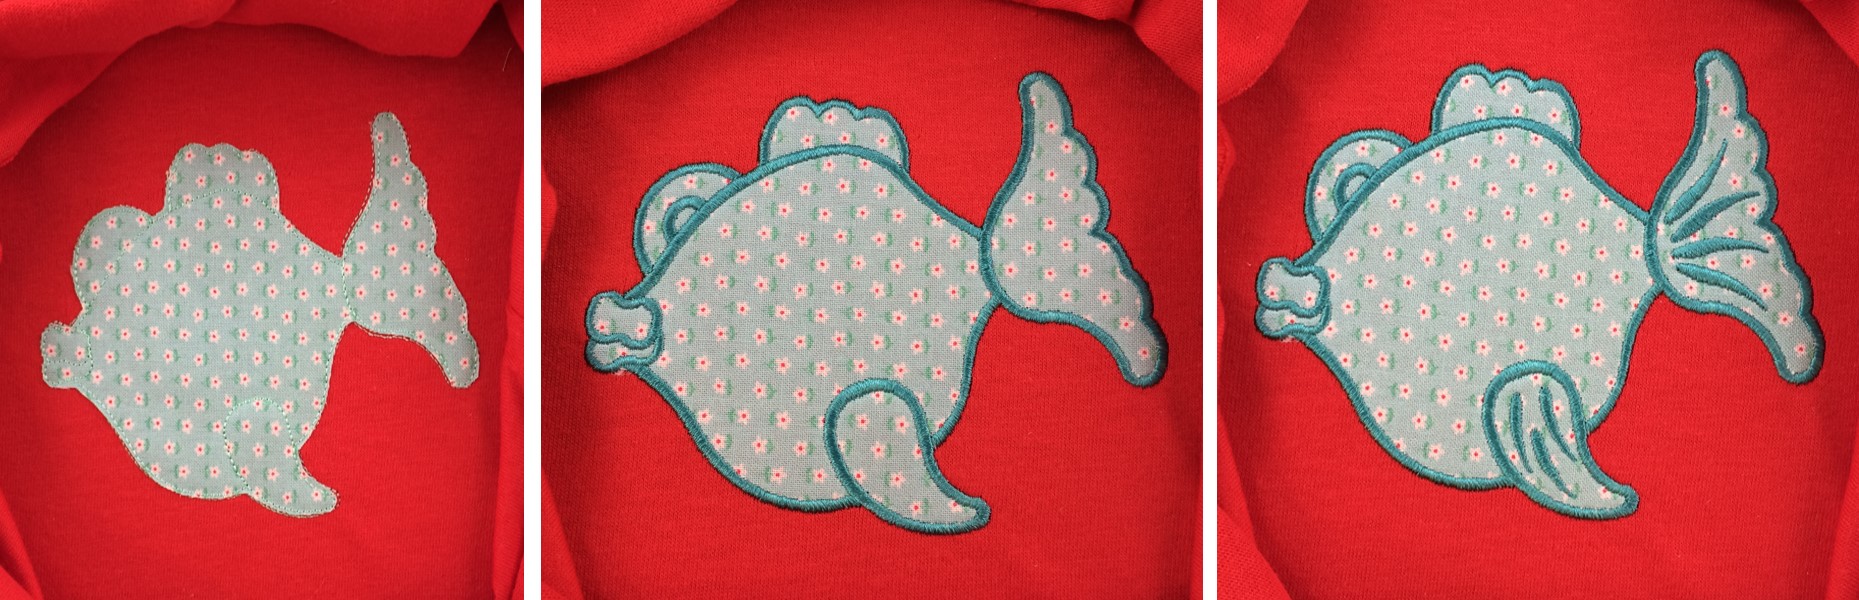
Remove the hoop from your machine, but DO NOT REMOVE THE PROJECT FROM THE HOOP. Using sharp embroidery scissors, trim the applique fabric around the tack down stitching.
Trim close to the stitches but not so close as to cut the stitches themselves. Sew the finishing stitches on the fish. (2nd photo) Sew the decorative stitches on the tail and fin. (3rd photo)
(Click Image to Enlarge)
Step 10:
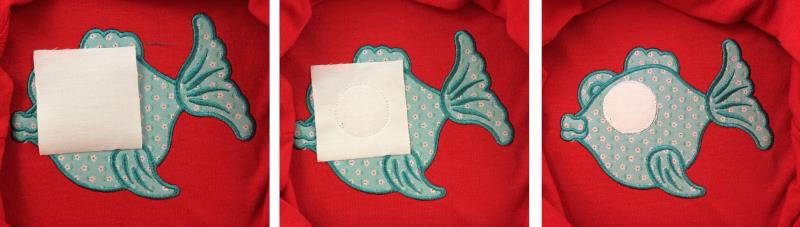
There is not a placement stitch for the eye. Use the paper design template as a guide for placement of the applique fabric. (photo 1)
Sew the tack down stitches for the white applique fabric. Remove the hoop from your machine, but DO NOT REMOVE THE PROJECT FROM THE HOOP. Using sharp embroidery scissors, trim the applique fabric around the tack down stitching. Trim close to the stitches but not so close as to cut the stitches themselves.
(Click Image to Enlarge)
Step 11:
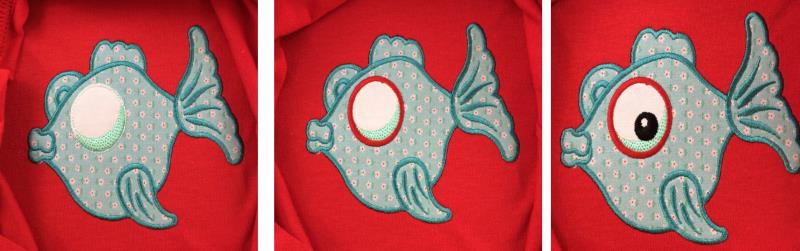
Sew the blue in the eye. (color change 5) Sew the finishing stitches around the eye. (color change 6) Sew the center of the eye. (color change 7)
(Click Image to Enlarge)
Step 12:
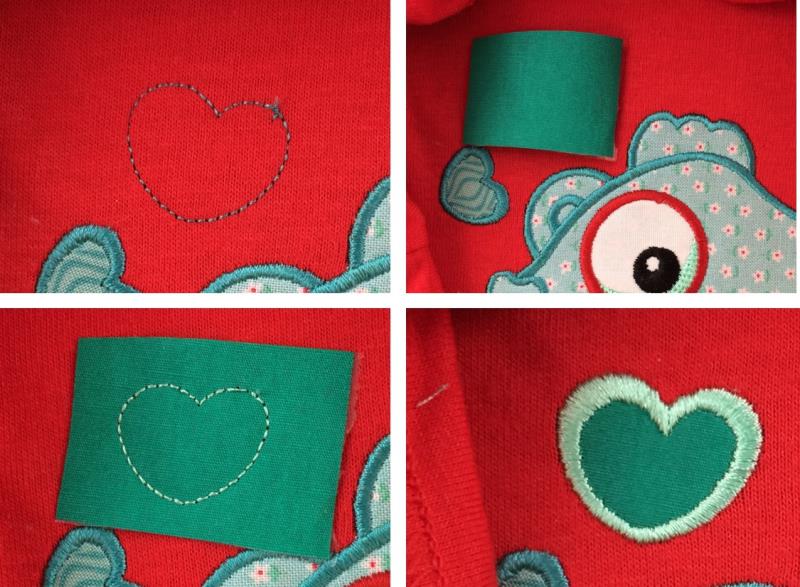
Sew the placement stitches for the first heart. (color change 8) Place applique fabric over the placement stitches. There is not a color stop after the tack down stitches. So, watch closely, and after fabric is tacked down, stop the machine. Otherwise, the machine begins with the finishing stitches. Remove the hoop from your machine, but DO NOT REMOVE THE PROJECT FROM THE HOOP. Using sharp embroidery scissors, trim the applique fabric around the tack down stitching. Trim close to the stitches but not so close as to cut the stitches themselves. Sew the finishing stitches for the heart. (color change 9)
(Click Image to Enlarge)
Step 13:
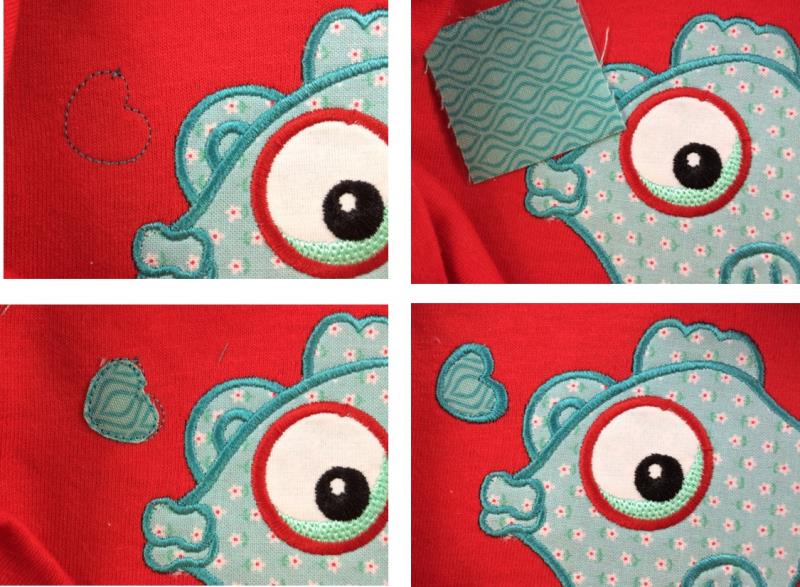
Sew the placement stitches for the second heart. (color change 10) Place applique fabric over the placement stitches. There is not a color stop after the tack down stitches. So, watch closely, and after fabric is tacked down, stop the machine. Otherwise, the machine begins with the finishing stitches. Remove the hoop from your machine, but DO NOT REMOVE THE PROJECT FROM THE HOOP.
Using sharp embroidery scissors, trim the applique fabric around the tack down stitching. Trim close to the stitches but not so close as to cut the stitches themselves. Sew the finishing stitches for the heart. (color change 11)
(Click Image to Enlarge)
Step 14:
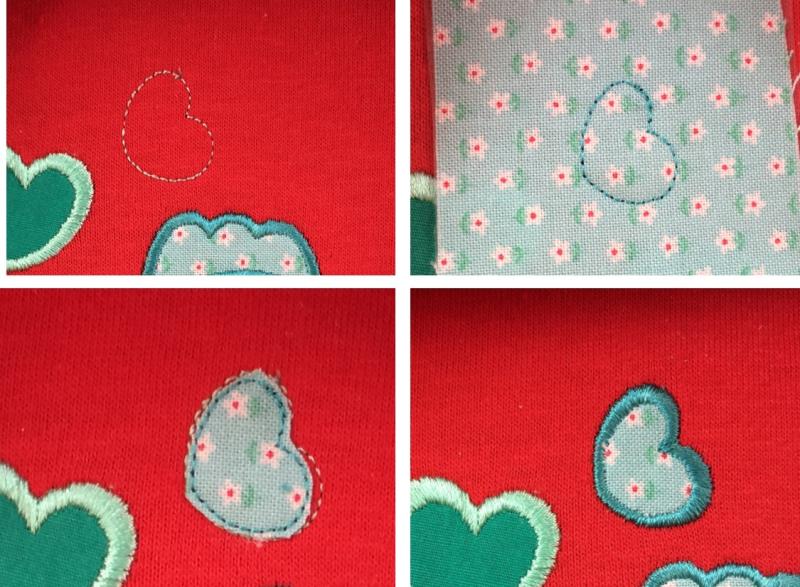
Sew the placement stitches for the third heart. (color change 12) Place applique fabric over the placement stitches. There is not a color stop after the tack down stitches. So, watch closely, and after fabric is tacked down, stop the machine. Otherwise, the machine begins with the finishing stitches. Remove the hoop from your machine, but DO NOT REMOVE THE PROJECT FROM THE HOOP. Using sharp embroidery scissors, trim the applique fabric around the tack down stitching. Trim close to the stitches but not so close as to cut the stitches themselves. Sew the finishing stitches for the heart. (color change 13)
(Click Image to Enlarge)
Step 15:
(Click Image to Enlarge)
Sew the caption ‘I’m A’. (color change 14) Sew the caption ‘Keeper’. (color change 15)
Step 16:
Remove the project from the hoop.
Turn the T-shirt, inside out, and cut the excess stabilizer away. Leave about ½” of stabilizer around the design.
Trim thread. A lint roller is very helpful when tidying up the work area.
(Click Image to Enlarge)
Step 17:
(Click Image to Enlarge)
You have completed the appliqued embroidery design ‘I’m a Keeper’ T-shirt project.
Marisa Littleton is a retired educator with a love for teaching and learning. Interests include machine embroidery, hand embroidery, quilting, cooking, and antiques.