Border OptionsHugging border, circle, square, or rectangle — with a 3mm satin stitch.
Backing OptionsAvailable with iron-on, sew-on, or velcro backing.
Fast ShippingShipped quickly from the USA.
Free Online Tools
Powerful embroidery utilities that save time and prevent costly mistakes.
Stitch AssistantRECOMMENDED
Get the exact stabilizer, machine settings, needle, and thread color sequence for every embroidery design you purchase — based on that design's stitch density, dimensions, and color count.
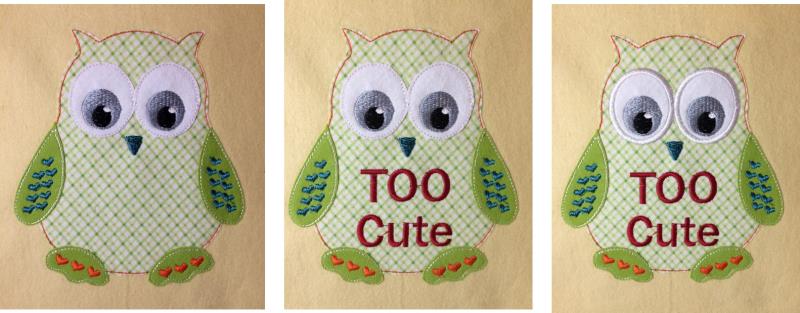
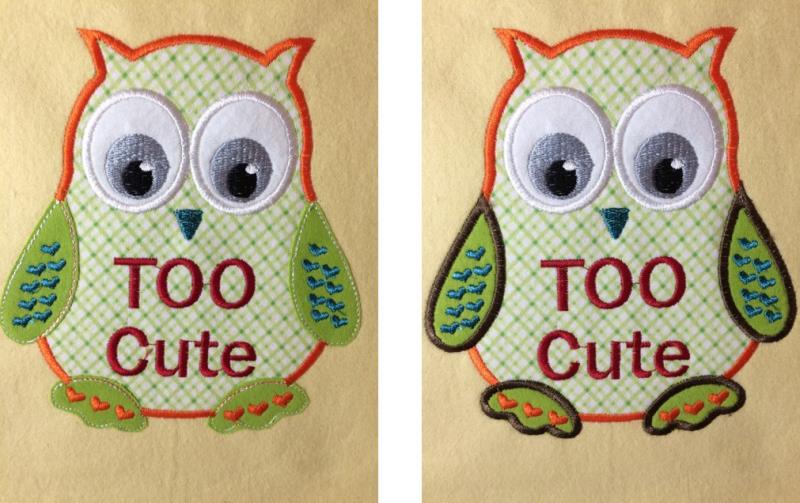
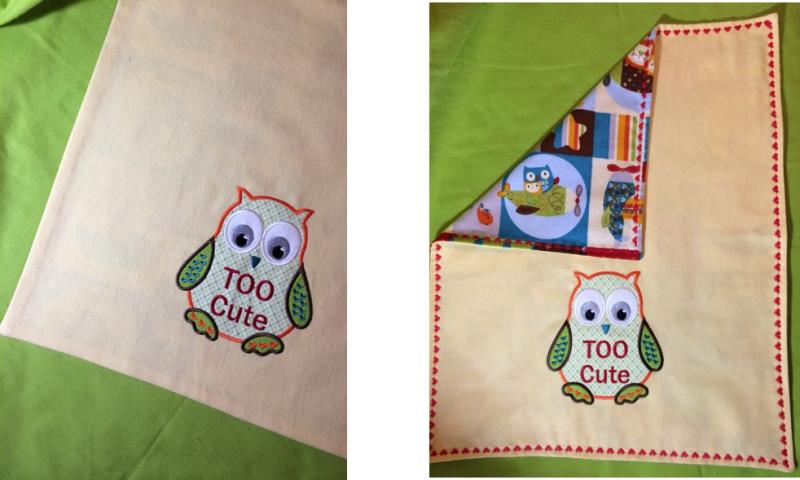
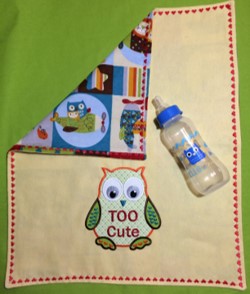
A Valentine themed burp cloth with a 'Too Cute' appliqued owl. The owl will be appliqued onto one piece of the 18" x 20” flannel before the burp cloth is sewn. After the owl is appliqued, the two 18" x 20” pieces of flannel will be sewn together leaving a three inch opening to turn the burp cloth. A straight or decorative stitch completes the burp cloth.
Applique designs use fabric as an essential element of the design. Each patch of fabric will have 3 elements, the placement stitch, the tack down stitch and the finishing stitch. Each type of stitch will be a different color in the design so that the machine knows to stop after each step.
Step 1:
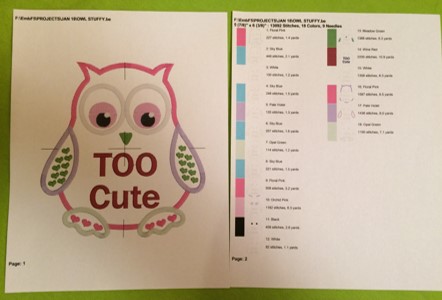
Print the paper template and color sequence chart.
Step 2:
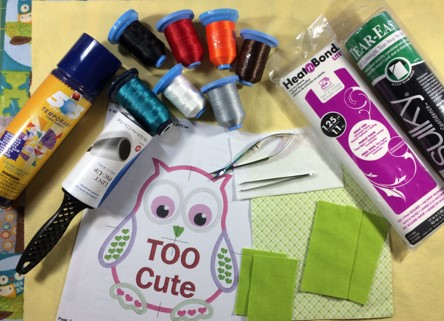
Gather the materials and read through the instructions before beginning.
Iron and lightly starch the flannel.
Step 3:
Cut two pieces of flannel 18” x 20”.(The example has one piece a solid color and one piece printed.) Cut one piece of flannel 6” x 7” for the body of the owl. Cut two pieces of flannel 2" x 4" for the wings of the owl. Cut two pieces of flannel 2" x 2" for the feet of the owl. Cut one piece of white flannel 3" x 4.5" for the eyes of the owl.
Cut one piece of Heat n Bond lite 6” x 7” for the body of the owl. Cut two pieces of Heat n Bond lite 2" x 4" for the wings of the owl. Cut two pieces of Heat n Bond lite 2" x 2" for the feet of the owl. Cut one piece of white flannel 3" x 4.5" for the eyes of the owl.
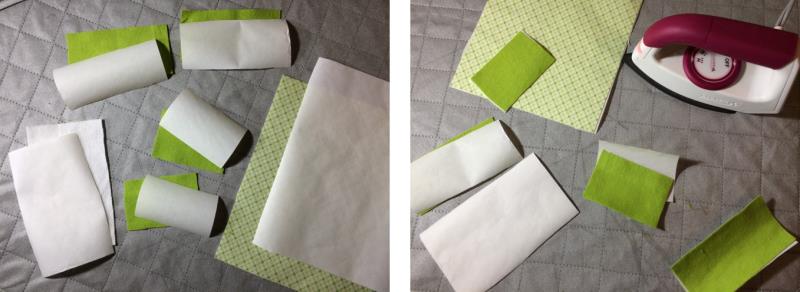
Adhere Heat n Bond lite to the flannel for the body, wings, feet, and eyes of the owl according to the direction on the package.
Heat n Bond lite is a fusible, sewable iron-on adhesive. Using Heat n Bond lite when appliqueing will bond the fabrics together. Heat n Bond lite has a rough, textured side and a slick, paper side. The rough, textured side is the adhesive.
(Click Image to Enlarge)
Step 4:
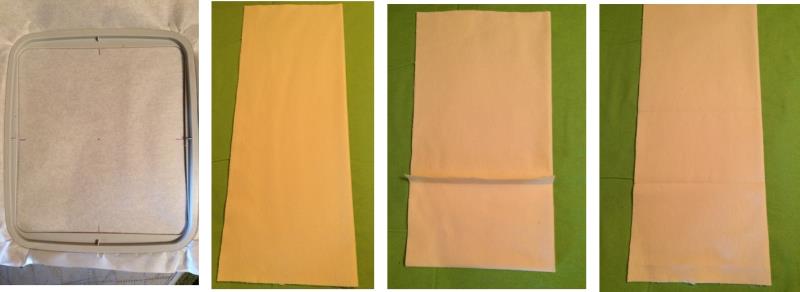
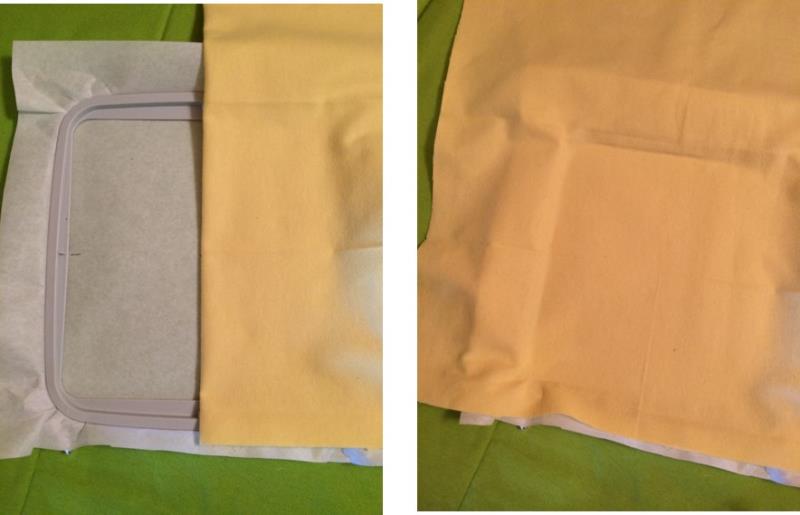
Hoop the Tear-away Stabilizer.
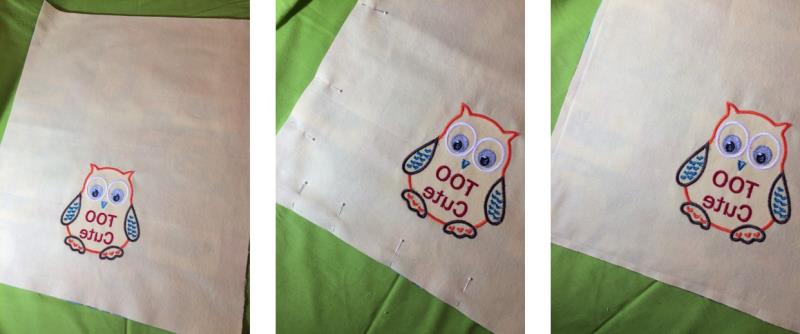
Fold one piece of the flannel in half lengthwise with right side facing each other. Fabric will measure 9" x 20".
Fold the fabric in half making the fabric measure 9" x 10". Press light to crease fabric on the fold. Open the fabric back to the 9" x 20'.
Measure one inch off of the bottom, find the center point for the lower half.
(Click Image to Enlarge)
Step 5:
Align the fabric with the center point on the hoop.
Spray stabilizer with temporary adhesive. Press fabric gently onto stabilizer.
(Click Image to Enlarge)
Step 6:
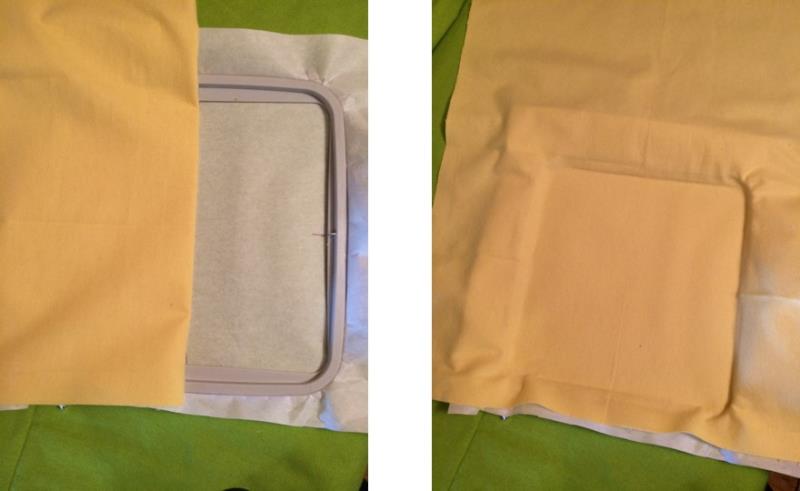
Fold fabric to the right side of the hoop.
spray stabilizer with temporary adhesive. Press fabric gently onto stabilizer.
(Click Image to Enlarge)
Step 7:
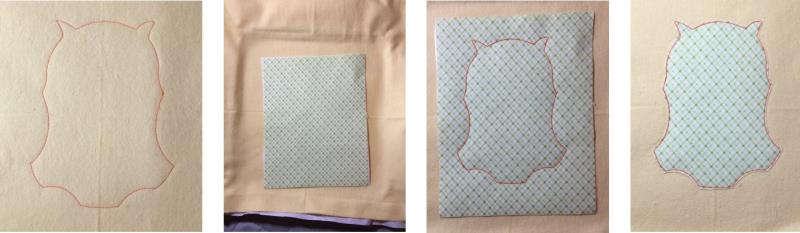
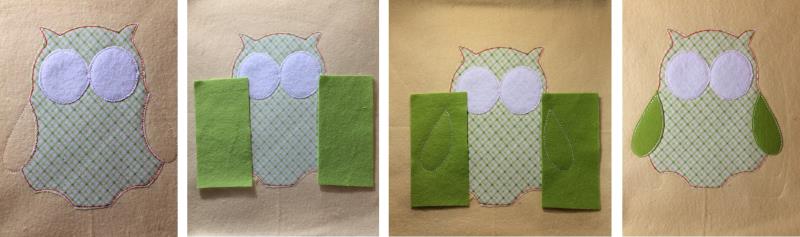
Sew placement stitches for the body of the owl.
Place your applique fabric RIGHT SIDE UP on top of the outline you just stitched.
Run the next step, which will be the tack down stitches. This will sew the applique fabric onto your fabric.
Remove the hoop from your machine, but DO NOT REMOVE THE PROJECT FROM THE HOOP. Trim around the tack down stitches you just sewed, to remove the excess fabric.
(Click Image to Enlarge)
Step 8:
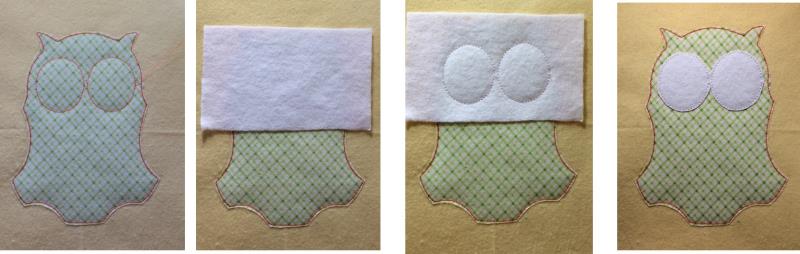
Sew placement stitches for the eyes of the owl.
Place your applique fabric RIGHT SIDE UP on top of the outline you just stitched.
Run the next step, which will be the tack down stitches. This will sew the applique fabric onto your fabric.
Remove the hoop from your machine, but DO NOT REMOVE THE PROJECT FROM THE HOOP. Trim around the tack down stitches you just sewed, to remove the excess fabric.
(Click Image to Enlarge)
Step 9:
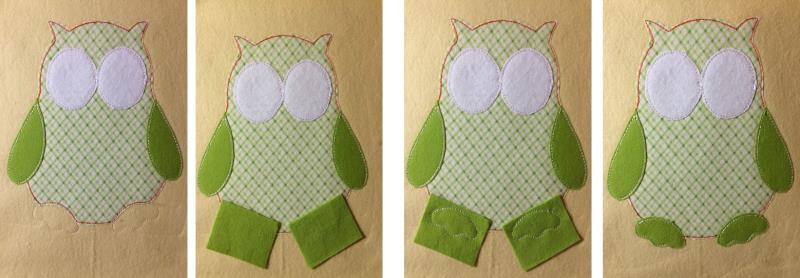
Sew placement stitches for the wings of the owl.
Place your applique fabric RIGHT SIDE UP on top of the outline you just stitched.
Run the next step, which will be the tack down stitches. This will sew the applique fabric onto your fabric.
Remove the hoop from your machine, but DO NOT REMOVE THE PROJECT FROM THE HOOP. Trim around the tack down stitches you just sewed, to remove the excess fabric.
(Click Image to Enlarge)
Step 10:
Sew placement stitches for the feet of the owl.
Place your applique fabric RIGHT SIDE UP on top of the outline you just stitched.
Run the next step, which will be the tack down stitches. This will sew the applique fabric onto your fabric.
Remove the hoop from your machine, but DO NOT REMOVE THE PROJECT FROM THE HOOP. Trim around the tack down stitches you just sewed, to remove the excess fabric.
(Click Image to Enlarge)
Step 11:
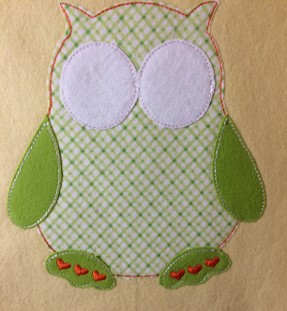
(Click Image to Enlarge)
Embroider the hearts on the feet.
Step 12:
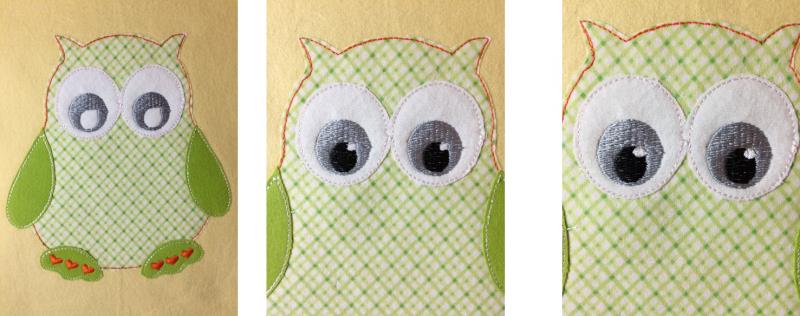
Embroider the eyes. Follow the color stops for each part of the eyes.
(Click Image to Enlarge)
Step 13:
Embroider the nose and hearts on the wings.
Embroider 'Too Cute'.
Embroider the finishing stitches around the eyes.
(Click Image to Enlarge)
Step 14:
Embroider the finishing stitches around the body of the owl.
Embroider the finishing stitches around the wings and feet of the owl.
Follow the directions on the Heat n Bond lite to fuse the appliqued owl to the fabric.
(Click Image to Enlarge)
Step 15:
Remove the project from the hoop. Remove the tear-away stabilizer from the back of the project. Trim threads. A lint roller is very helpful when tidying up the work area.
Place right sides of the 18" x 20" pieces of fabric together. Pin in place.
Leaving a three inch gap, sew a 1/4" seam around the outer edges of the fabric.
(Click Image to Enlarge)
Step 16:
Turn the fabric right side out.
Press along the seam.
Sew a 1/4" seam or decorative stitch around the outer edges of the burp cloth. A decorative stitch was used in the example.
Marisa Littleton is a retired educator with a love for teaching and learning. Interests include machine embroidery, hand embroidery, quilting, cooking, and antiques.