Border OptionsHugging border, circle, square, or rectangle — with a 3mm satin stitch.
Backing OptionsAvailable with iron-on, sew-on, or velcro backing.
Fast ShippingShipped quickly from the USA.
Free Online Tools
Powerful embroidery utilities that save time and prevent costly mistakes.
Stitch AssistantRECOMMENDED
Get the exact stabilizer, machine settings, needle, and thread color sequence for every embroidery design you purchase — based on that design's stitch density, dimensions, and color count.
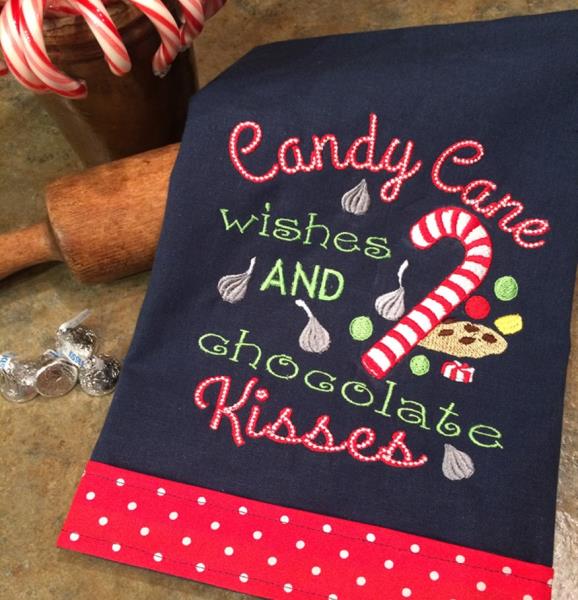
Like a personal touch and to be creative? Learn how to customize projects with some editing tips and techniques making word art. Take dimension and texture to another level design using puffy foam to make a festive holiday towel.
What
better way to add a festive touch to the holiday season than with candy canes
and chocolate kisses!Simple editing techniques transform a basic embroidery design into a multi-dimensional piece using puffy
foam and words into art. Warning!May cause a snack attack!
Step 1:
An embroidery software program is needed for this project. You will need to be familiar with how the program works. Tips and editing techniques will work for most all software programs. The embroidery software program used in the illustrations is Embrilliance Essentials by Briton Leap.
The software programs add a touch of fun and ease to enhancing or customizing a project. Using a simple design with different font styles is an easy way to customize projects. Rotate, resize, and manipulate are editing techniques when customizing your template design. Horizontal, vertical, slanted, arched, curved, and straight are some ways letters can be manipulated in projects. Color choices also increase visual appeal in projects.
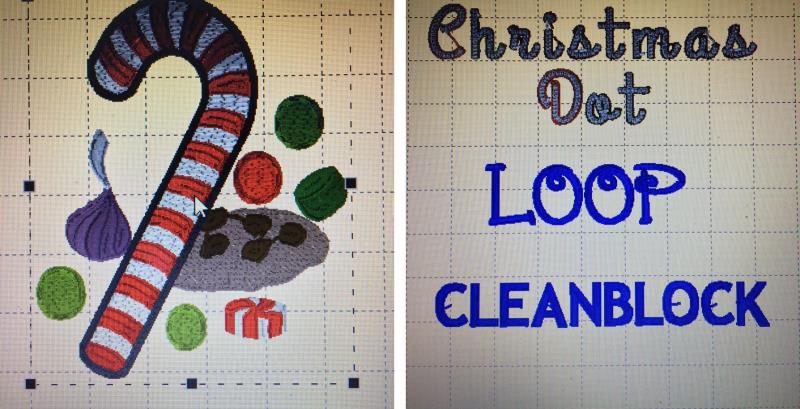
Three different font styles are used to customize the design for this project.
(Click Image to Enlarge)
Step 2:
(Click Image to Enlarge)
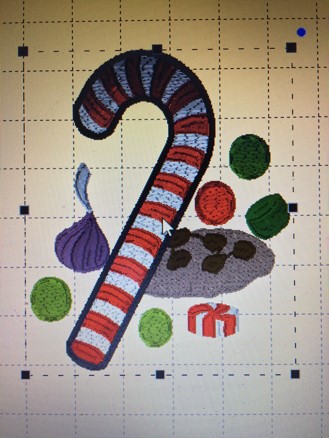
Begin the project by creating the template. Start by selecting the hoop size. An 8 x 8 hoop was used for this design. A 5 x 7 hoop would work also with some slight resizing. A 4 x 4 hoop would be too small because of the size of the Puffy Foam Candy Cane design.
Start by placing the Puffy Foam Candy Cane design in the frame. This design is the focal point in the project.
Step 3:
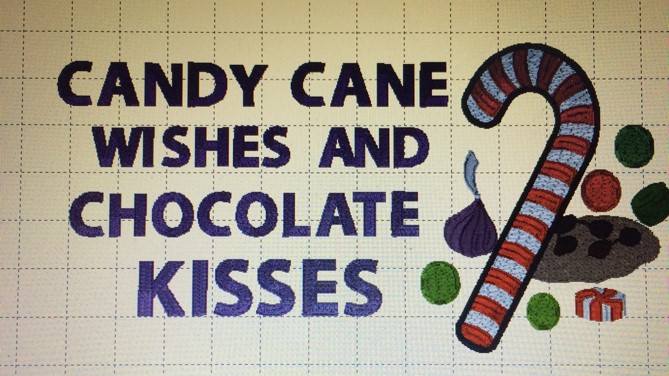
The next step is using a cute, catchy little saying that relates to the embroidery design. For this project, the design is the Puffy Foam Candy Cane. Thinking about the candy canes and chocolate kisses in the design, the idea of "Candy Cane Wishes and Chocolate Kisses" clicked for me.
A plain block font was used for the caption in the picture. So this way is not as interesting. The caption can be more appealing using different font styles with editing, resizing, and manipulation of the lettering.
(Click Image to Enlarge)
Step 4:
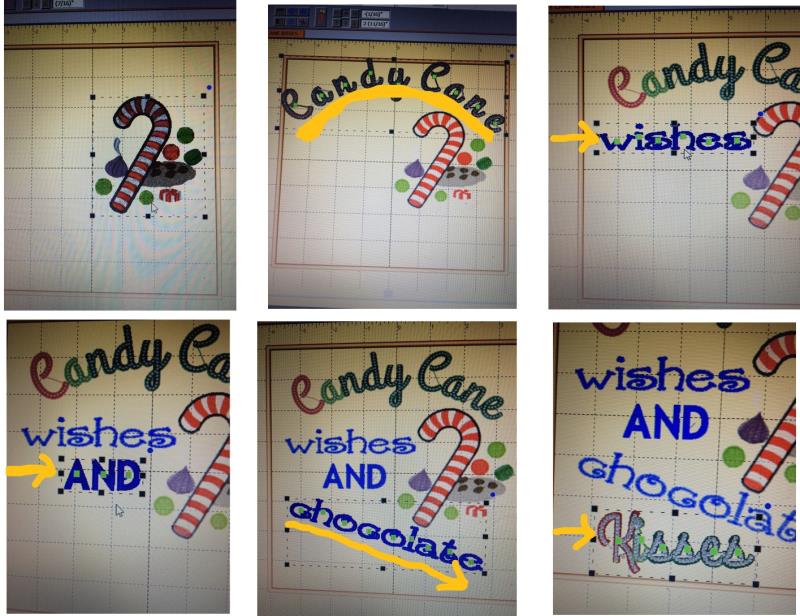
Specialty, curly, and block font styles were used in the caption of this project. The Christmas Dot specialty font has knots on a satin base. This font style adds texture and dimension to the project.
Using the Christmas Dot Font, add ‘Candy Cane’ to your frame. The stitched example ‘Candy Cane’ is in a semi-circle.
Loopy Font was used for the word ‘wishes’ in lowercase letters. Loopy Font is a curly, twirling font and gives contrast within the caption.
The Cleanblock Font was used for the word ‘AND’. Make the word 'AND' in a font size slightly larger that the word 'wishes'. Block fonts are very plain and simple but make a bold statement.
Loopy Font was used for the word ‘chocolate’ in lowercase letters. Chocolate has been rotated and placed at a slant.
Christmas Dot font was used for ‘Kisses’.
(Click Image to Enlarge)
Step 5:
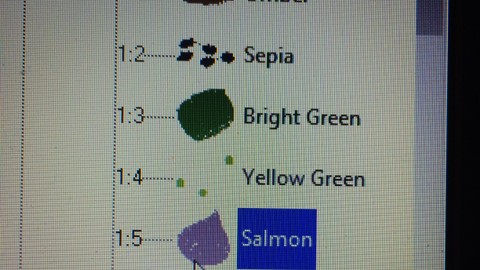
The next step is to fill some space with chocolate kisses. Go to the color chart. Open the color chart so that you can see the sewing and color sequence of the design. Click on the chocolate kiss. Simply copy and paste the chocolate kiss on your design. Repeat. An asterisk was used for the white tags for some of the chocolate kisses.
Check your print preview of your design. Now is the time to tweak the finishing touches. You can assign specific colors at this point or use the chart provided. Save your project template.
Step 6:
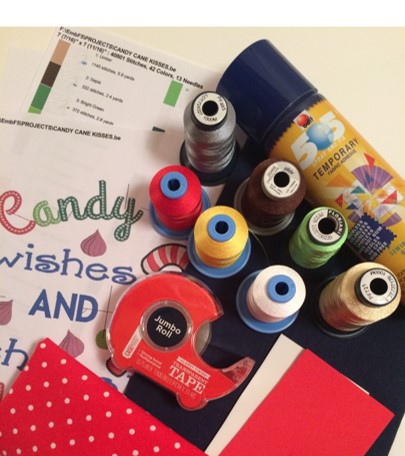
Gather the materials and read through the instructions before beginning. Print out the design template and color sequence.
Step 7:
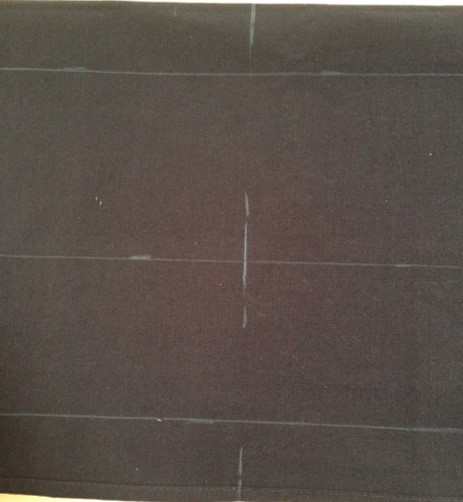
Iron the towel and starch 2 to 3 times. Fold towel in half. With the towel folded in half, measure 2-3" from the top and bottom edges. Find the center point between these margins.
Hoop 2 layers of tear-away stabilizer. The towel will be held in place (float) on top of the stabilizer with temporary spray adhesive.
After centering the towel on top of the tear-away stabilizer, lightly spray the temporary adhesive spray on the stabilizer. Press gently to smooth and adhere the towel to the stabilizer.
Step 8:
Stitch the design following the steps on the color chart. This part will be the cookie and candy pieces.
When stitching the candy cane, stop your machine after the outline is finished. WATCH CLOSELY because there is NOT a stop in the design for this step.
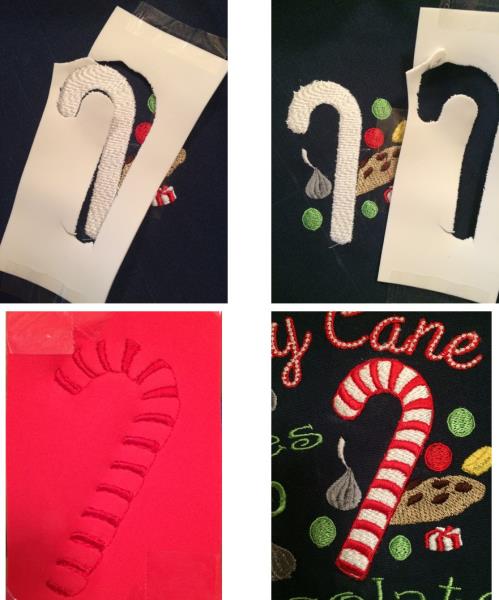
A 90/14 needle works well when sewing puffy foam. Puffy foam is generally used with satin stitching to add height to a detail in the design. Foam is used on the base of the candy cane to add more dimension. Another layer of foam is used for the stripes.
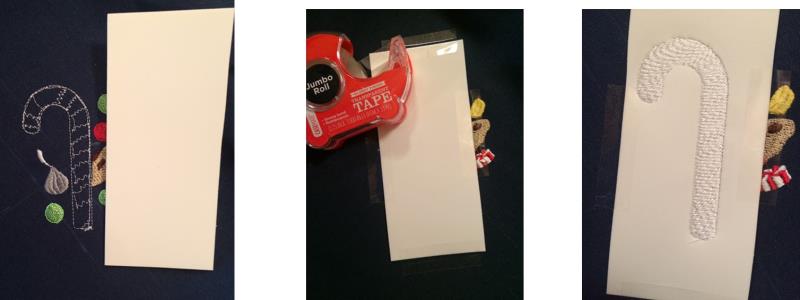
Place a piece of white puffy foam on top of the candy cane outline. Use scotch tape to hold the puffy foam in place. Stitch the white on the candy cane. While still in the hoop, gently remove the excess puffy foam from around the candy cane. The foam tears easily.
(Click Image to Enlarge)
Step 9:
Place red foam on top of the candy cane. Sew the stripes. Gently remove the excess foam.
Use a hot iron on the candy cane to shrink any rough edges of the puffy foam. A fabric marker may be used to touch up areas if needed. Finish sewing your design.
(Click Image to Enlarge)
Step 10:
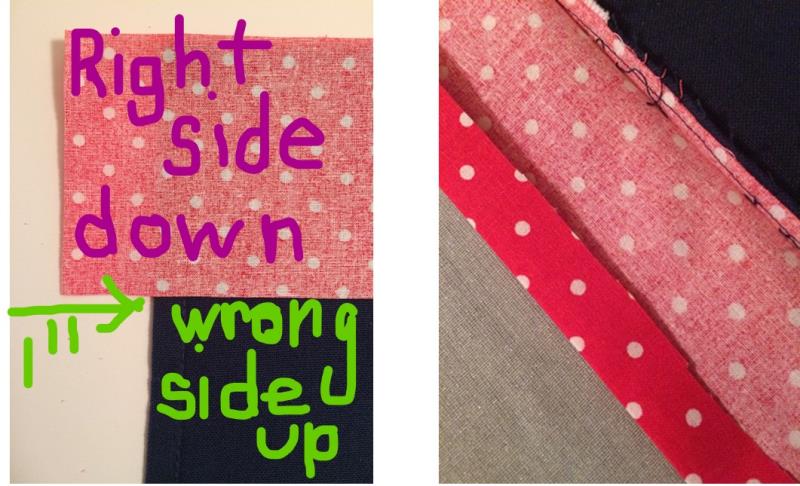
Iron the cotton fabric. Cut a 3 1/4” strip of the cotton fabric two inches longer than the width of your towel.
Place the RIGHT side of the cotton fabric to the WRONG side of the dish towel at the bottom edge of the towel. Center the strip so that there is 1” of the strip extending past each side of the towel. Sew a ¼” seam along the edge.
(Click Image to Enlarge)
Step 11:
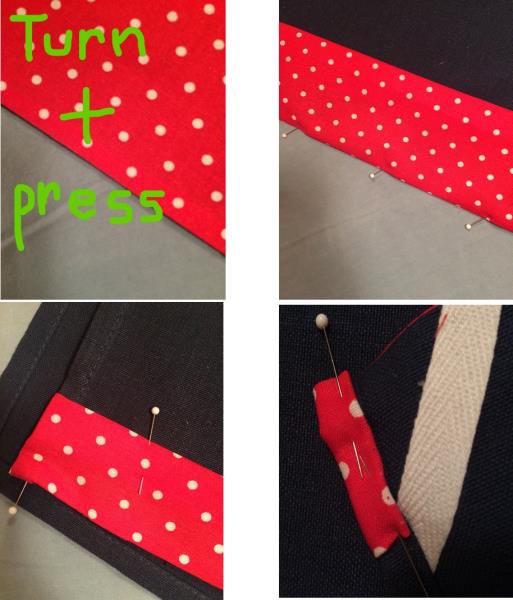
Using your iron, press 1/2" on the edge of the fabric. Turn fabric toward the right side of the towel. Press with an iron along the seam edge. The fabric will make a 1 1/2" trim at the bottom of the towel. Pin in place.
(Click Image to Enlarge)
Step 12:
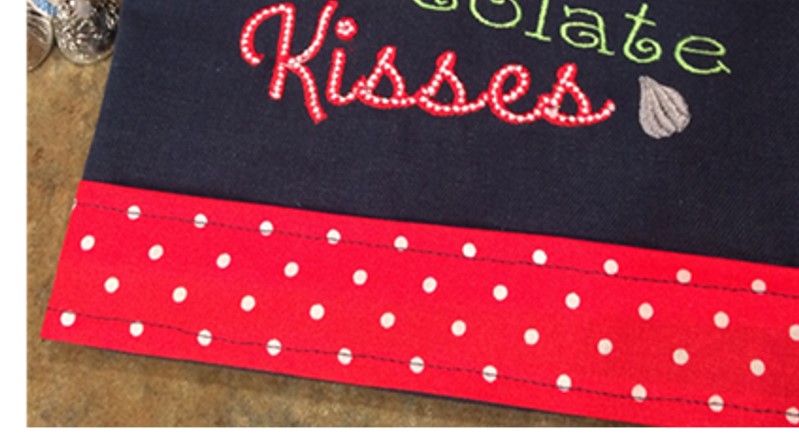
Sew 1/4" seam around the edges of the trim.
(Click Image to Enlarge)
Step 13:
Congratulations!! You have customized a design and stitched a festive dish towel!
Marisa Littleton is a retired educator with a love for teaching and learning. Interests include machine embroidery, hand embroidery, quilting, cooking, and antiques.