{{superHeaderAds.title}}
Live Chat
Embroidery Designs
Welcome, Embroiderer
Login
Happy New Year Hat
{{mainImageAlt || (productInfo._source && productInfo._source.name) || ''}}

Happy New Year Hat Embroidery Project

By   Ramona Baird   on   December 11, 2017

PROJECT DETAILS

SKILL LEVEL
Some Experience
TIME REQUIRED
04:00
Description

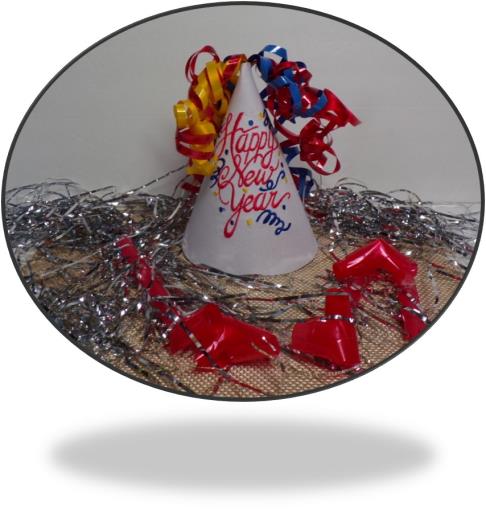
Have fun creating a hat to ring in the New Year!

Project Preview Video

Materials
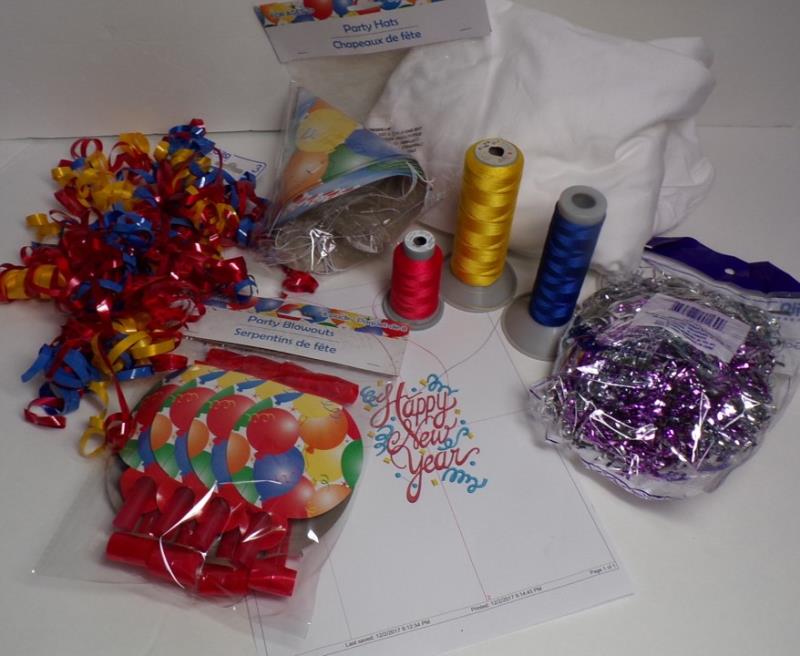
  • Cardboard party hat
  • Curly bow
  • Party horns
  • Embroidery thread as stated in the color sequence and to match the ribbons purchased
  • Fabric to fit hoop
  • Tearaway stabilizer to fit hoop
  • Heat ‘n Bond Lite
  • Fabric glue

  • Designs used in this project

    Final Product: What You Will Create

    Preface:
    These hats can be used as centerpieces or they can actually be made to be worn. Because all hat sizes are different, general directions will be given on how to cover and decorate a hat. Take measurements off the hat you purchase to determine how much fabric and adhesive you’ll need. 


    Step 1:
    Gather the materials and read through the instructions before beginning. Print out a paper template of the design and color sequence.

    (Click Image to Enlarge)


    Step 2:
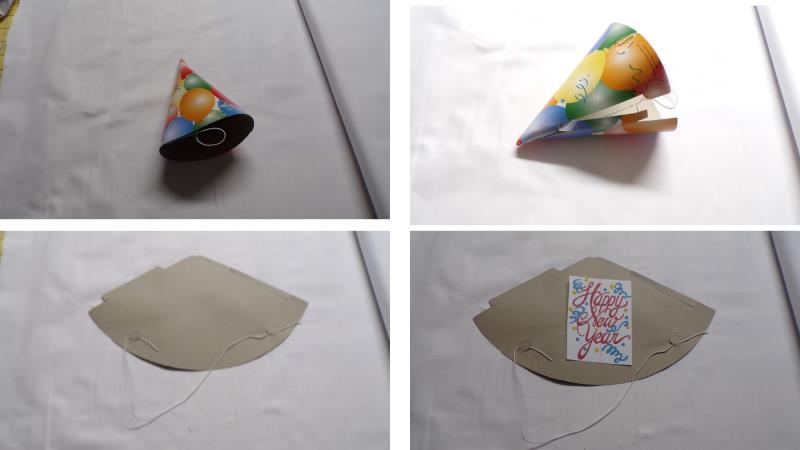
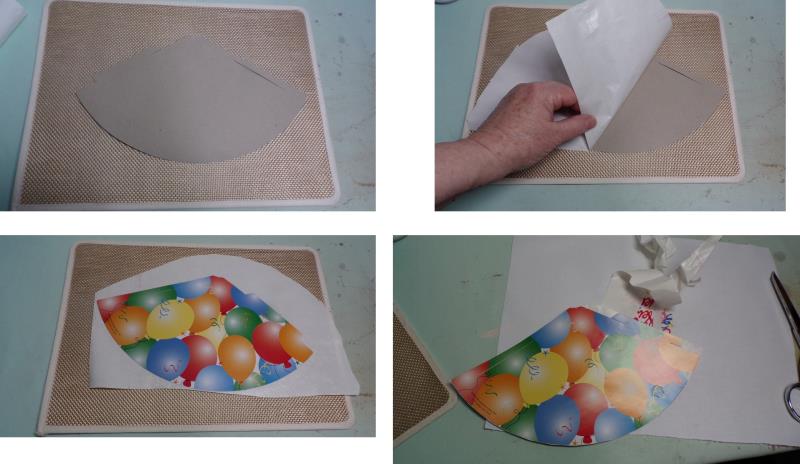
    Using one of the hats as a template, determine how the hat comes apart (some are stapled, some are glued, and ones like this just have a slit. Open the hat up flat. Cut out around the paper design and make sure the design will fit on the hat. 

    (Click Image to Enlarge)


    Step 3:
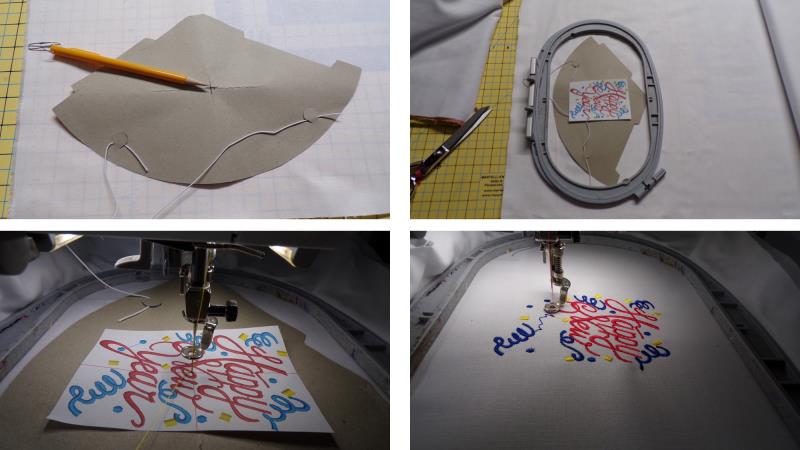
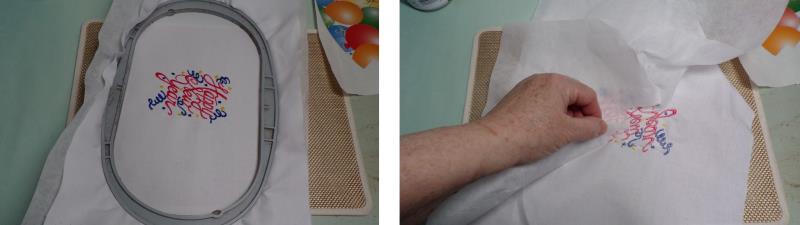
    Fold the hat in half lengthwise and crosswise to find the center. Determine the best way to hoop the fabric in the hoop; this will help determine how much fabric you’ll need. For the project, a 5”x7” hoop was used and the fabric cut about 1” larger all the way around. Cut the fabric the size needed, press it well with spray starch, and hoop the fabric with a layer of tearaway stabilizer. Load the design on the machine, rotating it if necessary. Align the needle to the center of the design and stitch the design following the color sequence. 

    (Click Image to Enlarge)


    Step 4:
    After the design has finished stitching, remove it from the hoop and remove the excess stabilizer from the back of the fabric.

    (Click Image to Enlarge)


    Step 5:
    Next will be to apply the fabric to the cardboard hat. Begin with a new hat and open it up. You may need to dry-press the hat on the wrong side to get it to lie flat. Place a piece of Heat ‘n Bond Lite to the wrong side of the hat, following the manufacturers’ directions; let cool. Before removing the paper from the adhesive, cut the adhesive to match the outline of the hat.

    (Click Image to Enlarge)


    Step 6:
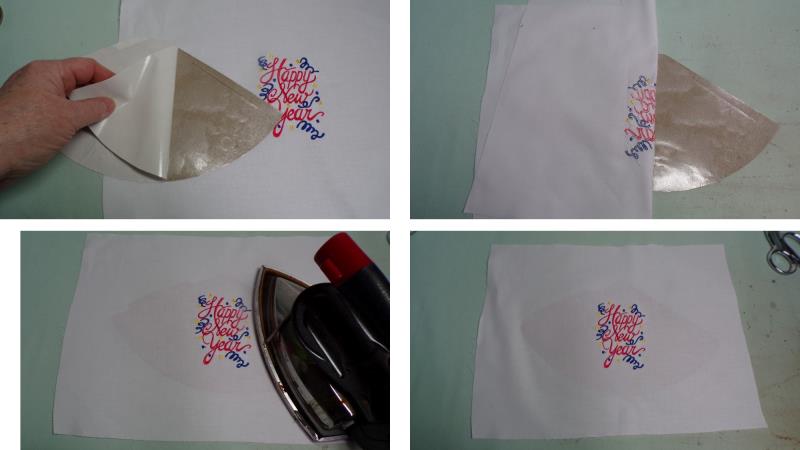
    Remove the protective paper from the adhesive. Lightly mark the center (use the first hat template that was marked with the center mark.) Press the embroidered fabric well. Fold the embroidered fabric in half and align the center of the design to the center mark on the hat. Press the fabric to the hat; let the fabric cool.

    (Click Image to Enlarge)


    Step 7:
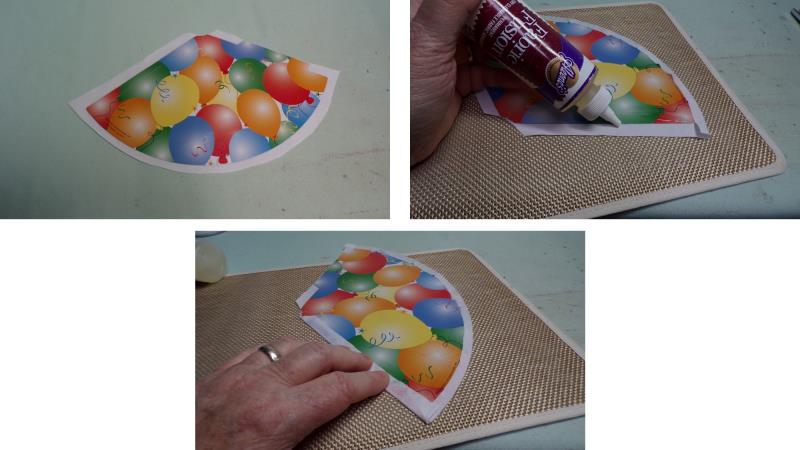
    Cut away the excess fabric leaving about 3/8” all around. Using the fabric glue, place a light line of glue on the hat edges and fold the fabric to the wrong side of the hat. Be sure to leave the flap (the side to be tucked under the finished edge) unglued. Let the glue dry. 

    (Click Image to Enlarge)


    Step 8:
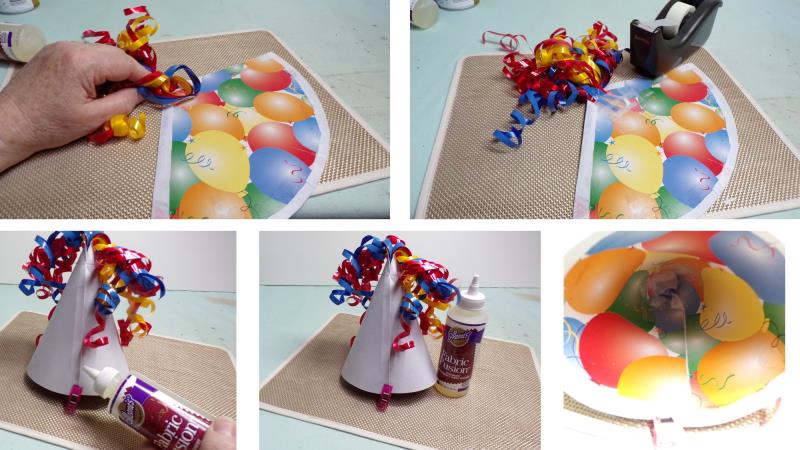
    At the top point of the hat, tape the base of the bow to the inside top of the hat. Form the hat back into a cone shape and using the fabric glue to glue the back seam in place. Use clips and/or pins to hold the hat form until the glue dries. The last photo is how the inside of the hat looks.

    (Click Image to Enlarge)


    Step 9:
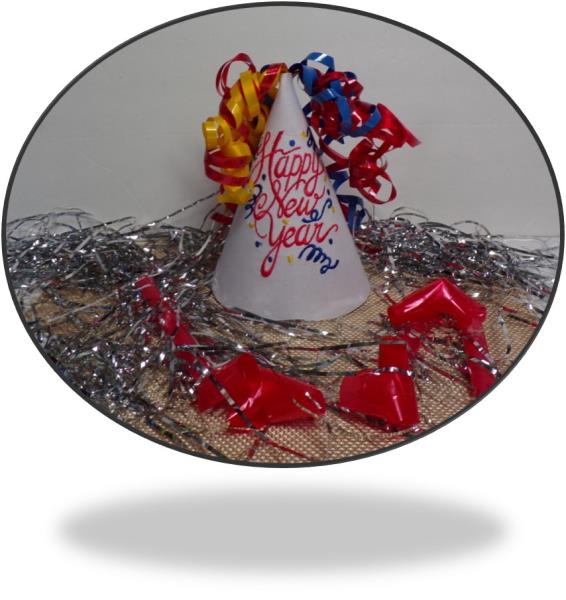
    Congratulations on creating a centerpiece hat to ring in the New Year! For a centerpiece, add horns to blow, streamers, confetti, and other fun things to decorate your table for party guests. Add the elastic back to the hat if the hat is to be worn. Make several so each party guest has a nice party-favor to take home as a nice remembrance. 

    (Click Image to Enlarge)

    Meet the Author: Ramona Baird
    Ramona Baird
    Ramona Baird has been in the embroidery industry for over 23 years. She and her husband owned a commercial and retail embroidery store in Arizona for many years. She is an experienced digitizer having been mentored by award-winners Pat Williams and Lindee Goodall. Ramona is a contributor to “Creative Machine Embroidery” magazine having 5 covers to her credit. Ramona has worked for Wilcom America and served many years as Education Director for the American Sewing Guild. With a degree in fashion design, she is able to design and execute patterns which Pat Williams says are “out of the box” in creativity and application. Ramona likes to challenge the boundaries of embroidery and bring new and exciting designs, ideas, and projects to EmbroideryDesigns.com. She wants embroiderers of all levels to increase their skills and enjoyment in using their embroidery machine for gift-making and personal pleasure.
    More From This Author
    Link is Broken, Please check the URL
    Exclusive Embroidery Offers!
    Copyright © {{ currentDate | date:'yyyy'}} - EmbroideryDesigns.com
    GET 50% OFF! ×