Border OptionsHugging border, circle, square, or rectangle — with a 3mm satin stitch.
Backing OptionsAvailable with iron-on, sew-on, or velcro backing.
Fast ShippingShipped quickly from the USA.
Free Online Tools
Powerful embroidery utilities that save time and prevent costly mistakes.
Stitch AssistantRECOMMENDED
Get the exact stabilizer, machine settings, needle, and thread color sequence for every embroidery design you purchase — based on that design's stitch density, dimensions, and color count.
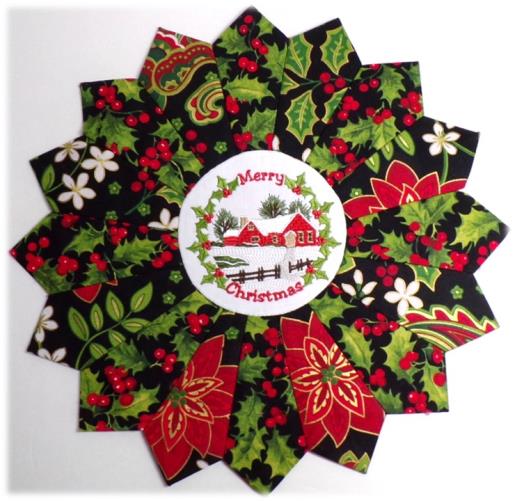
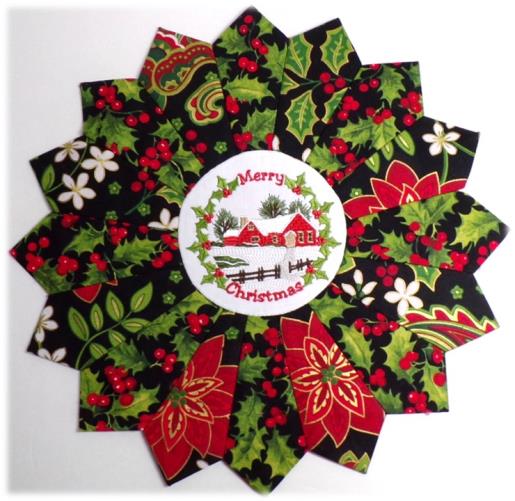
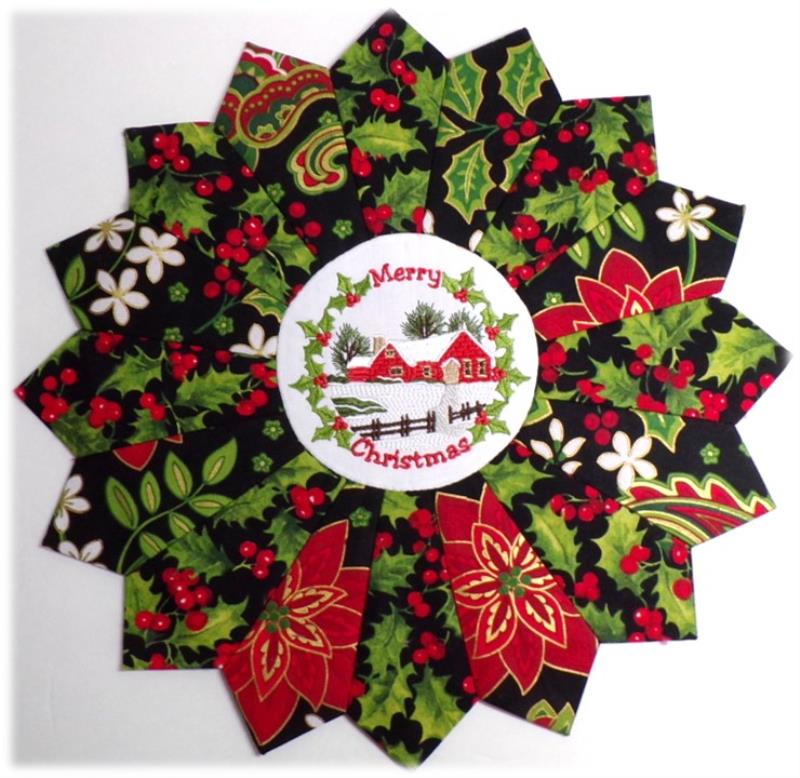
Create a charming Christmas centerpiece by surrounding a central design with vibrant Dresden fans. This decorative piece adds holiday flair to any table setting. Step-by-step instructions are included.
Step
of
Festive Dresden Plate Christmas Centerpiece
By Ramona Baird
A Dresden plate quilt pattern lends itself beautifully to an embroidered center. Cut and sew the fan blades, back the centerpiece and then embroidery fabric for the center circle, apply it to the front, and you’ve got a lovely table mat. The nice thing about a Dresden plate quilt pattern is the blades can be made any size to fit any table.
Step 1:
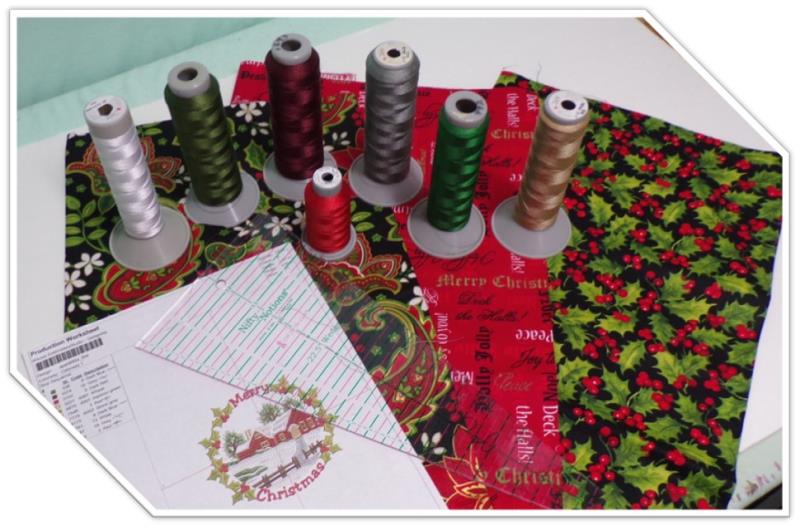
Gather the materials and read through the instructions before beginning. Print out a paper template of the design and color sequence. ¼” seams are used throughout the project. The specialty ruler makes quick work of marking and cutting the fabric. The “blades” can be made any size; for this project, 5” blades are cut which makes a 12” diameter centerpiece mat. Instructions are included when purchasing the ruler and there are also instructions and videos on websites you can view.
(Click Image to Enlarge)
Step 2:
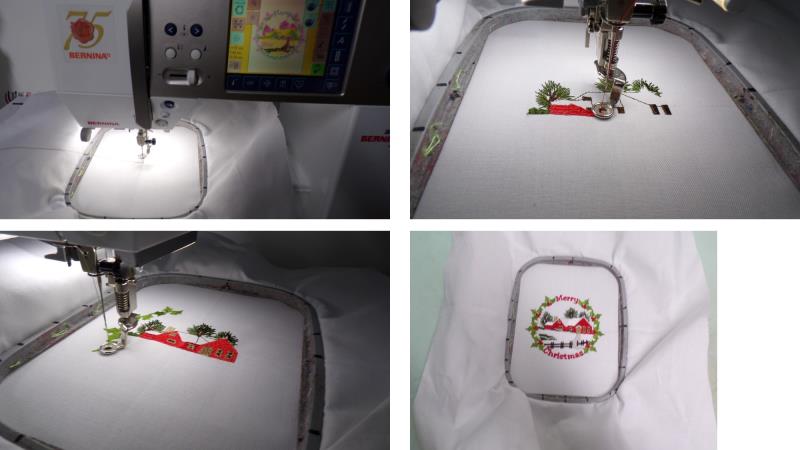
Begin by embroidering the design. Quarter-fold the fabric. Hoop the fabric and stabilizer, centering the fold lines in to the hoop—this is important because these fold lines will be used later on when cutting the embroidered design into a circle in Step 11. Load the design on the machine and stitch the design following the color sequence. Hint: while the design is stitching, start pressing fabric and cutting blades.
(Click Image to Enlarge)
Step 3:
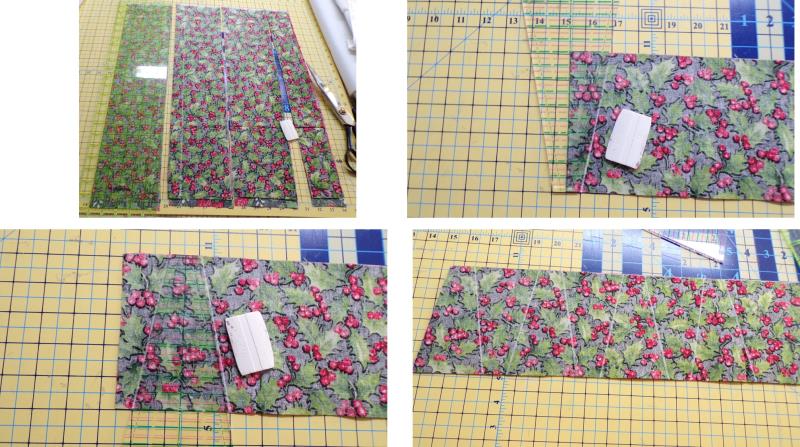
Decide on the size blade you would like (project used 5”). Following the directions for the ruler, align and cut the fabric strips the width needed (5” used for the project). For the end piece, center the ruler along the edge of the fabric and align the small end of the ruler at the bottom of the fabric; draw along the right edge of the ruler to create the first blade line. Now flip the ruler so that the small end of the ruler is at the top of the fabric and the left side of the ruler is aligned with the first mark drawn. Draw along the right side of the ruler. Continue drawing and flipping the ruler until you have enough for 8 blades for each of the two fabrics.
(Click Image to Enlarge)
Step 4:
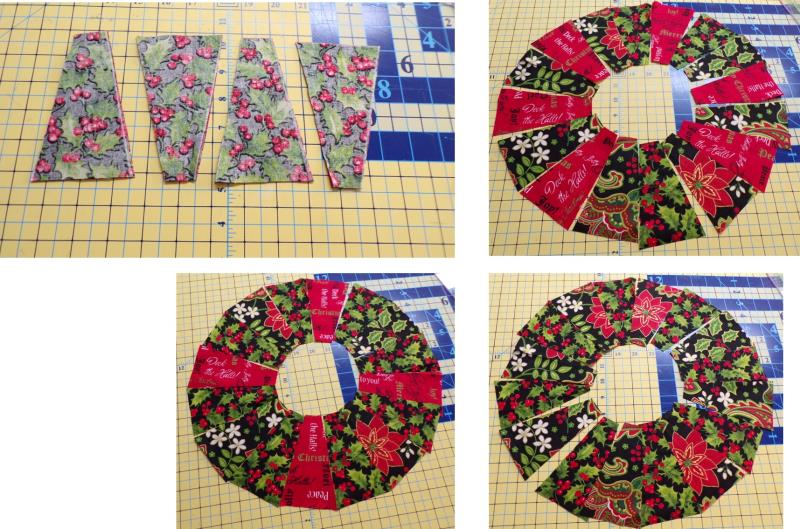
Here are some samples when three fabrics are used. You can mix and match fabrics and put them in any design combination you wish as long as you have 16 blades. For the project, two fabrics, 8 blades each, was used.
(Click Image to Enlarge)
Step 5:
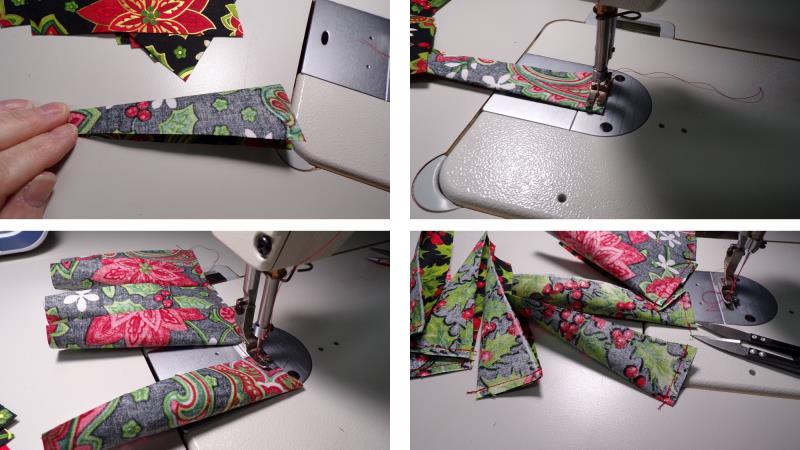
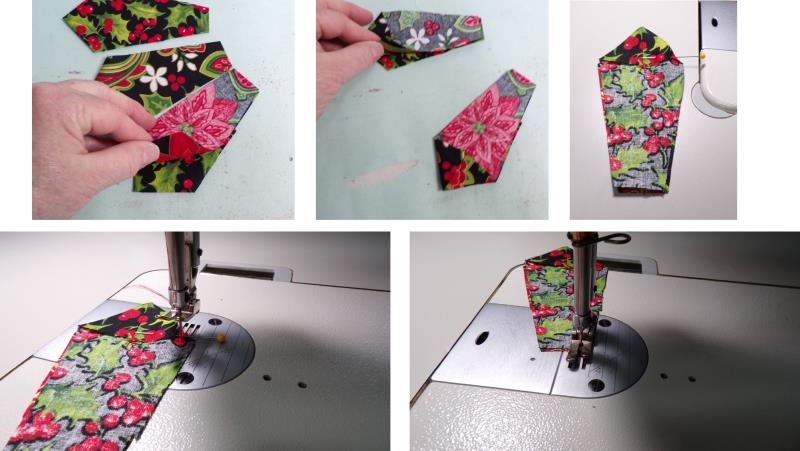
To sew the blades, fold each blade in half, right sides together and sew the seam across the blade. To make the process go faster, chain stitch each blade one right after the other and then when all blades are sewn, cut apart the little threads between each blade.
(Click Image to Enlarge)
Step 6:
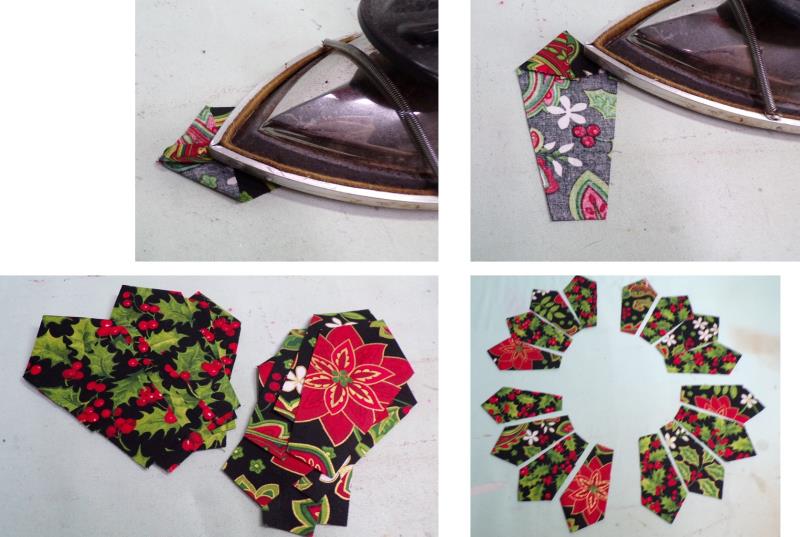
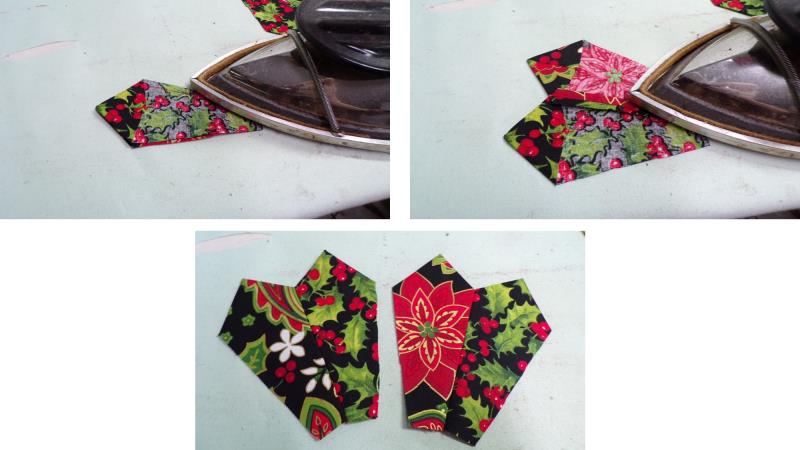
Press open the seam, turn the point to the right side and make sure the seam is aligned with the center of the blade and press the point. Repeat until all the blades are pressed. It is easiest to sew the blades together first in sections of four, then the quarter sections into a half, and then the two halves together to finish the entire Dresden plate. Begin by laying out the blades, alternating fabrics as you’d like, and aligning the blades in groups of four.
(Click Image to Enlarge)
Step 7:
For each group of four, lay two adjoining blades right sides together and placing a pin at the top of the blade sections. Sew the seam beginning at the top and sewing toward the bottom (this makes sure the blades all meet at the top).
(Click Image to Enlarge)
Step 8:
Press the seam to set the stitches and then press the seam open; repeat for the other two blade sections.
(Click Image to Enlarge)
Step 9:
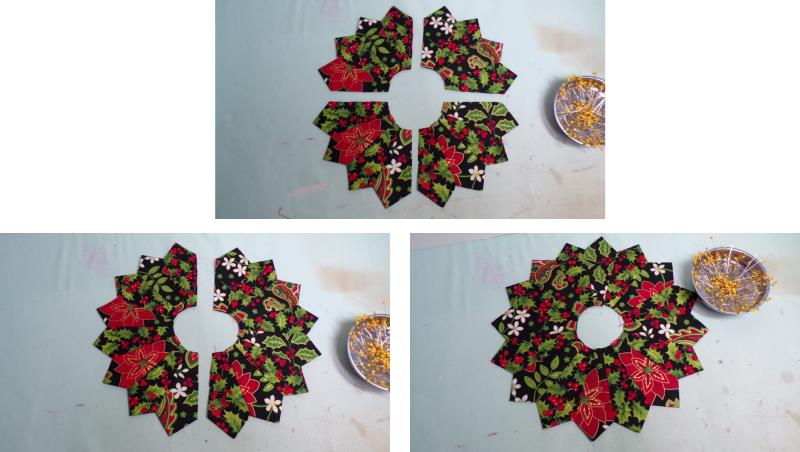
Repeat pinning and sewing blade sections together until all four sections are assembled as shown. Next take and place right sides together for the left sections, and for the right sections and sew those together to form two half sections. Place the two half sections together and sew to form the whole Dresden plate.
(Click Image to Enlarge)
Step 10:
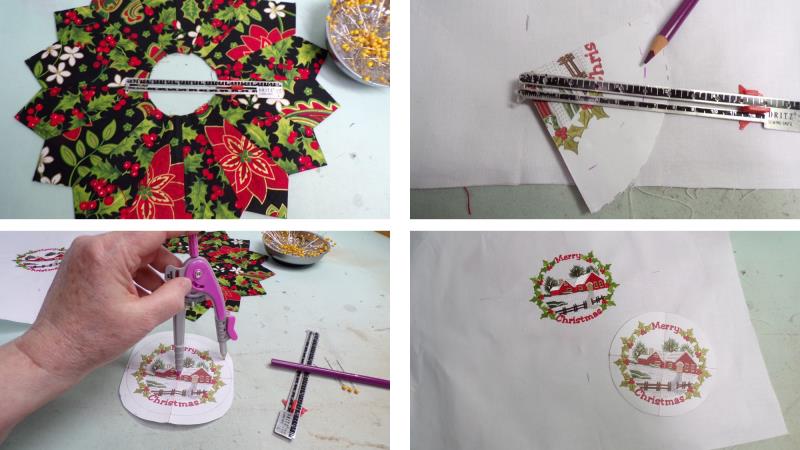
Measure the inner circle of the Dresden plate and decide how large you would like the circle. Quarter fold the paper template of the design along the crosshairs to use as a guide for cutting the circle of fabric. Use either a ruler (which sometimes is not as accurate) or preferably a compass to draw the circle the diameter desired (seam allowances are added later). Now the paper template will be aligned to the fabric.
(Click Image to Enlarge)
Step 11:
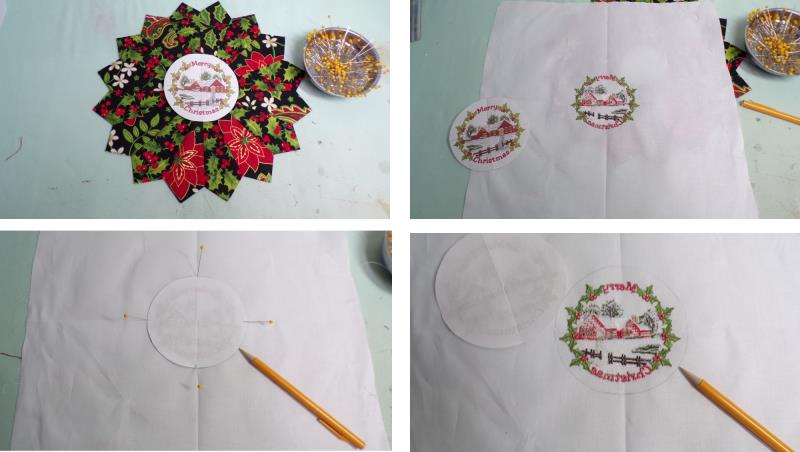
Place the paper template over the Dresden block—make sure you like the size and also make sure there is at least ¼” coverage along all edges of the bottom of the Dresden blades. If needed, print out a new paper template and redraw the circle to the proper size. Working from the wrong side of the fabric, align the paper template to the embroidered fabric, aligning the fold lines of the paper to the fold lines of the fabric—this ensures an accurate alignment of the paper to the embroidery design. Use a pencil to very lightly trace around the paper template; this line will be used as a stitching guide.
(Click Image to Enlarge)
Step 12:
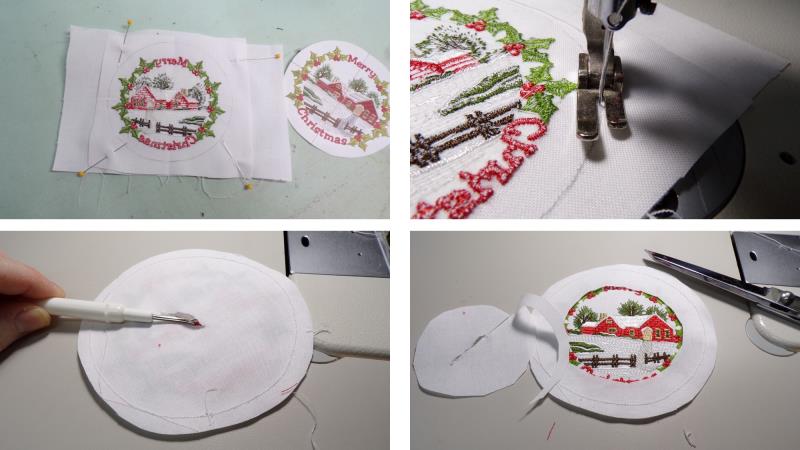
Cut away the excess fabric from around the circle, making the fabric a square, and leaving at least 1” all around. Take the 6”x 6” square of white fabric and place it underneath the embroidered fabric (right sides will be together) and pin the two pieces of fabric together. Using a very small stitch length (1.5mm—small stitches create a pretty and smooth circle) and the sewing thread to match the fabric, stitch right on the drawn line. Begin off the line and then onto the line (you don’t want any back stitching to add bulk to the stitching line). Carefully and slowly sew right on the line all the way around the circle, and then when you get back to the beginning, overlap the first few stitches and then sew off the circle onto the outer edge of the fabric (again, no back stitching). Cut out the design leaving about ½” all around at first. Using a sharp seam ripper, separate the two fabrics and use the seam ripper blade to make a small slash in the back fabric. Now use a sharp scissors to cut away the inner part of the back, leaving about ¾”. Then trim the outer edge to about ¼”.
(Click Image to Enlarge)
Step 13:
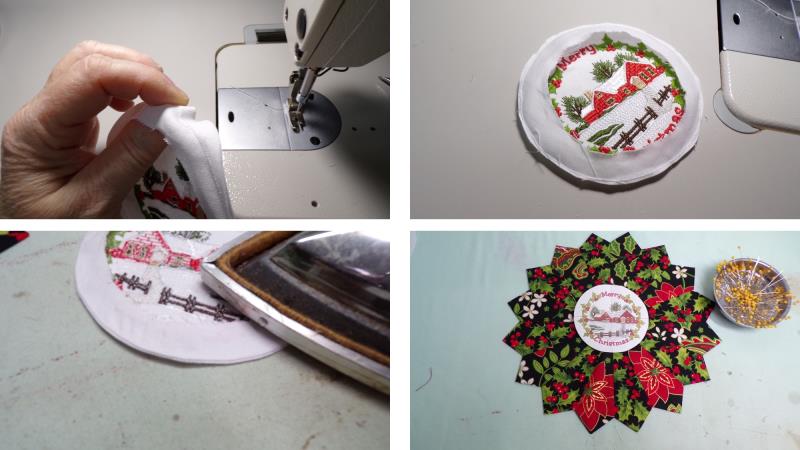
Use your fingers to turn that ¾” seam allowance to the back. While you are doing that, smooth all along the seam edge with your fingers. Press all along the seam while at the same time using your fingers to have just a small bit of the top fabric rolling to the back side as shown. Be sure the seam has a very smooth edge. Place the embroidered circle over the Dresden block to see how it will look when finished--but now take it off again to sew the fabric back on.
(Click Image to Enlarge)
Step 14:
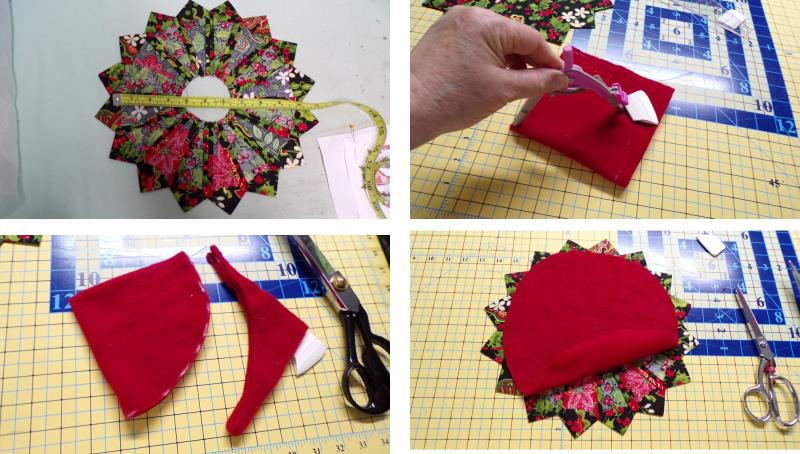
From the back side of the Dresden block, measure from inner point across to inner point. Quarter fold the felt or fleece piece. Using the compass and a marking chalk, mark the fabric half the distance of the measurement of the block (radius). Cut out along the drawn line. Open up the fabric and align it to the inside points of the block.
(Click Image to Enlarge)
Step 15:
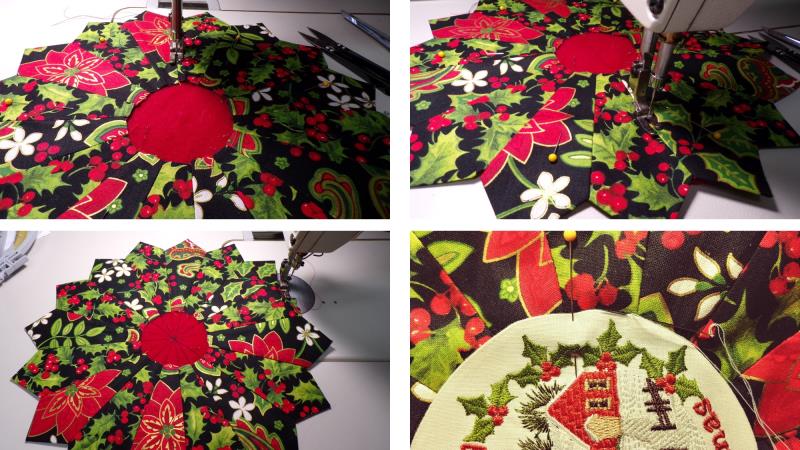
Attach the back fabric to the block by stitching in the ditch between blades from one side to the other, until all the lines have been sewn between each blade. Align the circle to the front of the Dresden block and hand stitch the circle to the block front (options: instead of hand-stitching, use a picot stitch on the machine or a small zig-zag stitch. Match the thread to the circle fabric or even use an invisible thread on top to make the stitching practically invisible.
(Click Image to Enlarge)
Step 16:
Congratulations on creating a beautiful Dresden plate centerpiece. This is so much fun and so easy to do, you’ll want to create several! Get creative and coordinate other embroidery designs, fabrics for different centerpieces throughout the year.
Ramona Baird has been in the embroidery industry for over 23 years. She and her husband owned a commercial and retail embroidery store in Arizona for many years. She is an experienced digitizer having been mentored by award-winners Pat Williams and Lindee Goodall. Ramona is a contributor to “Creative Machine Embroidery” magazine having 5 covers to her credit. Ramona has worked for Wilcom America and served many years as Education Director for the American Sewing Guild. With a degree in fashion design, she is able to design and execute patterns which Pat Williams says are “out of the box” in creativity and application. Ramona likes to challenge the boundaries of embroidery and bring new and exciting designs, ideas, and projects to EmbroideryDesigns.com. She wants embroiderers of all levels to increase their skills and enjoyment in using their embroidery machine for gift-making and personal pleasure.