Border OptionsHugging border, circle, square, or rectangle — with a 3mm satin stitch.
Backing OptionsAvailable with iron-on, sew-on, or velcro backing.
Fast ShippingShipped quickly from the USA.
Free Online Tools
Powerful embroidery utilities that save time and prevent costly mistakes.
Stitch AssistantRECOMMENDED
Get the exact stabilizer, machine settings, needle, and thread color sequence for every embroidery design you purchase — based on that design's stitch density, dimensions, and color count.
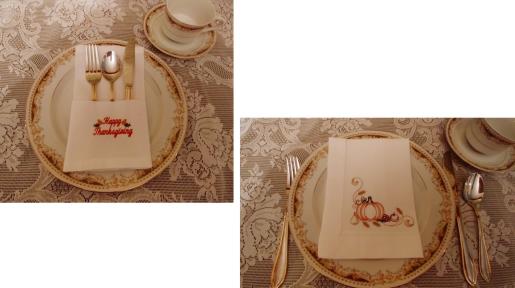
Create elegant quilted napkins perfect for a Thanksgiving table setting. These napkins feature simple yet sophisticated designs, adding a touch of charm to your dining experience. Ideal for both formal dinners and casual gatherings. Step-by-step instructions are included.
Whether a formal dinner setting or a buffet, adding embroidered napkins is a special touch. These are so simple and quick to stitch you can do several in an afternoon and be ready to set a beautiful table this Thanksgiving holiday. You could even do the pumpkin napkin for Thanksgiving Day, and then use the napkin that folds into a silverware caddy for a buffet of leftovers the day after Thanksgiving when you may be watching football, or hitting the black Friday sales, or starting your holiday decorating or sewing.
Step 1:
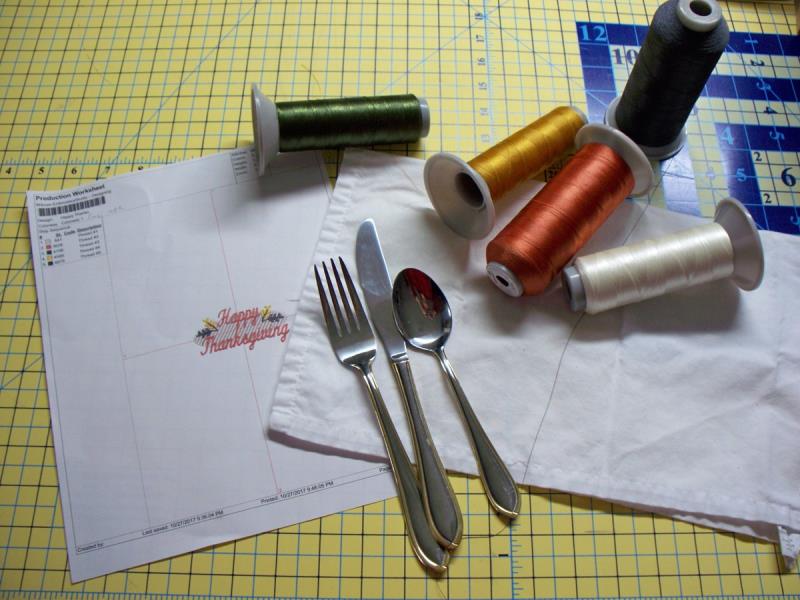
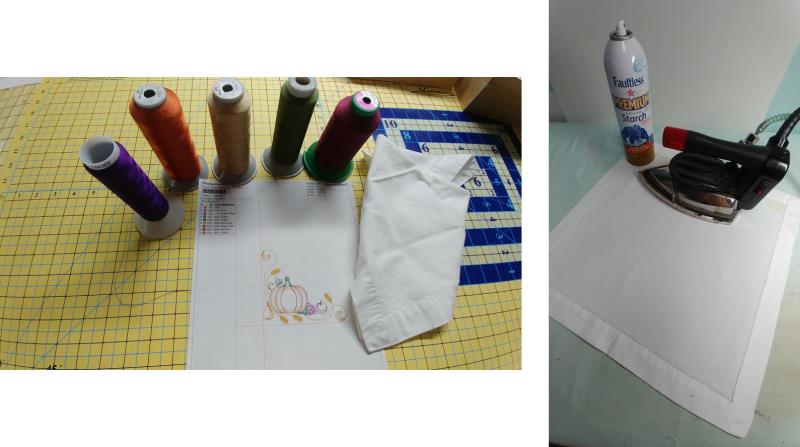
Gather the materials and read through the instructions before beginning. Print out a paper template of the designs and color sequence. The first napkin in this set of instructions is a silverware caddy that is perfect for a buffet the day after Thanksgiving.
(Click Image to Enlarge)
Step 2:
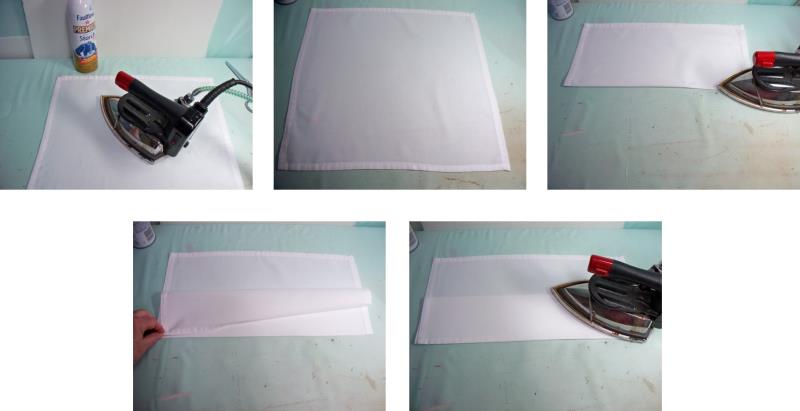
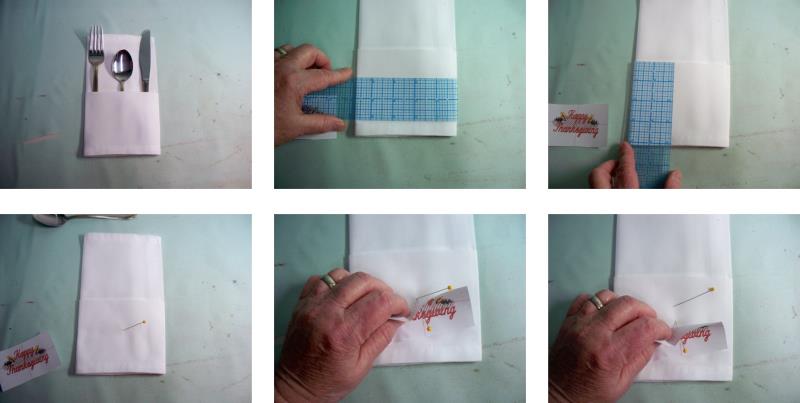
Starch the fabric well. For this napkin, it was starched three times on each side with the starch. It is important to pre-fold the napkin to be able to center the design. With the napkin right side up, Bring the bottom of the napkin to the top and press in a crease. Now take the section that was just brought up and bring it to the fold just created and press in the new fold.
(Click Image to Enlarge)
Step 3:
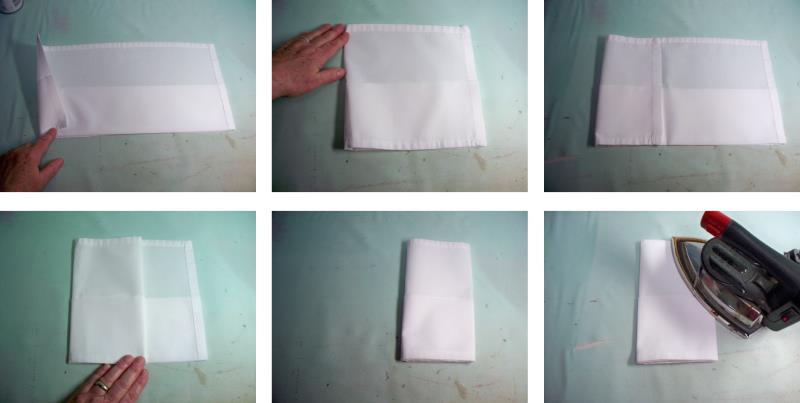
Carefully flip the napkin over. Fold the napkin in half width-wise and just finger press at the top and bottom. Bring the left edge of the nap short of the center finger-pressed marks about an inch. Holding all layers on the left side together, fold the left fold over again, and then once more; press.
(Click Image to Enlarge)
Step 4:
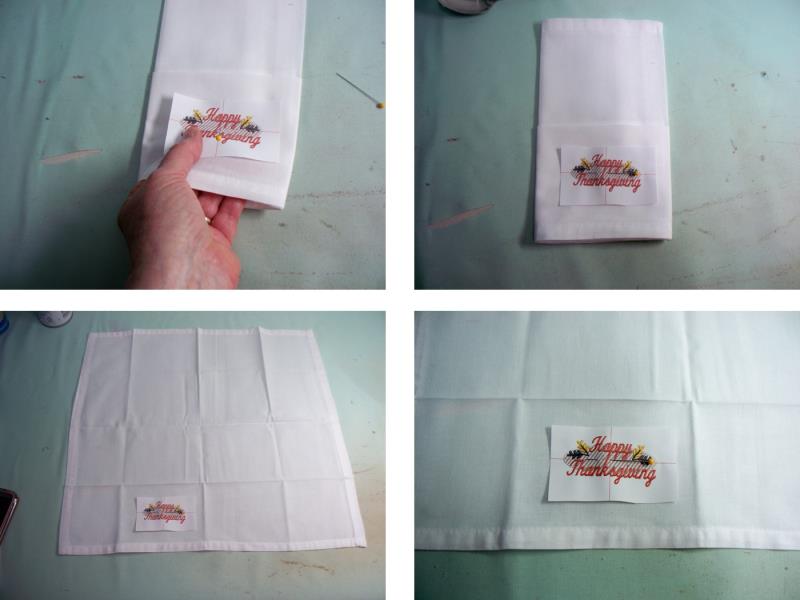
Test fit the silver service. If any changes are needed, make them now by repressing and folding. Measure the width and length of the lower half between the folds and napkin bottom. Place a pin at the center of this area. Cut out the paper template of the Happy Thanksgiving design. Place a pin in the crosshair of the design and align that pin with the one previously placed; remove the pin in the napkin.
(Click Image to Enlarge)
Step 5:
Place your hand under the top layer of the bottom portion of the napkin and pin the template in place. Open up the napkin and double check the placement.
(Click Image to Enlarge)
Step 6:
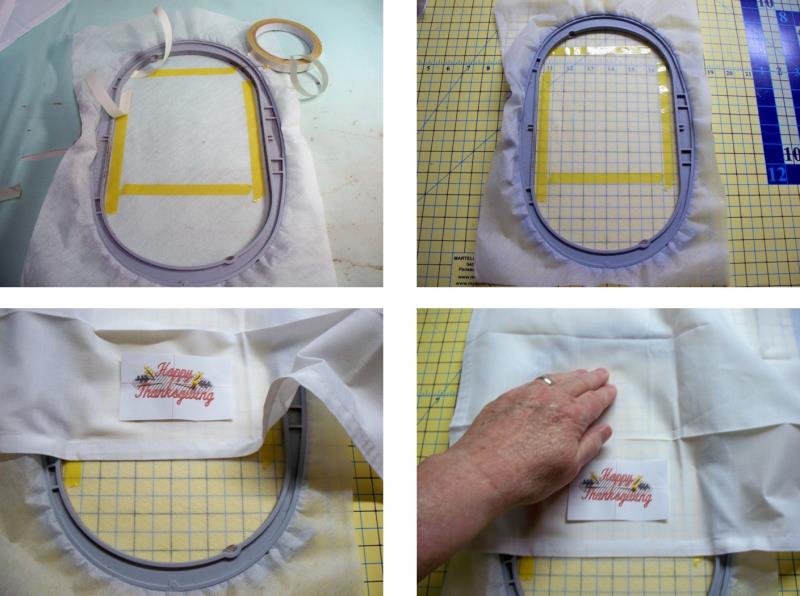
Hoop a layer of stabilizer. For this napkin the double-sided embroidery tape was used. Note: be sure to keep the area of the fabric to be stitched out of the taped area. Tear off lengths and place them along the sides and top of the napkin, and also a piece where the bottom edge of the napkin will be placed. Remove the protective paper. Align the hoop on a gridded surface like a cutting mat—this helps with aligning the napkin squarely in the hoop. Firmly press the bottom edge of the napkin into the bottom tape on the stabilizer. Smooth the fabric up to the top and then press the fabric to the tape at the top of the hoop.
(Click Image to Enlarge)
Step 7:
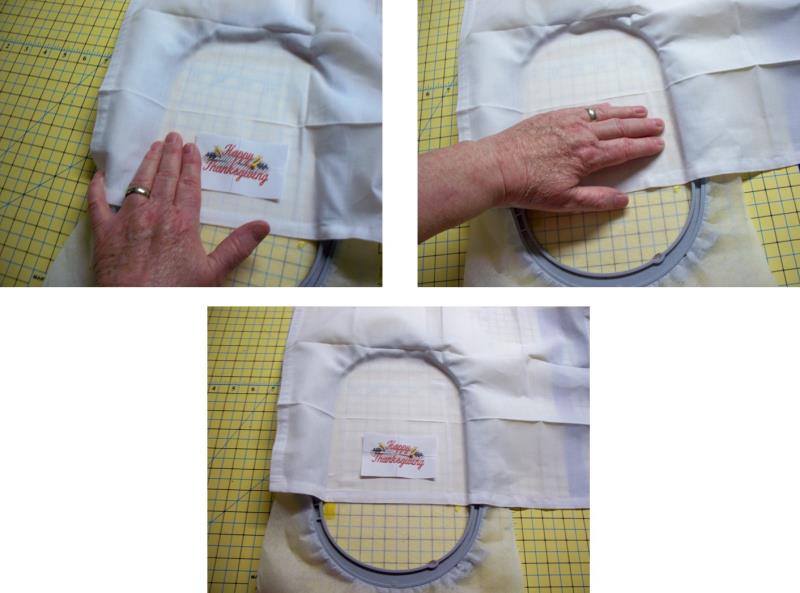
Smooth the fabric over and press it to the left side of the hoop and repeat for the fabric and tape on the right side.
(Click Image to Enlarge)
Step 8:
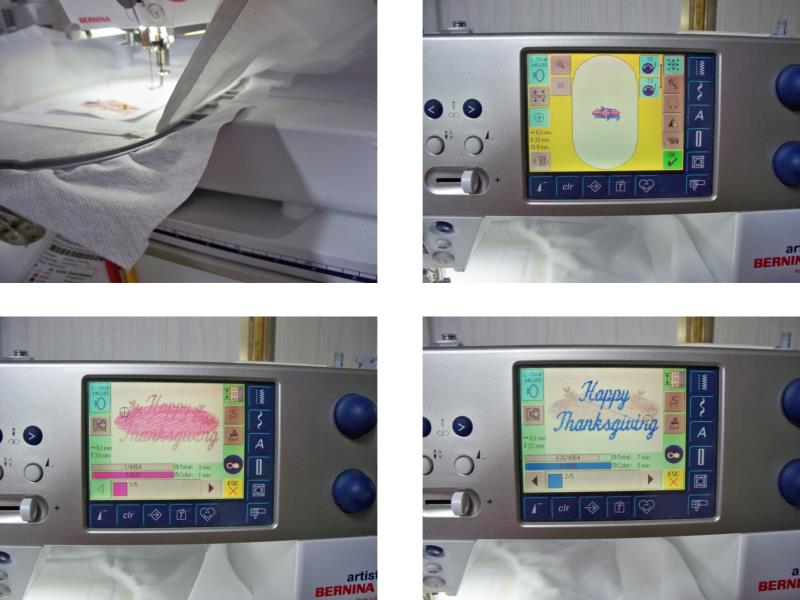
Place the hoop on the machine and check to make sure there is no fabric caught under the hoop. Load the design on the machine. For this project the first color is skipped and stitching begins at the second color.
(Click Image to Enlarge)
Step 9:
Stitch the napkin following the color sequence. For this design, it was decided to also omit the last color as well; you do what you wish.
(Click Image to Enlarge)
Step 10:
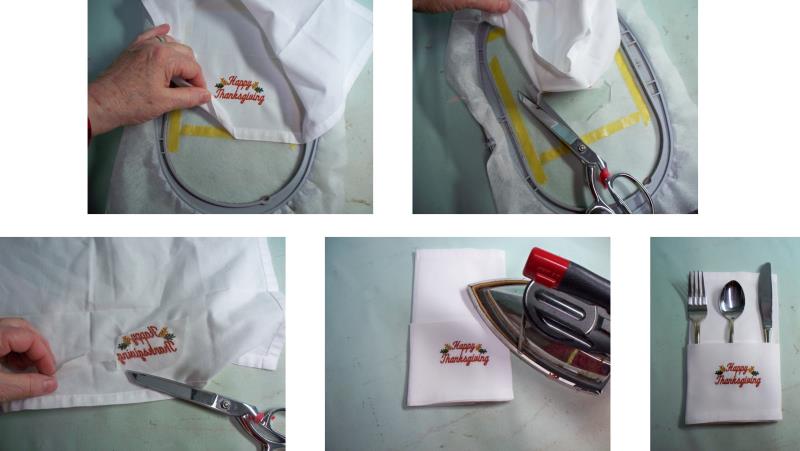
Very carefully lift the fabric off the tape and then cut the design away from the stabilizer. The excess stabilizer will wash away during the first laundering. Refold the napkin and press again; insert cutlery.
(Click Image to Enlarge)
Step 11:
This napkin caddy can be used at the table or for a buffet service. Repeat the steps of hooping and stitching to complete the number of napkins you need for your guests.
(Click Image to Enlarge)
Step 12:
Gather the supplies for the next napkin. Press the napkin well.
(Click Image to Enlarge)
Step 13:
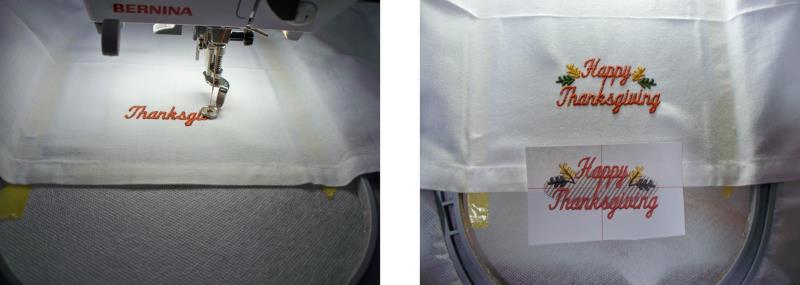
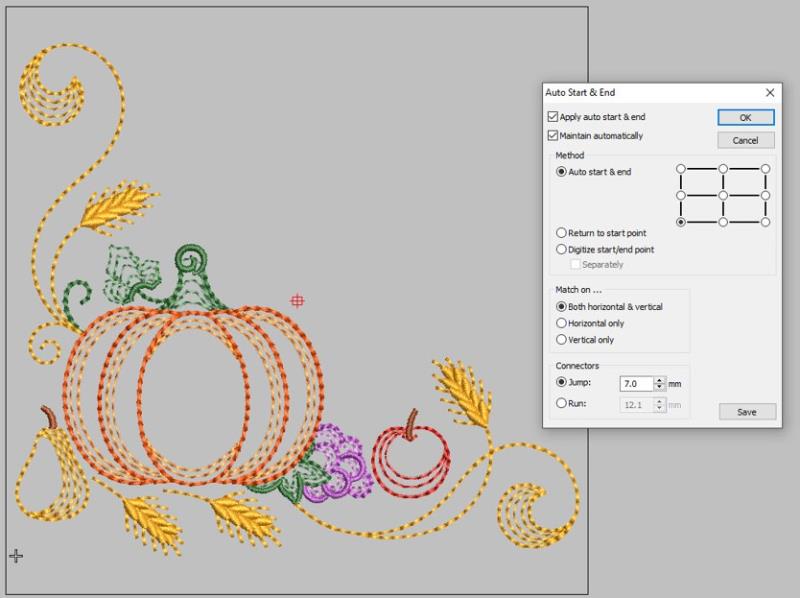
To accurately align the design in the corner, if you have software and can change the start—or alignment point—change it to the lower left corner. Your machine may or may not be able to align to this point. If it doesn’t, there is another way to align accurately to a corner of a napkin.
(Click Image to Enlarge)
Step 14:
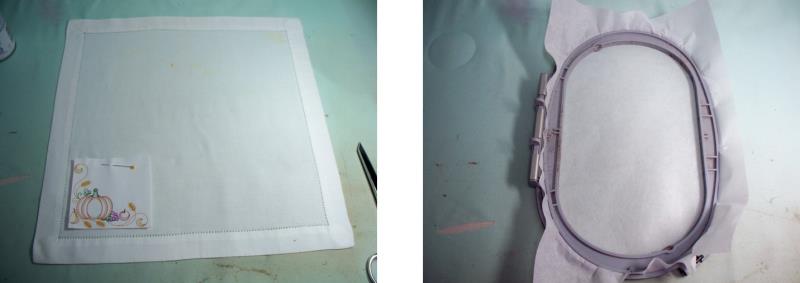
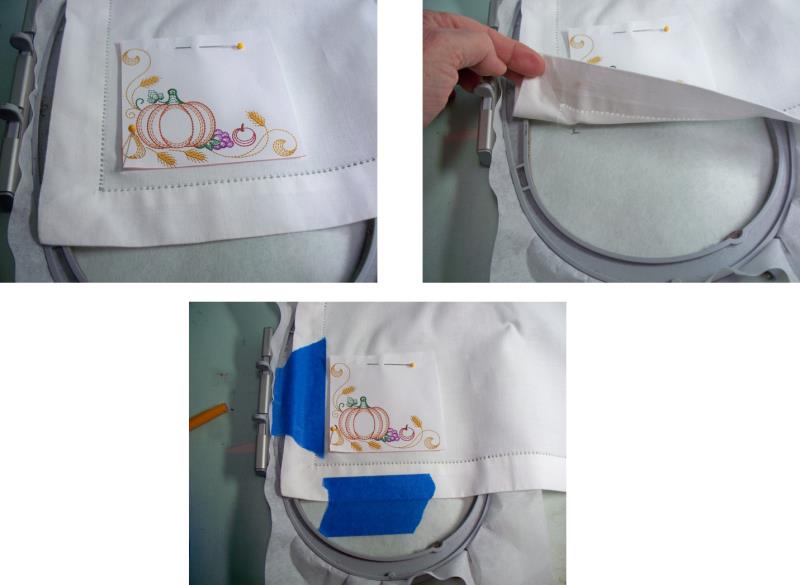
Cut out the paper template of the design and align it ¼”-1/2” away from the lower left border hem of the napkin. Hoop the stabilizer.
(Click Image to Enlarge)
Step 15:
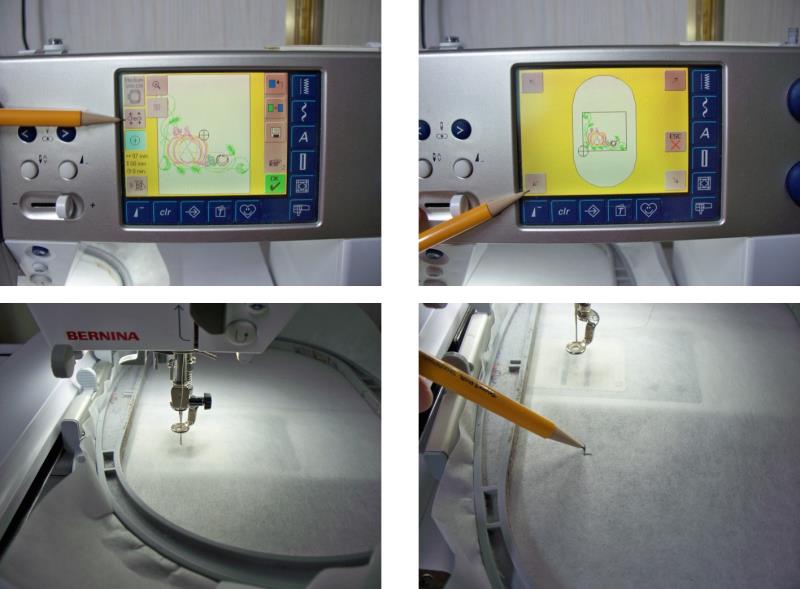
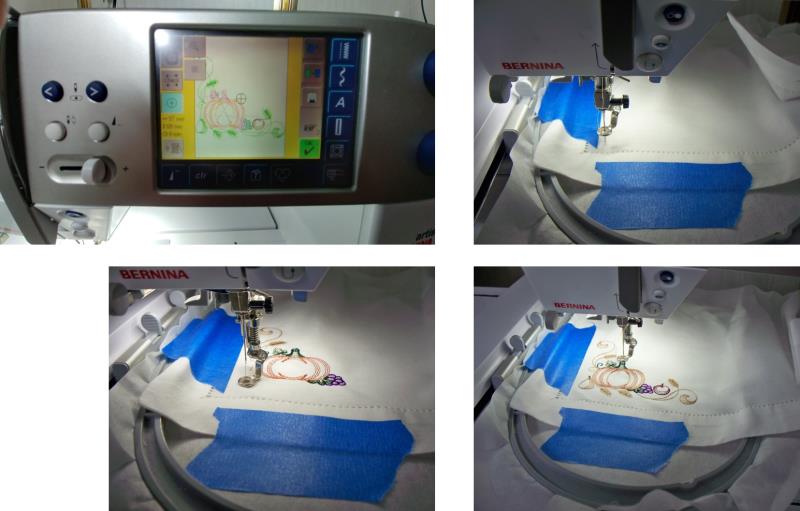
Load the design on the machine. This machine will not align to anything but the center but, a design can still accurately be aligned to a corner. Do a “check” on the design alignment by choosing the lower left corner. Lower the needle into the stabilizer and raise it again. Make a little corner mark on the stabilizer at the needle penetration.
(Click Image to Enlarge)
Step 16:
Place a pin at the lower left edge of the paper template that is aligned on the napkin. Align the tip of the pin with the pin hole on the stabilizer and then use painters tape (or double-sided embroidery tape) to secure the fabric to the stabilizer. Be sure to keep the tape out of the way of the area to be embroidered.
(Click Image to Enlarge)
Step 17:
Do a check again and make sure the lower left of the design where be where you want it. Stitch the design following the color sequence.
(Click Image to Enlarge)
Step 18:
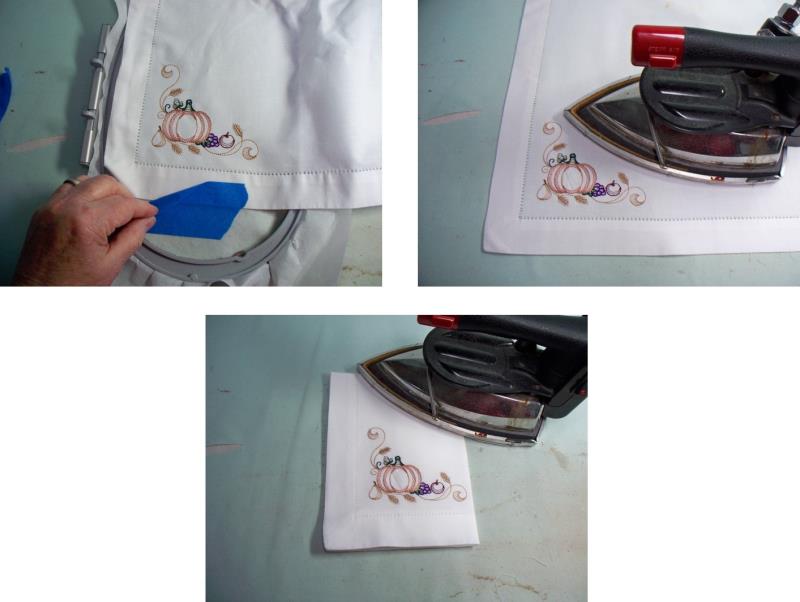
After the design has finished stitching, remove the tape, remove the napkin and stabilizer from the hoop and trim away the excess stabilizer; press the napkin, fold it, and then press again. Repeat the steps of hooping and stitching to complete the number of napkins you need for your guests.
(Click Image to Enlarge)
Step 19:
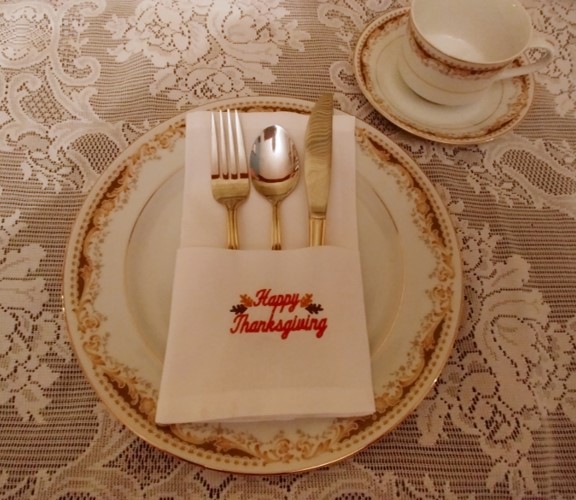
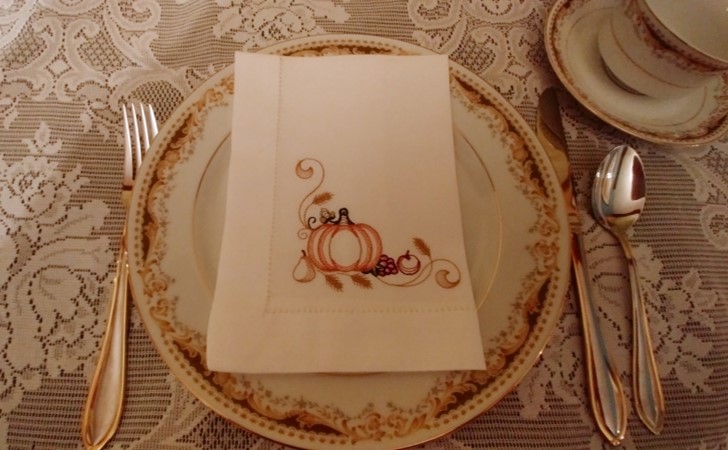
Such a simple yet beautiful napkin for to add color and elegance to a pretty Thanksgiving table.
Ramona Baird has been in the embroidery industry for over 23 years. She and her husband owned a commercial and retail embroidery store in Arizona for many years. She is an experienced digitizer having been mentored by award-winners Pat Williams and Lindee Goodall. Ramona is a contributor to “Creative Machine Embroidery” magazine having 5 covers to her credit. Ramona has worked for Wilcom America and served many years as Education Director for the American Sewing Guild. With a degree in fashion design, she is able to design and execute patterns which Pat Williams says are “out of the box” in creativity and application. Ramona likes to challenge the boundaries of embroidery and bring new and exciting designs, ideas, and projects to EmbroideryDesigns.com. She wants embroiderers of all levels to increase their skills and enjoyment in using their embroidery machine for gift-making and personal pleasure.