Border OptionsHugging border, circle, square, or rectangle — with a 3mm satin stitch.
Backing OptionsAvailable with iron-on, sew-on, or velcro backing.
Fast ShippingShipped quickly from the USA.
Free Online Tools
Powerful embroidery utilities that save time and prevent costly mistakes.
Stitch AssistantRECOMMENDED
Get the exact stabilizer, machine settings, needle, and thread color sequence for every embroidery design you purchase — based on that design's stitch density, dimensions, and color count.
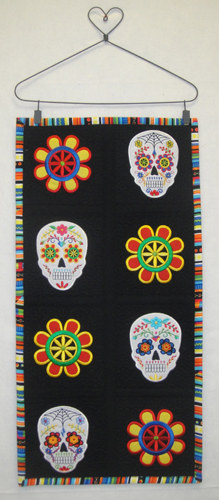
These ITH Sugar Skull and Flower Quilt Blocks make a great wall hanging, but can just as easily be a table runner. Stitch and trim or use your electronic cutting machine to cut the applique pieces.
I used water soluble thread to tack down the fabric blocks in this project as I always use water soluble thread as it is easily removed if any of it shows after the quilt blocks are completed. However, none of it showed and had to be removed in this project. Therefore I have listed it as optional as it looks as though you could just use black thread in the bobbin and top of your machine if desired. The instructions below will show you how to use the stitch and trim method and the method for applying appliques cut with your electronic cutting machine.
Step 1:
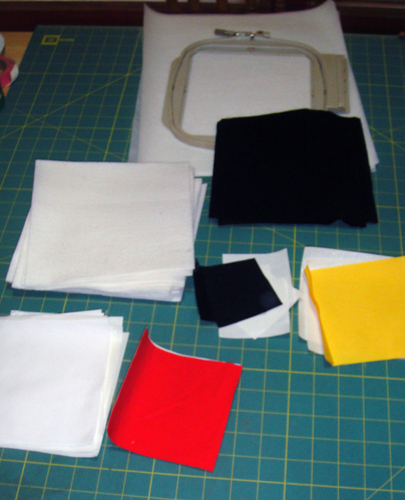
Cut your black fabric into 16 7.5” squares and cut 2 1.25” strips and 2 1.5” strips the width of the fabric, cut 4 3” squares of black for the flower centers. Cut 8 7.5” squares of the Battilizer®. Cut the Heat N Bond Lite to fit the 4 white 5” x 6” appliques, the 4 5” x 5” flower appliques and the 4 3” x 3” black appliques.
Step 2:
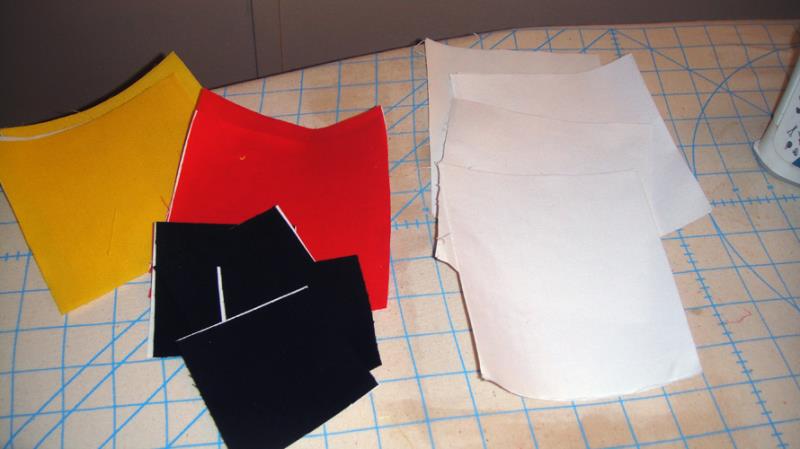
Spray all of the applique pieces 3 or 4 times with Magic Sizing and apply the Heat N Bond Lite to the back of each applique.
(Click Image to Enlarge)
Step 3:
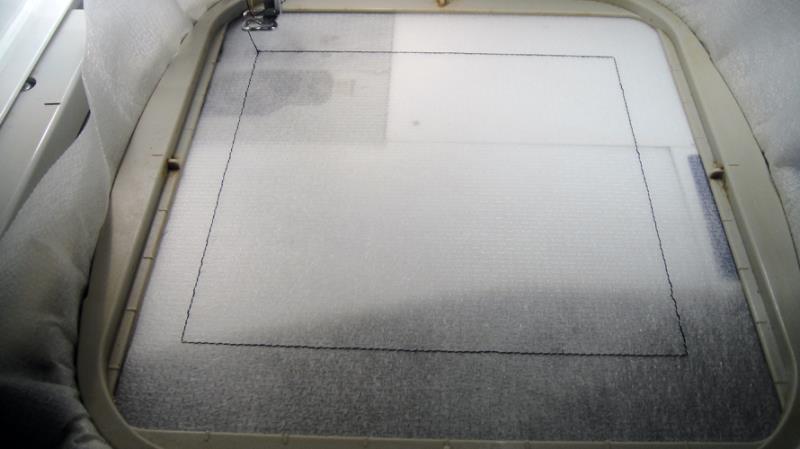
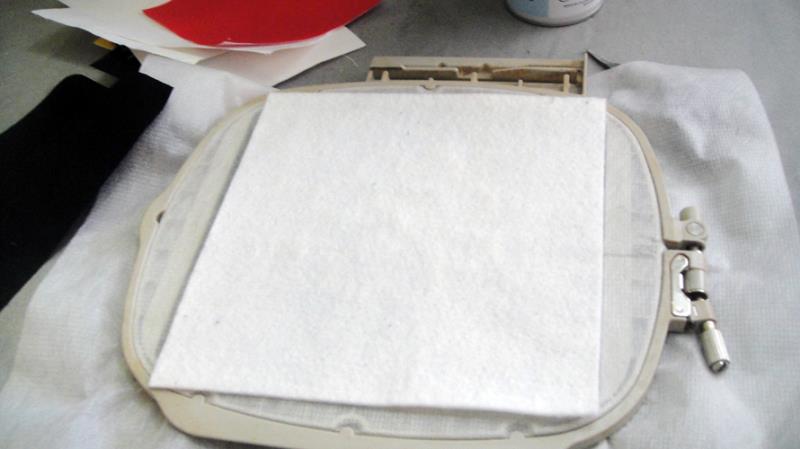
Tautly hoop no-show stabilizer in your hoop. Run color stop (CS) 1 in any neutral color to stitch the placement line.
(Click Image to Enlarge)
Step 4:
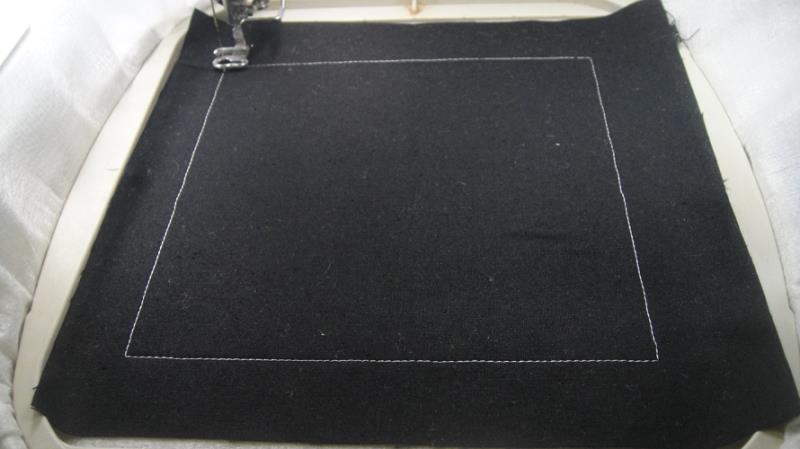
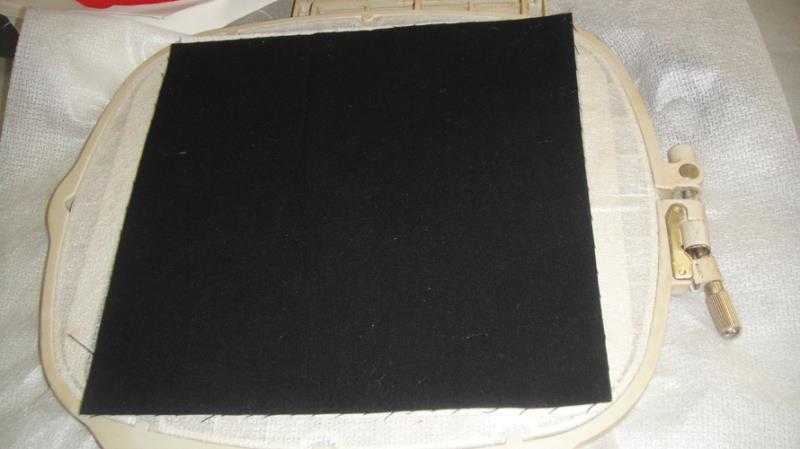
Spray adhesive on a 7.5” square of Black Kona® cloth and position over the placement line so that the fabric exceeds the placement line by ½” on all sides. Run CS 2 in water soluble thread to tack down the fabric.
(Click Image to Enlarge)
Step 5:
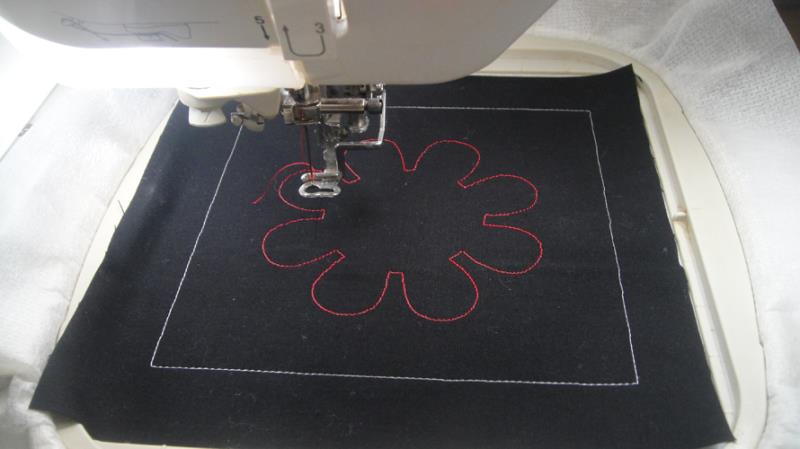
Run CS 3 in red or a color to match your flower fabric as a placement line for the applique.
(Click Image to Enlarge)
Step 6:
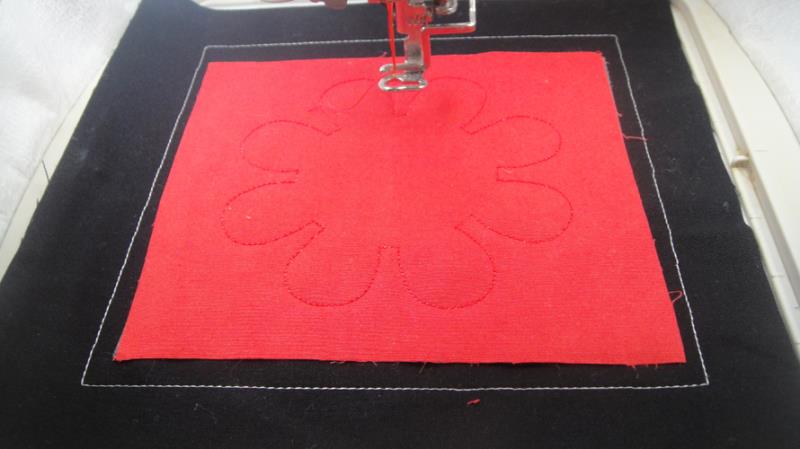
For the Stitch and Trim method: Remove the paper backing from the applique fabric; spray lightly with the spray adhesive and position over the placement line; run CS 4 in a thread to match the fabric to tack down the applique.
(Click Image to Enlarge)
Step 7:
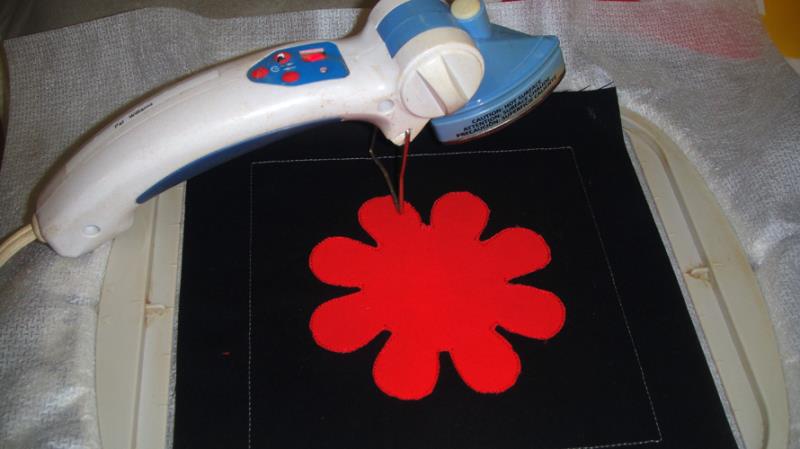
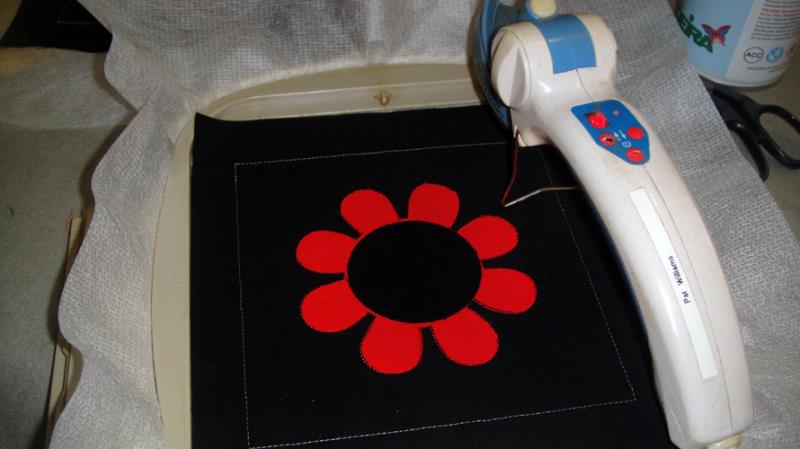
For the Stitch and Trim Method: remove the hoop from the machine, do not unhoop, place it on a flat surface; lift the excess fabric towards the tack down lines and trim the applique right next to the tack down lines; then press the applique with an applique iron.
(Click Image to Enlarge)
Step 8:
For the Stitch and Trim method: return the hoop to the machine and run CS 5 as a placement line for the center of the flower.
(Click Image to Enlarge)
Step 9:
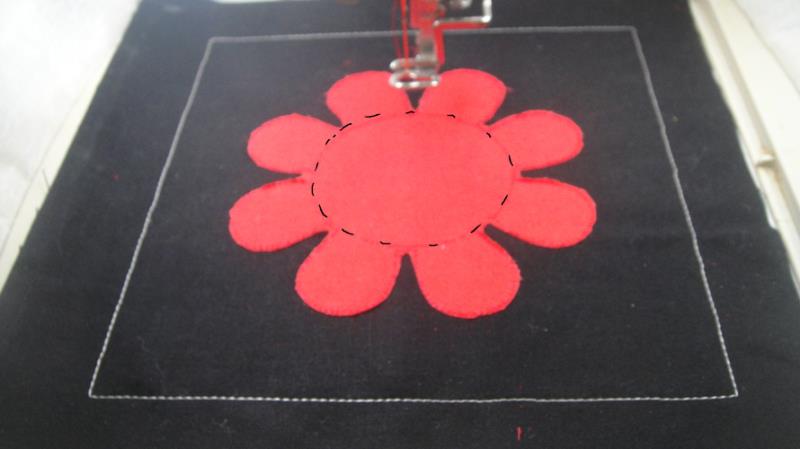
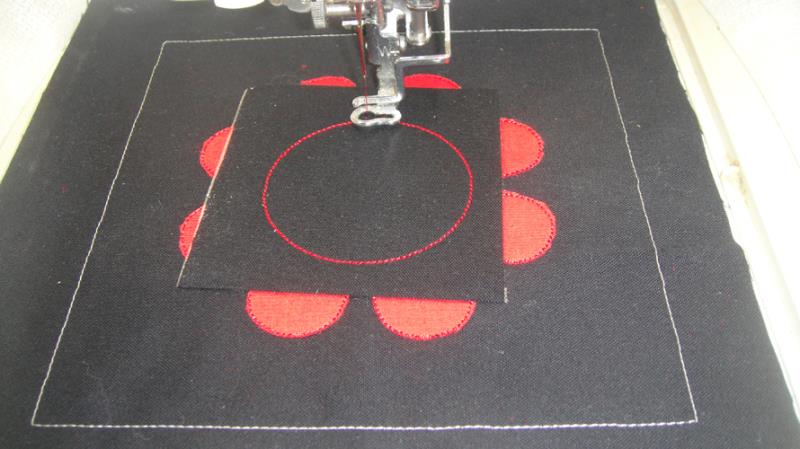
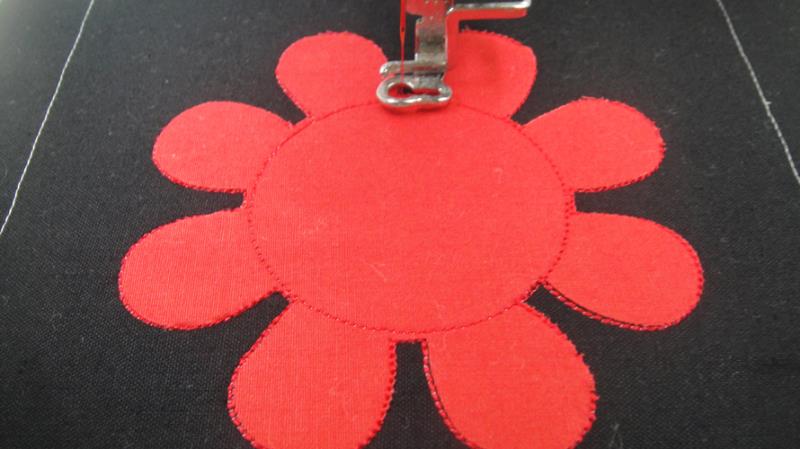
For the Stitch and Trim method: Remove the paper from the back of a 3” black square, spray with adhesive and position over the placement lines. Run CS 6 in black (red was used in the photo so you can see it), to tack down the black flower center.
(Click Image to Enlarge)
Step 10:
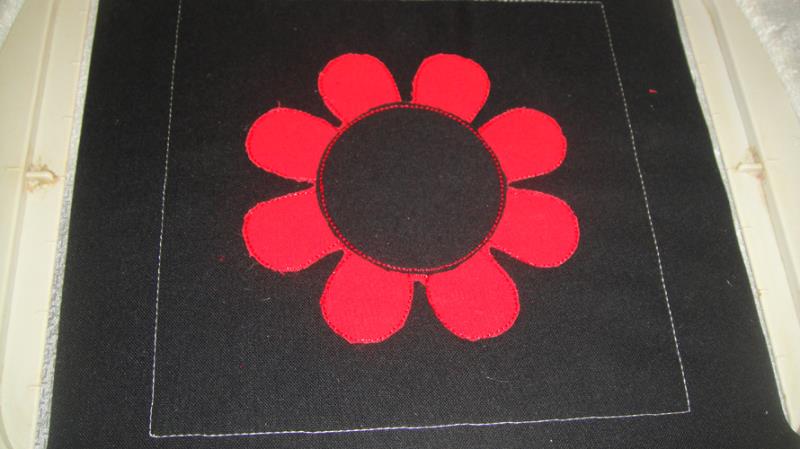
For the Stitch and Trim Method: Remove the hoop from the machine, do not unhoop, place the hoop on a flat surface, trim the applique right up next to the tack down lines and then press with the applique iron.
(Click Image to Enlarge)
Step 11:
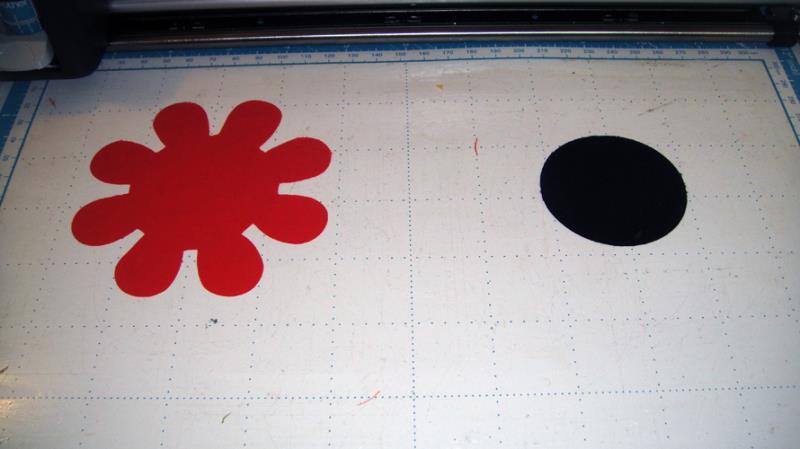
For Electronic Cutting users: These appliques were cut with the Scan N Cut. SVG and FCM files are loaded with the design files for those that can use them. When you purchase the designs the system automatically defaults to the types of embroidery files that you ordinarily use such as pes, dst, etc. To find the SVG and FCM files select “All File Types” and you will see these cutting files to download. For the Scan N Cut select the FCM files so that you can load different colors of fabrics on your mat at one time and be able to move the pieces over the appropriate fabrics. Settings may differ from machine to machine, but I always remove the paper backing from the Heat N Bond Lite, place the fabrics fabric side up and use a Speed of 4, Pressure 4, Blade 4” to cut the appliques. All of my mats have been cleaned and have had Zig 2 way glue applied to obtain the perfect stickiness. I recommend that you leave the flower pieces on the mat until you are ready to use them. The pieces are not symmetrical so you will want to note which petal you pull off of the mat first so that you can place that in the proper position when you put it onto the project.
(Click Image to Enlarge)
Step 12:
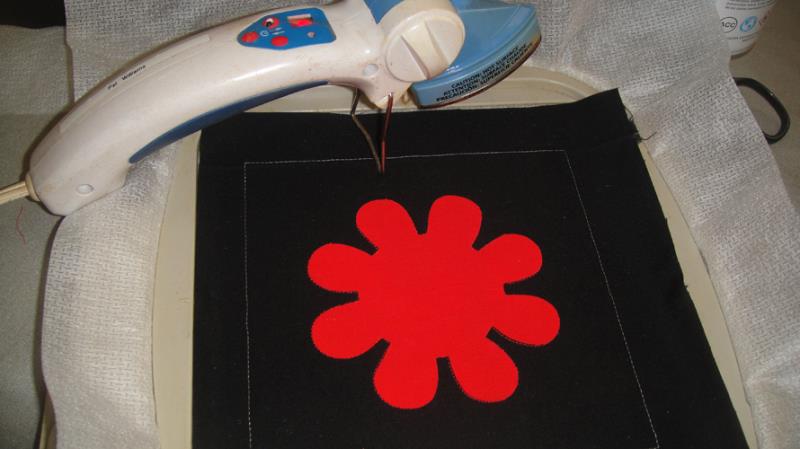
For Electronic Cutting users: Follow Steps 1 through 5 then remove your flower applique from the mat and position in place, you will not need to spray your applique with adhesive spray, but instead iron into position as you place it onto the block.
(Click Image to Enlarge)
Step 13:
For Electronic Cutting users: Technically you don’t need to stitch the tack down lines in CS 4, but I run them anyway as they will show you that your applique is perfectly in place. Then Run CS 5 as a placement line for the flower center.
(Click Image to Enlarge)
Step 14:
For Electronic Cutting users: Run CS 5 as a placement line. Iron the flower center into place, then run the tack down stitches with CS 6.
(Click Image to Enlarge)
Step 15:
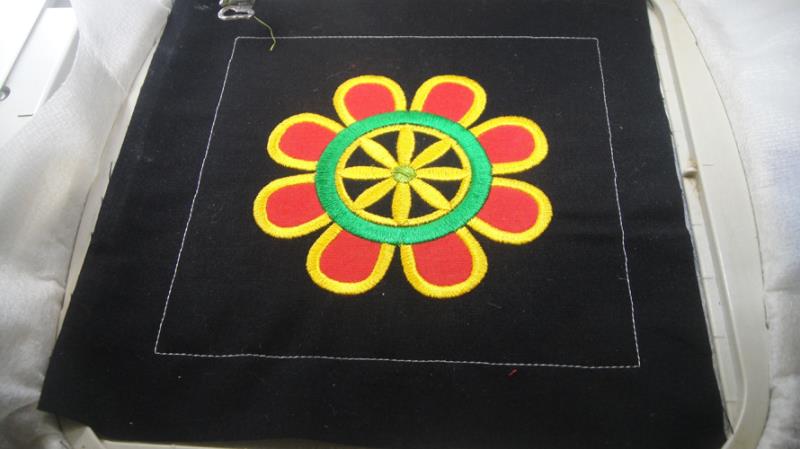
All the rest of the instructions are for all users. Follow the color chart though CS 9 or switch up the colors to embroider two different colored flowers, but stop after CS 9 runs.
(Click Image to Enlarge)
Step 16:
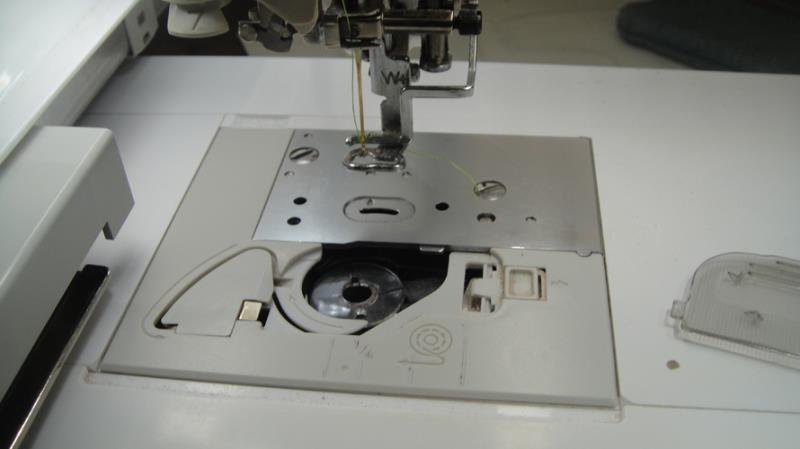
At this point remove the hoop from the machine, do not unhoop, insert a black bobbin into your machine.
(Click Image to Enlarge)
Step 17:
Spray adhesive on a square of Battilizer® and position over the embroidery on the back of the hoop.
(Click Image to Enlarge)
Step 18:
Spray adhesive on a black square of fabric and position over the Battilizer®.
(Click Image to Enlarge)
Step 19:
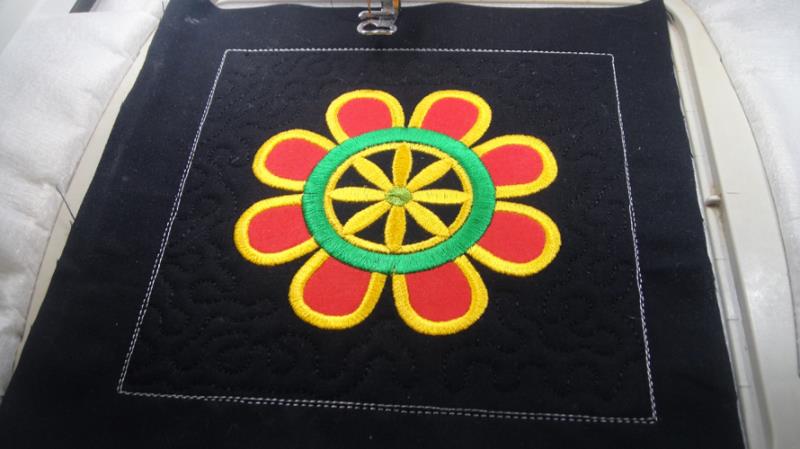
Return the hoop to the machine. Run CS 10 in water soluble thread to tack down the Battilizer® and back fabric. Run CS 11 in black to quilt the project.
(Click Image to Enlarge)
Step 20:
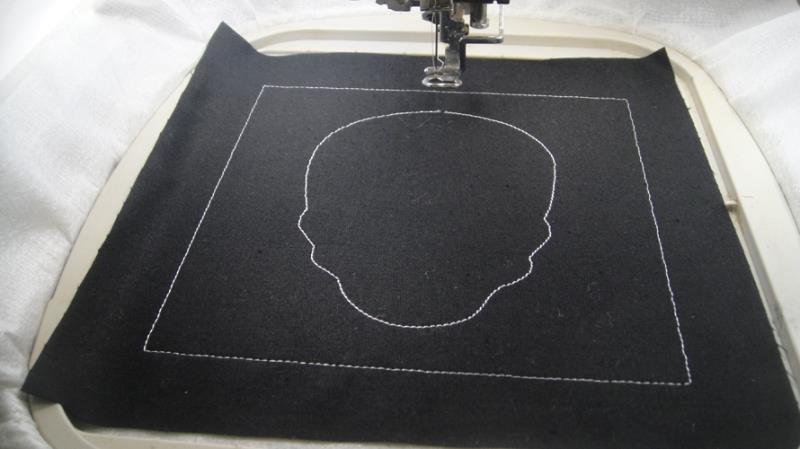
Follow Steps 3 and 4 to start your Sugar Skull Applique blocks. Run CS 3 as a placement line, in white for the skull placement line. Use CS 4 to tack down the skull applique following the techniques outlined above for using the stitch and trim or precut applique methods. Follow the color charts to stitch the embroidery on the Sugar Skulls leaving the last two CSs unstitched. Then follow Steps 16 through 19 to complete the blocks.
(Click Image to Enlarge)
Step 21:
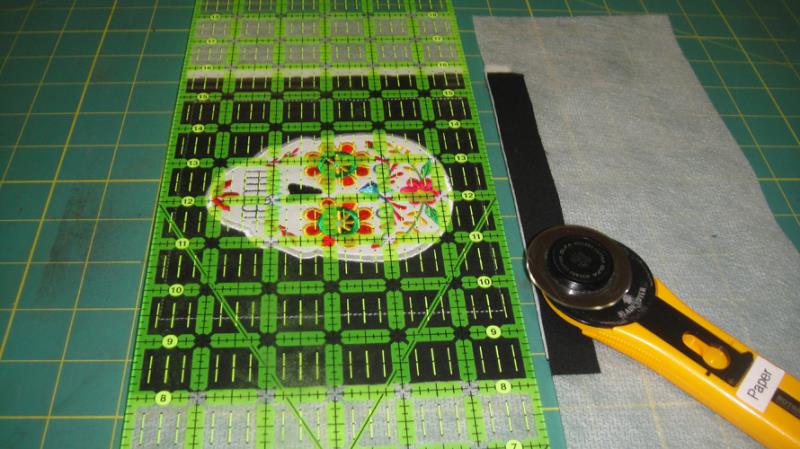
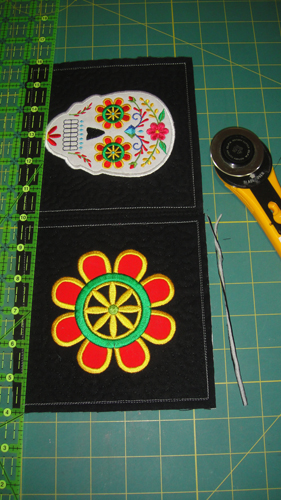
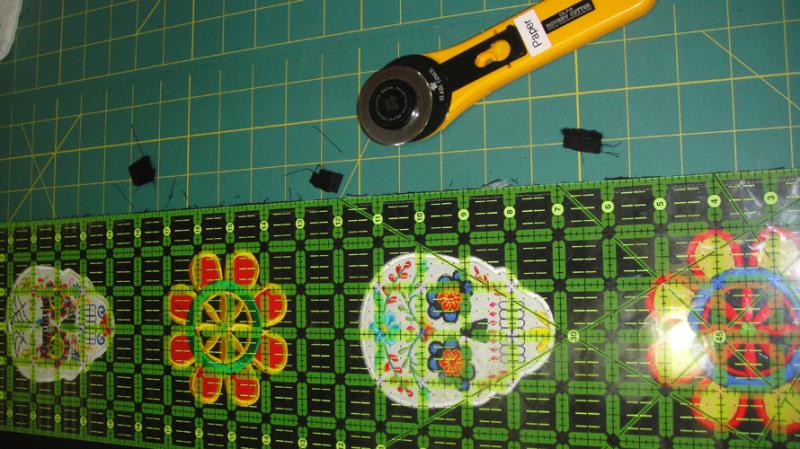
Lay the ¼” mark of a quilting ruler on the water soluble thread lines around each block. And trim the seam allowances to ¼”. Do to the pull of the embroidery the water soluble lines might not be exactly aligned, in these cases use the outside water soluble thread line to line up your ruler and trim.
(Click Image to Enlarge)
Step 22:
(Click Image to Enlarge)
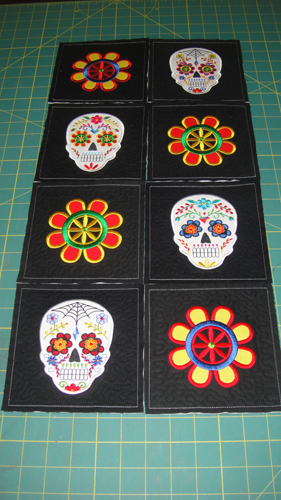
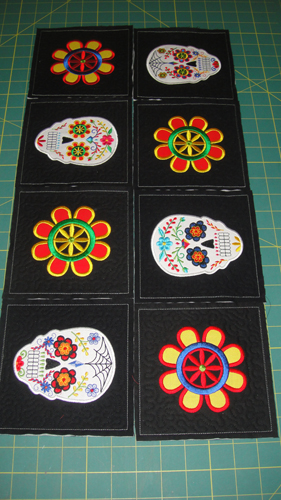
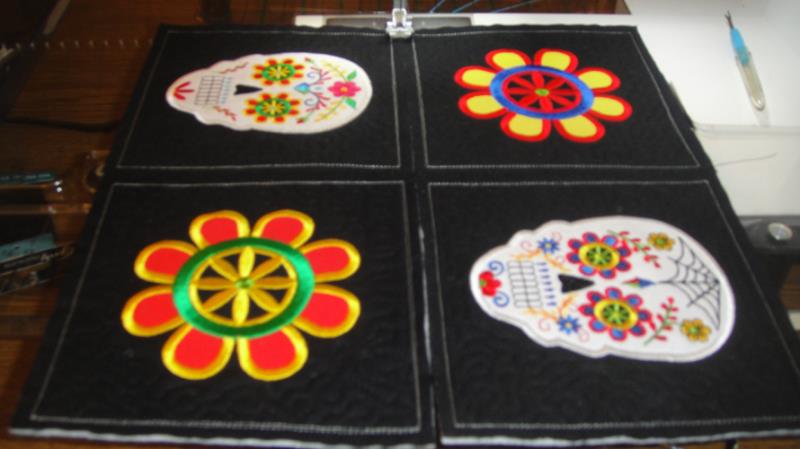
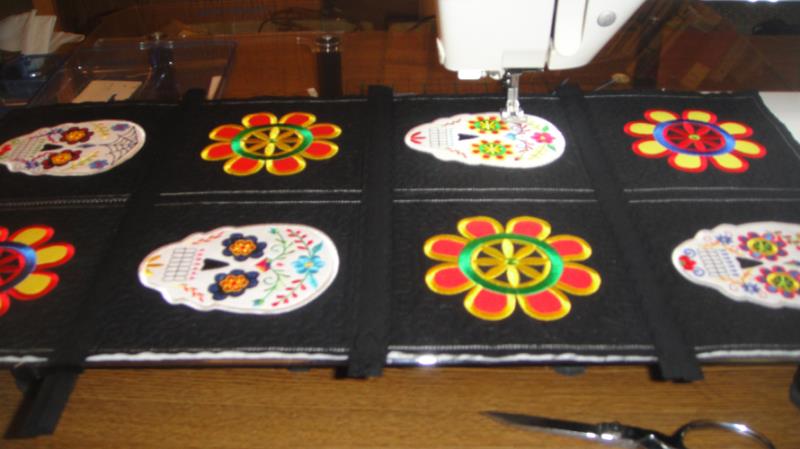
Lay out your blocks in the desired order. This photo shows the quilt blocks as I laid them out for a wall hanging.
Step 23:
(Click Image to Enlarge)
If you want this project to be a table runner, you may want to turn the Sugar Skull blocks so that the skulls are facing both sides of the table. The decision is up to you. The remaining instructions will apply regardless of the way you turn the skulls.
Step 24:
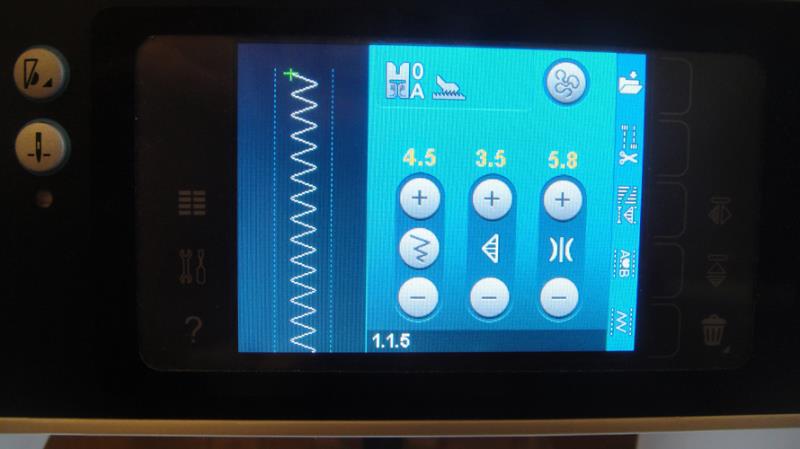
Load black thread in the top and bobbin of your sewing machine. Choose a wide zigzag stitch to join the blocks together.
(Click Image to Enlarge)
Step 25:
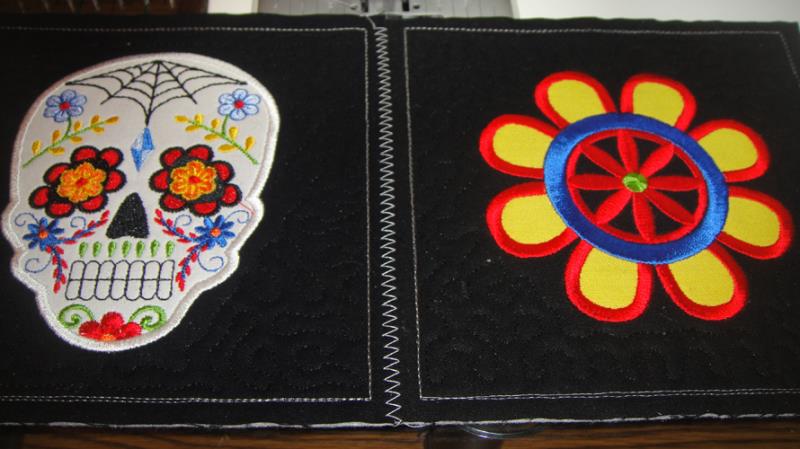
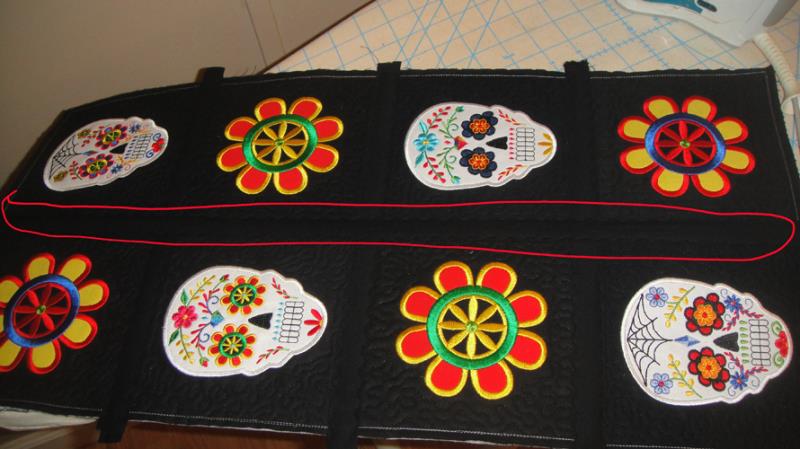
Starting with the bottom two blocks of your layout, butt the inner edges of the two blocks together and zigzag down the center. Do this in black thread, the photo is shown with white thread so you can see the stitching. Join each set of two blocks together.
(Click Image to Enlarge)
Step 26:
(Click Image to Enlarge)
If necessary trim the top and or bottom edges of the joined block sets so that all are straight.
Step 27:
Now butt the rows of the blocks next to each other and join with the zigzag stitch until all or your rows are joined together.
(Click Image to Enlarge)
Step 28:
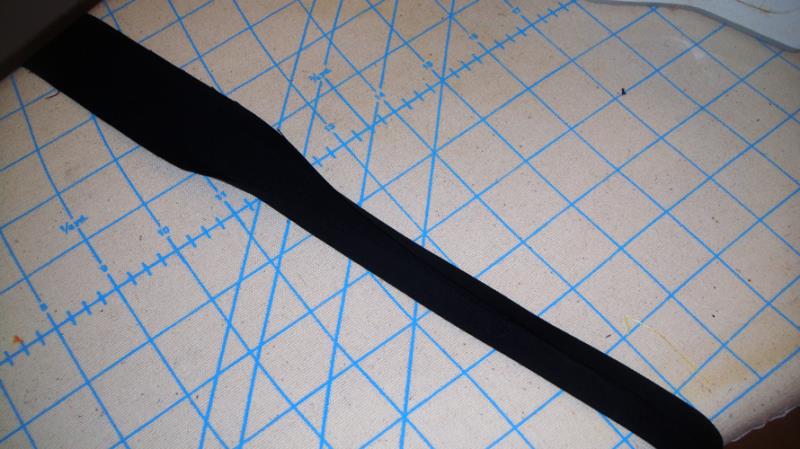
Take the black sashing strips you cut in Step 1 and fold the two lengthwise outer edges into the center and press. Keep the wider and narrow strips in separate piles, the narrow strips will be applied to the back of the blocks, the wider strips will be applied to the front of the blocks.
(Click Image to Enlarge)
Step 29:
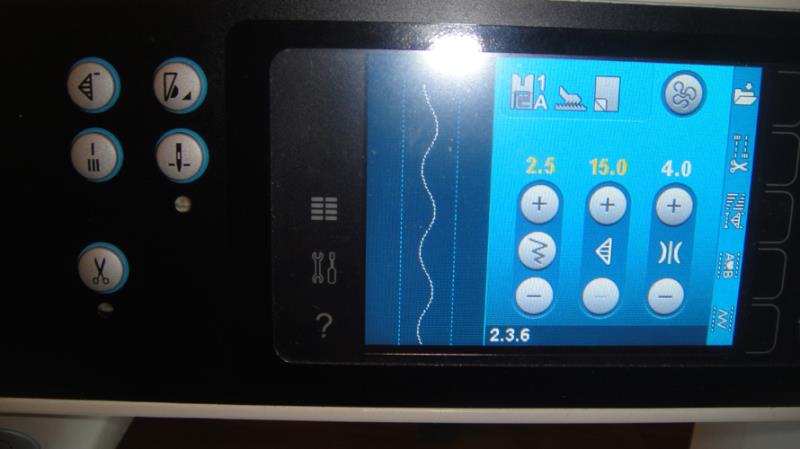
Choose a stitch to attach the sashing. I used this spread out serpentine stitch as it blends in well with the stippling in the quilting of the blocks, but if you don’t have a stitch like this a straight stitch can be used. I used black thread as the front and back of my blocks were all quilted in black. If you have chosen another color to quilt your blocks you may want to use invisible thread in the top and bobbin of your machine to have these sashing application stitches blend into your quilt.
(Click Image to Enlarge)
Step 30:
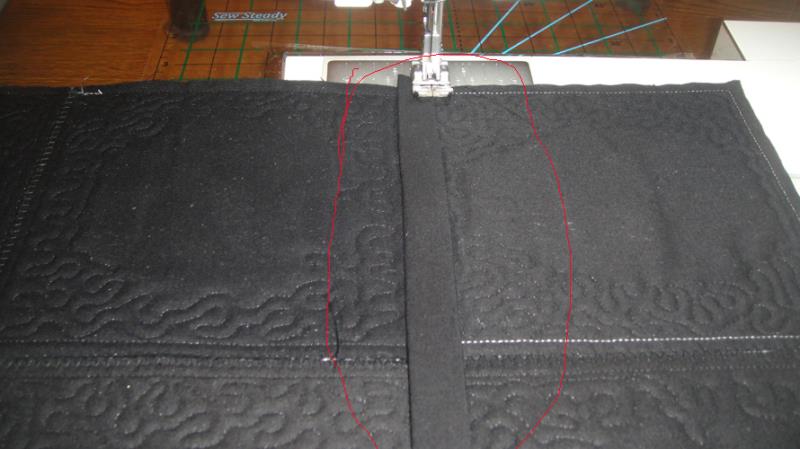
Lay the narrow sashing strip right side up on the horizontal rows of the back of the quilt. Stitch down both sides of the sashing strip to cover the zig zag seams. Leave about ½” of excess sashing on both sides of the quilt. Repeat for all of the horizontal rows of the quilt back.
(Click Image to Enlarge)
Step 31:
Turn the quilt over and using the wider sashing strips cover all of the horizontal seams on the front of the wall hanging in the same manner.
(Click Image to Enlarge)
Step 32:
Return to the back of the quilt. Stitch the narrow sashing over the vertical seam in the same manner.
(Click Image to Enlarge)
Step 33:
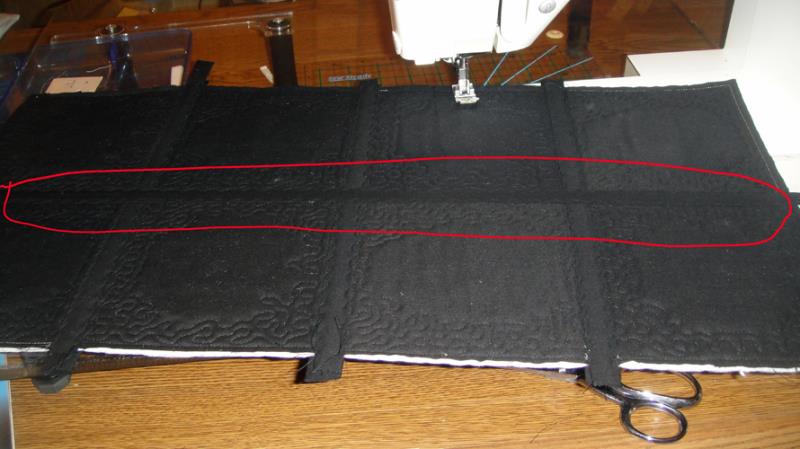
Turn over to the front of the quilt, stitch the remaining wider sashing strip down the full center of the quilt in the same manner.
(Click Image to Enlarge)
Step 34:
Trim the excess sashing and square up your blocks as necessary.
(Click Image to Enlarge)
Step 35:
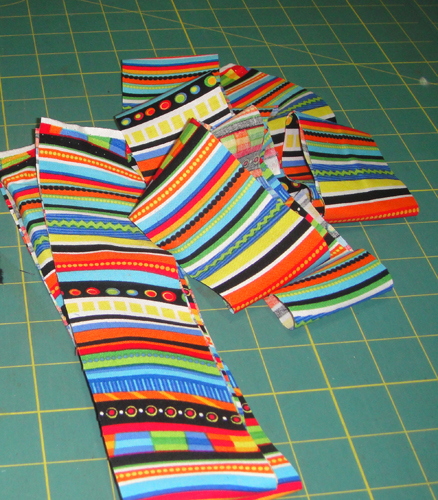
Sometimes you just have to pay attention to what your quilts are saying to you. I fully intended to bind this quilt with red fabric. As I was walking into the sewing room to apply the sashing to the quilt, this fabric was poking up out of one of my many drawers of fabrics. It seemed it was saying “Use me, Pick me!” for the binding. Though this quilt would have looked great with red or even gold binding, I was really happy with the results with this stripped binding. Cut 3 strips of binding, I used 2 ¼” binding for this project and bind as desired.
Step 36:
(Click Image to Enlarge)
You can attach a hanging sleeve ½” below the top edged of the quilt to attach to a different type of quilt hanger or attach it with clips to a hanger like this from Ackfeld Manufacturing. Congratulations, your Sugar Skull Wall Hanging is complete.
Award winning Digitizer, Embroidery Educator, Author and a Consultant to the Industry, Pat Williams has 30 years of experience in the embroidery industry. Pat has won multiple awards for her digitizing expertise including the 2007 Impressions Awards Grand Championship, Best of Show as well as the 1st and 2nd Place Awards. Pat’s love of digitizing has afforded her the opportunity to write numerous articles for Impressions magazine in the United States and Images Magazine in Europe. In 2001 Pat was named “Embroidery Educator of the Year.” For many years Pat taught digitizing seminars at the ISS Shows in Long Beach, CA and for Compucon software. She now resides in Tucson, AZ.