Border OptionsHugging border, circle, square, or rectangle — with a 3mm satin stitch.
Backing OptionsAvailable with iron-on, sew-on, or velcro backing.
Fast ShippingShipped quickly from the USA.
Free Online Tools
Powerful embroidery utilities that save time and prevent costly mistakes.
Stitch AssistantRECOMMENDED
Get the exact stabilizer, machine settings, needle, and thread color sequence for every embroidery design you purchase — based on that design's stitch density, dimensions, and color count.
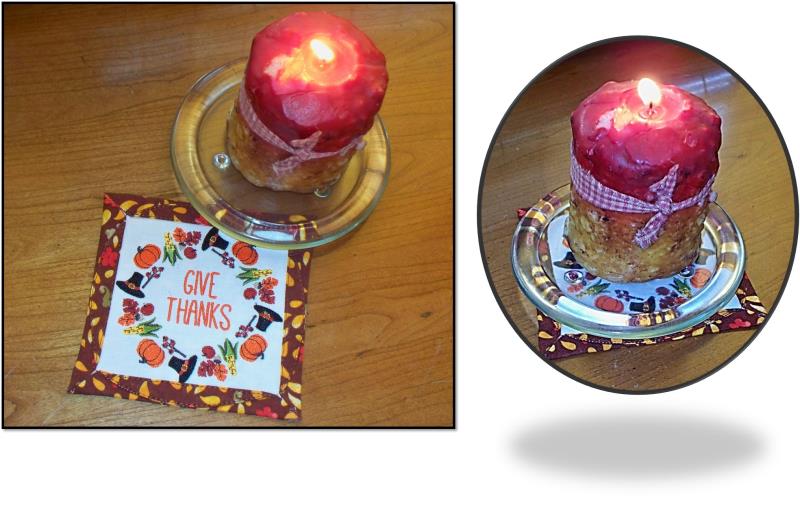
Enhance your Thanksgiving table with this elegant candle mat, featuring a festive design perfect for the holiday. Ideal for adding a warm touch to your decor. Step-by-step instructions are included.
This candle mat uses a “cathedral window” technique and a specialty ruler (optional) to create a simple, yet stunning mat that can also be used as a mug rug for holiday entertaining.
Step 1:
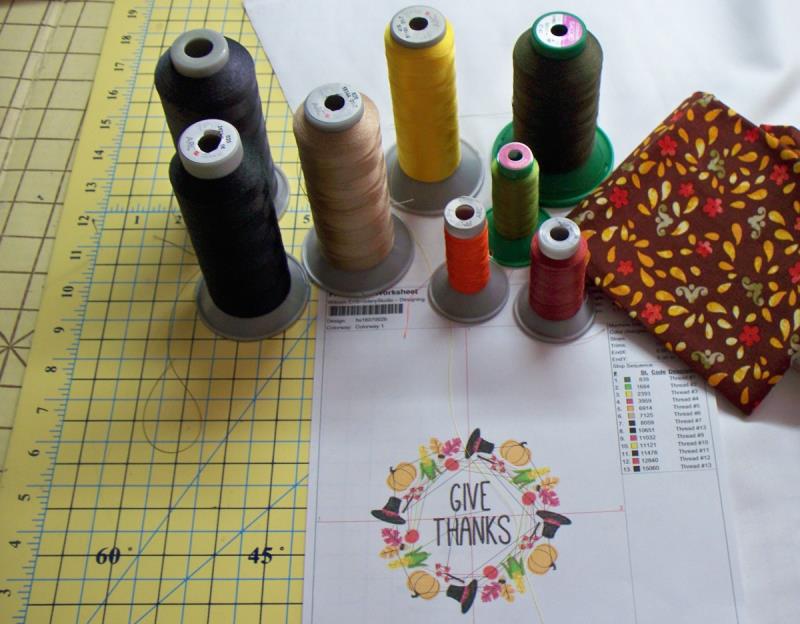
Gather the materials and read through the instructions before beginning. Print out a paper template of the design and color sequence. Coordinate the embroidery threads to the print fabric chosen.
(Click Image to Enlarge)
Step 2:
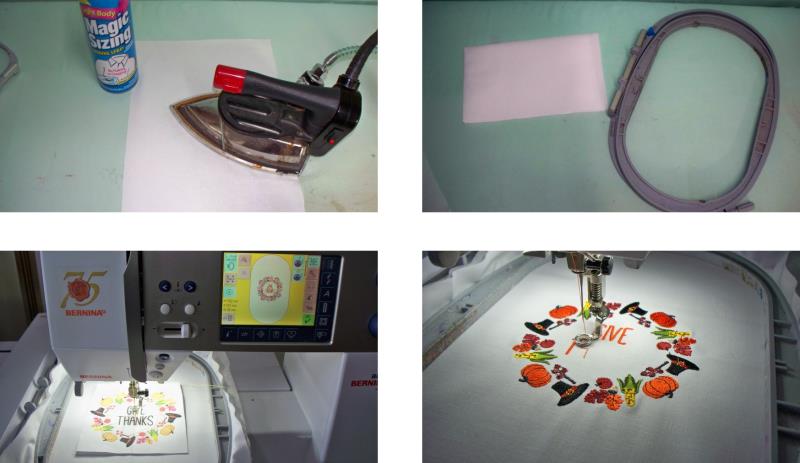
Press all the fabrics well. Quarter fold the white fabric and lightly crease to find the center. Hoop the fabric with a layer of poly mesh stabilizer. Load the embroidery design on the machine and place the hoop on the machine, centering the design in the hoop. Stitch the design following the color sequence.
(Click Image to Enlarge)
Step 3:
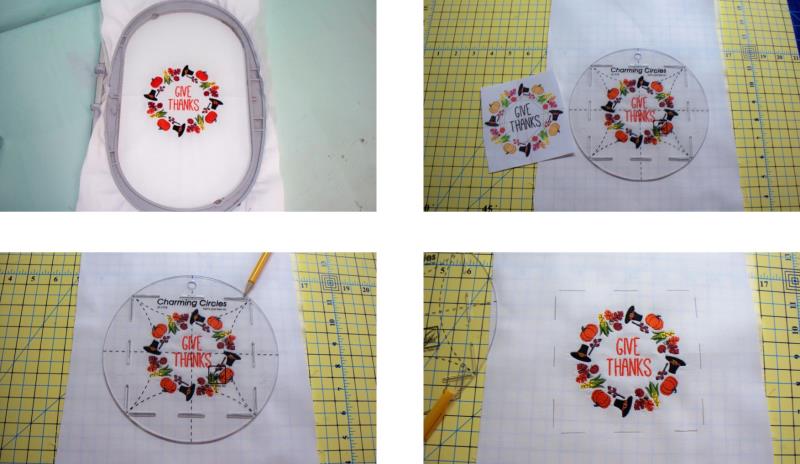
Remove the completed embroidery from the hoop but do not trim the stabilizer - it remains behind the fabric; press out the crease marks. Use the paper template as a guide for centering the Charming Circles ruler over the design. Use a pencil to draw the square lines on the fabric through the slits on the ruler. Since the ruler is optional, an option is to cut the embroidered fabric scant 5” square, centering the embroidery design.
(Click Image to Enlarge)
Step 4:
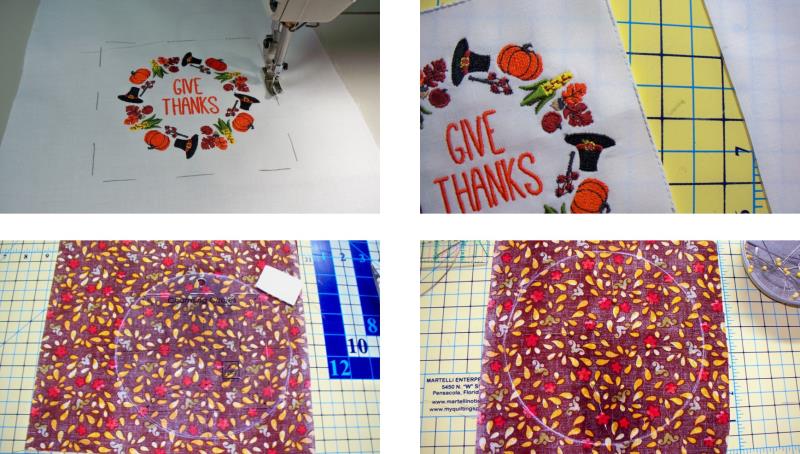
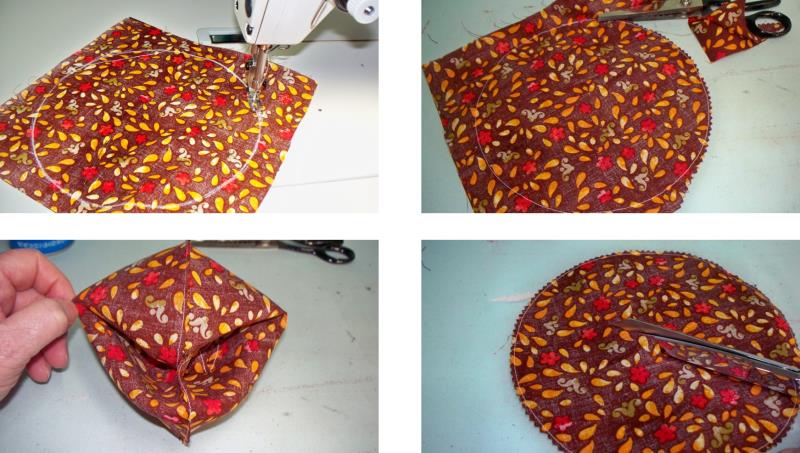
Stitch the fabric and stabilizer together just inside the drawn line; trim away the excess fabric close to the stitching line. Place the two pieces of print fabric right sides together and draw a circle on the wrong side of the top piece of fabric using the ruler (or use a compass or plate to draw a 7” circle and add a ¼” seam allowance).
(Click Image to Enlarge)
Step 5:
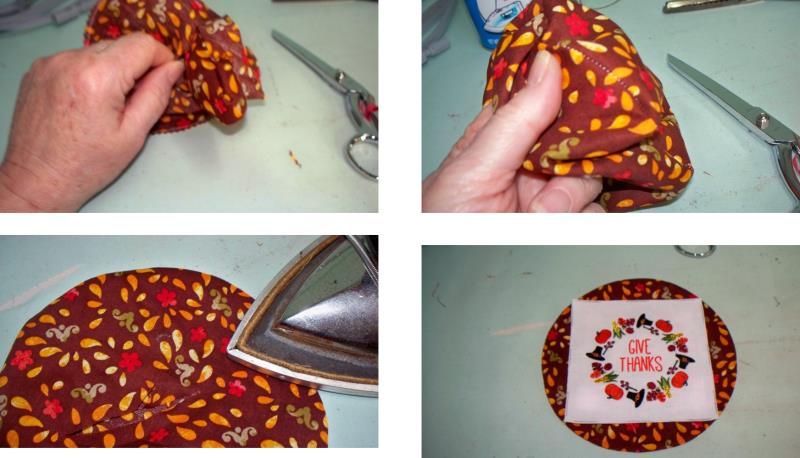
Sew the two pieces of fabric together along the drawn line using a short stitch length (1.5-2.0mm) using the sewing thread that coordinates with the fabric. Use pinking shears to trim away the excess fabric leaving ¼” seam allowance. Separate the two layers of fabric and create a snip in one of them across the bias of the fabric.
(Click Image to Enlarge)
Step 6:
Turn the circle right side out through the slit and use your fingers to go all around the circle and push along the seam line to make it smooth; press around the circle seam line. Lay the print fabric with the slit right side up on a flat surface and then place the embroidered square on top of the circle, centering it.
(Click Image to Enlarge)
Step 7:
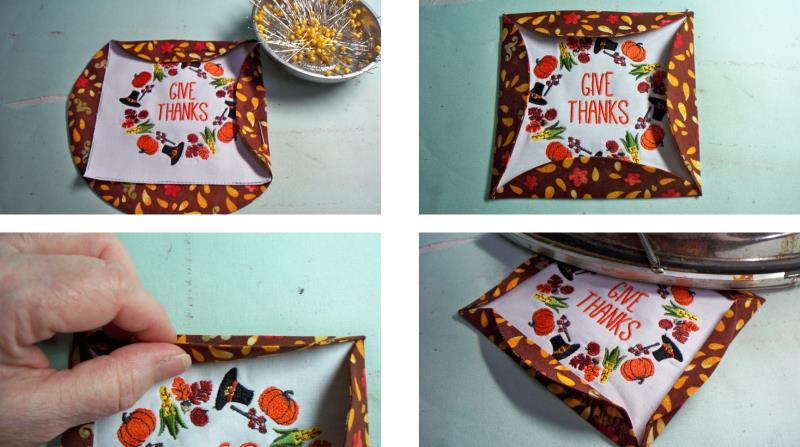
Turn the curved edges over the square and press well. Place pins in the four flaps to temporarily hold them in place (note: if the square is just a bit too large, just trim it so it will fit nicely within the circle). Turn the curved edges of each of the four sections back and press the top of the curve to the top of the straight edge and press again.
(Click Image to Enlarge)
Step 8:
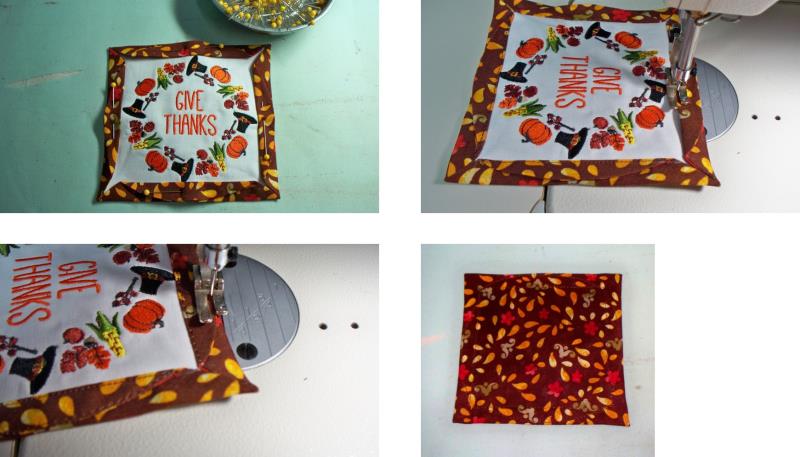
Pin to temporarily hold the sections in place. Wind a bobbin with the embroidery thread and thread the machine with the embroidery thread that matches the print fabric. Edge stitch along all four inner straight edges first and then edge stitch along the curved edges. From the back the thread blends into the fabric.
(Click Image to Enlarge)
Step 9:
Congratulations on creating a lovely candle mat for your Thanksgiving holiday.
Ramona Baird has been in the embroidery industry for over 23 years. She and her husband owned a commercial and retail embroidery store in Arizona for many years. She is an experienced digitizer having been mentored by award-winners Pat Williams and Lindee Goodall. Ramona is a contributor to “Creative Machine Embroidery” magazine having 5 covers to her credit. Ramona has worked for Wilcom America and served many years as Education Director for the American Sewing Guild. With a degree in fashion design, she is able to design and execute patterns which Pat Williams says are “out of the box” in creativity and application. Ramona likes to challenge the boundaries of embroidery and bring new and exciting designs, ideas, and projects to EmbroideryDesigns.com. She wants embroiderers of all levels to increase their skills and enjoyment in using their embroidery machine for gift-making and personal pleasure.