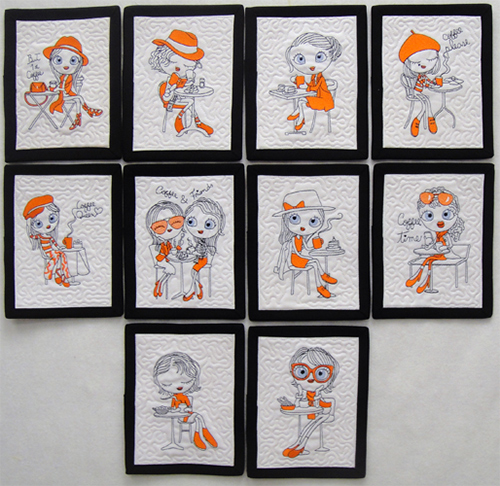
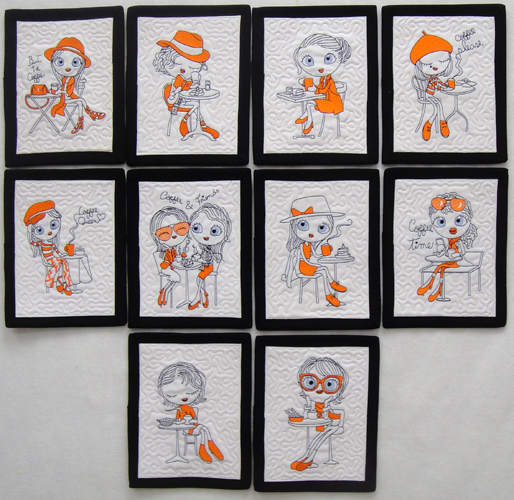
ITH Café Chic Mug Rug Set

ITH Café Chic Mug Rug Set Embroidery Project

By   Pat Williams   on   June 09, 2025
  • SKILL LEVELSome Experience
  • TIME REQUIRED00:50
  • FINISHED SIZE5.88 x 7.68 inches
Description

Create a charming set of coffee-themed mug rugs with this in-the-hoop project. Each mat features a delightful café scene, perfect for adding a touch of elegance to your coffee break. Ideal for gifts or craft fairs. Step-by-step instructions are included.

Step of

Materials

Project Preview Video

Materials
  • For 1 mug mat:
  • 9” x 7” rectangle of white Kona® cloth for the face of the mat
  • 9” x 7” orange dot cotton fabric for the back of the mat
  • 9” x 7” Battilizer® or low loft batting
  • 2 ½” x 42” strip of black Kona® cloth for binding
  • No show stabilizer to fit the hoop
  • Spray adhesive
  • Water soluble thread
  • Black thread and bobbin for your sewing machine
  • Craft Clips

  • Designs used in this project
  • https://www.embroiderydesigns.com/productdetails/pat-williams/designpack/1/dpcgmmdp
  • https://www.embroiderydesigns.com/productdetails/pat-williams/designs/1/cgmm10
  • https://www.embroiderydesigns.com/productdetails/pat-williams/designs/1/cgmm09
  • https://www.embroiderydesigns.com/productdetails/pat-williams/designs/1/cgmm08
  • https://www.embroiderydesigns.com/productdetails/pat-williams/designs/1/cgmm07
  • https://www.embroiderydesigns.com/productdetails/pat-williams/designs/1/cgmm06
  • https://www.embroiderydesigns.com/productdetails/pat-williams/designs/1/cgmm05
  • https://www.embroiderydesigns.com/productdetails/pat-williams/designs/1/cgmm04
  • https://www.embroiderydesigns.com/productdetails/pat-williams/designs/1/cgmm03
  • https://www.embroiderydesigns.com/productdetails/pat-williams/designs/1/cgmm02
  • https://www.embroiderydesigns.com/productdetails/pat-williams/designs/1/cgmm01

  • Final Product: What You Will Create

    Preface:
    I usually give the dimensions for the binding strips to be cut at 2 ¼”, but in this project the binding strips are cut at 2 ½”. This is to allow extra binding to cover the wider seam allowance left on the blocks when they are cut to size. This is to maximize the size of mug mat made in a 5” x 7” hoop.


    Step 1:
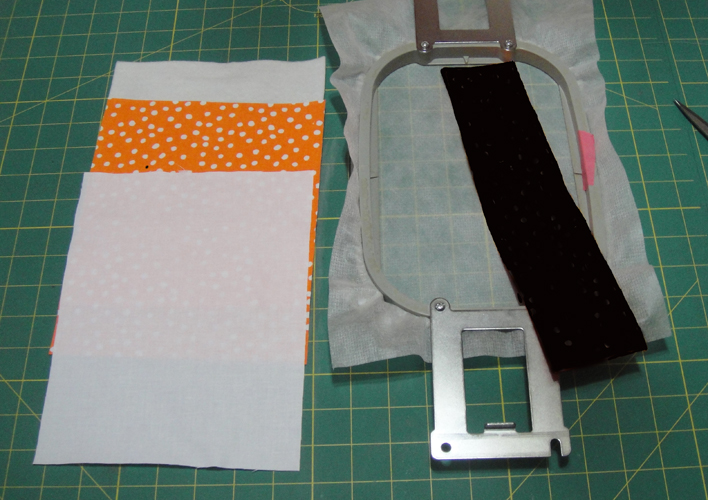
    Cut the fabrics per the materials list above. Tautly hoop the stabilizer in the embroidery hoop.

    (Click Image to Enlarge)


    Step 2:
    (Click Image to Enlarge)
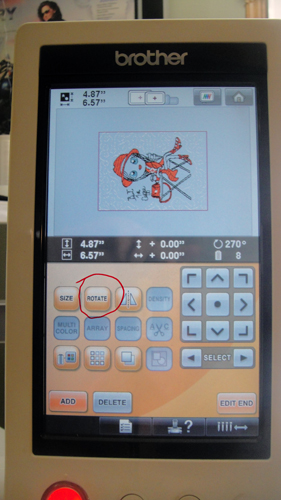
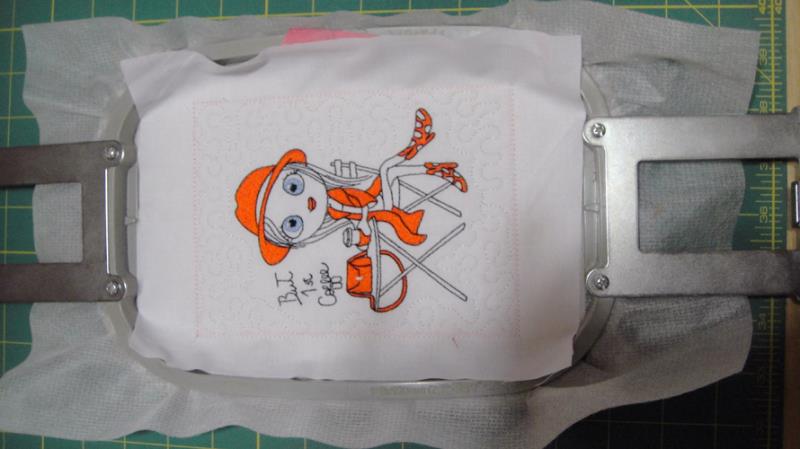
    The following pictures show the project being stitched on a multi-needle machine. If you are doing the same, rotate the design 90 degrees at the machine. If you are stitching on a single needle machine you do not need to rotate the design.


    Step 3:
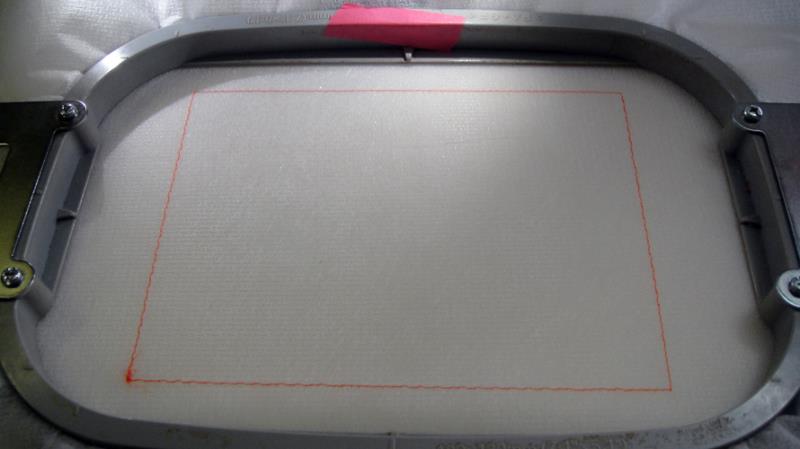
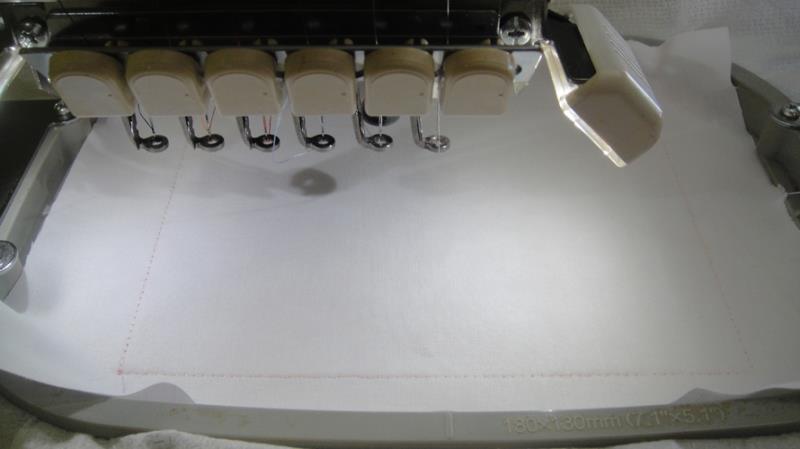
    Run the first color stop (CS) in a neutral color as a placement line. I would normally use white thread for this color stop but have chosen orange for this photograph so that you can more easily see it.

    (Click Image to Enlarge)


    Step 4:
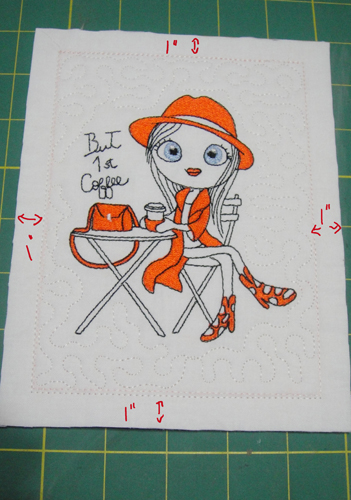
    Spray adhesive on the white Kona® cloth and position over the placement line so that the fabric exceeds the placement line by 1” on all sides. Tack the fabric to the stabilizer with water soluble thread with CS 2. Water soluble thread is used for the tack down stitches now and at the end of the project so that these stitches can be removed with a damp cloth if the event that the bonding does not cover them when the project is completed. If you have no objection to them showing in the final project you can run this color stop with white thread.

    (Click Image to Enlarge)


    Step 5:
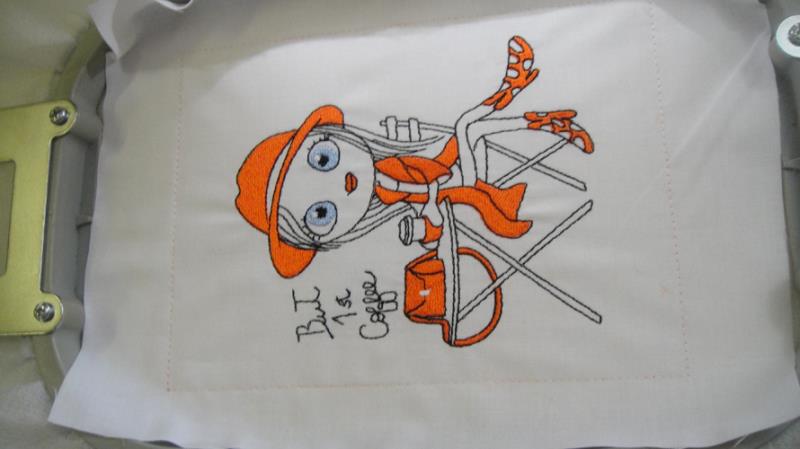
    Follow the color chart for the design you have chosen to embroider the design. Do not stitch the last two color stops yet.

    (Click Image to Enlarge)


    Step 6:
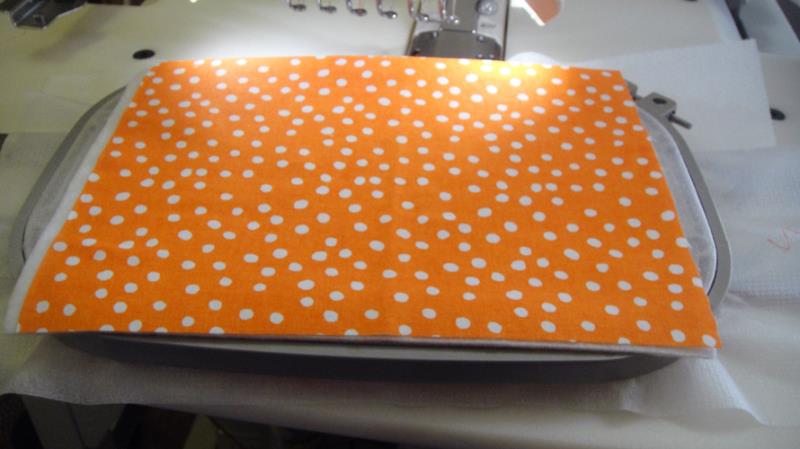
    Remove the hoop from the machine; do not unhoop; place the hoop face down on a flat surface; spray adhesive on the rectangle of Battilizer® and place over the back of the hoop so that the edges of the Battilizer® exceed the original placement line by 1” on all sides; spay adhesive on the back fabric and align right side up over the Battilizer®.

    (Click Image to Enlarge)


    Step 7:
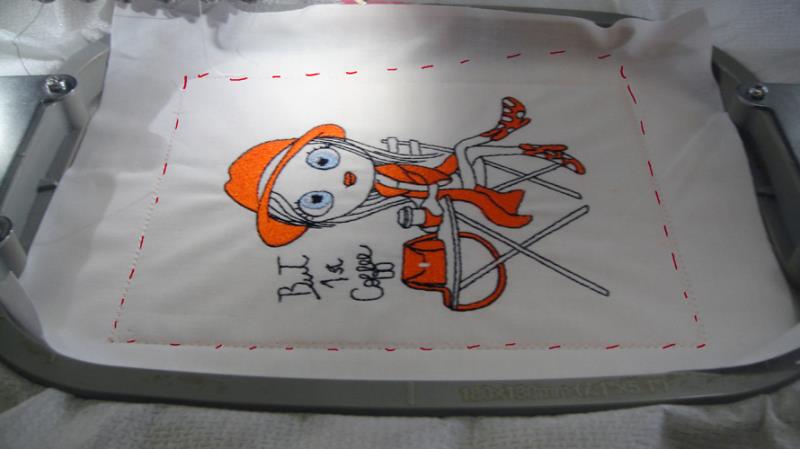
    Return the hoop to the machine, make sure the back fabrics remain smoothed on the back of the hoop. Run the next to last CS in water soluble thread to tack down the back fabrics.

    (Click Image to Enlarge)


    Step 8:
    Run the final CS in white thread to quilt the mug mat.

    (Click Image to Enlarge)


    Step 9:
    (Click Image to Enlarge)
    Trim all edges of the block to ½” from the water soluble tack down stitches.


    Step 10:
    Following the instructions in the article “Binding Small Embroidery Projects”. Stitch the 2 ½” binding folded in half lengthwise with a ¼” seam to the back of the mug mat.

    (Click Image to Enlarge)


    Step 11:
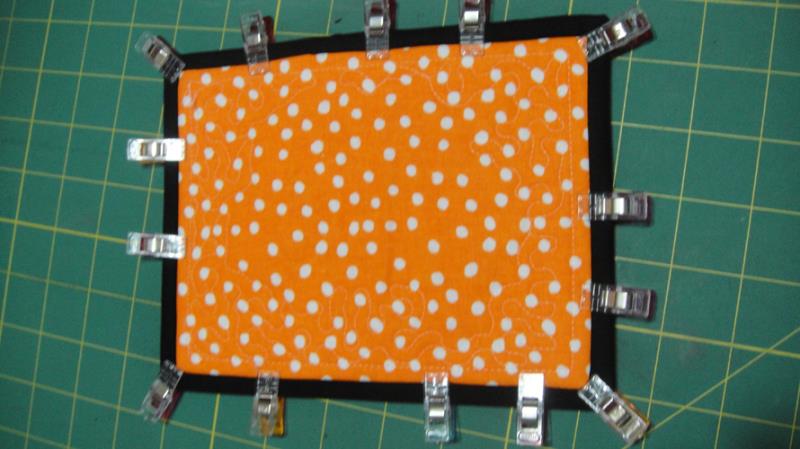
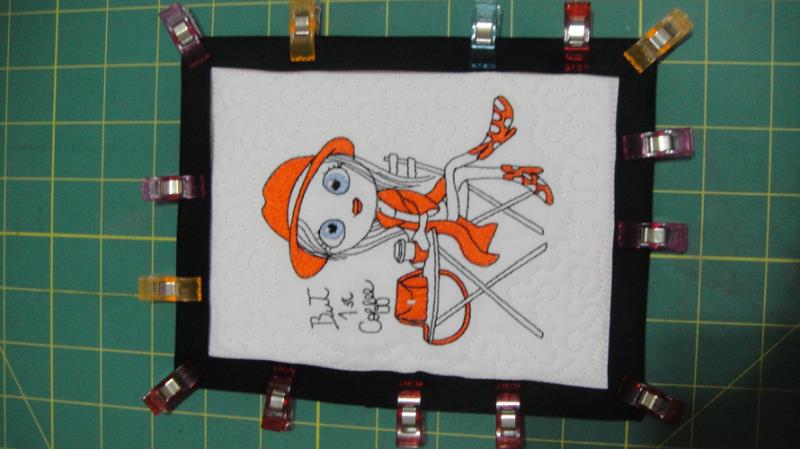
    This will give you approximately ½” of binding to fold to the front of the mat to meet up with the water soluble tack down lines. Clip the binding to the front of the mug mat.

    (Click Image to Enlarge)


    Step 12:
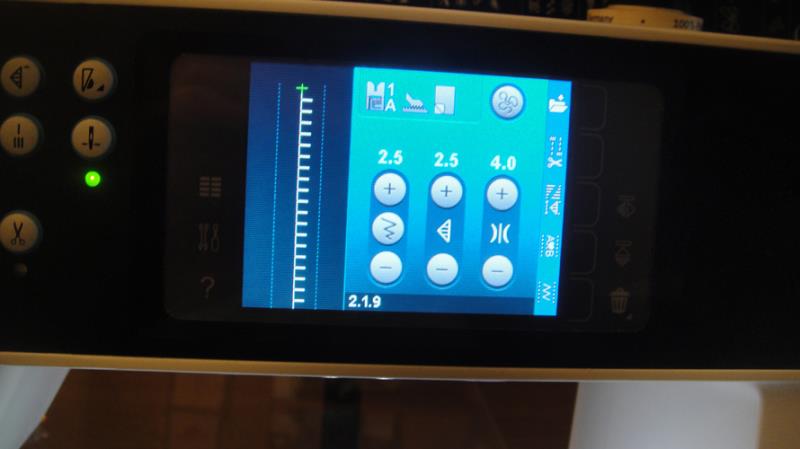
    Stitch down the binding with a straight or decorative stitch. I like to use the E stitch or blanket stitch on my machine.

    (Click Image to Enlarge)


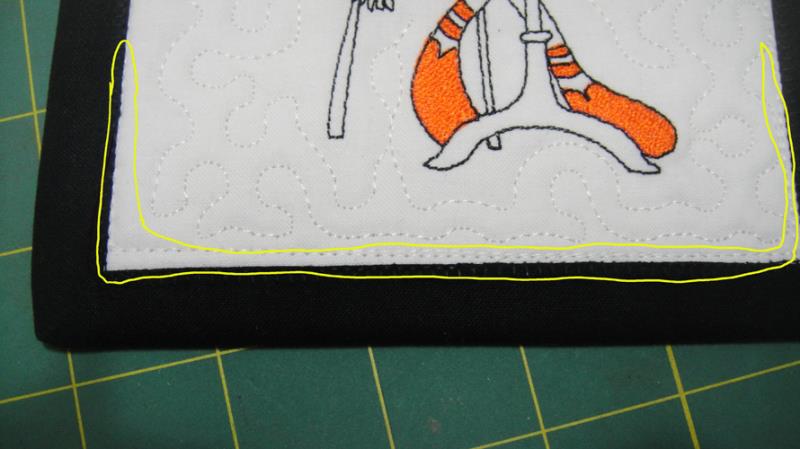
    Step 13:
    No matter how carefully we measure everything some of the tack down stitches may show around the edges of our quilted blocks. This is why we use water soluble thread.

    (Click Image to Enlarge)


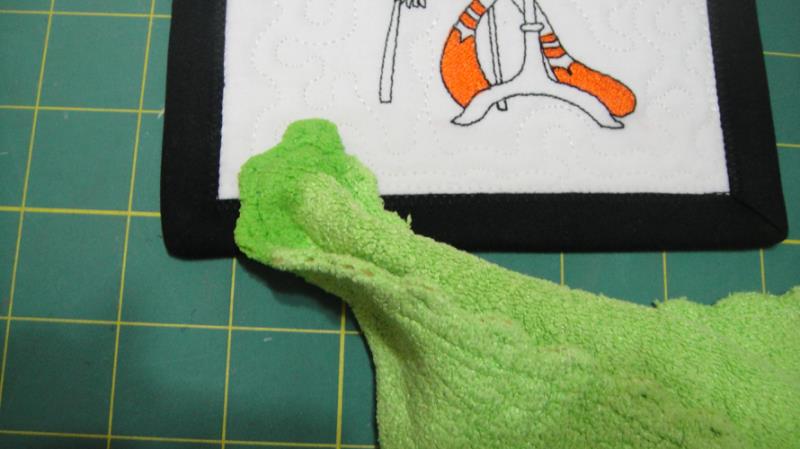
    Step 14:
    Dip the corner of a cloth or sponge and wipe across the water soluble thread which will dissolve the thread.

    (Click Image to Enlarge)


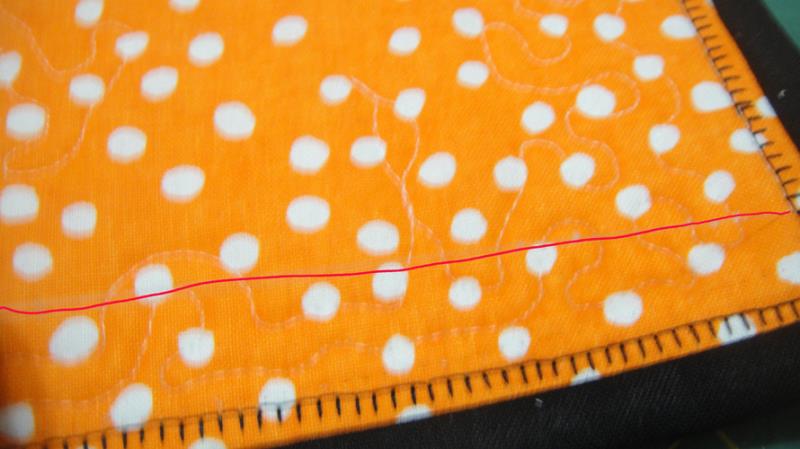
    Step 15:
    This was almost impossible to get a photo of, but the red line is showing the bobbin thread that has now been released by the water soluble thread being dissolved on the front of the mat. Pull this bobbin thread off the back of the mug mat and clip as needed.

    (Click Image to Enlarge)


    Step 16:
    Congratulations your French Café Girly Mug Mat is complete. Make all 10 as great gifts and craft fair items.

    For the love of embroidery…
    Pat Williams
    Meet the Author: Pat Williams
    Pat Williams
    Award winning Digitizer, Embroidery Educator, Author and a Consultant to the Industry, Pat Williams has 30 years of experience in the embroidery industry. Pat has won multiple awards for her digitizing expertise including the 2007 Impressions Awards Grand Championship, Best of Show as well as the 1st and 2nd Place Awards. Pat’s love of digitizing has afforded her the opportunity to write numerous articles for Impressions magazine in the United States and Images Magazine in Europe. In 2001 Pat was named “Embroidery Educator of the Year.” For many years Pat taught digitizing seminars at the ISS Shows in Long Beach, CA and for Compucon software. She now resides in Tucson, AZ.
    More From This Author
    Link is Broken, Please check the URL
    Exclusive Embroidery Offers!
    Copyright © {{ currentDate | date:'yyyy'}} - EmbroideryDesigns.com
    GET 50% OFF! ×