Border OptionsHugging border, circle, square, or rectangle — with a 3mm satin stitch.
Backing OptionsAvailable with iron-on, sew-on, or velcro backing.
Fast ShippingShipped quickly from the USA.
Free Online Tools
Powerful embroidery utilities that save time and prevent costly mistakes.
Stitch AssistantRECOMMENDED
Get the exact stabilizer, machine settings, needle, and thread color sequence for every embroidery design you purchase — based on that design's stitch density, dimensions, and color count.
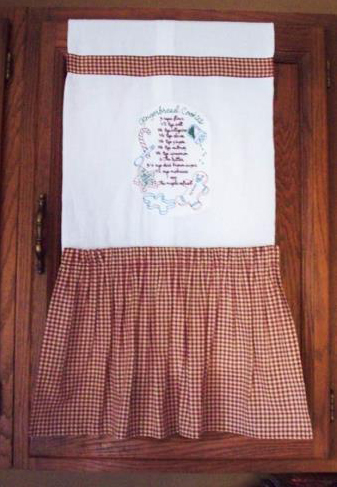
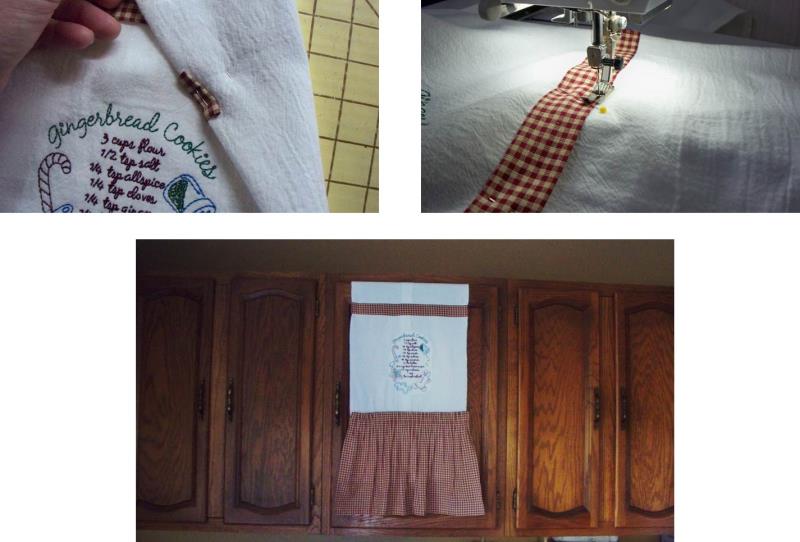
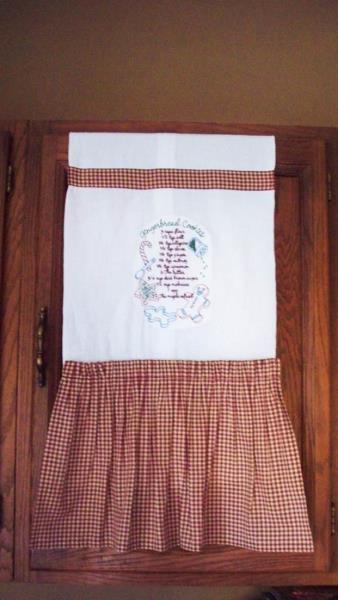
Enhance your kitchen decor with this charming flour sack towel, perfect for draping over a cupboard door. This decorative accessory combines embroidery and fabric to add a touch of elegance to your kitchen space. Step-by-step instructions are included.
Because all cupboard sizes differ, only general instructions will be given for this project. Use the instructions to figure out the dimensions of the cupboard and then the finished dimension of the towel you need to make. The use of a ruffling foot for the machine comes in very handy on this project to gather the top area of the fabric for the towel. For the project, embroidery thread in a burgundy was used to sew the fabric onto the towel. The use of a washaway-tearaway stabilizer allows the fabric to be nicely embroidered and the excess will wash away during the towel’s first washing.
Step 1:
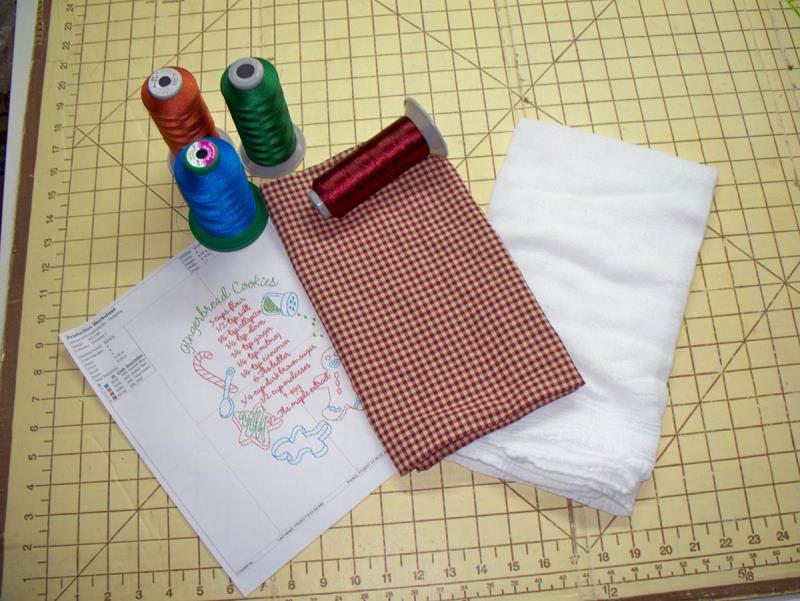
Gather the materials and read through the instructions before beginning. Print out a paper template of the design and color sequence.
(Click Image to Enlarge)
Step 2:
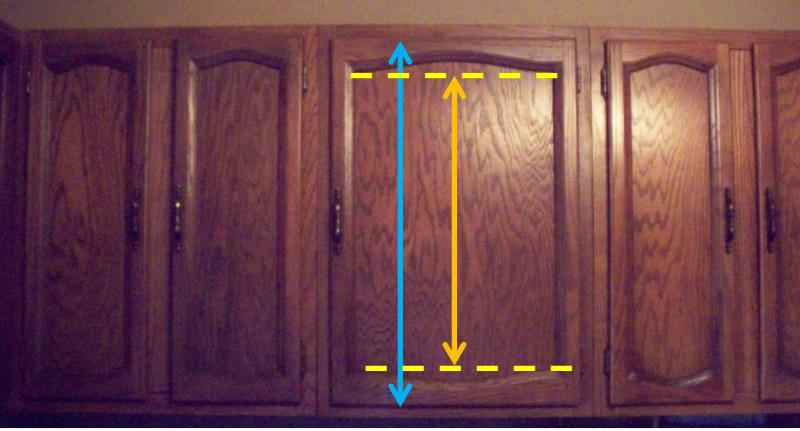
Measure the kitchen cupboard. You’ll need two measurements; the first will be the total length of the cabinet door (blue). The second measurement needed is the length of the decorated portion of the towel from the top of the band to the bottom of the skirt (yellow).
(Click Image to Enlarge)
Step 3:
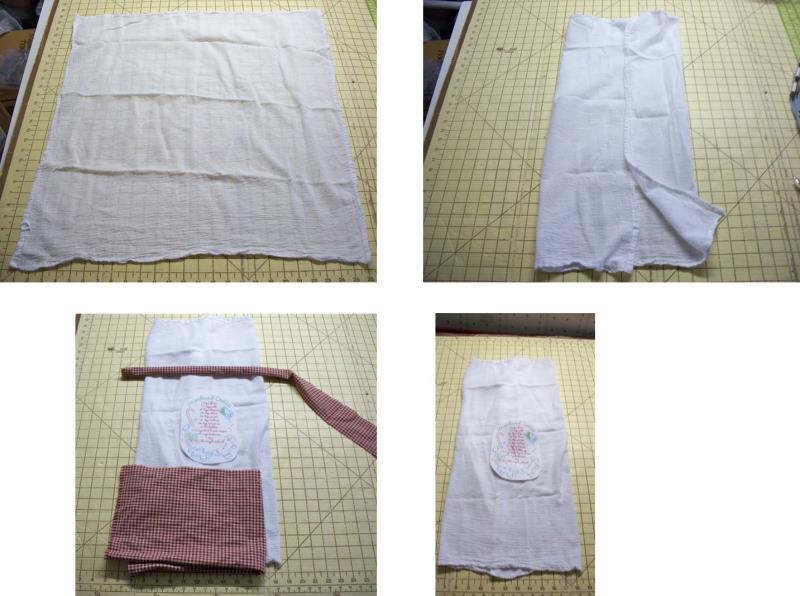
For the project, a flour sack towel was used but you could certainly use any smooth cotton fabric towel. To get an idea of the dimensions and to make sure it will fit within the cabinet door dimensions, a basic layout idea was done first. I folded the towel sides toward the center. Then the paper template was cut out, as was a strip of fabric for the band at the top of the design and the skirt (which will be gathered or pleated). After deciding the width and length of fabrics to cut, then embroidery can begin. For the project, the full length of the towel will be used, the bottom skirt was cut 13“ long plus ½” at the bottom for the turned up hem and 1.5” at the top to turn under for the pleating. The fabric was also cut the width of the fat quarter (and cut down later). The band at the top was cut 3” wide and longer than needed. Set the fabrics aside until a later step.
(Click Image to Enlarge)
Step 4:
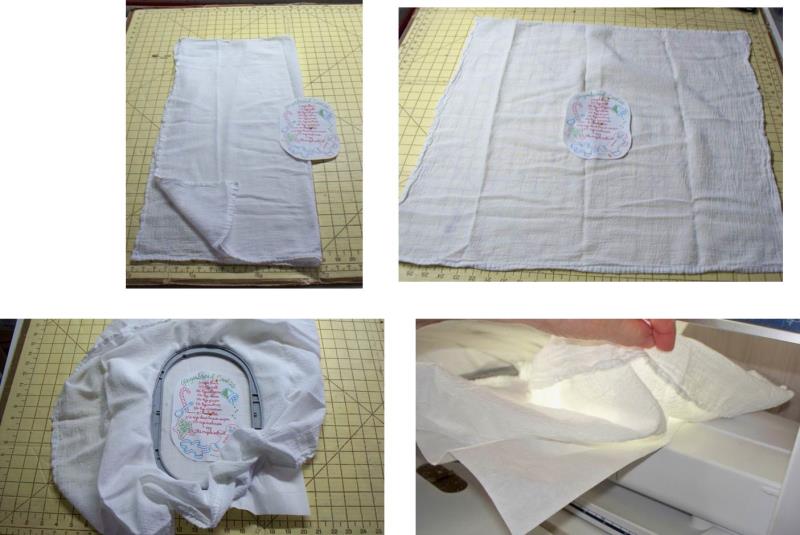
Fold the towel lengthwise to center the template as was planned. Hoop the towel with a layer of washaway-tearaway stabilizer, centering the template in the hoop. Place the hoop on the machine (check to be sure no fabric is caught under the hoop).
(Click Image to Enlarge)
Step 5:
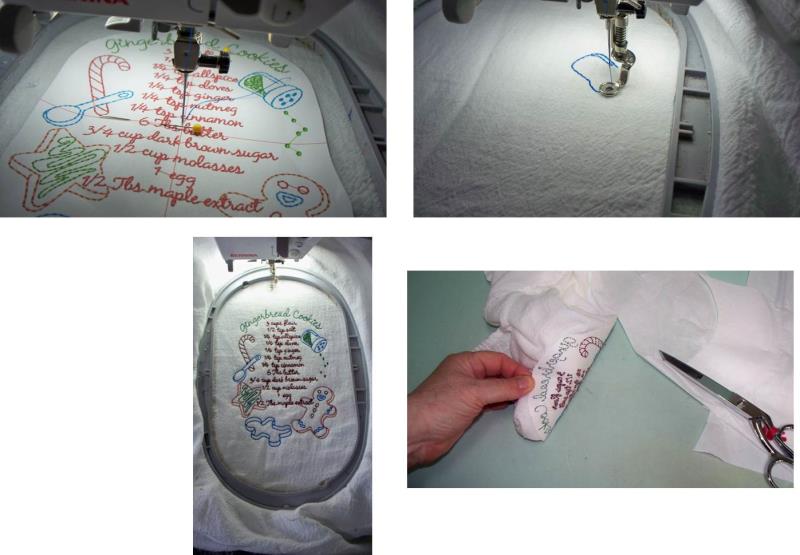
Load the “Gingerbread Cookies Recipe” design on the machine. Center the needle over the center of the template. Remove the template and start stitching. Stitch following the color sequence. Remove the fabric from the hoop and trim away the excess stabilizer. The remaining stabilizer could be rinsed away at this point or left as is and the towel finished; the remainder will dissolve during the first washing.
(Click Image to Enlarge)
Step 6:
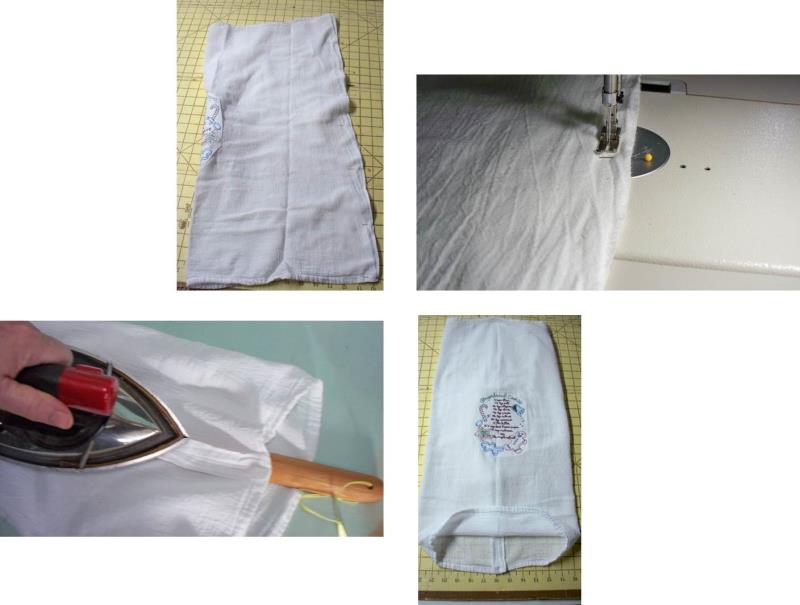
Fold the towel, lengthwise, right sides together and sew the seam; press open. Turn the towel right side out and align the seam to the center front fold, matching the top and bottom edges.
(Click Image to Enlarge)
Step 7:
Stitch the towel top and bottom closed. Fold down 1.5” at the top of the skirt fabric. The entire width of the fat quarter will be used and the sides will be turned under and stitched down at a later step.
(Click Image to Enlarge)
Step 8:
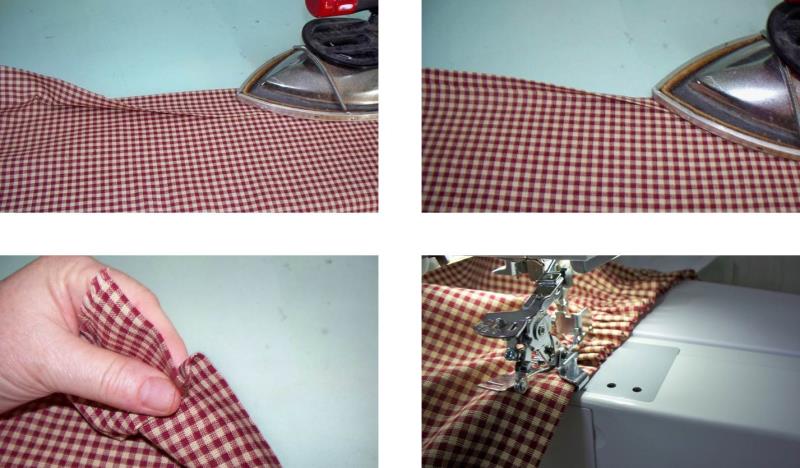
Starch and press the fabric well. Turn the top to the wrong side and press a crease. For the bottom of the fabric, do a double fold and press well. Choose whether to gather, pleat or use the ruffling foot to create tucks or gathers along the top of the fabric 1" from the top folded edge.
(Click Image to Enlarge)
Step 9:
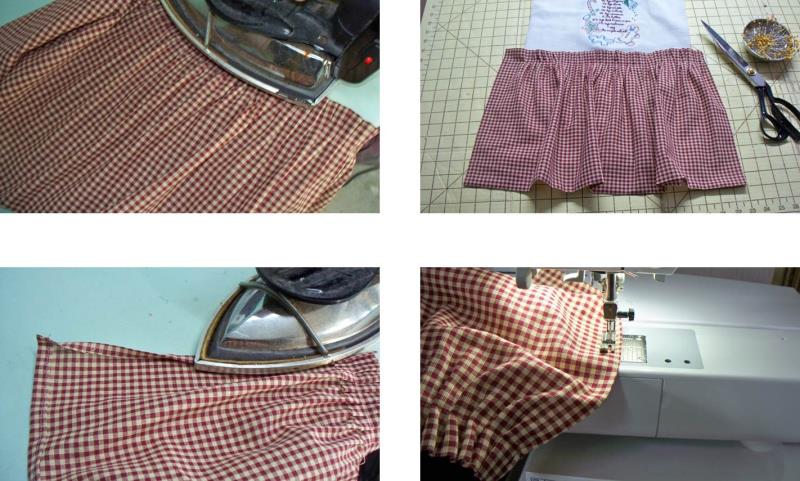
Lightly press the tucks. Position in place along the towel width and trim off the excess leaving ½” at each side for turning under a hem and stitching.
(Click Image to Enlarge)
Step 10:
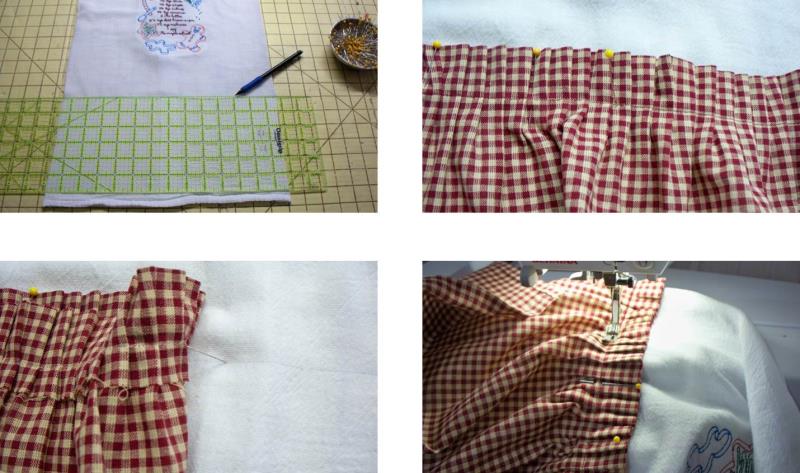
Draw a line where the stitched pleated line can be aligned to the towel. Match the stitching line to the drawn line and pin the skirt in place. Stitch the skirt to the towel through all layers.
(Click Image to Enlarge)
Step 11:
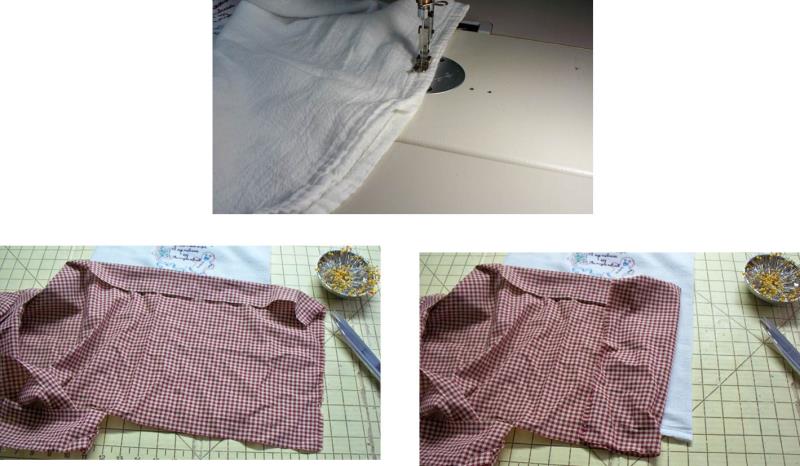
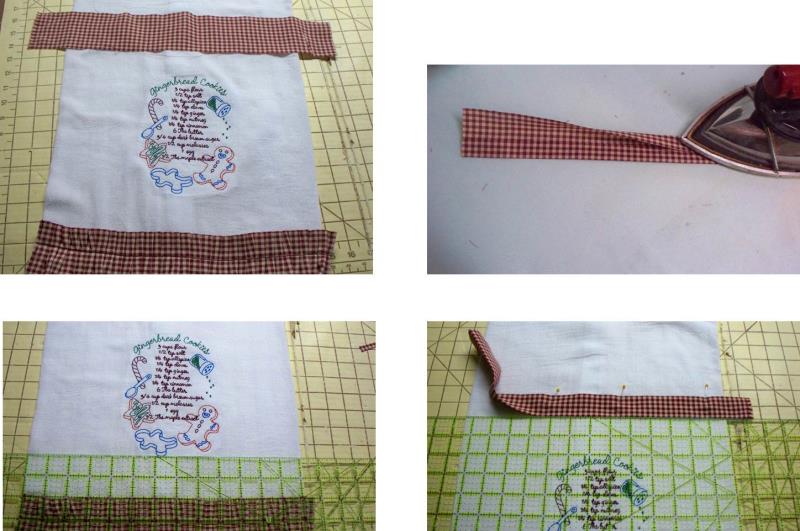
Cut the band to the length needed, plus ½” on each side to turn under the towel edges. Press the long edges of the band toward the center. There was 2” between the bottom of the embroidery and the top of the skirt, so the ruler was aligned 2” above the embroidery design and the bottom of the band laid along the ruler edge and the band pinned in place.
(Click Image to Enlarge)
Step 12:
Turn under the edges of the band and pin to the back side of the towel. Stitch the band along all sides to the towel. Give the towel a final press. Drape the top edge of the towel over the top of the cabinet and close the door, which will hold the towel in place.
(Click Image to Enlarge)
Step 13:
(Click Image to Enlarge)
What a fun and unique way to add a decorative touch to a stretch of cabinets during the holiday season.
Ramona Baird has been in the embroidery industry for over 23 years. She and her husband owned a commercial and retail embroidery store in Arizona for many years. She is an experienced digitizer having been mentored by award-winners Pat Williams and Lindee Goodall. Ramona is a contributor to “Creative Machine Embroidery” magazine having 5 covers to her credit. Ramona has worked for Wilcom America and served many years as Education Director for the American Sewing Guild. With a degree in fashion design, she is able to design and execute patterns which Pat Williams says are “out of the box” in creativity and application. Ramona likes to challenge the boundaries of embroidery and bring new and exciting designs, ideas, and projects to EmbroideryDesigns.com. She wants embroiderers of all levels to increase their skills and enjoyment in using their embroidery machine for gift-making and personal pleasure.