Border OptionsHugging border, circle, square, or rectangle — with a 3mm satin stitch.
Backing OptionsAvailable with iron-on, sew-on, or velcro backing.
Fast ShippingShipped quickly from the USA.
Free Online Tools
Powerful embroidery utilities that save time and prevent costly mistakes.
Stitch AssistantRECOMMENDED
Get the exact stabilizer, machine settings, needle, and thread color sequence for every embroidery design you purchase — based on that design's stitch density, dimensions, and color count.
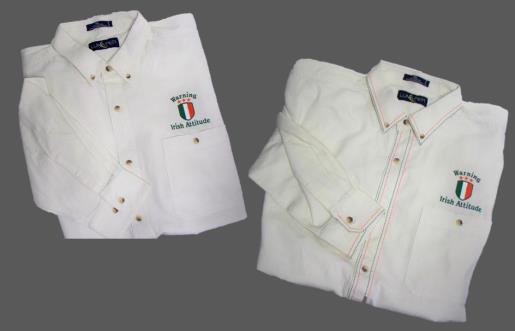
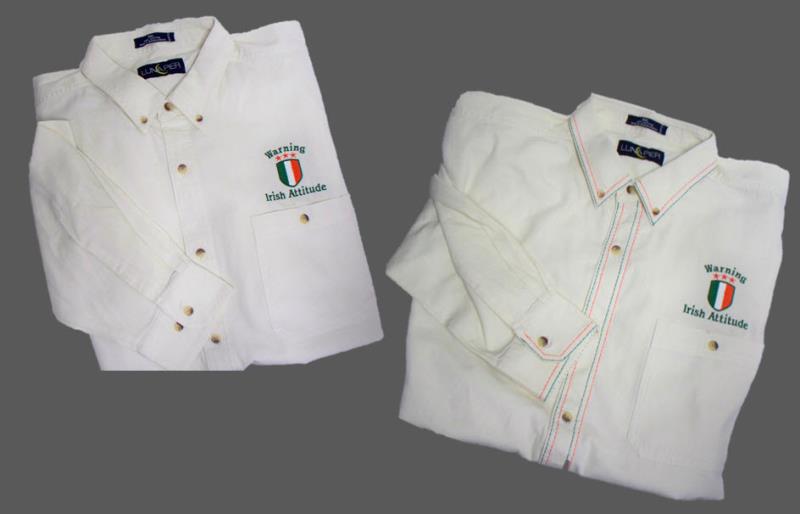
Create a personalized shirt that showcases your Irish pride with this fun and easy project. Perfect for casual wear or themed events, this shirt adds a touch of personality to your wardrobe. Step-by-step instructions are included.
This project shows tips on how to align and place an embroidery design above a pocket.
Step 1:
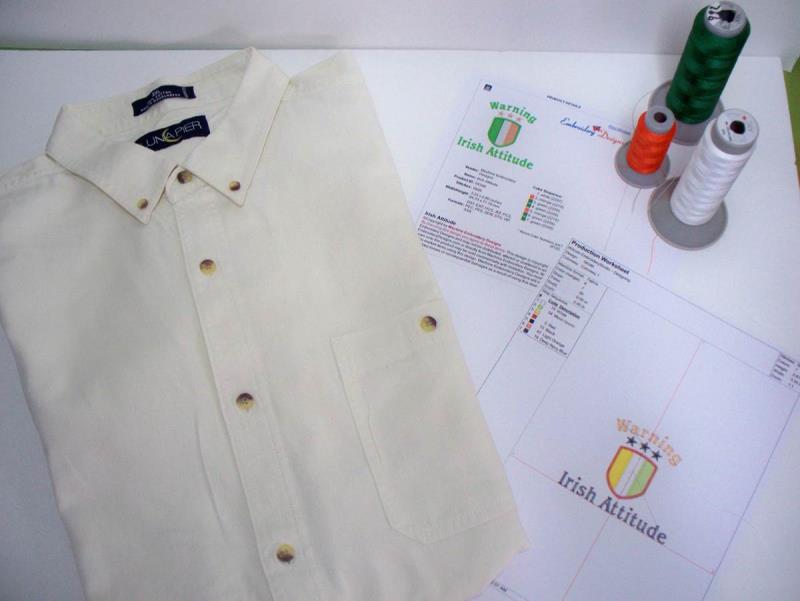
Gather the materials and read through the instructions before beginning. Print out a paper template of the design and color sequence.
(Click Image to Enlarge)
Step 2:
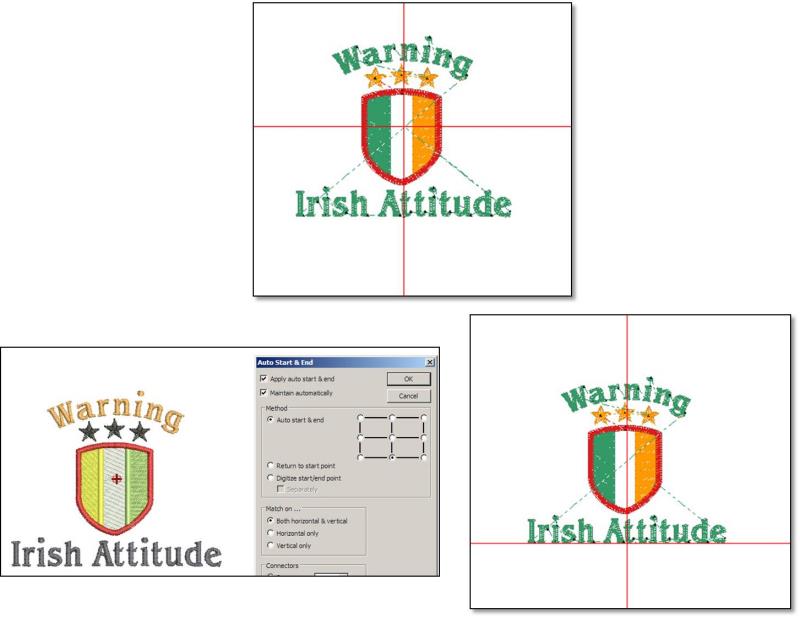
Embroidery software allows the “start/end” point to be moved. Open the software and find the tab where you can move the start/end point (in the software used for this project, it was under the “design” tab). Usually the default is the “center” of the design. To easily align above a pocket, click the bottom center point and save. This moves the start/end point to the bottom center of the design.
(Click Image to Enlarge)
Step 3:
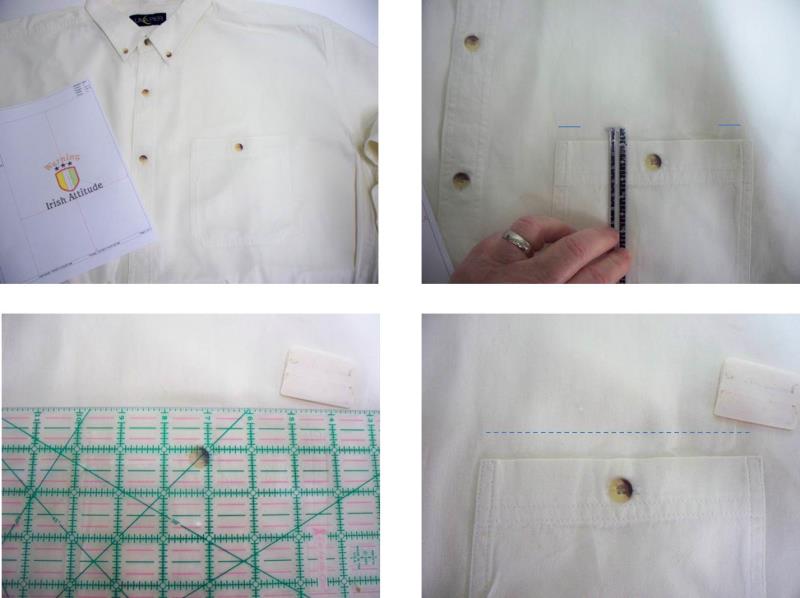
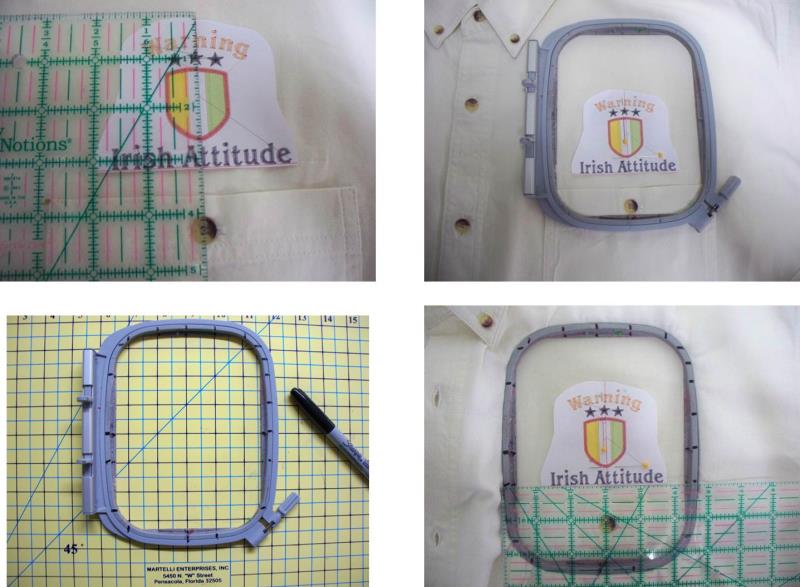
Determine how far above the pocket you would like the bottom of the design to be to the pocket; usually this is anywhere from ¼”-½”. For the project, ½” was used. Use a ruler to measure up from both sides of the pocket ½” and place a mark. Use a ruler and connect the two lines with something that will be easily removed from the fabric (tailor’s chalk used for the project). Tip: even if the pocket is crooked on the shirt, unless you want to remove and re-sew on the pocket, use this technique. It fools the eye into thinking the pocket is sewn on straight.
(Click Image to Enlarge)
Step 4:
Now use the ruler and square up a line (from the line just drawn) from the center of the pocket. Cut out and align the paper template to the lines. To help in aligning the design in the hoop, it is helpful to make some marks on the hoop. Place the hoop on a gridded surface and mark the hoop with a permanent marker. Then when hooping, use the marks and a ruler to align the design in the hoop.
(Click Image to Enlarge)
Step 5:
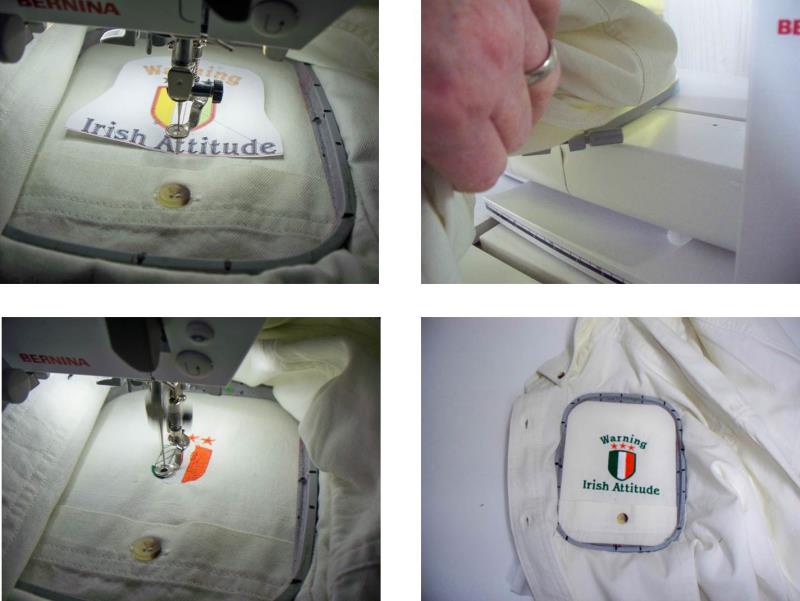
Load the “Irish Attitude” design on the machine and place the hoop on the machine. Align the machine needle to the alignment start/end point of the paper template. Remove the paper template and check to be sure no fabric is caught under the hoop. Stitch the design following the color sequence.
(Click Image to Enlarge)
Step 6:
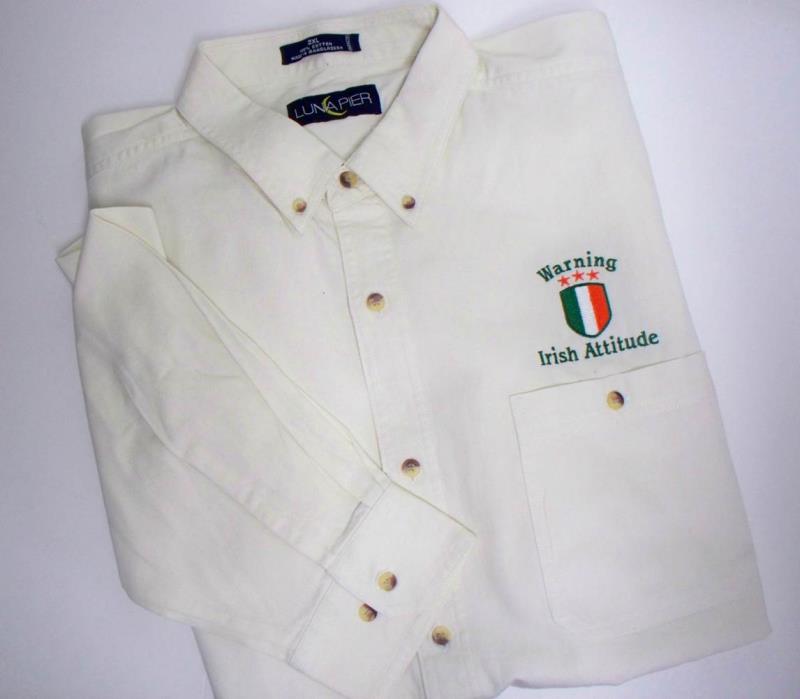
For a man’s shirt, this is considered complete. Use these tips for doing pocketed shirts with corporate logos, too.
(Click Image to Enlarge)
Step 7:
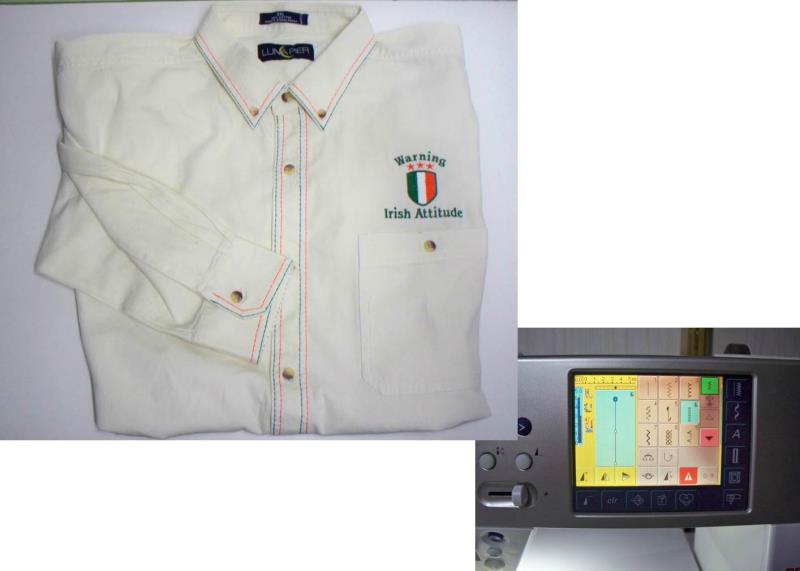
Many times, shirts are “uni-sex”. Use the same technique of aligning and stitching the design. To add some extra detail on a woman’s shirt, use the same color embroidery thread, and with a triple machine straight stitch set at 5mm, use the shirt topstitching as a guide to add colorful details to the collar, placket front and cuffs. Decorative stitching may also be used.
(Click Image to Enlarge)
Step 8:
Congratulations! You can now show of your “Irish Attitude” on St. Patrick’s Day!
Ramona Baird has been in the embroidery industry for over 23 years. She and her husband owned a commercial and retail embroidery store in Arizona for many years. She is an experienced digitizer having been mentored by award-winners Pat Williams and Lindee Goodall. Ramona is a contributor to “Creative Machine Embroidery” magazine having 5 covers to her credit. Ramona has worked for Wilcom America and served many years as Education Director for the American Sewing Guild. With a degree in fashion design, she is able to design and execute patterns which Pat Williams says are “out of the box” in creativity and application. Ramona likes to challenge the boundaries of embroidery and bring new and exciting designs, ideas, and projects to EmbroideryDesigns.com. She wants embroiderers of all levels to increase their skills and enjoyment in using their embroidery machine for gift-making and personal pleasure.