Border OptionsHugging border, circle, square, or rectangle — with a 3mm satin stitch.
Backing OptionsAvailable with iron-on, sew-on, or velcro backing.
Fast ShippingShipped quickly from the USA.
Free Online Tools
Powerful embroidery utilities that save time and prevent costly mistakes.
Stitch AssistantRECOMMENDED
Get the exact stabilizer, machine settings, needle, and thread color sequence for every embroidery design you purchase — based on that design's stitch density, dimensions, and color count.
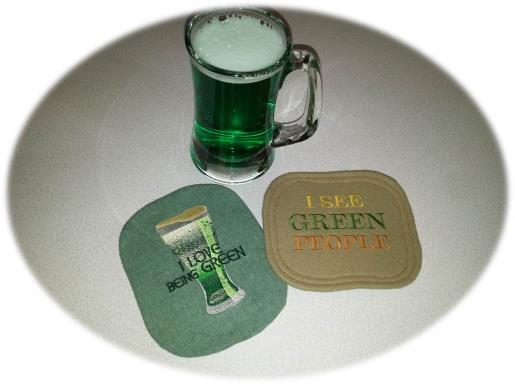
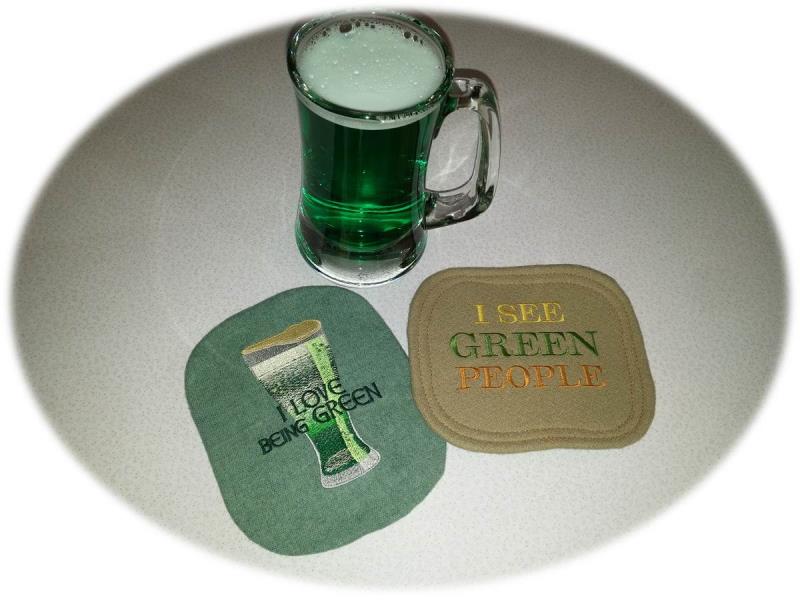
Create festive bar coasters to enhance your St. Patrick's Day celebrations. These stylish coasters are perfect for adding a touch of Irish charm to your gatherings. Step-by-step instructions are included.
Here is a new twist on making mug or bar mats. Usually they are fabric backed with batting sandwiched in between. These bar mats use a layer of white craft foam in the middle and a green craft foam for the backing.
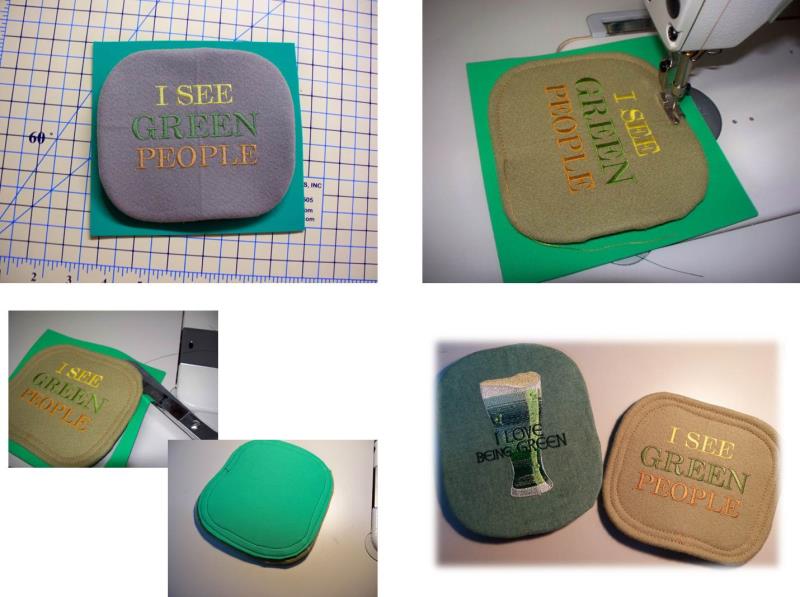
The designs are stitched on the wool fabric using tearaway stabilizer. Then the printed design templates are used to create a shape for the bar mat. The white foam is cut to size, the fabric cut larger and then glued to the craft foam, rolling the edges of the embroidered fabric to the underside of the craft foam. Two choices are given for attaching the green foam to the back - either by gluing or stitching.
Once you do a set of these, you’ll want to do more!
Step 1:
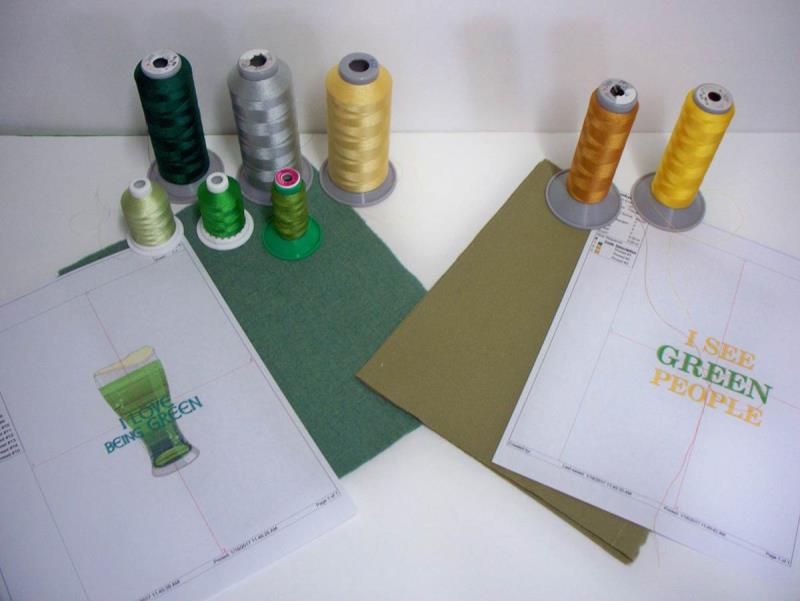
Gather the materials and read through the instructions before beginning. Print out a paper template of the design and color sequence.
(Click Image to Enlarge)
Step 2:
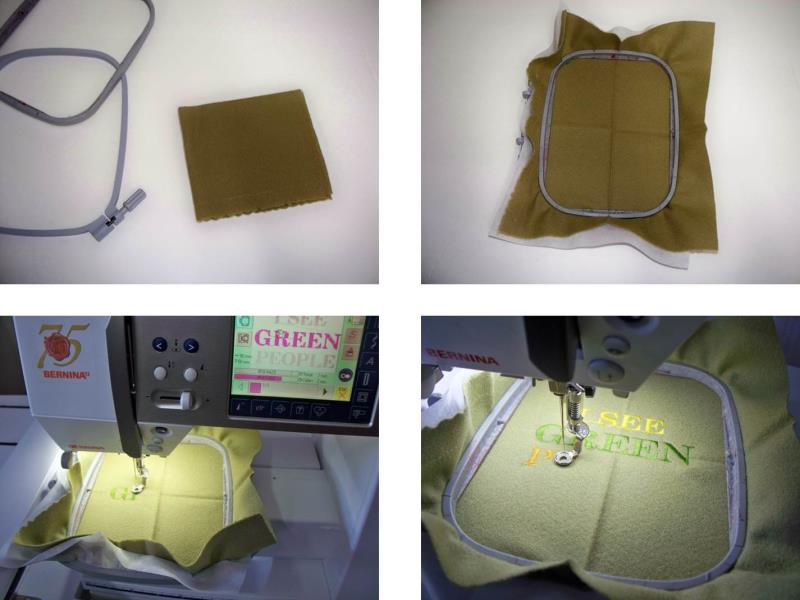
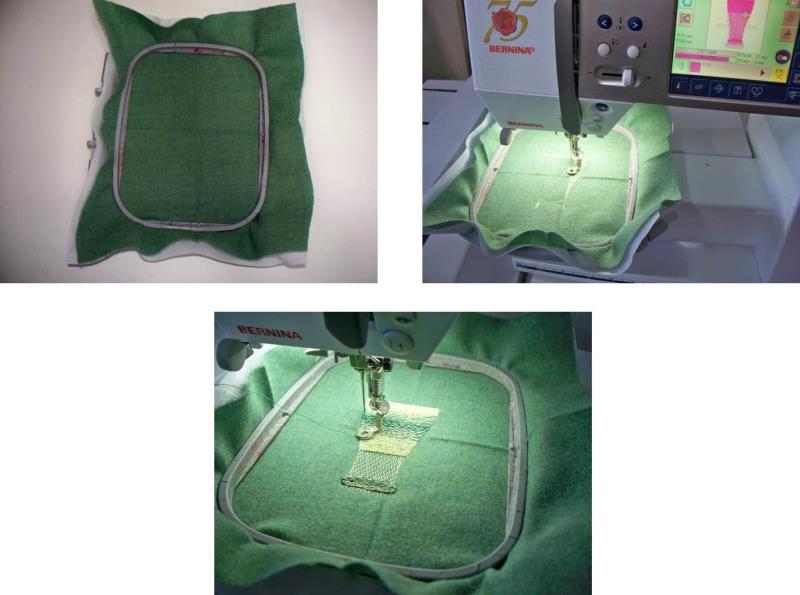
Quarter fold one piece of wool and hoop with one piece of tearaway stabilizer, with the center of the fabric in the center of the hoop. Load the design “I See Green People” on the machine. Align the needle to the center of the fabric and stitch the design following the color sequence.
(Click Image to Enlarge)
Step 3:
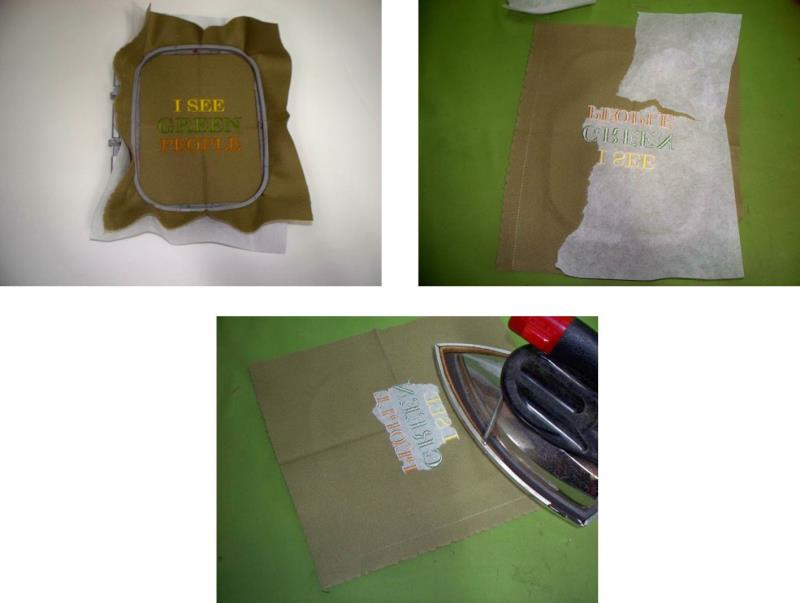
After the design has stitched, remove the fabric from the hoop and remove the excess stabilizer carefully; press the fabric.
(Click Image to Enlarge)
Step 4:
Repeat quarter folding, hooping, and stitching the second piece of wool fabric with the “Love Being Green” embroidery design. After the design has finished stitching, remove the fabric from the machine, remove the excess stabilizer, and press the fabric.
(Click Image to Enlarge)
Step 5:
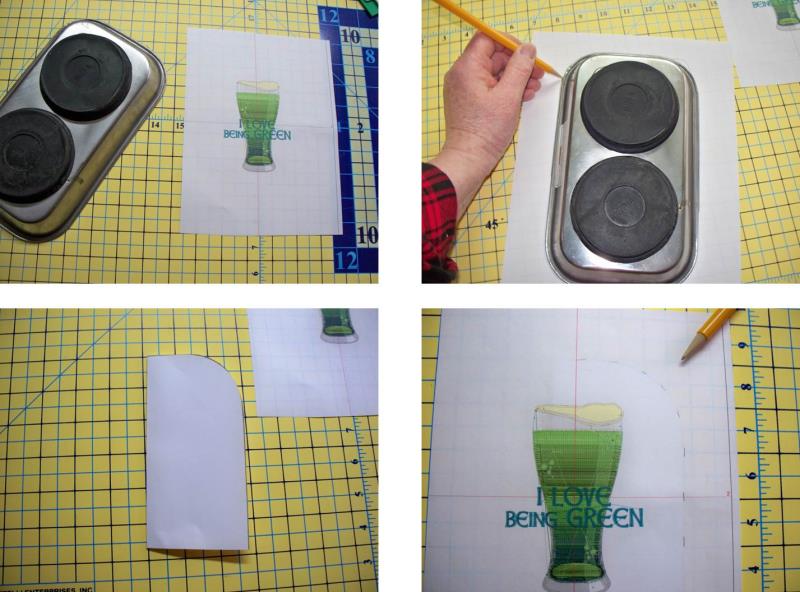
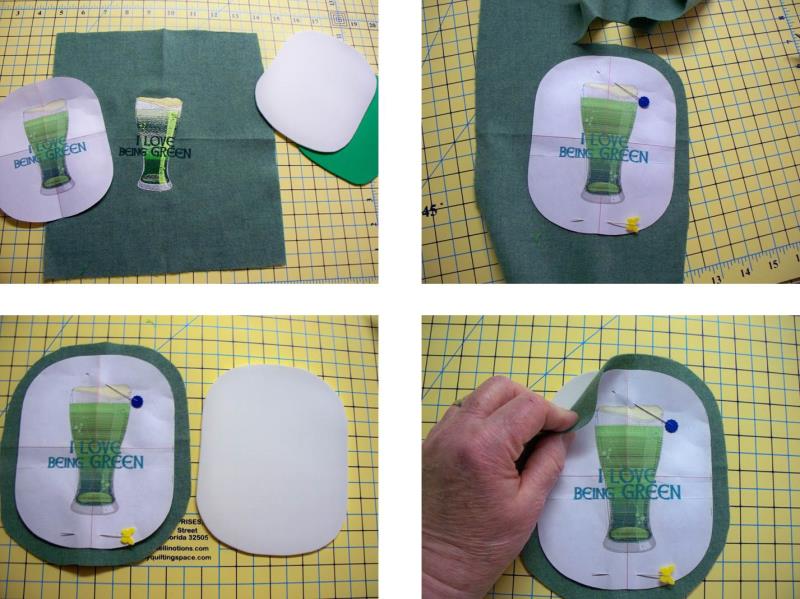
Now find something to use as a template for the shape of the bar mats. For the project, a large magnetic bowl was used. Lay the bowl on a new piece of paper and trace the upper half of the bowl. Cut along the pencil line and then fold the template in half. Lay the fold on a gridded surface and then place the paper template of the embroidery design over the template, positioning the paper so that there is extra room at the top and side of the embroidery design.
(Click Image to Enlarge)
Step 6:
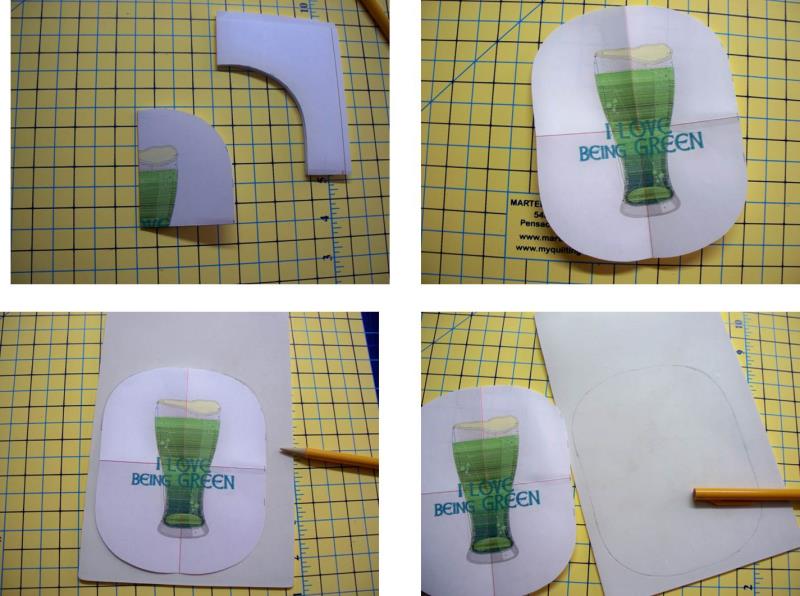
Quarter fold the embroidery paper template along the crosshairs and cut along the pencil line. Now open up the new template and place it on one piece of white craft foam. Use a pencil to trace around the template on the craft foam.
(Click Image to Enlarge)
Step 7:
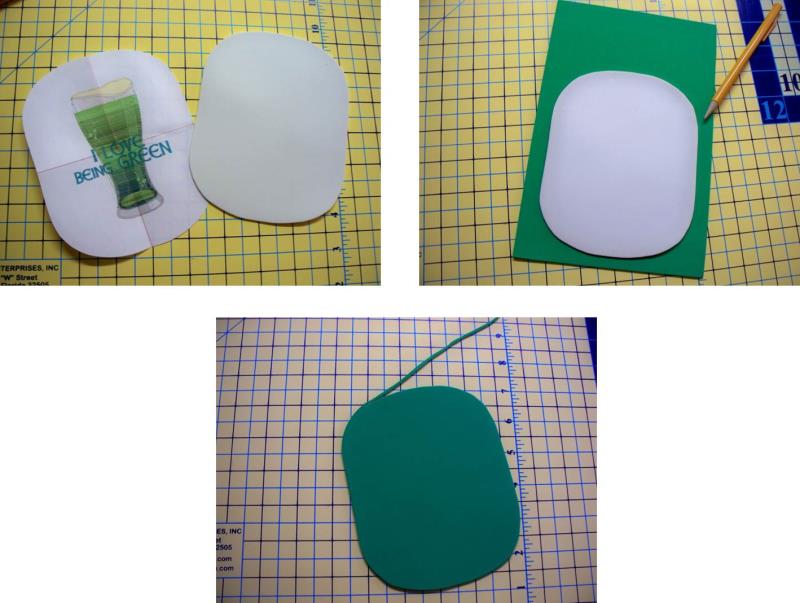
Place the white craft foam shape on top of one piece of green craft foam and trace the shape onto the green craft foam. Cut out the green craft foam just slightly inside the drawn line.
(Click Image to Enlarge)
Step 8:
Align the embroidery design paper template on top of the embroidered design and use chalk to draw around the paper template. Cut out the embroidered fabric leaving a good ½” to the outside of the paper template. Now align the white foam and aligned with the paper template.
(Click Image to Enlarge)
Step 9:
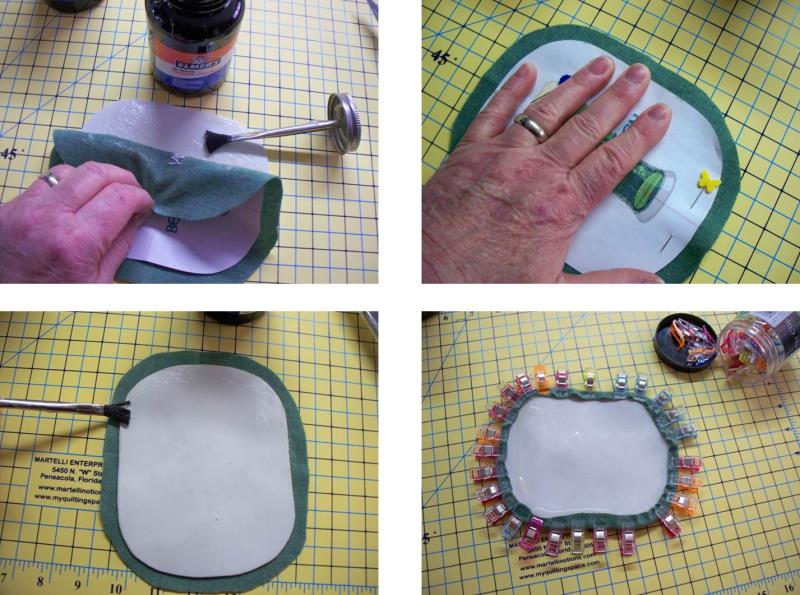
Carefully turn back half the fabric and lightly and evenly spread the glue onto the craft foam and press the fabric in place. Repeat for the other side. Flip the fabric over and place glue along the edge of the foam. Press the fabric seam allowance over the foam and clip in place. Let dry for about 5-10 minutes until the glue is set.
(Click Image to Enlarge)
Step 10:
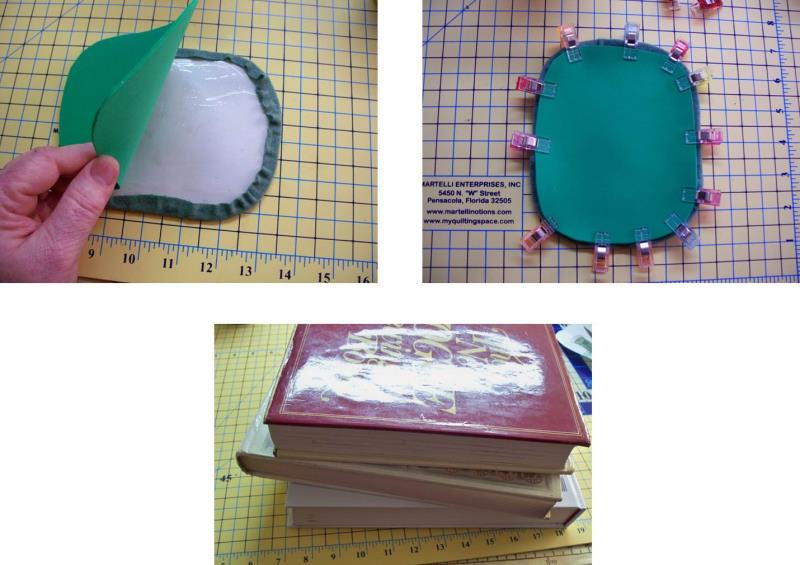
Now place an even amount of glue on the exposed white foam and align and clip the green foam in place over it. After the glue has set up a short time, remove the clips and then place several heavy books on top of the bar mat and let the glue set for at least an hour (longer is preferable).
(Click Image to Enlarge)
Step 11:
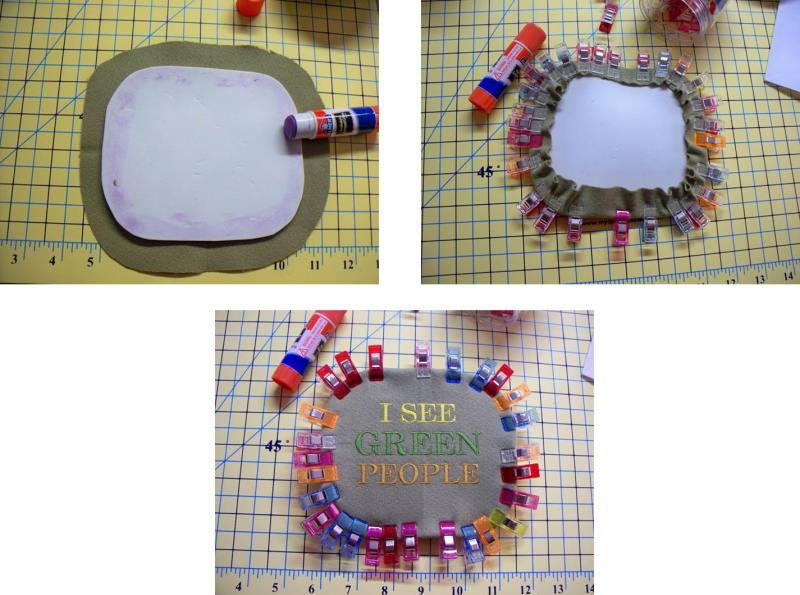
Repeat the steps of marking and cutting the template and white craft foam piece. Another technique to finish the project is to use a glue stick to adhere the seam allowance to the craft foam; clip in place and let the glue dry.
(Click Image to Enlarge)
Step 12:
After the glue has dried, place the back side of the embroidery on top of the second piece of green craft foam. At the machine, use embroidery thread in the top and bobbin to stitch the embroidered fabric to the green craft foam. Stitch one or two rows following the shape. Use old scissors and trim the excess green foam.
(Click Image to Enlarge)
Step 13:
Congratulations on completing bar mats for your St. Patrick’s Day celebrations - make a toast with green beer!
Ramona Baird has been in the embroidery industry for over 23 years. She and her husband owned a commercial and retail embroidery store in Arizona for many years. She is an experienced digitizer having been mentored by award-winners Pat Williams and Lindee Goodall. Ramona is a contributor to “Creative Machine Embroidery” magazine having 5 covers to her credit. Ramona has worked for Wilcom America and served many years as Education Director for the American Sewing Guild. With a degree in fashion design, she is able to design and execute patterns which Pat Williams says are “out of the box” in creativity and application. Ramona likes to challenge the boundaries of embroidery and bring new and exciting designs, ideas, and projects to EmbroideryDesigns.com. She wants embroiderers of all levels to increase their skills and enjoyment in using their embroidery machine for gift-making and personal pleasure.