Border OptionsHugging border, circle, square, or rectangle — with a 3mm satin stitch.
Backing OptionsAvailable with iron-on, sew-on, or velcro backing.
Fast ShippingShipped quickly from the USA.
Free Online Tools
Powerful embroidery utilities that save time and prevent costly mistakes.
Stitch AssistantRECOMMENDED
Get the exact stabilizer, machine settings, needle, and thread color sequence for every embroidery design you purchase — based on that design's stitch density, dimensions, and color count.
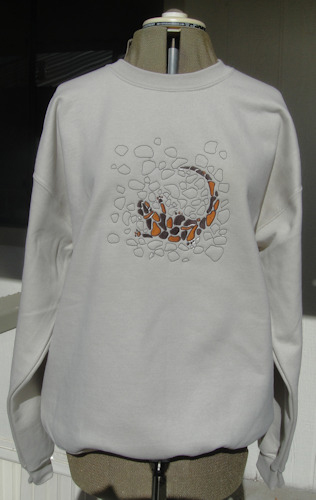
This sweatshirt features a striking lizard design on the chest, perfect for casual wear. Suitable for both standard and multi-needle embroidery machines. Step-by-step instructions are included.
Are you new to sewing on a multi-needle machine? These instructions are for using your tubular options to their best advantage.
Step 1:
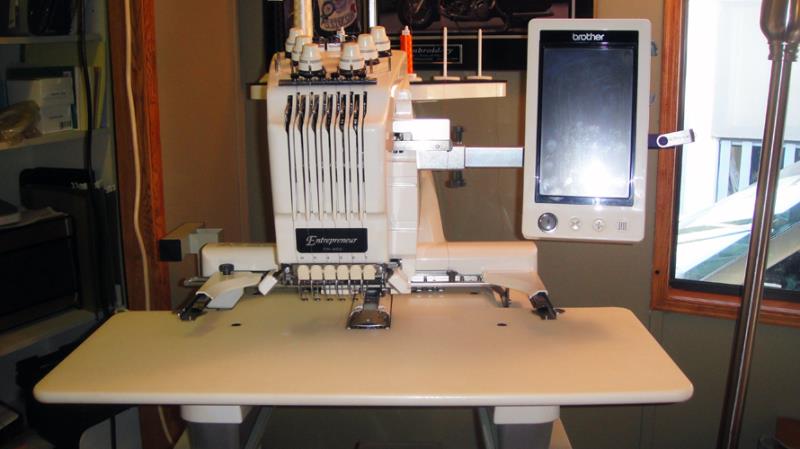
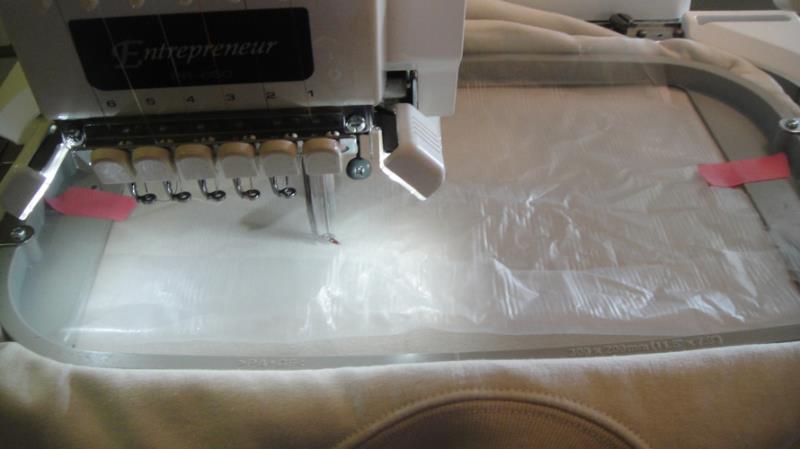
This is a picture of what your multi-needle machine looks like when set up for regular use. Before you turn the machine on slide the pantograph all the way to the back of the machine and remove the table. You may have to slide a couple of stabilizing plastic arms under the table top out of the way under the sewing arm to remove the table. Check your manual if you don’t know how to do this.
(Click Image to Enlarge)
Step 2:
(Click Image to Enlarge)
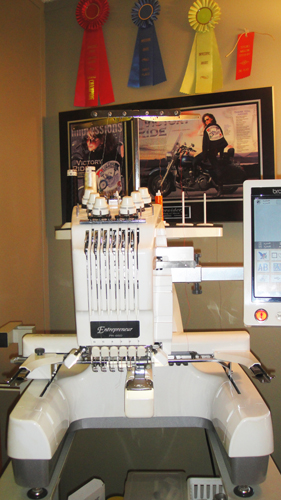
Your machine will now look like this with the table removed. Set the arms width to accommodate your 12” x 8” embroidery hoop.
Step 3:
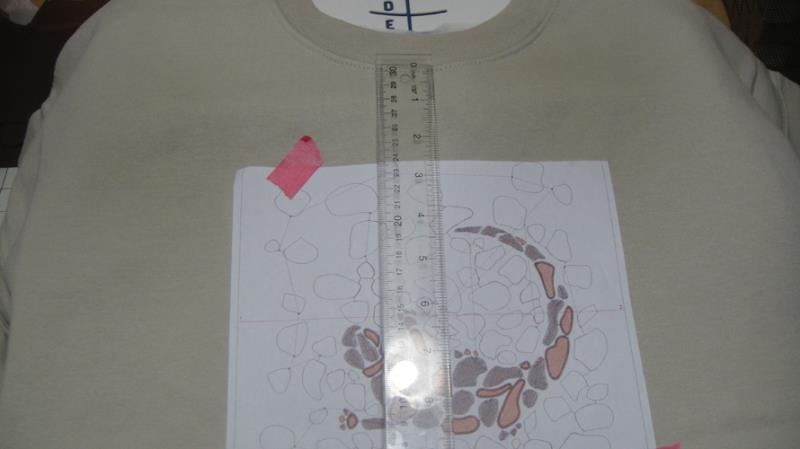
If you have one available slip your sweatshirt on a hooping board, or lay flat on a table. Print and cut out the image of the design to use as a template. Place the template in the desired position on the shirt. 3” to 5” from the seam of the crewneck to the top of the design is standard for a sweatshirt. Tape your template into place. This shirt already had a nice fold line down the middle of the front to use as a vertical guide. If yours does not fold the shirt in half and lightly press a fold line down the center front.
(Click Image to Enlarge)
Step 4:
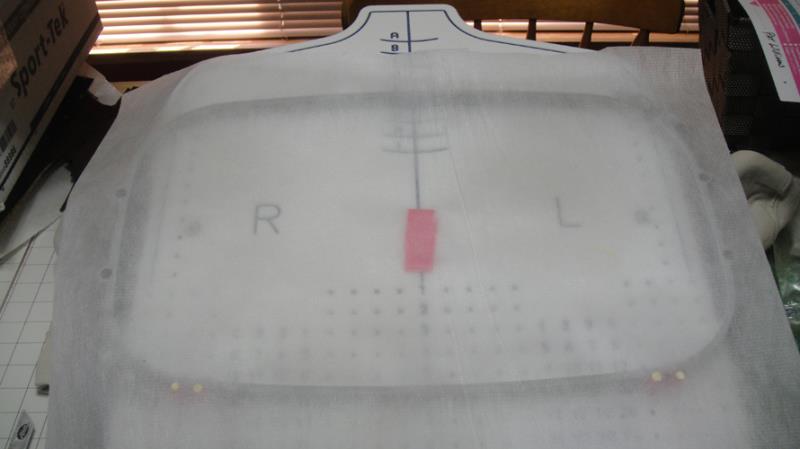
Slide the outer ring of the 12” x 8” hoop under the shirt and adjust whatever you need to on your particular board to hold the hoop into position. Have the screw on the ring relatively loose as you do not want to have to force the inner into position. Having the bottom ring too tight when hooping a knit shirt will create hoop marks on the garment as well as push excess fabric into the embroidery area.
Step 5:
If using a hooping board remove the shirt from the board; make a small roll of embroidery tape and stick it to the center of the hoop area to help hold the polymesh stabilizer in position. Pull the shirt over the board again; reach inside the shirt and check that the stabilizer is smooth on all areas over the hoop; insert the inner hoop smoothing out the excess fabric; then reach inside and tighten the outer hoop screw. You may need to loosen and tighten the screw several times to get the tautness you need for embroidery, but you do not want to tug on the sweatshirt when the hoop is tight or you will distort the grain of the fabric.
(Click Image to Enlarge)
Step 6:
(Click Image to Enlarge)
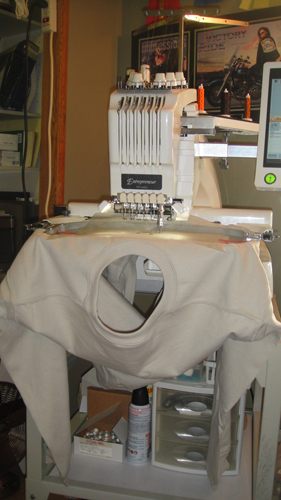
Insert your hoop into the machine through the bottom of the shirt; having the arms hang down and ensuring that the bottom of the shirt is not going to become wedged into any part of the pantograph.
Step 7:
(Click Image to Enlarge)
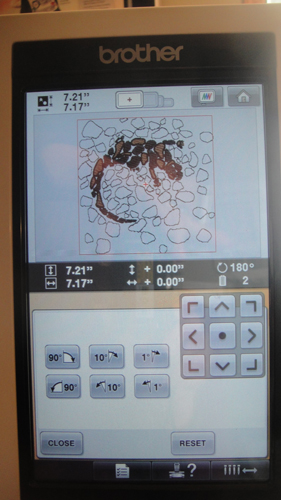
Load the design into the machine, turn the design upside down by rotating 90 degrees to the right twice as you are now sewing upside down. Input the color sequence for the design. In this case the 1st (CS) color stop is Bronze (1257) and then CS 2 is Chocolate Chip (1030).
Step 8:
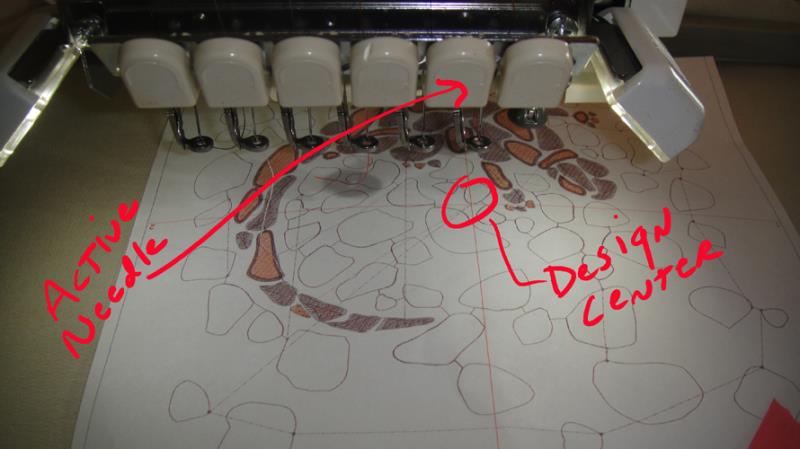
Center the active needle over the center point on your template.
(Click Image to Enlarge)
Step 9:
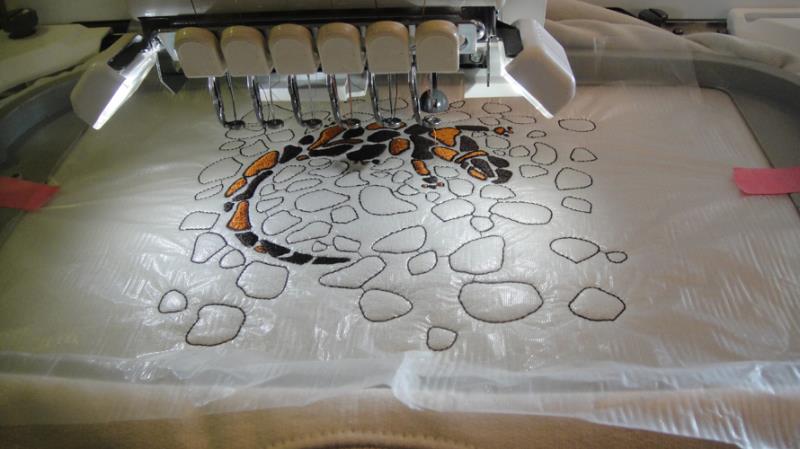
Cut a piece of Solvy® about 12” x 9” and tape in place over the design area.
(Click Image to Enlarge)
Step 10:
Stitch the design.
(Click Image to Enlarge)
Step 11:
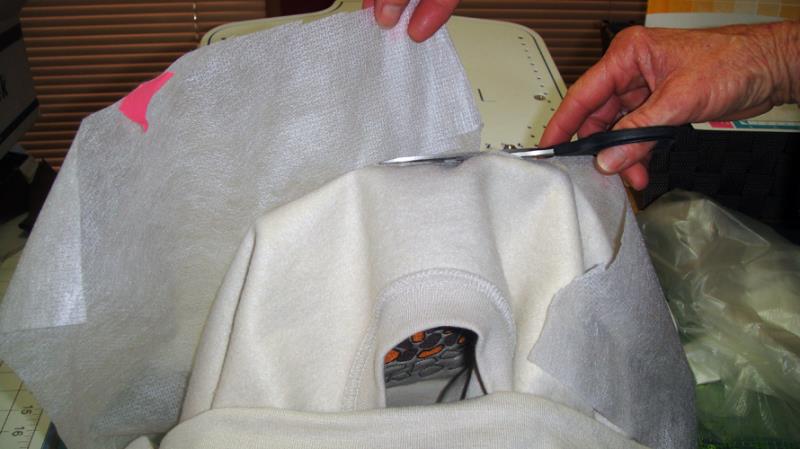
Trim the excess stabilizer from around the design. Tip: Always hold the stabilizer and have the garment falling forwards towards you to avoid clipping the garment when trimming away the stabilizer.
(Click Image to Enlarge)
Step 12:
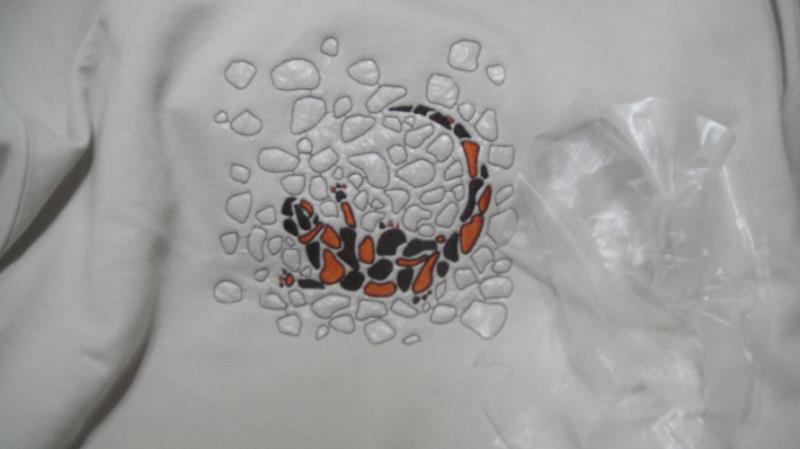
Tear away the excess Solvy® from the front of the shirt and from the center of the stones. Remove any remaining Solvy® with water or steam following the instructions that came with your product.
(Click Image to Enlarge)
Step 13:
(Click Image to Enlarge)
Congratulations your Lizard in the Stone Sweatshirt is complete! A wonderful treat for yourself or a great gift!
Award winning Digitizer, Embroidery Educator, Author and a Consultant to the Industry, Pat Williams has 30 years of experience in the embroidery industry. Pat has won multiple awards for her digitizing expertise including the 2007 Impressions Awards Grand Championship, Best of Show as well as the 1st and 2nd Place Awards. Pat’s love of digitizing has afforded her the opportunity to write numerous articles for Impressions magazine in the United States and Images Magazine in Europe. In 2001 Pat was named “Embroidery Educator of the Year.” For many years Pat taught digitizing seminars at the ISS Shows in Long Beach, CA and for Compucon software. She now resides in Tucson, AZ.