{{superHeaderAds.title}}
Live Chat
Embroidery Designs
Welcome, Embroiderer
Login
Horse Sweatshirt
{{mainImageAlt || (productInfo._source && productInfo._source.name) || ''}}

Horse Sweatshirt Embroidery Project

By   Ramona Baird   on   December 12, 2016

PROJECT DETAILS

SKILL LEVEL
Some Experience
TIME REQUIRED
04:30
Description

Horse themed designs along with machine decorative stitches create a warm winter sweatshirt.

Project Preview Video

Materials
  • Sweatshirt in the size needed
  • Embroidery thread in desired colors
  • Tearaway stabilizer
  • Water soluble stabilizer
  • Temporary basting spray (optional)
  • Ruler and marking chalk

  • Designs used in this project

    Preface:
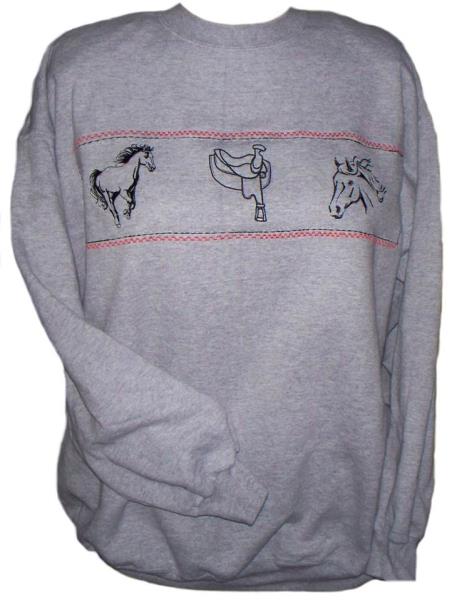
    Who couldn’t use another sweatshirt - especially one embroidered with horses and decorated with machine stitching? Embroider the horses and then add decorative machine stitches, using embroidery thread, to complete the garment.


    Step 1:
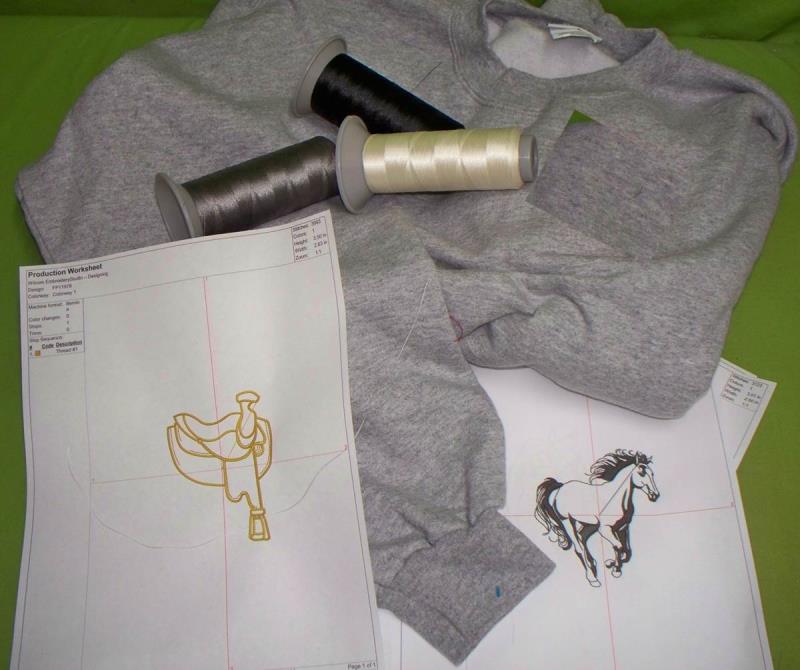
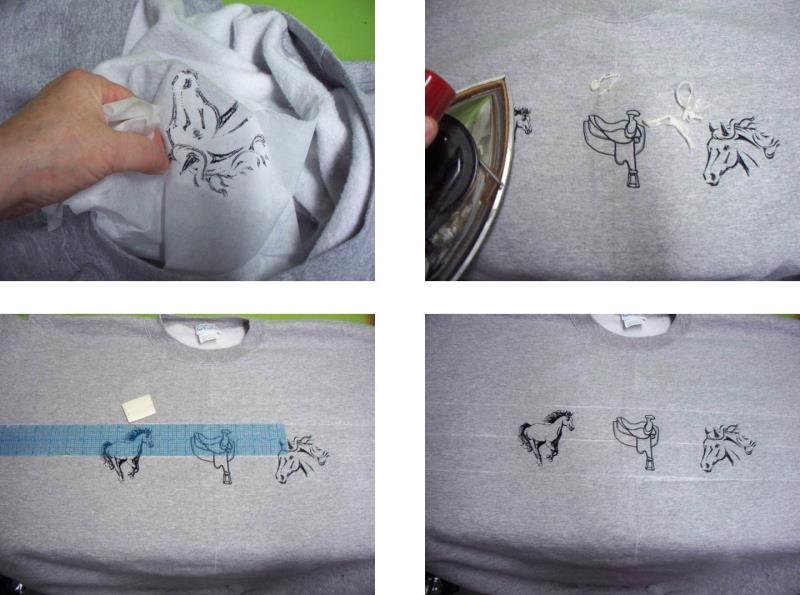
    Gather the materials and read through the instructions before beginning. Print out a paper template of the designs.

    (Click Image to Enlarge)


    Step 2:
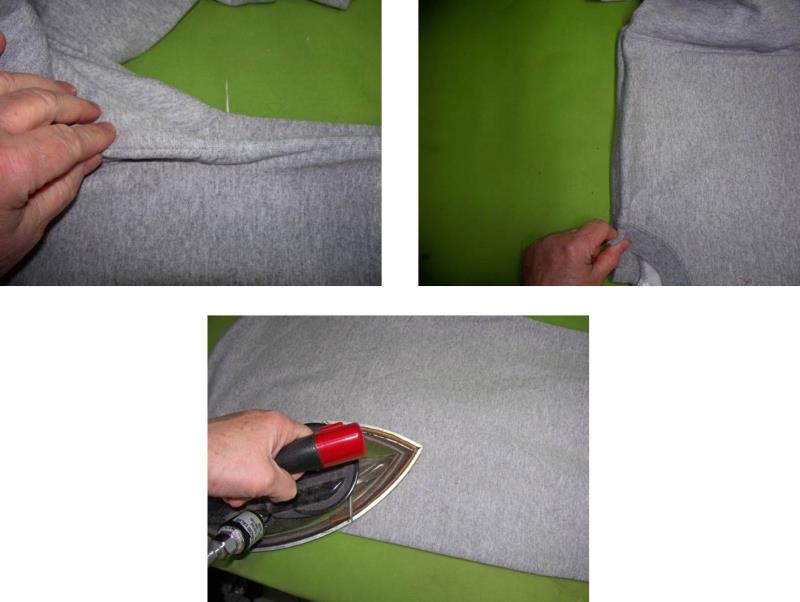
    To find the center front of the sweatshirt, fold the sweatshirt in half lengthwise matching the underarm seams, shoulder seams and then press in a light crease at the center front.

    (Click Image to Enlarge)


    Step 3:
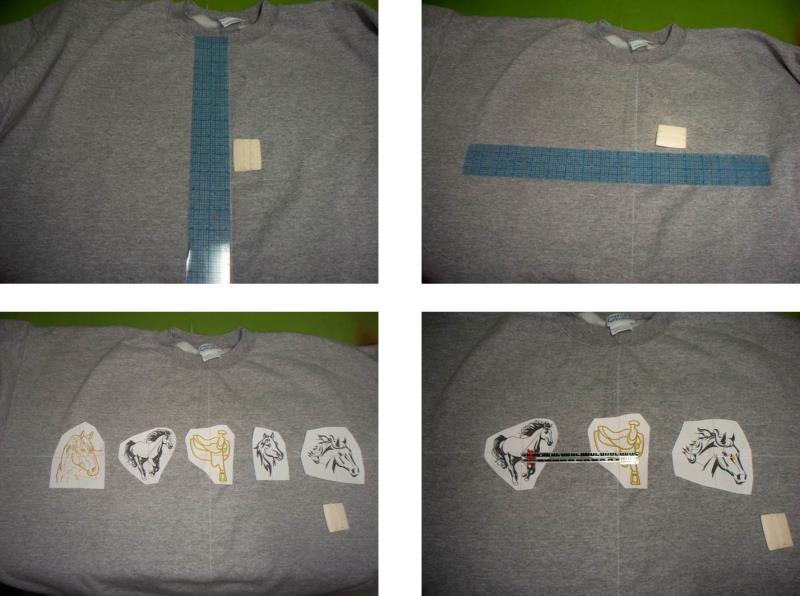
    Lay the ruler along the center front crease line and draw the line using chalk. Measure down from the bottom of the collar about 6” and draw another line perpendicular to the first. Cut out the designs and determine which designs to use. For the project three designs were used, spacing them centered along the horizontal line and 5” apart. Adjust these measurements for the size of the sweatshirt being stitched.

    (Click Image to Enlarge)


    Step 4:
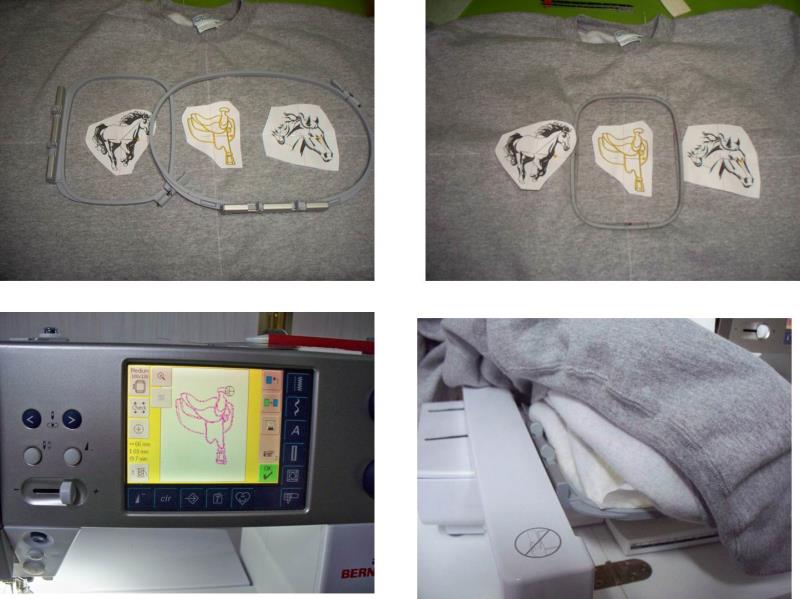
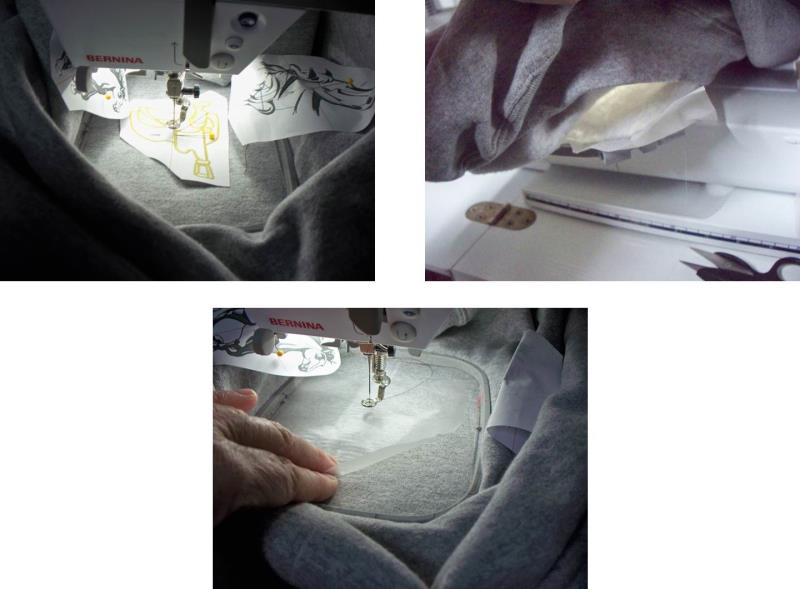
    Determine which hoop to use. Sometimes hoop are large enough to accommodate more than one design. For the project, each design was hooped separately beginning with the center design hooped with one layer of tearaway stabilizer. Load the center design on the machine and place the hoop on the machine. Be very careful that the excess fabric does not hang up on the embroidery arm or underneath the hoop.

    (Click Image to Enlarge)


    Step 5:
    Center the needle over the design template, check one more time that no fabric is caught anywhere, remove the paper template, and add a piece of water soluble stabilizer in the hoop.

    (Click Image to Enlarge)


    Step 6:
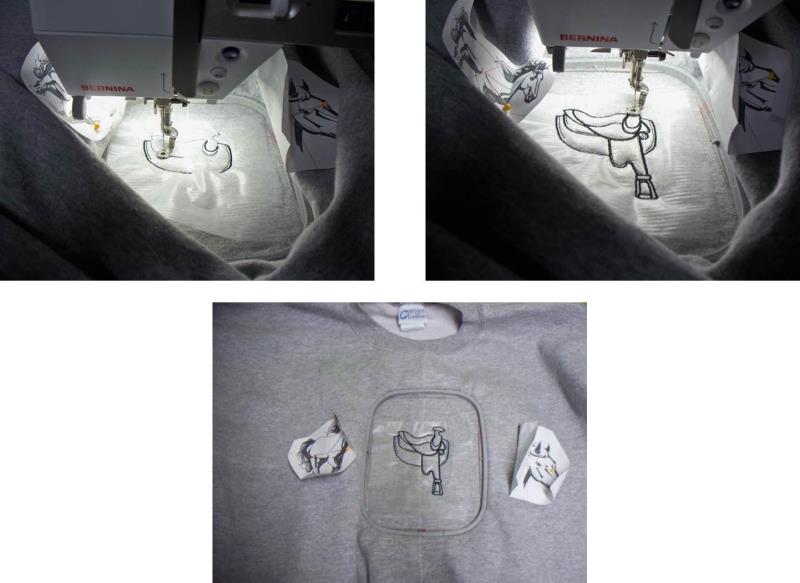
    Start the machine and stitch the design.

    (Click Image to Enlarge)


    Step 7:
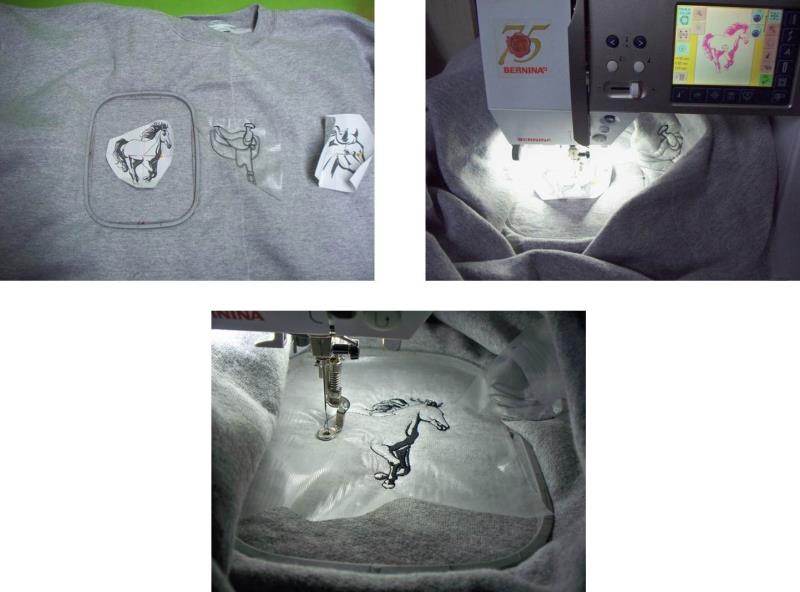
    After the first design has stitched, repeat the steps of hooping and stitching the design on the left.

    (Click Image to Enlarge)


    Step 8:
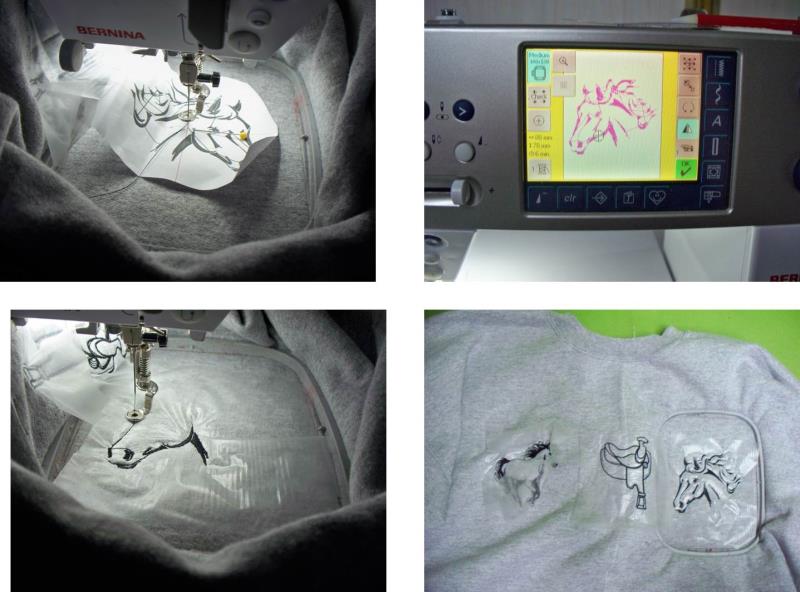
    Stitch the last design, mirroring it.

    (Click Image to Enlarge)


    Step 9:
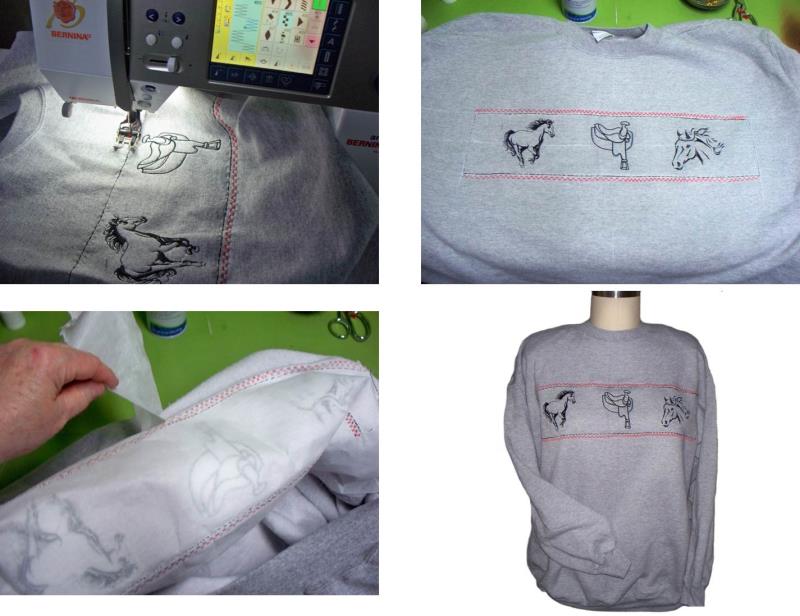
    Remove the stabilizer from the back of the designs and the water soluble topping. To have guidelines for the decorative stitching, measure and mark straight lines above and below the embroidery designs using the center line as a guide for spacing.

    (Click Image to Enlarge)


    Step 10:
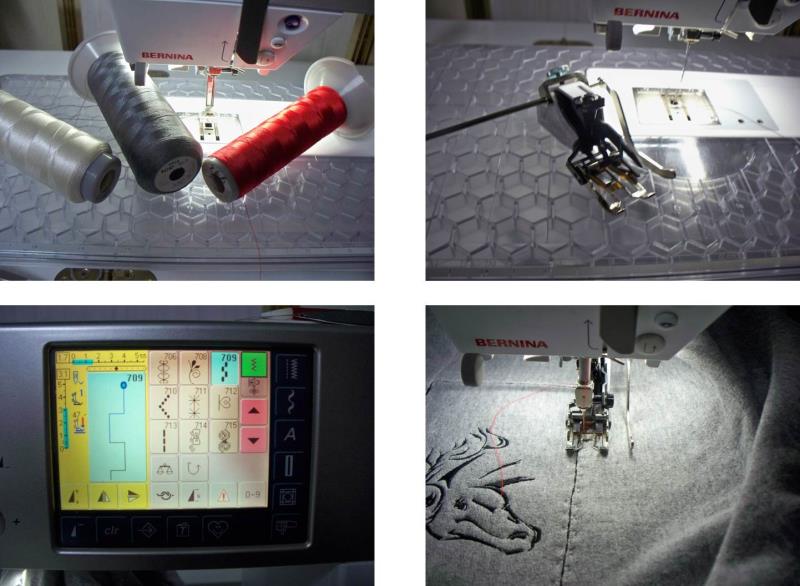
    Choose the embroidery thread colors you’d like for the decorative stitches. If you have one, a walking foot is helpful the feed the fabric evenly. Use decorative stitches that are heavier in their stitching. Use the mark for the first stitching line and use the presser foot and/or quilting guide for subsequent rows. Spray a large piece of tearaway stabilizer and place it behind the area for the decorative stitching.

    (Click Image to Enlarge)


    Step 11:
    Use the colors and number of rows you’d like. Remove the stabilizer after all the stitching is completed.

    (Click Image to Enlarge)


    Step 12:
    Congratulations on completing a cozy sweatshirt for the horse lover in your life.

    (Click Image to Enlarge)

    Meet the Author: Ramona Baird
    Ramona Baird
    Ramona Baird has been in the embroidery industry for over 23 years. She and her husband owned a commercial and retail embroidery store in Arizona for many years. She is an experienced digitizer having been mentored by award-winners Pat Williams and Lindee Goodall. Ramona is a contributor to “Creative Machine Embroidery” magazine having 5 covers to her credit. Ramona has worked for Wilcom America and served many years as Education Director for the American Sewing Guild. With a degree in fashion design, she is able to design and execute patterns which Pat Williams says are “out of the box” in creativity and application. Ramona likes to challenge the boundaries of embroidery and bring new and exciting designs, ideas, and projects to EmbroideryDesigns.com. She wants embroiderers of all levels to increase their skills and enjoyment in using their embroidery machine for gift-making and personal pleasure.
    More From This Author
    Link is Broken, Please check the URL
    Exclusive Embroidery Offers!
    Copyright © {{ currentDate | date:'yyyy'}} - EmbroideryDesigns.com
    GET 50% OFF! ×