{{superHeaderAds.title}}
Live Chat
Embroidery Designs
Welcome, Embroiderer
Login
Ring in 2017 Ticket Holder
{{mainImageAlt || (productInfo._source && productInfo._source.name) || ''}}

Ring in 2017 Ticket Holder Embroidery Project

By   Ramona Baird   on   December 04, 2016

PROJECT DETAILS

SKILL LEVEL
Intermediate
TIME REQUIRED
04:30
Description

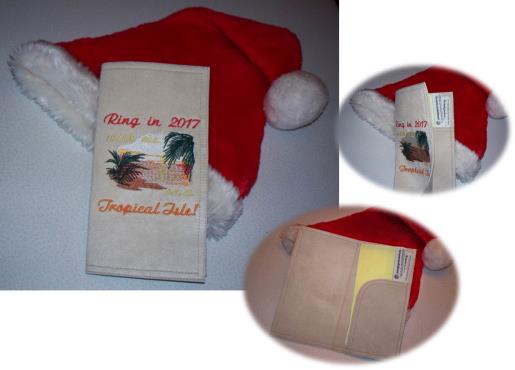
Surprise your sweetheart or children with tickets to a tropic adventure to ring in a new year presented in a decorated pouch.

Project Preview Video

Materials
  • Note: Use either actual tickets or a brochure, adjusting the fabric measurements as needed for the project you are doing. Fabrics are larger than needed and then cut down to size after embroidery.
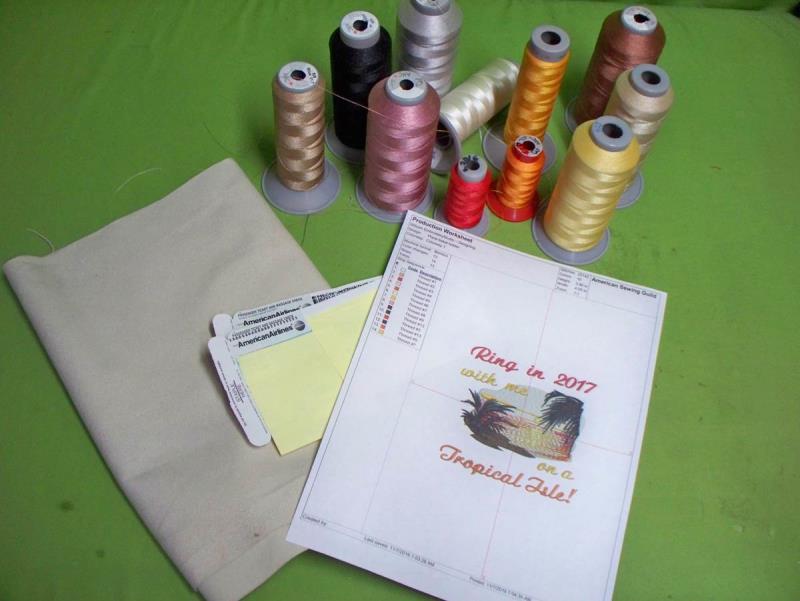
  • Brochure or travel tickets
  • 2 faux leather fabric 10.5” x 14” for outer and inner pouch; also
  • 1 faux leather fabric 4” x 6” for inside ticket holder
  • Pellon 809 Interfacing in the same sizes as above, one for fabric front and one for inside ticket holder
  • Embroidery thread as stated in design color sequence
  • Sewing thread to sew pouch together (project used embroidery thread in both top and bobbin to match fabric)
  • Basting spray
  • 2-tearaway stabilizer to fit hoop

  • Designs used in this project

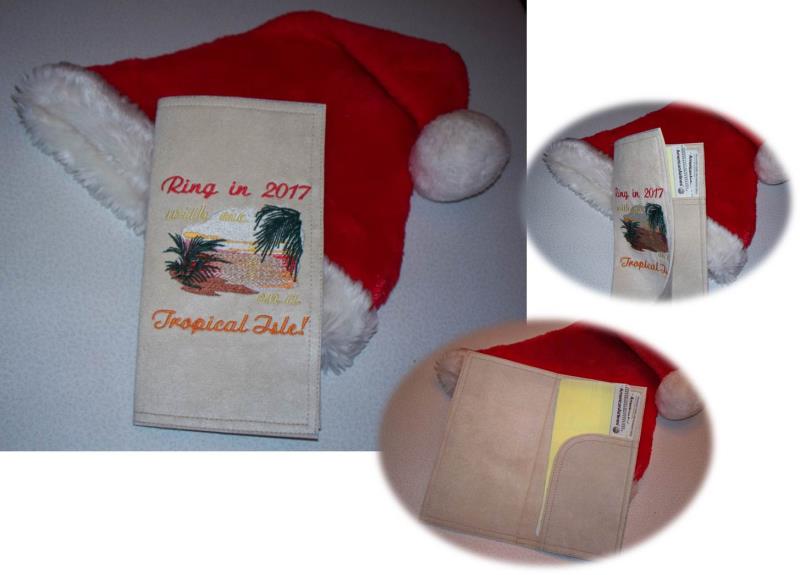
    Final Product: What You Will Create

    Preface:
    Gift nice surprise to present of a New Year’s trip in an embroidered pouch holding the tickets or destination brochure.


    Step 1:
    Gather the materials and read through the instructions before beginning. Add additional text to the design as desired either at the machine or in software. Print out a paper template of the design and color sequence. The fabric listed is cut larger than needed and is cut down to size in the final steps. Be sure to adjust the dimension for everything if you are using a destination brochure or if ticket sizes vary from the dimensions given in the project instructions.

    (Click Image to Enlarge)


    Step 2:
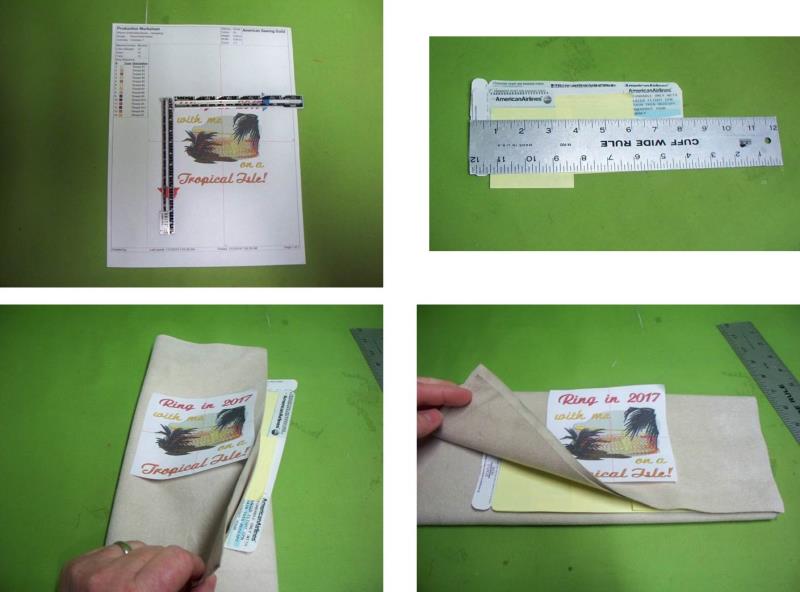
    Measure the dimensions of the design (or check the website or design sheet) and also measure the ticket or brochure height and width. Decide how the tickets will be presented in the holder so you will know whether to stitch the design vertically or horizontally. Instructions will be shown for a holder that will be vertical.

    (Click Image to Enlarge)


    Step 3:
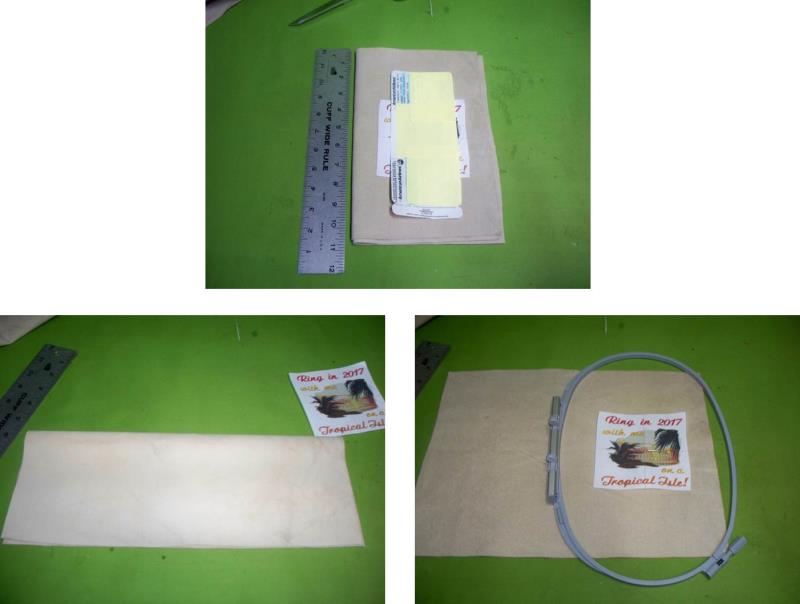
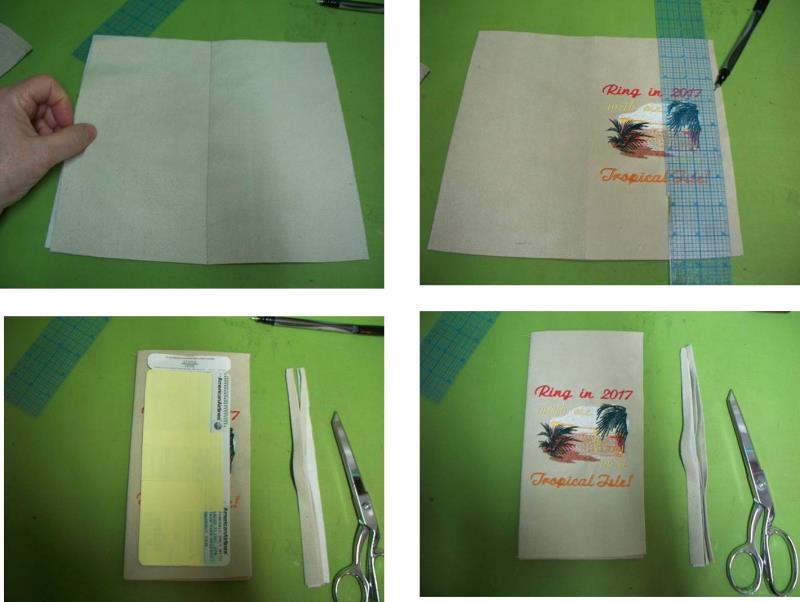
    Cut the fabric larger than needed and fold it in half to get a general idea of where to center the embroidery design. You want to make sure the tickets will be basically centered in the holder when they are inserted. Fold the fabric, right sides together, and lightly finger press to find the center. Because faux leather is being used and it could be marred by hooping, use a larger hoop than necessary to allow the fabric to lie as flat as possible while stitching.

    (Click Image to Enlarge)


    Step 4:
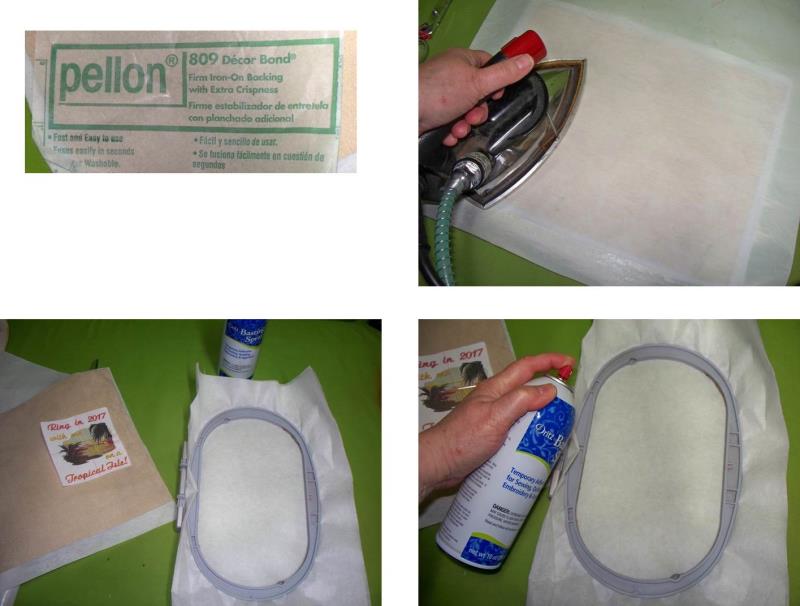
    Cut a piece of the Pellon 809 stabilizer and fuse it to the back of the fabric. Use plenty of steam and only a slightly warm iron so as not to crush the nap on the faux leather. Use a pressing sheet and press cloth to protect ironing surfaces. Center the paper template on the fabric right front. Hoop two layers of tearaway stabilizer and spray with basting spray.

    (Click Image to Enlarge)


    Step 5:
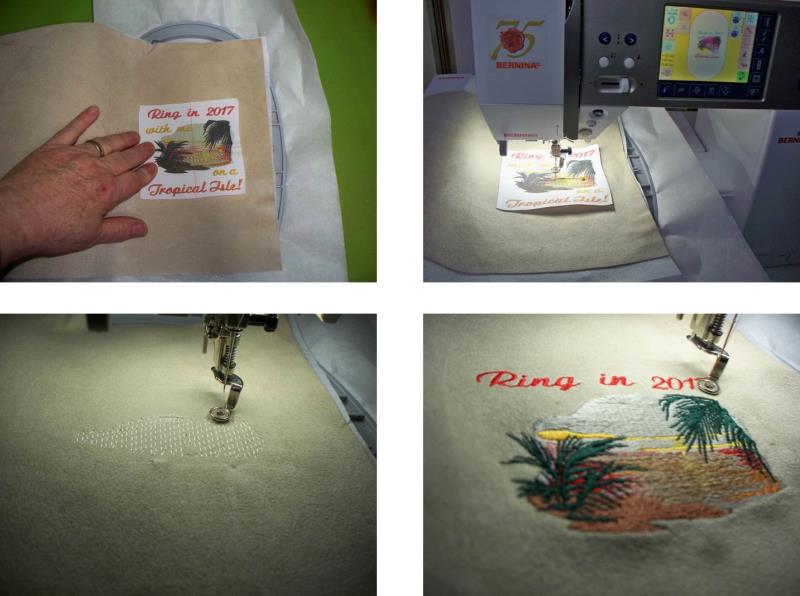
    Press the fabric into position. Load the design on the machine, center the needle over the crosshairs on the paper template, and stitch the design following the color sequence.

    (Click Image to Enlarge)


    Step 6:
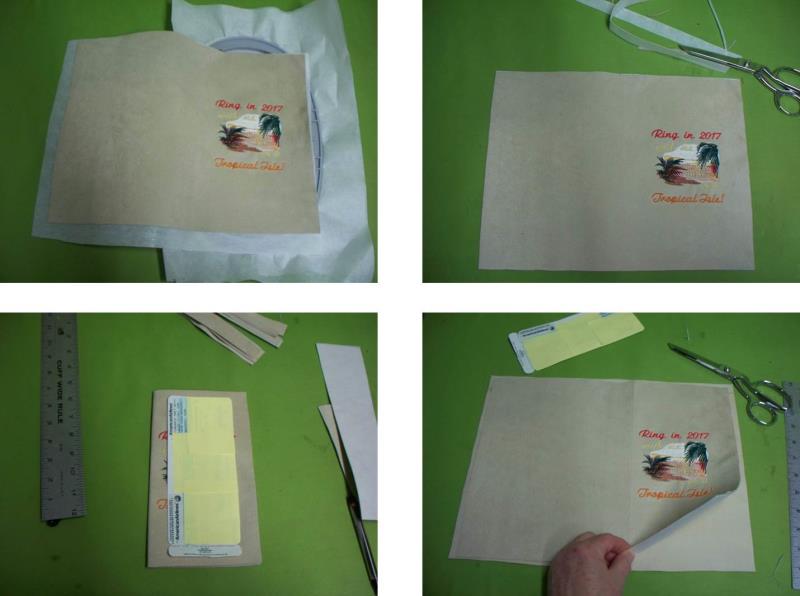
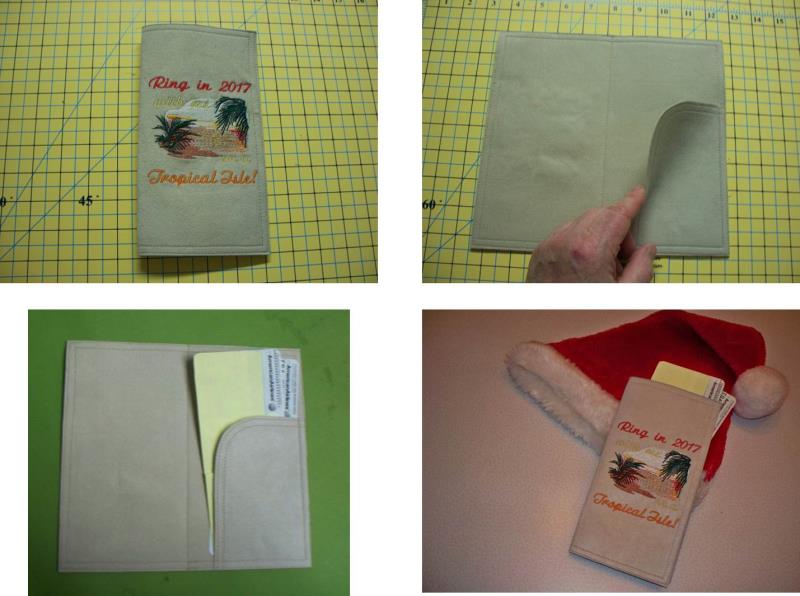
    After the design has finished stitching, remove the fabric from the hoop and tear away the excess stabilizer. Place the ticket over the design and re-fold the fabric so there will be about ½” from the design to the fold on the left side of the fabric and crease lightly with the iron. Open the fabric back up and place the second layer of faux leather under the embroidered piece, wrong sides together.

    (Click Image to Enlarge)


    Step 7:
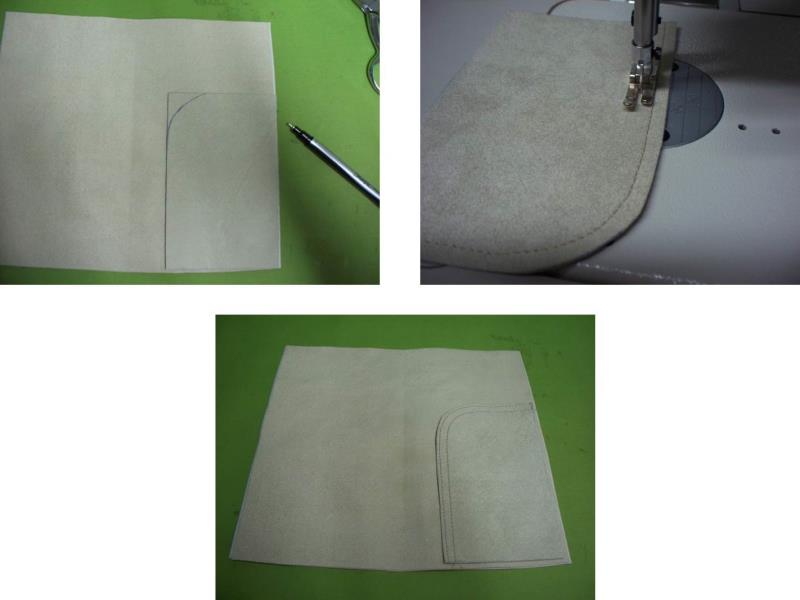
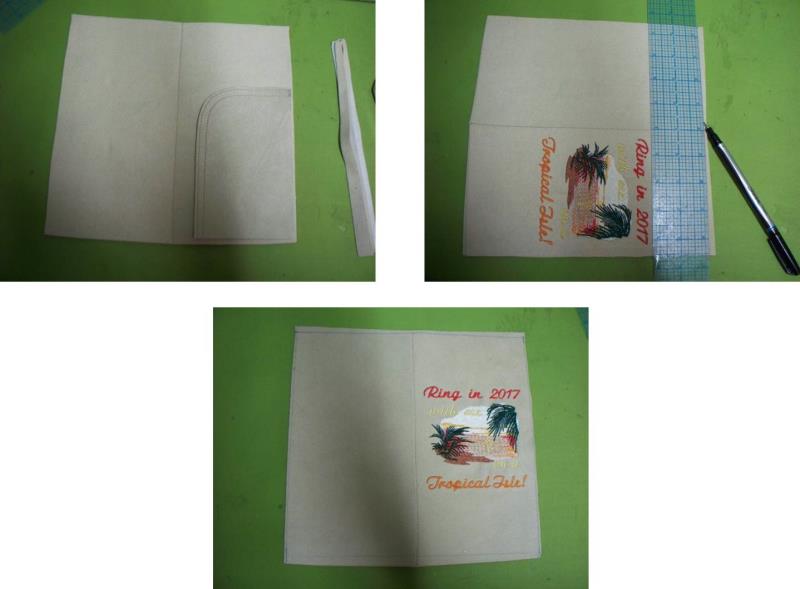
    Interface the smaller piece of faux leather. Draw a slight cure at the top left and trim the fabric along the drawn line. Top stitch two rows of to decorate along the curved edge.

    (Click Image to Enlarge)


    Step 8:
    Place the embroidered and inside fabric pieces together and stitch long the folded edge to hold them together. Now measure and mark ½” from the right side of the embroidery design and trim away the excess fabric. Also measure and mark the length of the fabric about ½” longer than the length of the ticket and trim the fabric.

    (Click Image to Enlarge)


    Step 9:
    Place and pin the unstitched edges of the inside fabric at the lower right of the inside fabric. One more time, draw straight lines to clean up all the edges on the right side of the fabric; these will be used as guide lines for stitching all the layers together.

    (Click Image to Enlarge)


    Step 10:
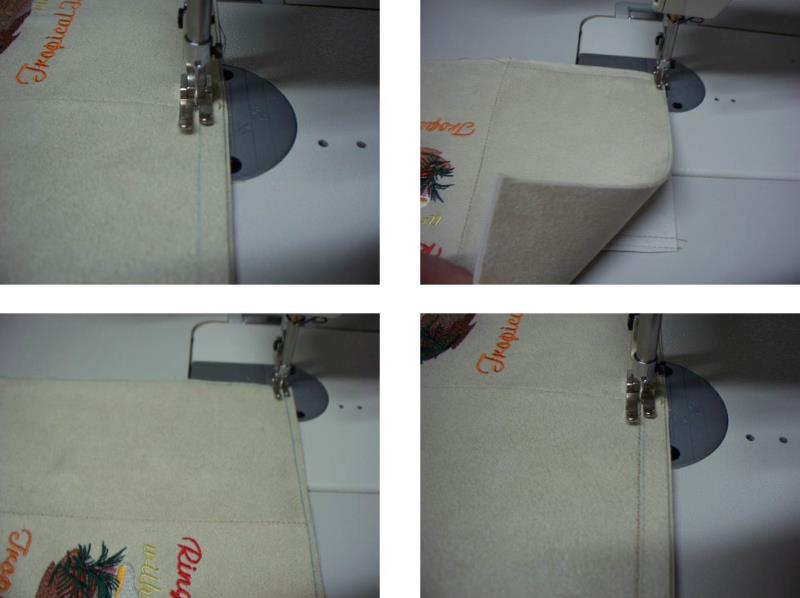
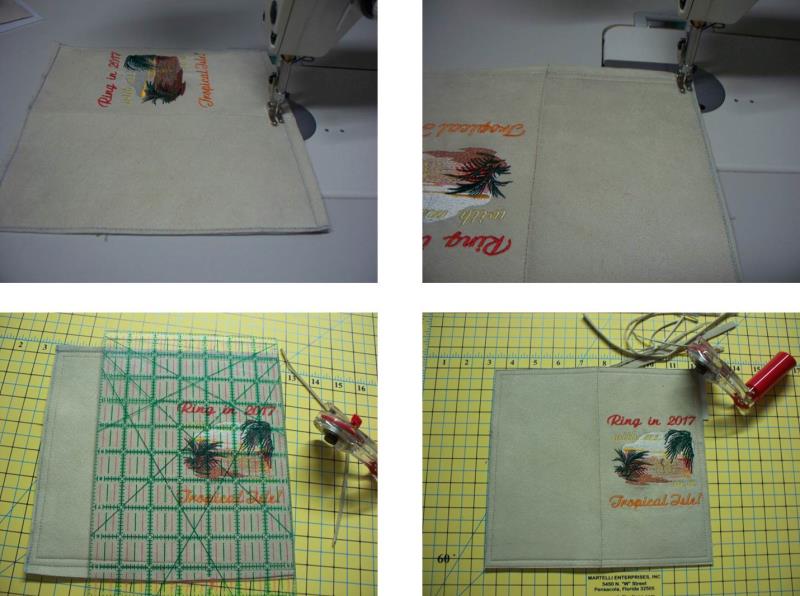
    Using the presser foot as a guide, stitch around all four sides of the pouch, beginning at the lower bottom edge and be sure the inside fabric holder is caught in the stitching.

    (Click Image to Enlarge)


    Step 11:
    Do a second row of stitching about a presser foot away from the first. Use a ruler and rotary cutter to trim the fabric just outside of the stitching lines.

    (Click Image to Enlarge)


    Step 12:
    The pouch is completed; the inner fabric holder is stitched into the corner and will hold the tickets or brochure.

    (Click Image to Enlarge)


    Step 13:
    Congratulations on completing the “Ring in 2017” ticket holder - enjoy your trip!

    (Click Image to Enlarge)

    Meet the Author: Ramona Baird
    Ramona Baird
    Ramona Baird has been in the embroidery industry for over 23 years. She and her husband owned a commercial and retail embroidery store in Arizona for many years. She is an experienced digitizer having been mentored by award-winners Pat Williams and Lindee Goodall. Ramona is a contributor to “Creative Machine Embroidery” magazine having 5 covers to her credit. Ramona has worked for Wilcom America and served many years as Education Director for the American Sewing Guild. With a degree in fashion design, she is able to design and execute patterns which Pat Williams says are “out of the box” in creativity and application. Ramona likes to challenge the boundaries of embroidery and bring new and exciting designs, ideas, and projects to EmbroideryDesigns.com. She wants embroiderers of all levels to increase their skills and enjoyment in using their embroidery machine for gift-making and personal pleasure.
    More From This Author
    Link is Broken, Please check the URL
    Exclusive Embroidery Offers!
    Copyright © {{ currentDate | date:'yyyy'}} - EmbroideryDesigns.com
    GET 50% OFF! ×