Border OptionsHugging border, circle, square, or rectangle — with a 3mm satin stitch.
Backing OptionsAvailable with iron-on, sew-on, or velcro backing.
Fast ShippingShipped quickly from the USA.
Free Online Tools
Powerful embroidery utilities that save time and prevent costly mistakes.
Stitch AssistantRECOMMENDED
Get the exact stabilizer, machine settings, needle, and thread color sequence for every embroidery design you purchase — based on that design's stitch density, dimensions, and color count.
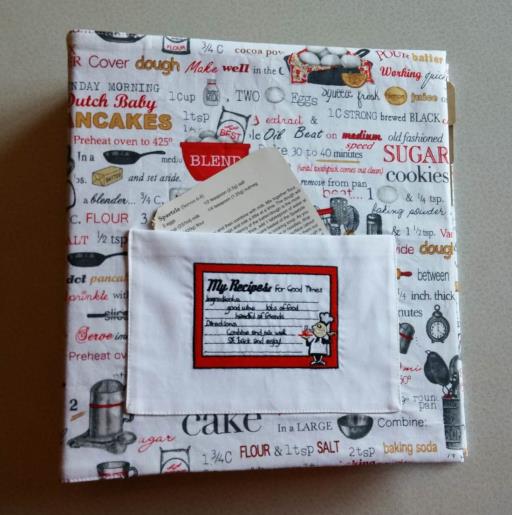
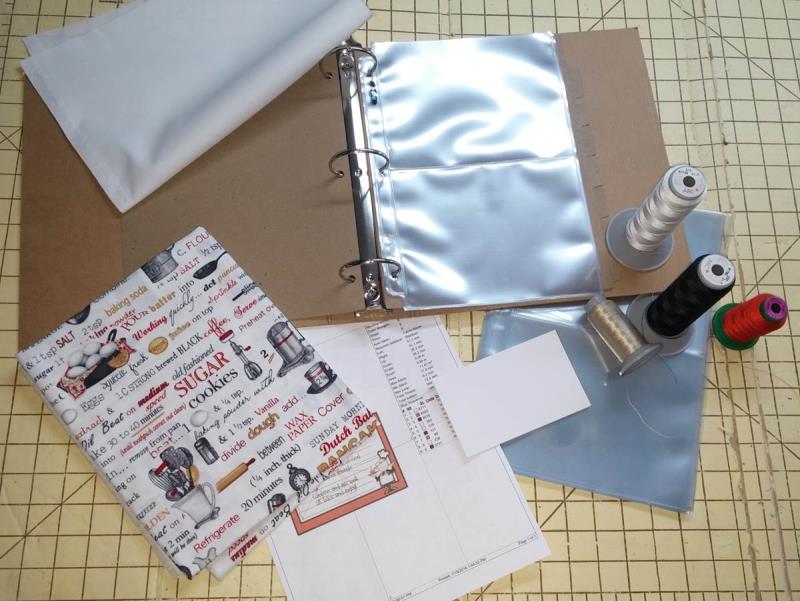
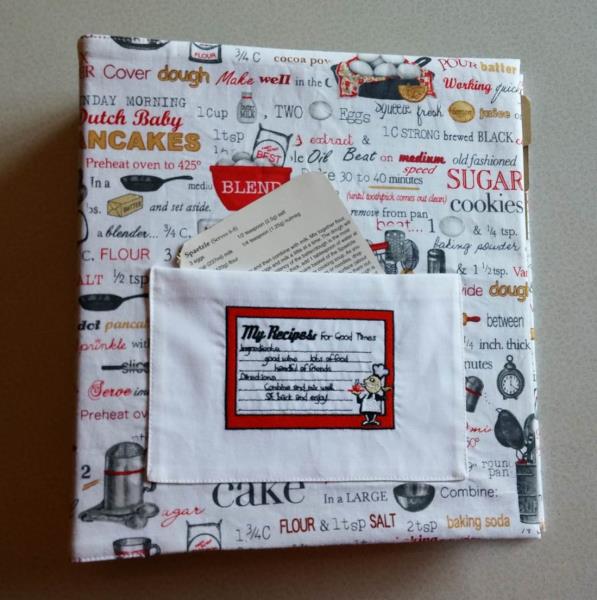
Notebook sizes vary so only general directions will be given to measure and cover a notebook with fabric. Use recipe themed fabric for the notebook cover and white cotton for the pocket. For the project, a 3” recycled cardboard notebook and inserts was used (purchased on Amazon from Aurora). The cooking themed fabric is a Robert Kaufmann fabric.
Step 1:
Gather the materials and read through the instructions before beginning. Print out a paper template of the design and color sequence.
(Click Image to Enlarge)
Step 2:
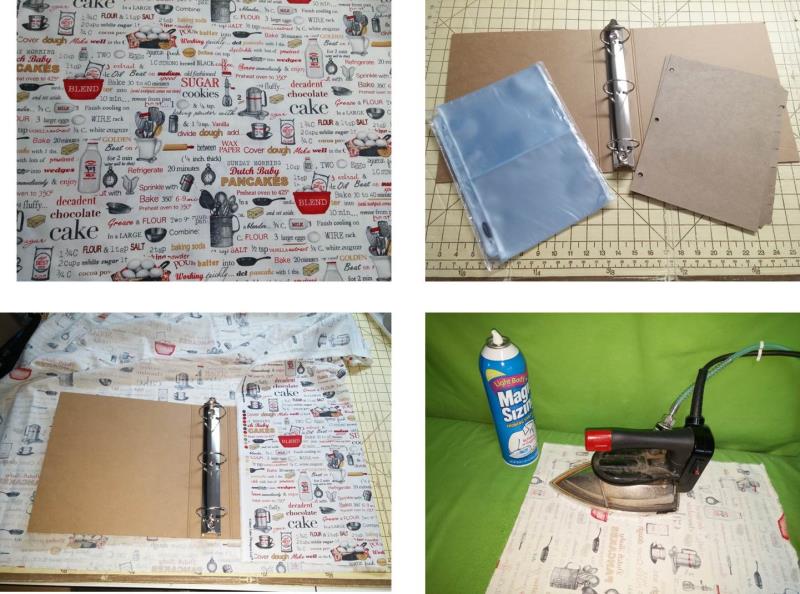
Purchase cooking-themed fabric or other fabric that will coordinate with your kitchen décor. Use a notebook you already have on hand or purchase a new one with tabs to divide the recipe inserts into categories. Determine the amount of fabric needed by measuring around the notebook and its height. The fabric will wrap to the inside to hold the fabric onto the notebook. Press the fabric well with spray starch or sizing.
(Click Image to Enlarge)
Step 3:
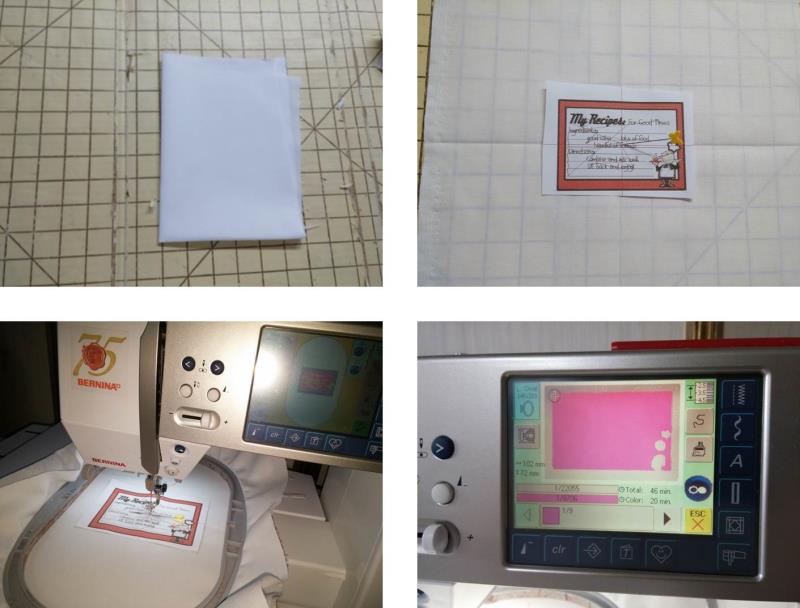
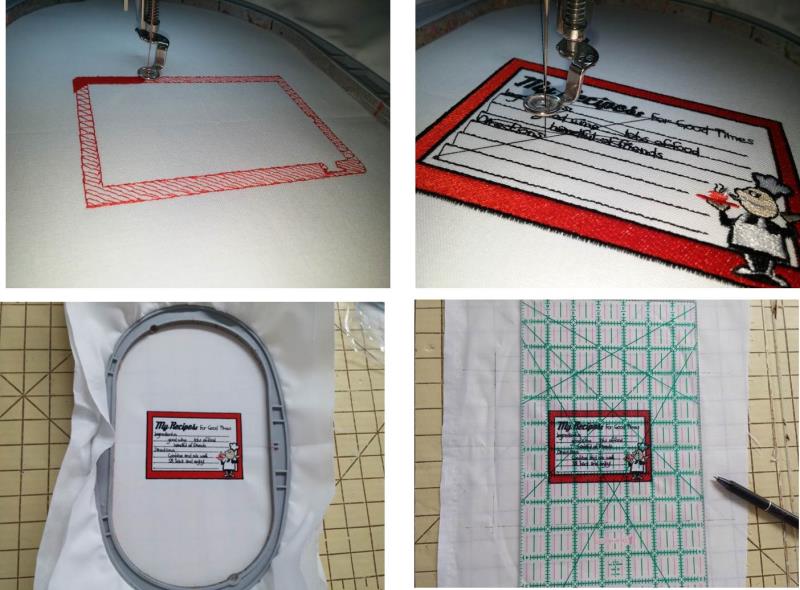
Begin by stitching the embroidery design on the pocket. Cut a piece of white cotton fabric to fit the hoop, press well, quarter fold and lightly crease. Cut out and center the design template to the fabric. Hoop the fabric with tearaway stabilizer. Place the hoop on the machine and align the needle to the center of the template. Remove the template. If desired, skip color 1 which is the background if it is to be stitched in white thread on the white fabric.
(Click Image to Enlarge)
Step 4:
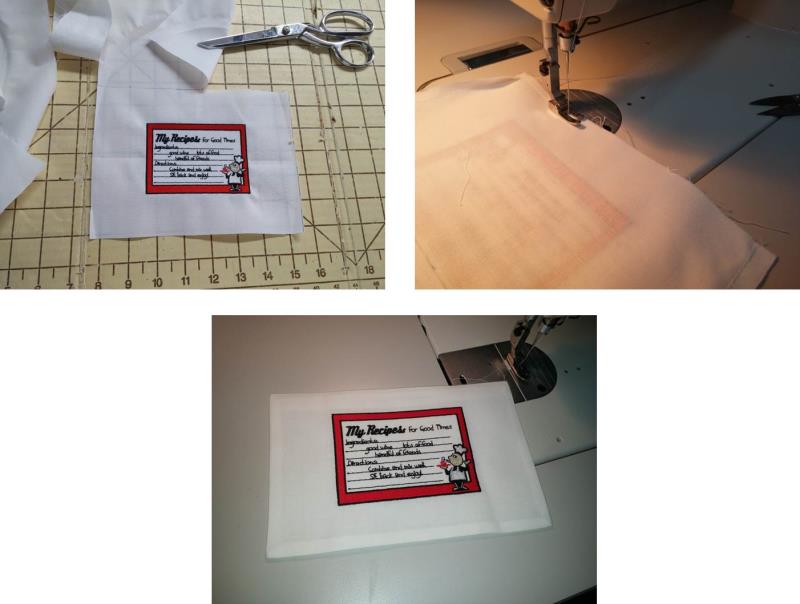
Stitch following the color sequence. Once the design is finished, remove the fabric from the hoop and remove the excess stabilizer. Mark the pocket, including seam allowances, to the desired size. For the project the edges were marked 1.5” away from the top and bottom and 2” away from the sides.
(Click Image to Enlarge)
Step 5:
Cut out the pocket along the lines, cut a second piece of the same size for the pocket lining. Place right sides together and sew around all edges leaving an opening for turning. Turn the pocket right side out through the opening and press well.
(Click Image to Enlarge)
Step 6:
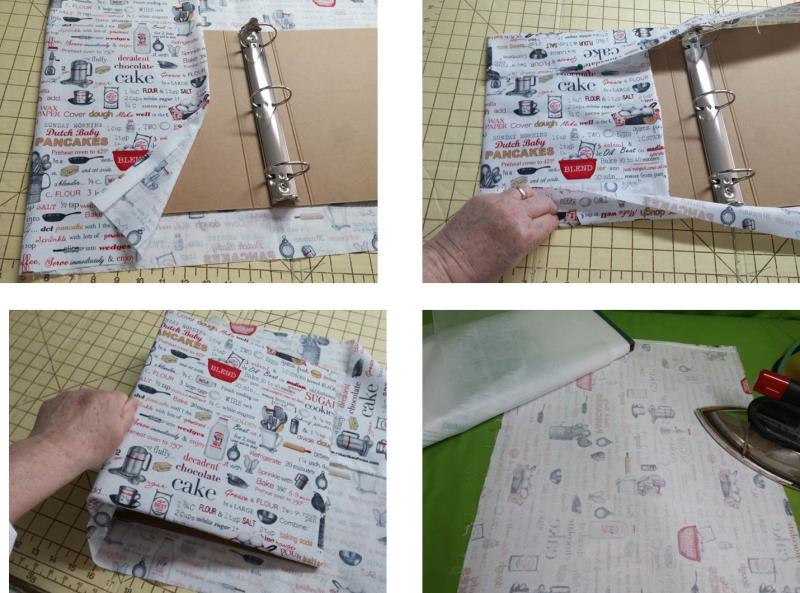
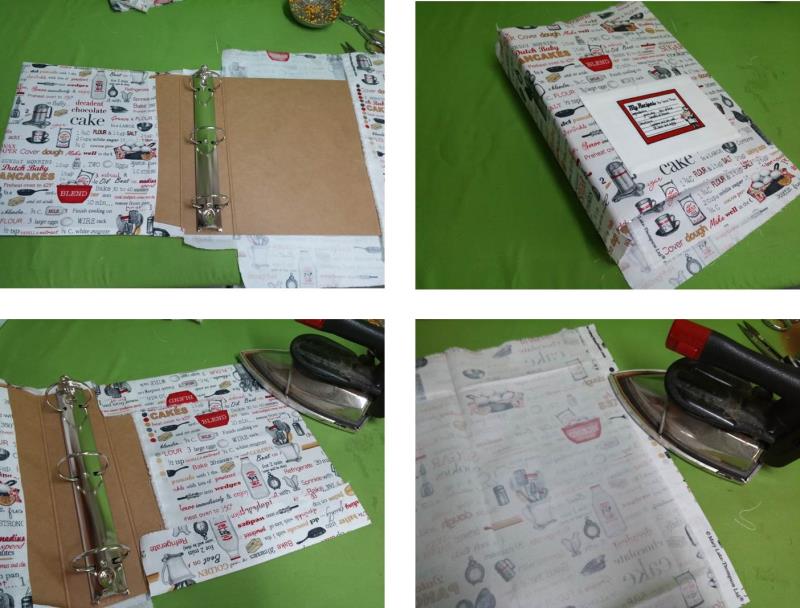
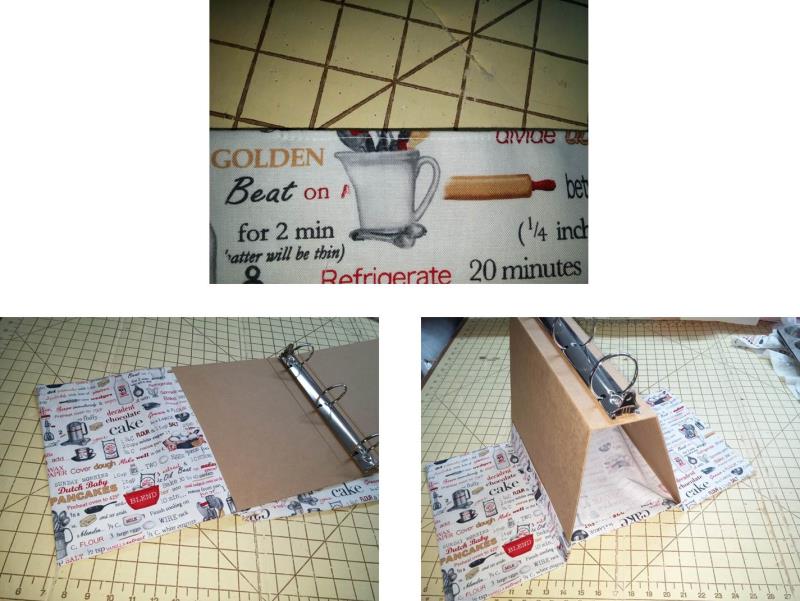
Fold under the left edge of the fabric to cover the notebook, wrap the fabric over the left cover and over the spine; crease all edges. Repeat for the other side and cut the fabric generously to size. Press interfacing on the back of the cut fabric.
(Click Image to Enlarge)
Step 7:
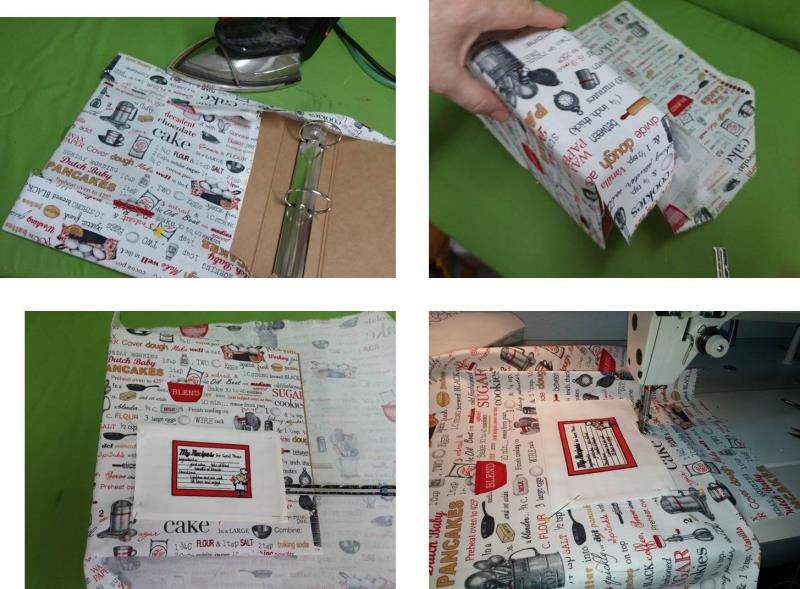
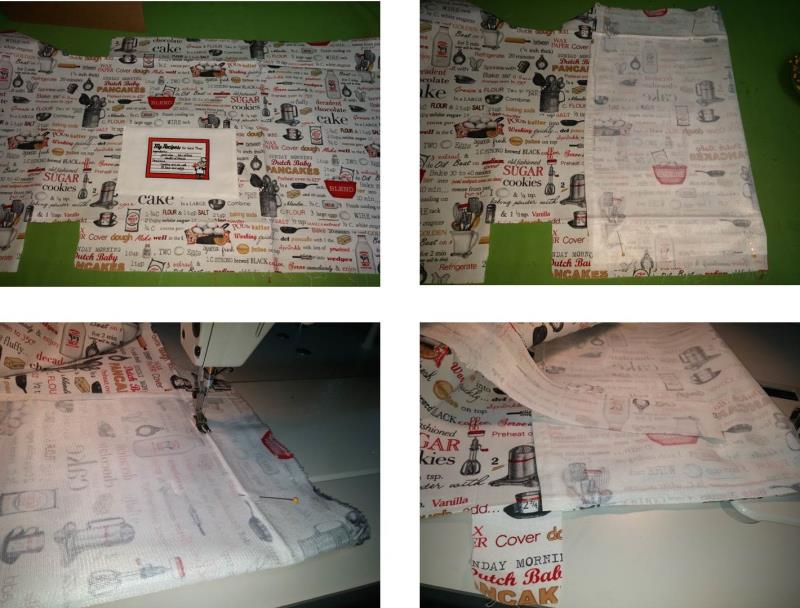
Wrap the fabric over the notebook again and with a slightly warm iron, press in the creases (this step may have to be marked instead of pressed if using a plastic covered notebook). At the spine clip the fabric to mark the spine edges. Place the pocket as desired on the front cover fabric and measure to center. Open up the fabric, pin the pocket in place, and stitch along both sides and the bottom.
(Click Image to Enlarge)
Step 8:
Using the folds as guides, fold back the front cover fabric along the outer edge meeting the top and bottom folds and pin in place. Sew from the edge to the end sewing just to the outside of the creased line to give a little extra ease to the cover so it will slip over the binder easily. Repeat for the other side. Trim away the excess fabric but keep the scraps to be used later.
(Click Image to Enlarge)
Step 9:
Slip the stitched side over the front cover. Fold the notebook to allow enough fabric to go over the spine and then fold in the edges on the back cover and press creases like was done for the front. Fold in the inside edge of the cover and topstitch.
(Click Image to Enlarge)
Step 10:
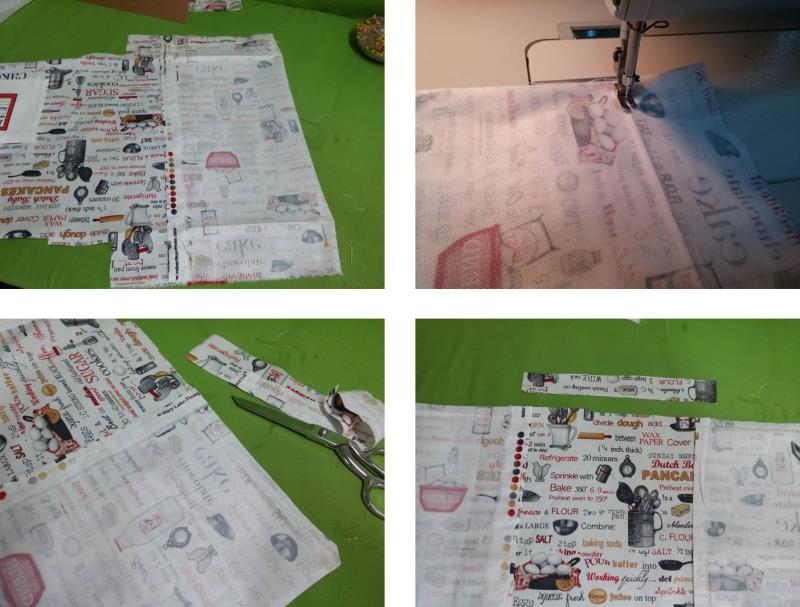
Fold the back cover along the outer fold and stitch along the top and bottom folds; trim the excess fabric. Now it is time to clean finish the area to go over the spine area. Turn the cover as shown. Cut a piece of the scrap fabric 2” longer than the area to be clean finished and about 1 ½” wide.
(Click Image to Enlarge)
Step 11:
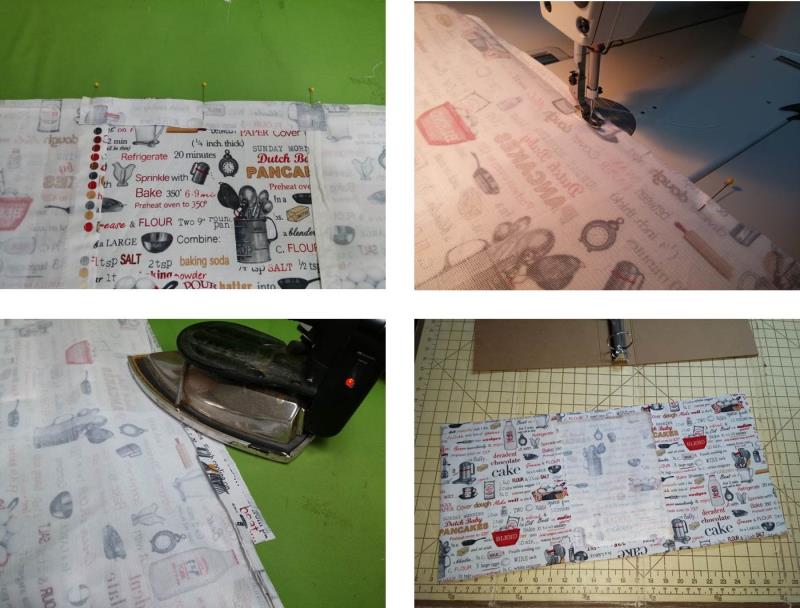
Pin the piece over the center, on top of the folded back covers. Sew the seam straight across from cover. Press the seam open and then repeat for the other side. Turn the cover right side out.
(Click Image to Enlarge)
Step 12:
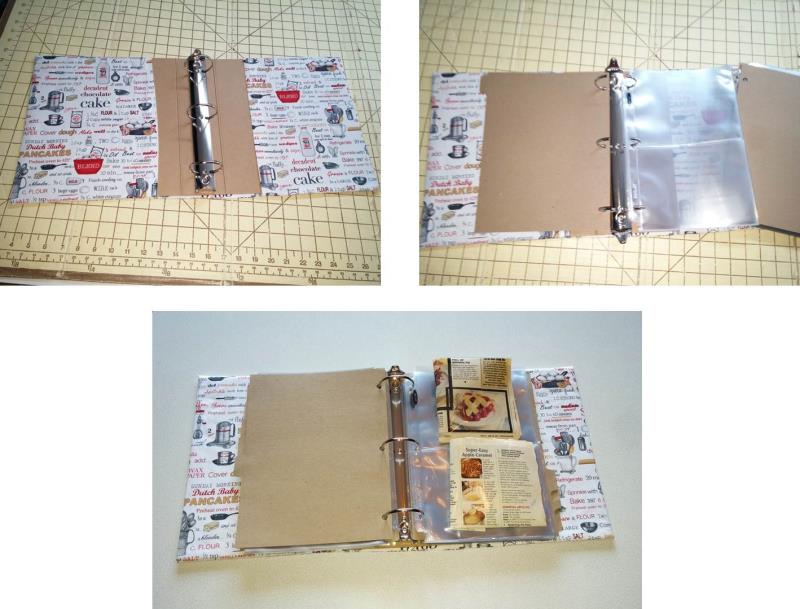
Top stitch the small sections down. Slip the cover on the binder.
(Click Image to Enlarge)
Step 13:
Insert the tabs and organizer sheets into the binder and fill with recipes.
(Click Image to Enlarge)
Step 14:
Congratulations on creating a personal recipe book that is sure to be a treasure passed down.
Ramona Baird has been in the embroidery industry for over 23 years. She and her husband owned a commercial and retail embroidery store in Arizona for many years. She is an experienced digitizer having been mentored by award-winners Pat Williams and Lindee Goodall. Ramona is a contributor to “Creative Machine Embroidery” magazine having 5 covers to her credit. Ramona has worked for Wilcom America and served many years as Education Director for the American Sewing Guild. With a degree in fashion design, she is able to design and execute patterns which Pat Williams says are “out of the box” in creativity and application. Ramona likes to challenge the boundaries of embroidery and bring new and exciting designs, ideas, and projects to EmbroideryDesigns.com. She wants embroiderers of all levels to increase their skills and enjoyment in using their embroidery machine for gift-making and personal pleasure.