Border OptionsHugging border, circle, square, or rectangle — with a 3mm satin stitch.
Backing OptionsAvailable with iron-on, sew-on, or velcro backing.
Fast ShippingShipped quickly from the USA.
Free Online Tools
Powerful embroidery utilities that save time and prevent costly mistakes.
Stitch AssistantRECOMMENDED
Get the exact stabilizer, machine settings, needle, and thread color sequence for every embroidery design you purchase — based on that design's stitch density, dimensions, and color count.
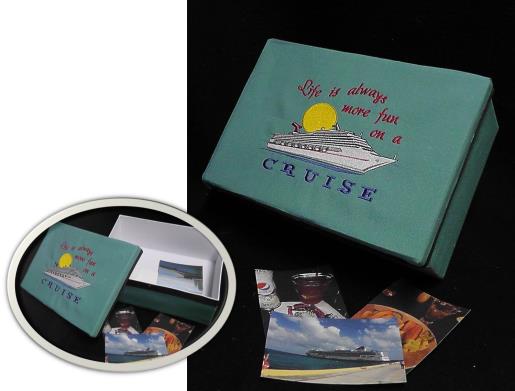
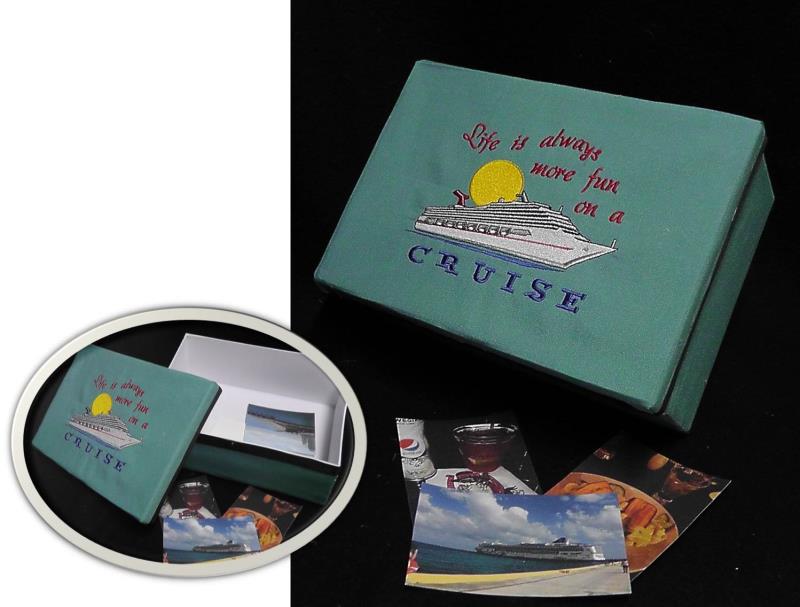
Capture and cherish your cruise memories with this Ocean Cruise Ship Memory Box. Ideal for storing photos and mementos from your travels, it features a charming cruise ship design. Step-by-step instructions are included.
Choose the box then measure it to determine how much fabric is needed for the project. The box is covered on the outside on both the cover and bottom; the raw edges of the fabric are affixed with hot glue. Gather all the mementos, print photographs, and keep them all in the “Ocean Cruise Ship box you will create.
Step 1:
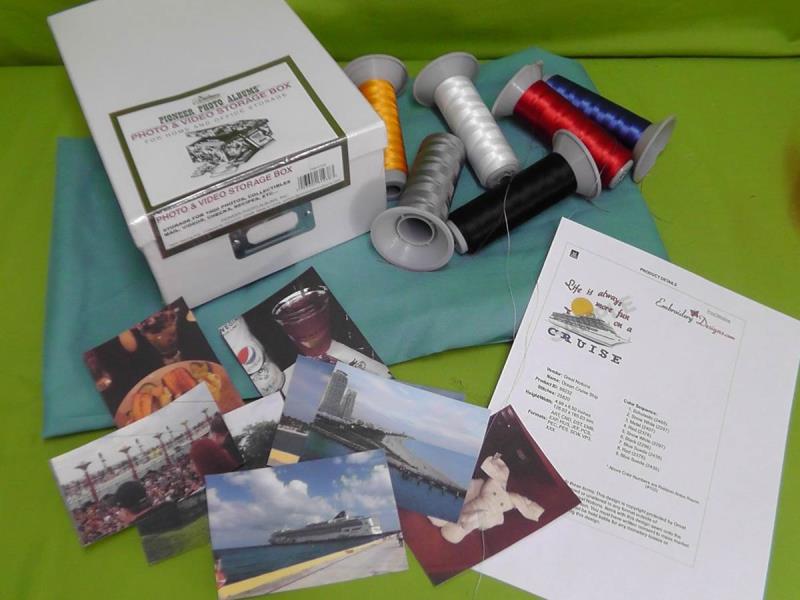
Gather the materials and read through the instructions before beginning. Print a copy of the color sequence.
(Click Image to Enlarge)
Step 2:
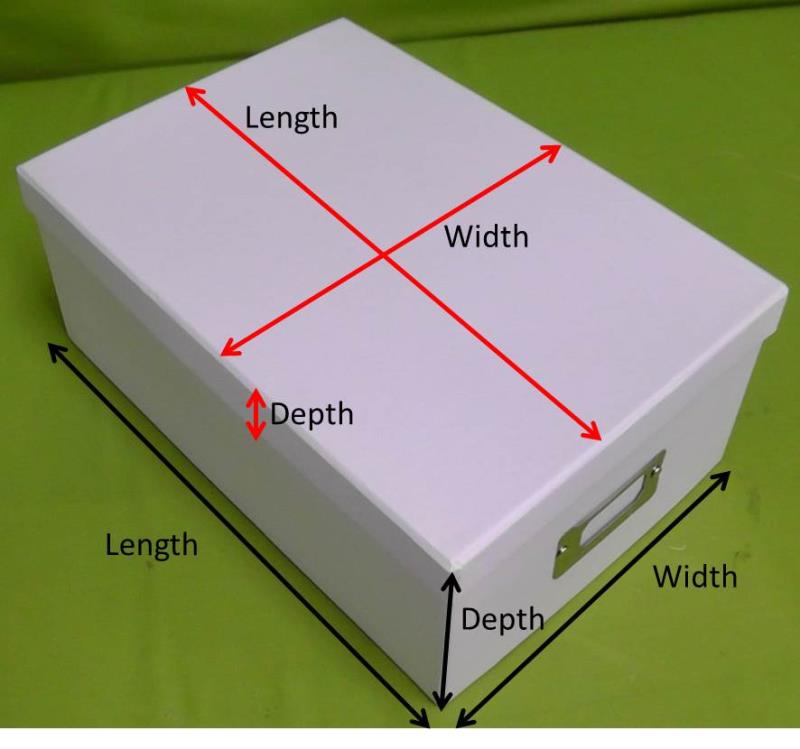
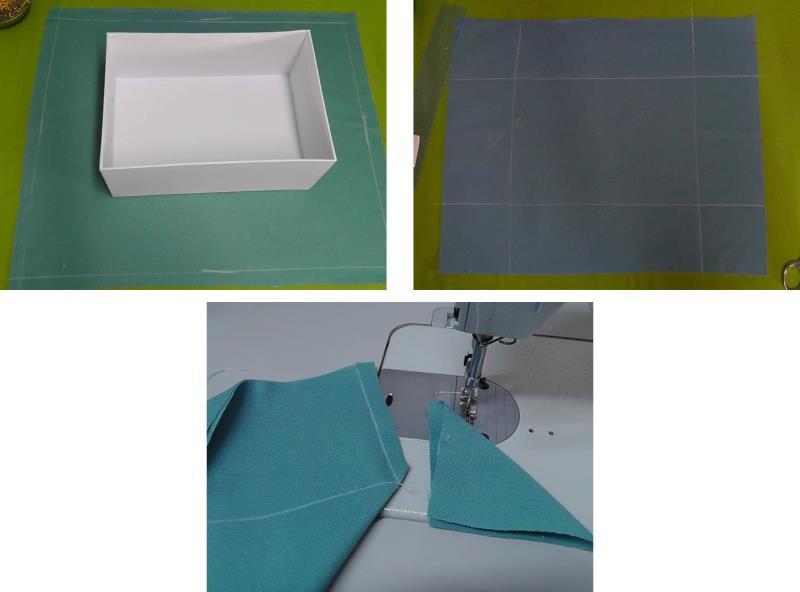
Two pieces of fabric will be cut - one for the box top, and one for the box bottom. Measure the length, width, and depth of both box pieces.
(Click Image to Enlarge)
Step 3:
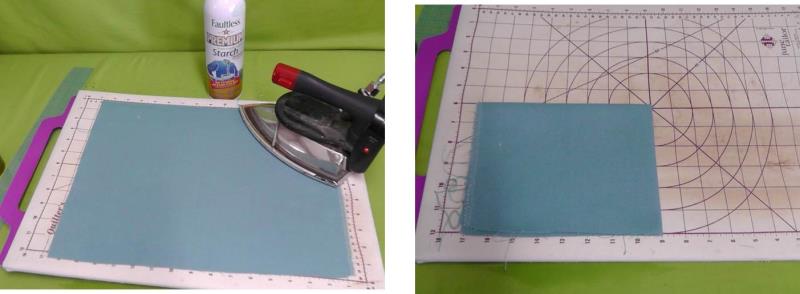
Cut the fabric for the box top using the measurements, and add about 1” all around (this will be trimmed to size later). Press the fabric well using spray starch. Quarter fold the fabric to find the center.
(Click Image to Enlarge)
Step 4:
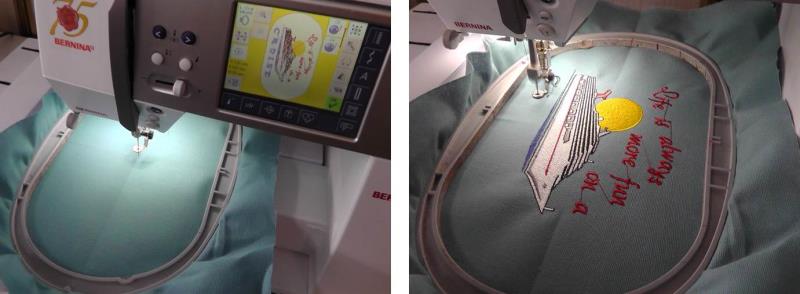
Hoop the fabric with cutaway stabilizer. Load the design “Ocean Cruise Ship” on the machine and rotate the design, if necessary, to fit within the hoop area. Stitch the design following the color sequence.
(Click Image to Enlarge)
Step 5:
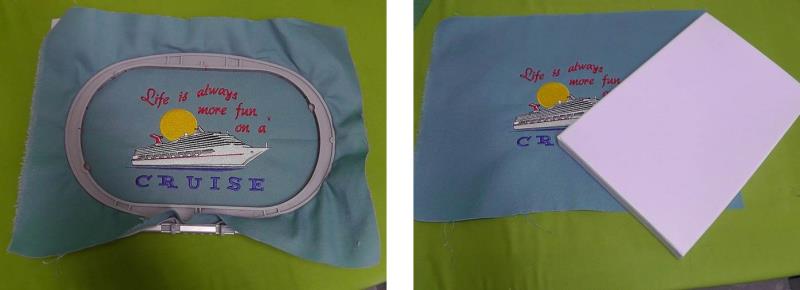
After the design has finished stitching, remove the fabric from the hoop and trim away the excess stabilizer. Press the fabric. It is not time to apply the fabric to the box top.
(Click Image to Enlarge)
Step 6:
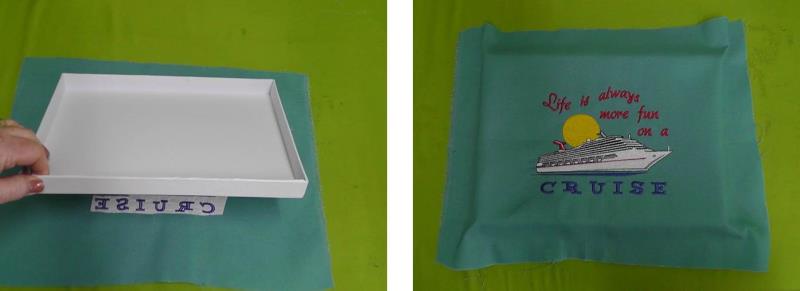
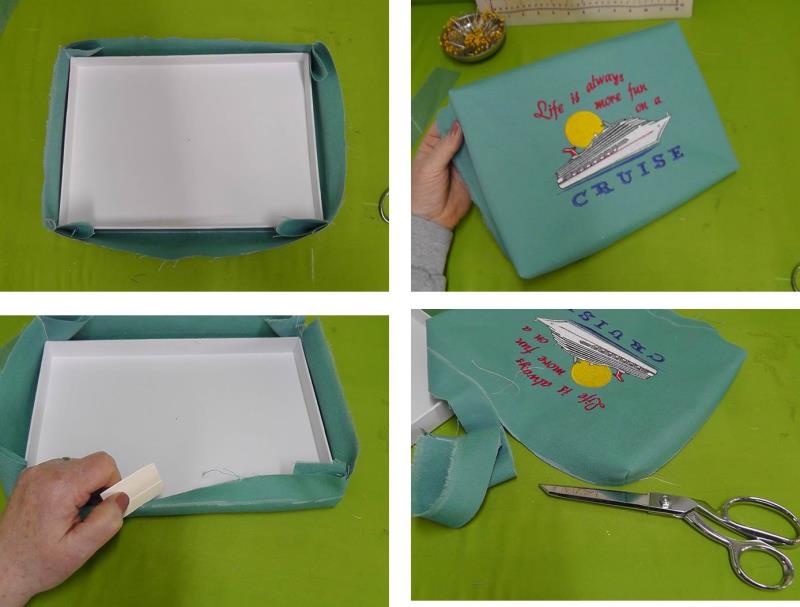
Center the top of the wrong side of the embroidered fabric. Flip the fabric and box top and double check to make sure the embroidery is centered on the box top.
(Click Image to Enlarge)
Step 7:
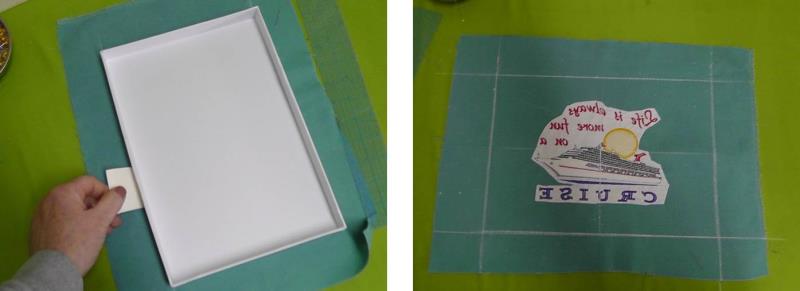
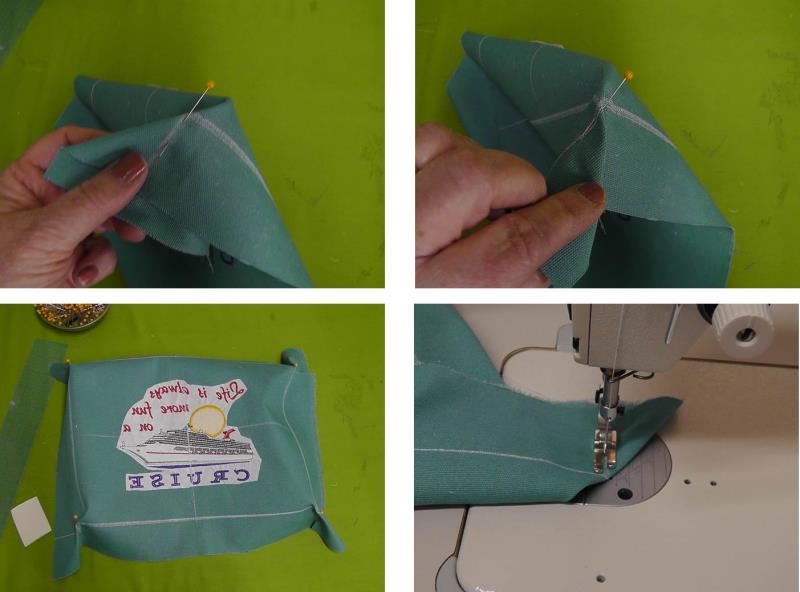
Use chalk to mark around the box top. Extend the lines to the outer cut edges of the fabric as shown.
(Click Image to Enlarge)
Step 8:
Bring adjoining lines together forming a point at the corner. Repeat for the remaining three corners. Sew each corner along the drawn line.
(Click Image to Enlarge)
Step 9:
Check the “fit” of the fabric to the box top and make any adjustments as necessary. Bring the excess fabric over each edge and mark the fabric along the box edge with the chalk. Remove the fabric and cut along the marked line.
(Click Image to Enlarge)
Step 10:
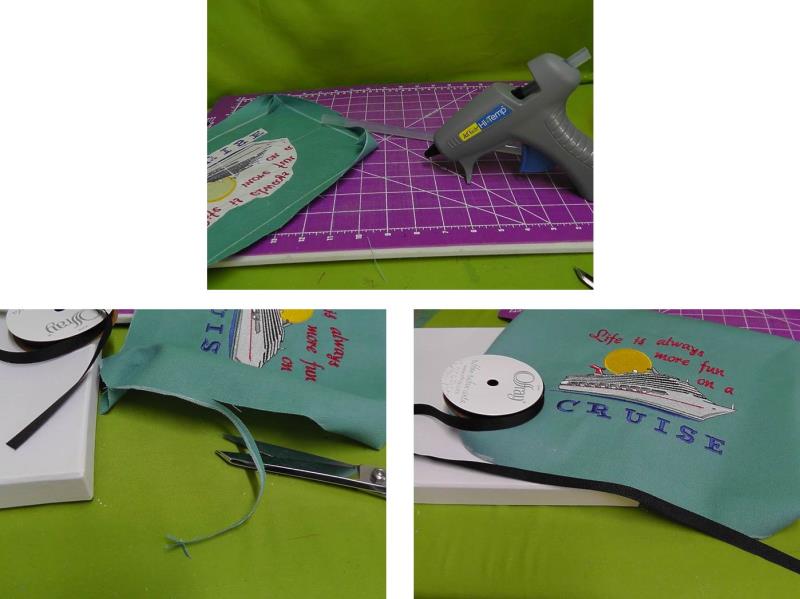
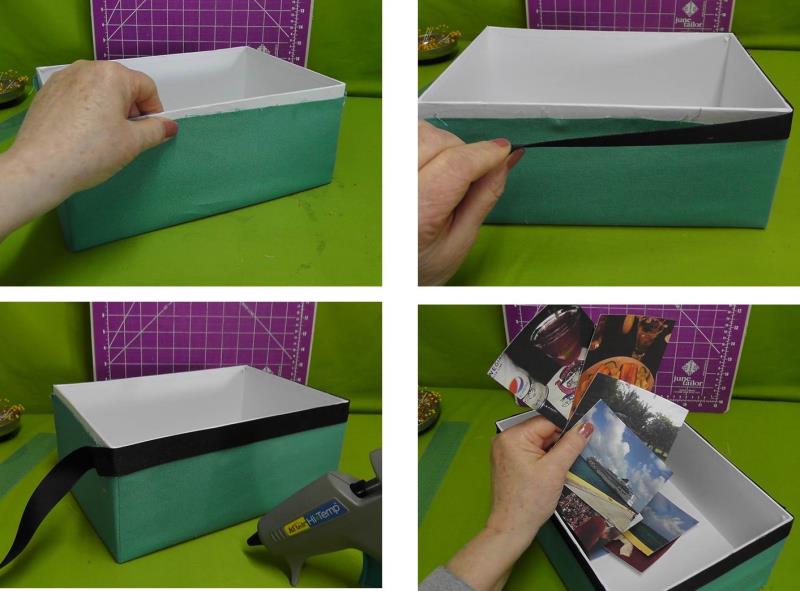
Heat the glue gun. While the glue is heating, cut about ¼” more away from around the fabric. The ¼” grosgrain ribbon will cover the raw edge of the fabric after the fabric is applied to the box top.
(Click Image to Enlarge)
Step 11:
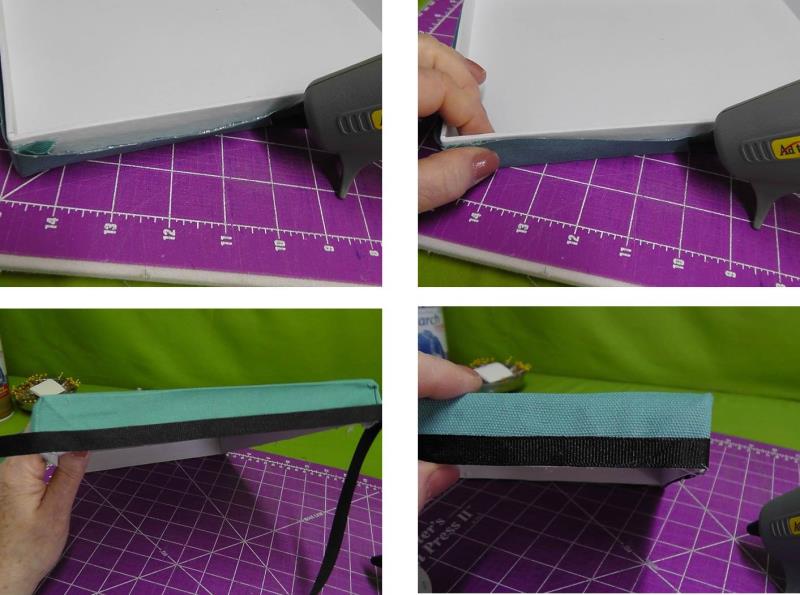
Position the fabric on the box top. Use the glue gun to apply a small bead of glue along the box top and smooth the edge of the fabric into place along all four sides. Now run a small bead of hot glue around the edge of the box top and apply the ¼” ribbon over it. The ribbon should be smooth and cover the raw edge of the fabric. Overlap the ribbon edges, cutting the upper ribbon edge at an angle and glue in place. Allow the glue to cool and start on the box bottom.
(Click Image to Enlarge)
Step 12:
Repeat the same steps of measuring the box bottom length, width, and depth. Cut the fabric about 1” larger all the way around and cut and mark the fabric like was done for the box top. Bring the lines of adjoining sides together and sew the corners trimming the excess fabric to about ¼”.
(Click Image to Enlarge)
Step 13:
“Fit” the fabric to the box bottom and make any adjustments needed before gluing the fabric in place. Trim the fabric and glue it into place. The last thing to do is glue on the 5/8” ribbon around the box edge covering the raw edge of the fabric. Add photos and mementos to the box and then add the box top.
(Click Image to Enlarge)
Step 14:
Congratulations on creating an “Ocean Cruise Ship” treasure box to keep precious memories of good times.
Ramona Baird has been in the embroidery industry for over 23 years. She and her husband owned a commercial and retail embroidery store in Arizona for many years. She is an experienced digitizer having been mentored by award-winners Pat Williams and Lindee Goodall. Ramona is a contributor to “Creative Machine Embroidery” magazine having 5 covers to her credit. Ramona has worked for Wilcom America and served many years as Education Director for the American Sewing Guild. With a degree in fashion design, she is able to design and execute patterns which Pat Williams says are “out of the box” in creativity and application. Ramona likes to challenge the boundaries of embroidery and bring new and exciting designs, ideas, and projects to EmbroideryDesigns.com. She wants embroiderers of all levels to increase their skills and enjoyment in using their embroidery machine for gift-making and personal pleasure.