














































PROJECT INSTRUCTIONS


PROJECT INSTRUCTIONS

Christmas Card Photo Frames Embroidery Project
By
Stitchitize
on
December 14, 2015
Description
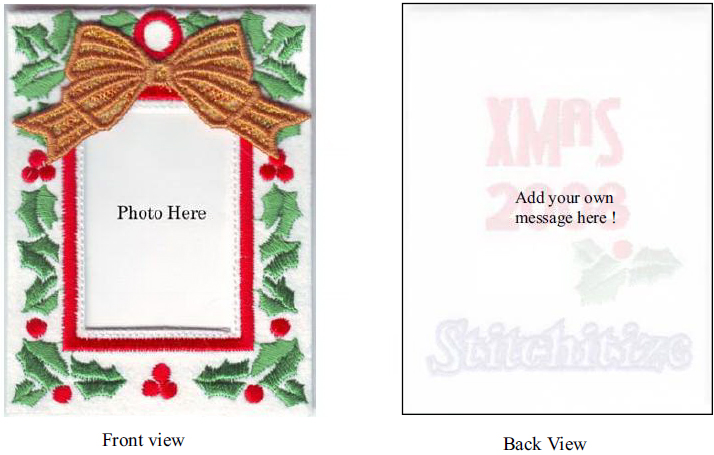
Follow these easy instructions to sew and assemble a Photo Frame Ornament.
Step
of
Materials
Project Preview Video

Christmas Card Photo Frames
$24.95
Circle Price: $24.95

Water Soluble Stabilizer - 12" x 25 Yds
$32.46
Circle Price: $29.21
{{ item.name }}
{{ item.listPriceDisplay }}{{ item.salePriceDisplay }}
Circle Price:
{{ item.clubPriceDisplay }}


| Materials 5.5” x 8.0” B hoop Dissolving Fabric Stabilizer for the Bow Scrimfelt or other similar materials such as craft felt or drill for the card. Glue gun or strong glue ie. Crazy glue 1/4 inch hole punch Scotch (transparent) tape Wallet size photo |
| Designs used in this project |
| Final Product: What You Will Create |
 |
|
Projects You May Like
Meet the Author:
Stitchitize

The name Stitchitize was coined and registered in 1988 when the Conquergoods sold their first contract embroidery business. “Stitchitize” was coined as the art of digitizing stitches for machine embroidery. The company actually started developing embroidery designs in 1983 and soon saw the need for Stock Embroidery Designs. By 1988 the company had several thousand Stock Designs to sell, however the majority of their development was still geared towards the commercial embroidery market. It wasn’t until 2001 when Trevor, the Conquergoods eldest son, now managing Stitchitize, saw the opportunity to start developing designs for the emerging domestic embroidery market. In 2002 the Conquergoods opened a Sewing Centre selling domestic machines and embroidery models. The staff members that were hired for the Sewing Centre were all accomplished sewers and they worked very closely with the Stitchitize staff developing new designs. It soon became apparent that project based designs would be well received by the consumers.
In late 2003 it was George Conquergood, the patriarch of the family that suggested the poem and storybook “Twas The Night Before Christmas” as a good place to start development. The manager of the Sewing Centre at that time, Brenda, was an accomplished artist and she was given the task to prepare the graphics for the storybook. Her drawings were then given to the digitizing department under direction of Beverley and her sister Linda the actual digitizer to execute. Another Sewing Centre staff member Darlene had the task of sewing the original prototypes, which eventually became an even bigger project. A quilt was also developed and Darlene and graphic artist Colin began the task of photographing and documenting every step of the construction process. Finally the collaborative efforts of eight staff members brought the project to completion and the production of the CD. To have the last word, George decided that as part of the product launch in 2004, Stitchitize would give every dealer a personalized copy of the storybook as a Christmas gift. The Conquergoods commercial production manager Darcy was brought in to discuss the logistics. Some of the pages in the book had over 24 colours and up to 42 color changes. Darcy was given the task to pleasingly reduce this to a maximum of 15 colours per page, as that was the maximum number of colours that their largest commercial machine could handle. He did this and started production of the over 200 books required. Darlene got to assemble all 200+ copies on a domestic sewing machine. The books were completed and sent out to all the dealers for Christmas 2004.
The following year George suggested the development of the Mother Goose 1 & 2 Collection, which was so well received that a second collection, Mother Goose 3 & 4 was produced. The graphics and nursery rhymes came from the original book “Mother Goose and her Goslings” which had belonged to George’s mother when she was a child, and read to George as a child. That book is now over 100 years old.
Other collaborative works included the FSL – 3D Flowers & Butterflies Collection, Italian Lace Collections, Mardi Gras Masks and the 13 Stitchitize Bees, which were fully tested by consumers in the Creative House Sewing Centre classrooms.
Feedback
Characters Remaining
Please Login to Submit a Feedback
Invalid Characters, Please enter a valid Comment
Please enter a valid Comment
Reviewed On
Link is Broken, Please check the URL