Border OptionsHugging border, circle, square, or rectangle — with a 3mm satin stitch.
Backing OptionsAvailable with iron-on, sew-on, or velcro backing.
Fast ShippingShipped quickly from the USA.
Free Online Tools
Powerful embroidery utilities that save time and prevent costly mistakes.
Stitch AssistantRECOMMENDED
Get the exact stabilizer, machine settings, needle, and thread color sequence for every embroidery design you purchase — based on that design's stitch density, dimensions, and color count.
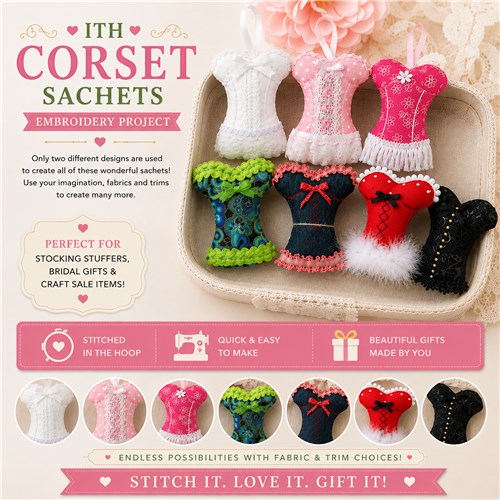
Create charming corset-shaped lavender sachets in the hoop with this versatile project. Perfect for stocking stuffers, bridal gifts, or craft sales, these sachets can be customized with different fabrics and trims. Step-by-step instructions are included.
Each sachets requires two 6” x 6” squares of fabric
Assorted trims in minimum lengths of 4.5” Note: At Joann’s fabrics I found packages of trims that combined 5 1 yard lengths of coordinating trims in a package for a reasonable price. These proved to be useful in having a variety of trims for the sachets.
Assorted ribbons in 10” lengths 1/8” to 3/8” wide
Poly-fil stuffing
Dried lavender – Amazon has it if you don’t have a local source
Soft Poly-mesh, No-show or Weblon cut away stabilizer
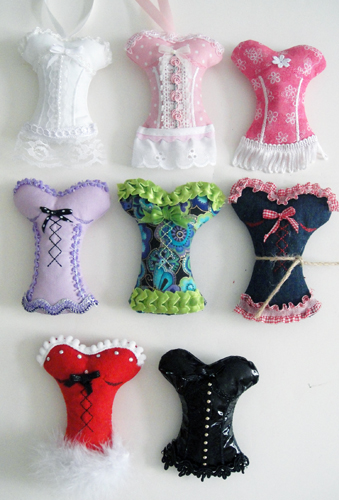
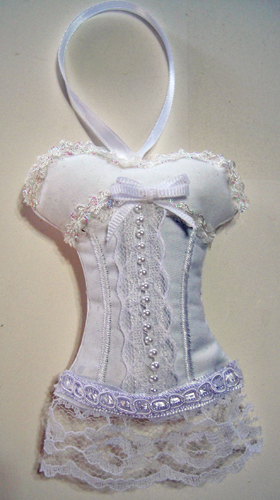
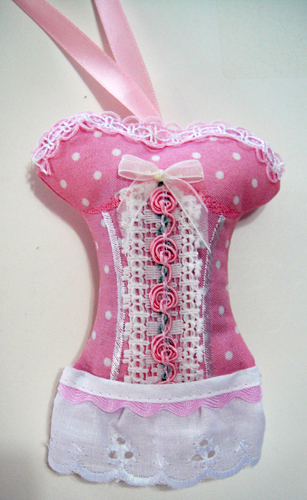
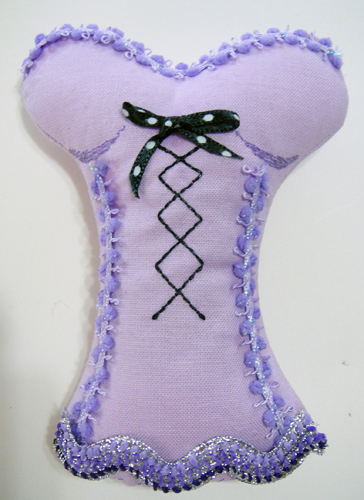
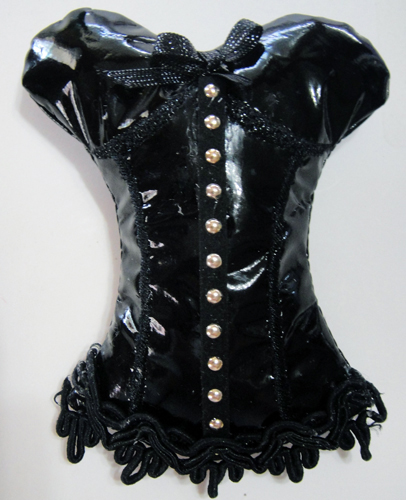
Time – how do I put time on this project? The basic designs only take about 6 minutes to sew, and it only takes about 15 minutes to trim, turn and stuff the sachets. But, I don’t know how to compute in how many trips you will make to the fabric and craft stores to look at and buy more trims for your sachets. Each time you complete one, your head will be spinning with ideas for new ones. Making these sachets has been so much fun. I’m sure you will enjoy making them as stocking stuffers, small gifts for friends, they are great for bridal shower favors or as gifts for the bridesmaids. I’m sure they will be hot items in your craft show booth too! All of these sachets were made from the two available patterns. The first pattern has embroidered boning up the sides, the second pattern has lacing stitched up the front. Other than that all of the differences in the models shown were created by the use of different fabrics and trims. Let you imagination run wild.
Step 1:
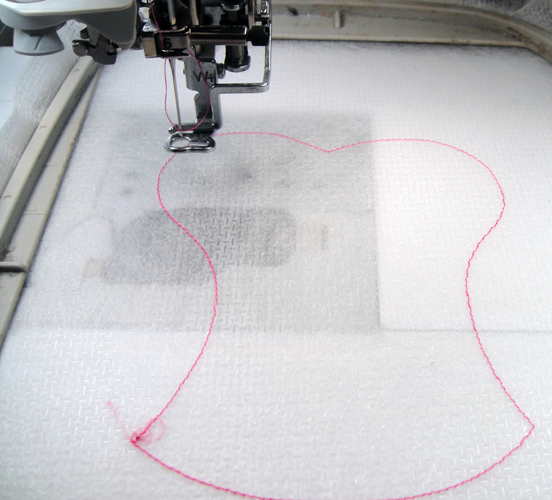
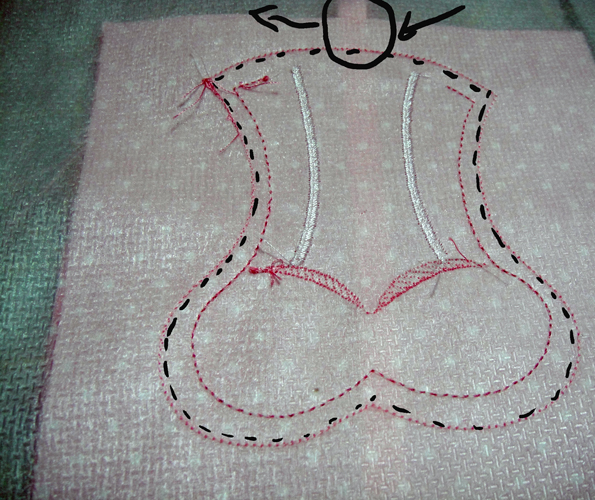
Hoop soft poly mesh cut away stabilizer in your embroidery hoop. Select and cut two 6” squares of fabric for your sachet. Load embroidery thread to match your fabric in the top of your machine and run color stop (CS) 1 to stitch cutting lines on the stabilizer.
(Click Image to Enlarge)
Step 2:
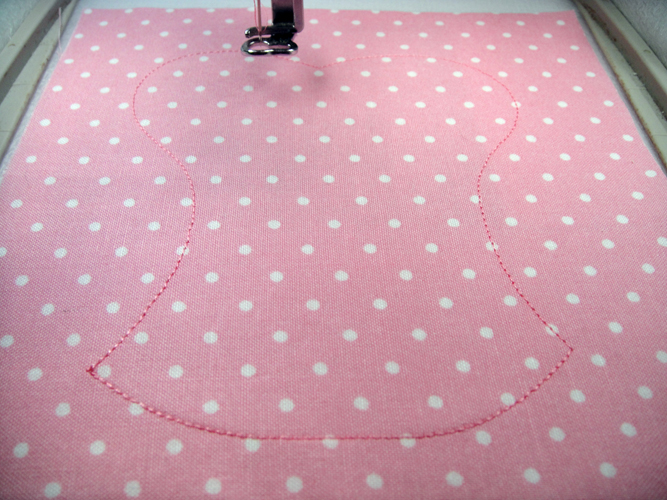
Spray a little adhesive of the wrong side of one of your fabric squares; place the fabric right side up over the outline; run CS 2 to stitch a tack down line.
(Click Image to Enlarge)
Step 3:
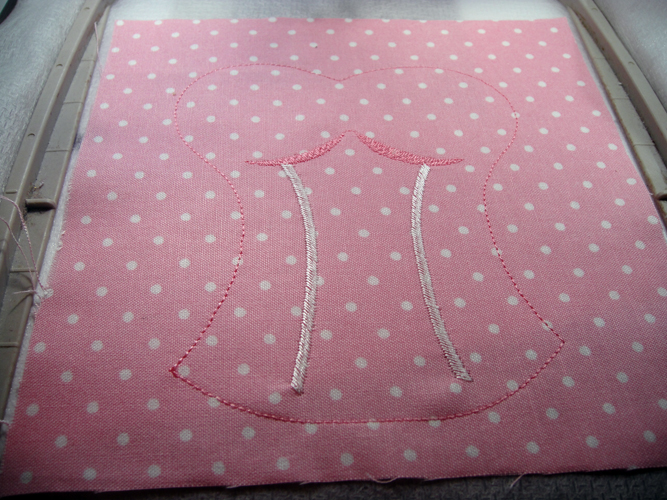
In design CRST01 CS 3 will stitch the boning on the corset and CS 4 will stitch the bust shadows, use whatever color threads you would like to coordinate with your chosen fabric.
(Click Image to Enlarge)
Step 4:
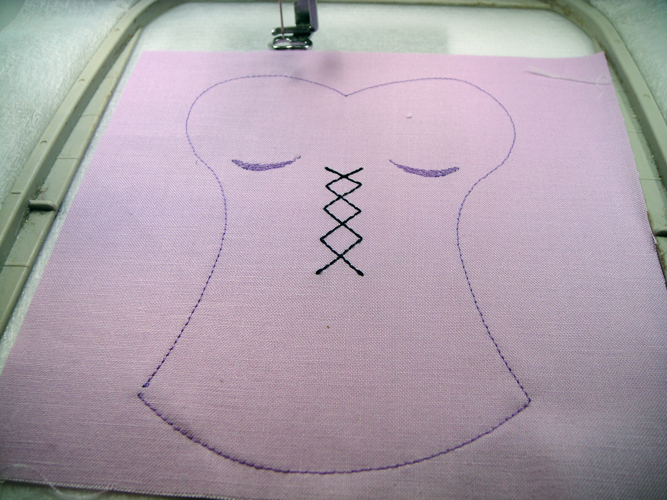
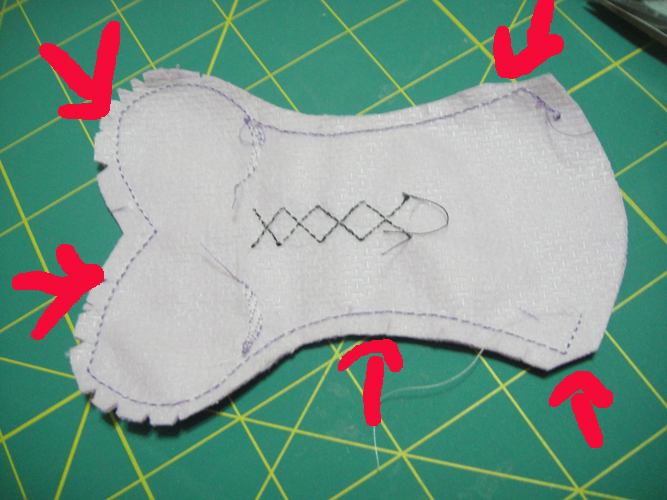
In design CRST02 CS 3 will stitch the bust shadows and CS 4 will stitch the lacing stitches up the front of the corset, use colors of thread to coordinate with your chosen fabric.
(Click Image to Enlarge)
Step 5:
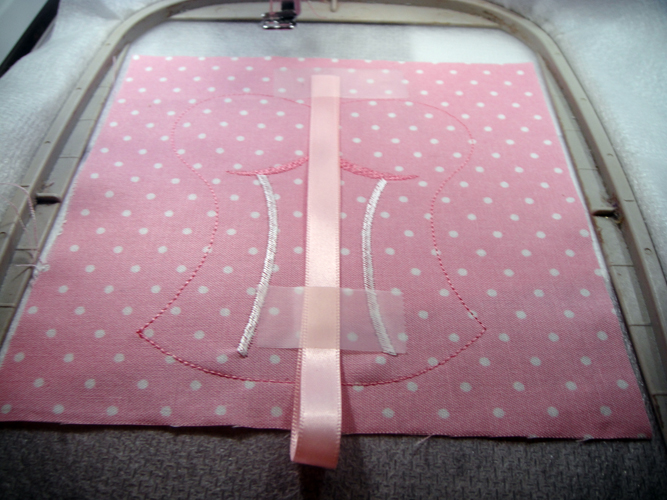
If you want to add a ribbon hanger to your sachet fold a length of ribbon in half (I used about 10” in this sachet) and tape over the center of the sachet and about ½” over the seamline at the top. Secure the ribbon into the center of the sachet at the bottom just so it does not get caught in the final seaming.
(Click Image to Enlarge)
Step 6:
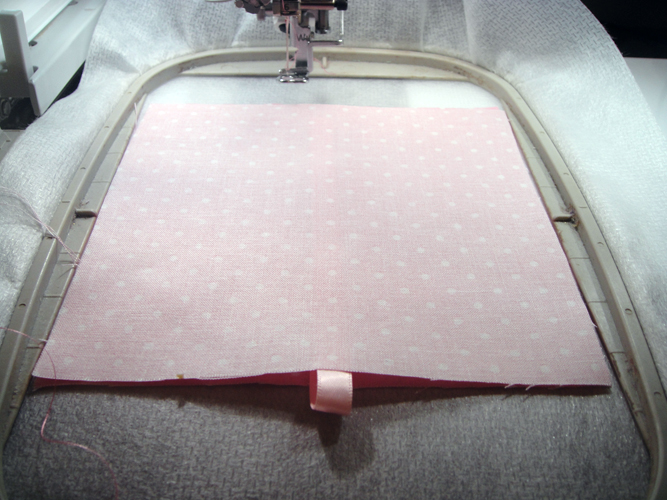
Lay the second 6” square of fabric right side down over the 1st fabric; run CS 5 to seam the fabrics together.
(Click Image to Enlarge)
Step 7:
Remove the project from the hoop; turn the back side up so that you can see the original outline; trim all around the project just inside the original outline; if you place a ribbon hanger on yours please tuck the ribbon inside the sachet before trimming so you don’t accidently cut it.
(Click Image to Enlarge)
Step 8:
Notch the convex curves; clip the inner curves; trim the bottom corners to make the project easier to turn.
(Click Image to Enlarge)
Step 9:
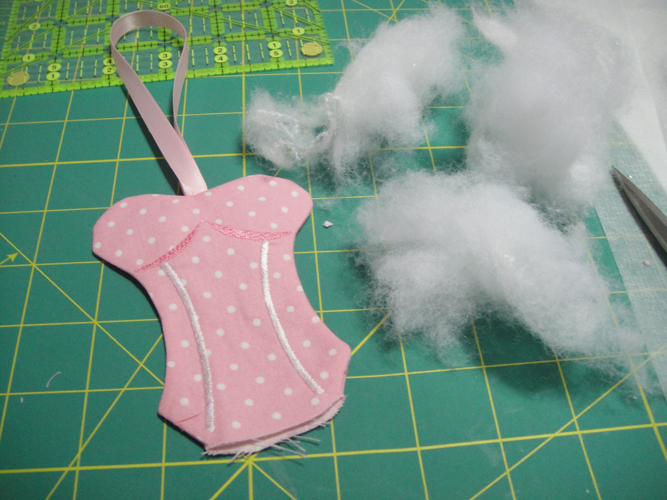
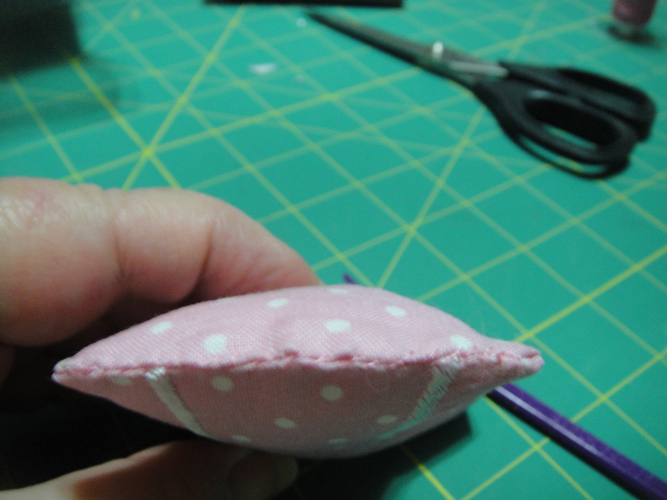
Turn the project right side out through the opening in the bottom; use a wooden stick or a thingamajig to get all the edges as smooth as possible; press if necessary.
(Click Image to Enlarge)
Step 10:
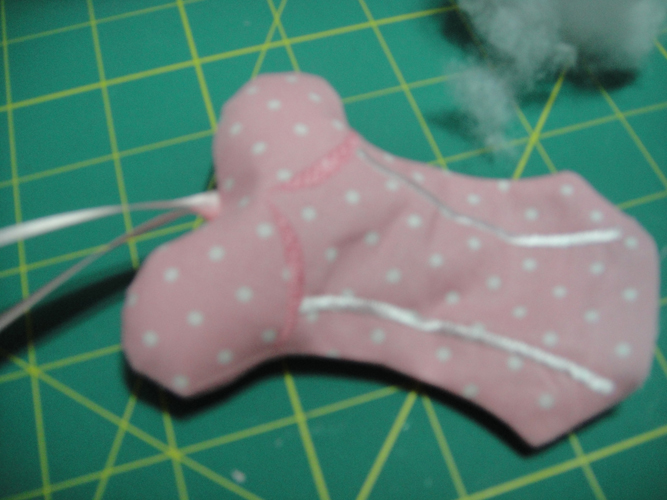
Firmly stuff the bust of the corset with small amounts of poly fill.
(Click Image to Enlarge)
Step 11:
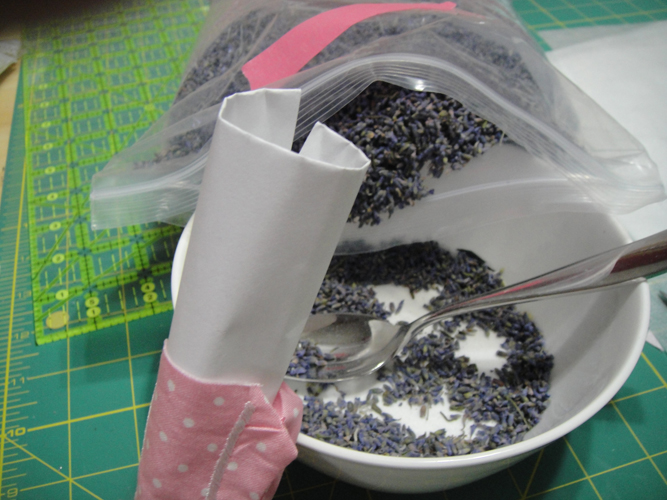
Roll a little piece of paper into a cone and insert it into the opening and spoon lavender into the sachet; compress the lavender and add more for a total of about 5 spoonfuls per sachet; top the lavender with a tiny bit more of the poly-fil as it is easier to push into the points of the corset bottom and will help hold the lavender in while you stitch the bottom of the sachet.
(Click Image to Enlarge)
Step 12:
Turn in the bottom seam allowances and whip stitch the bottom of the sachet closed.
(Click Image to Enlarge)
Step 13:
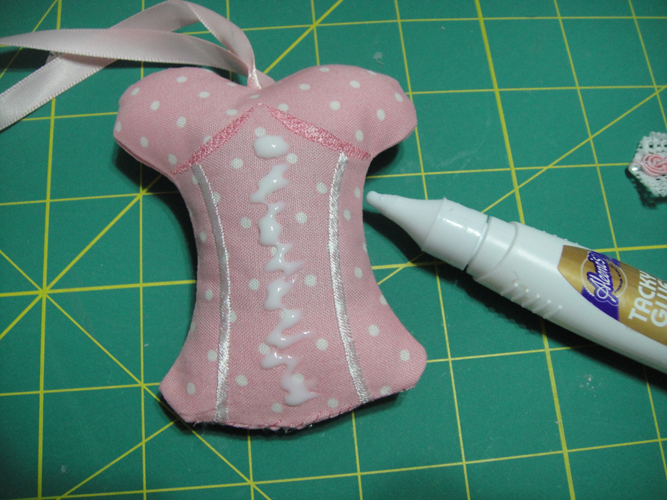
What you do next is absolutely up to you; audition your different trims and ribbons and hot fix crystals to see where you want to embellish your sachet; I found that working with the Aleene’s Tacky glue in the pen style container was really great for this project.
(Click Image to Enlarge)
Step 14:
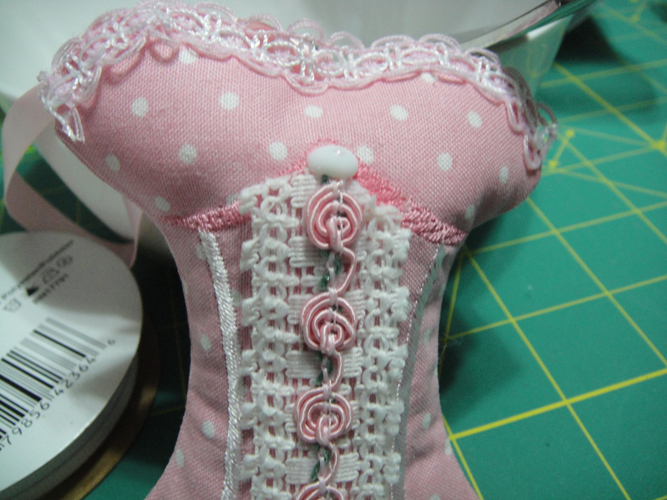
Apply trims down the center, across the top and bottom of the sachet as you see fit; if you have difficulty with any of the trims sticking to the sachet it would totally acceptable to apply some with a few stitches too. Apply glue or fray check to the ends of your trims to keep them from fraying on the project.
(Click Image to Enlarge)
Step 15:
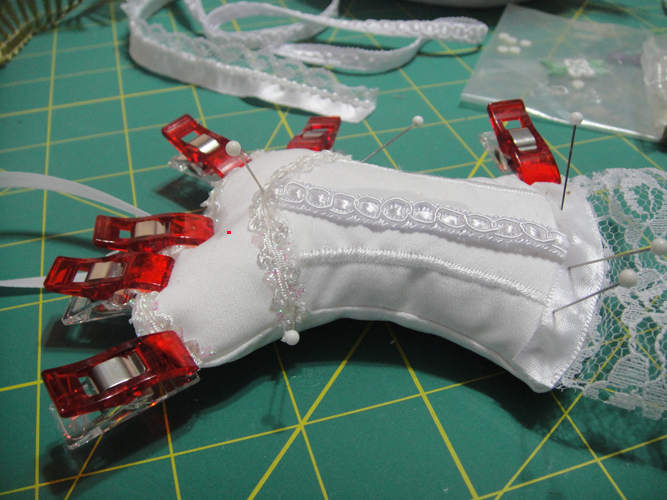
Wonder clips and straight pins are useful for holding trims and ribbons in place while the glue dries.
(Click Image to Enlarge)
Step 16:
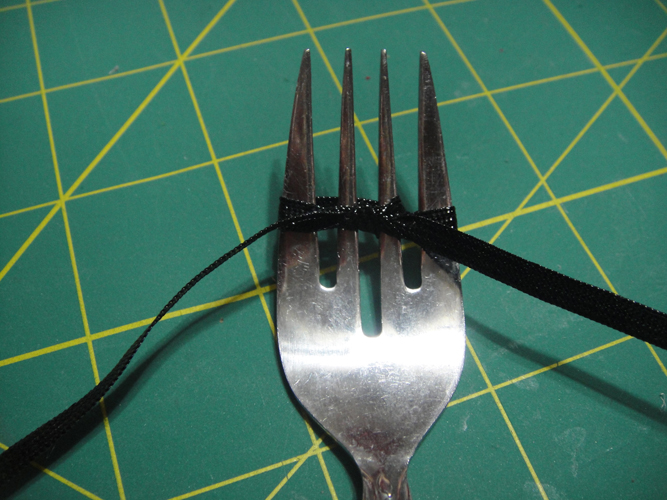
Tiny bows can be purchased or are really easy to make with a fork to further embellish your corsets. See the many videos on you tube for “Making tiny bows with a fork”; they only take a second to make and will match your other trims perfectly. It will be easier for you to watch the video’s rather than trying to follow me in pictures here.
(Click Image to Enlarge)
Step 17:
I’ll use the next 8 steps to tell you the fabrics and trims I used in these sample sachets just to get you started with your own ideas. I thought they were so cute I had to give them names.
Step 18:
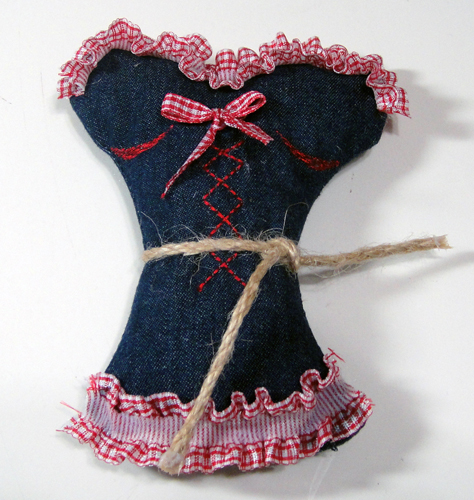
The Daisy Duke; fabric is a light weight denim; ruffles were made from ruffled, checked elastic ribbon; fork bow is from a straight checked ribbon, belt is from a jute string trim.
Step 19:
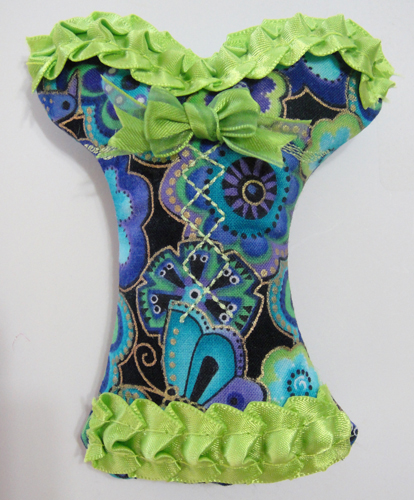
The Mystic Mama; fabric quilting cotton in black and bright print; top and bottom ribbons are a pre-pleated ribbon; fork bow is created from 3/8” ribbon.
Step 20:
The Bride; fabric is a heavy satin; the center lace trim already has the pearls down the center; small glitter trim was used across the bust line; gathered lace was used on the bottom of the skirt and further embellished with an additional glossy trim across the strip of ribbon used for the skirt; fork bow made from 1/8” satin ribbon.
Step 21:
The Bridesmaid; fabric quilting cotton in pink polka dot; the center trim is 7/8th cotton lace with the roses already applied; fork bow was made with ¼” ribbon; eyelet skirt was wrapped slightly around the sides of the sachet; 3/8th “ pink trim was applied to the top of the bust.
Step 22:
The Princess; fabric is cotton quilting fabric; small trims were glued down the on each side of the lacing stitches and across the bust; a coordinating wide rickrack was glued across the bottom; a fork bow was made from 1/8” black polka dot ribbon.
Step 23:
The Biker Chick, fabric is a black pleather (fake leather); center button stubs is a leather 1/8” leather trim with small fake studs; a fork bow of black ¼” ribbon was used at the top of the studs; heavy black lace trim was applied for a skirt.
Step 24:
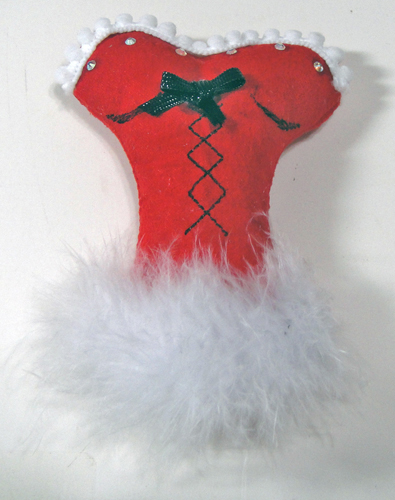
Santa Baby; fabric was thin red suede; couldn’t find fur small enough so the bottom of the skirt is a feather boa trim; black fork bow; small white bobbled trim and a few hot fix crystals were glued to the bust.
Step 25:
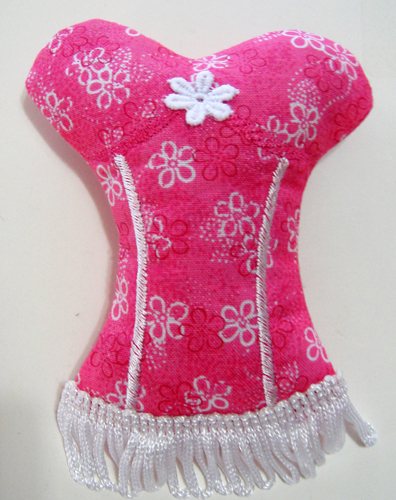
Vegas Baby; fabric cotton hot pink print; skirt from 1” wide purchased fringe; tiny daisy at top center was cut from a length of daisy lace. This was actually the first one that I made so it is the most simple, but as you can see, all the wildness in me came out as the corsets progressed. I hope your wildness comes out too!
Award winning Digitizer, Embroidery Educator, Author and a Consultant to the Industry, Pat Williams has 30 years of experience in the embroidery industry. Pat has won multiple awards for her digitizing expertise including the 2007 Impressions Awards Grand Championship, Best of Show as well as the 1st and 2nd Place Awards. Pat’s love of digitizing has afforded her the opportunity to write numerous articles for Impressions magazine in the United States and Images Magazine in Europe. In 2001 Pat was named “Embroidery Educator of the Year.” For many years Pat taught digitizing seminars at the ISS Shows in Long Beach, CA and for Compucon software. She now resides in Tucson, AZ.