Border OptionsHugging border, circle, square, or rectangle — with a 3mm satin stitch.
Backing OptionsAvailable with iron-on, sew-on, or velcro backing.
Fast ShippingShipped quickly from the USA.
Free Online Tools
Powerful embroidery utilities that save time and prevent costly mistakes.
Stitch AssistantRECOMMENDED
Get the exact stabilizer, machine settings, needle, and thread color sequence for every embroidery design you purchase — based on that design's stitch density, dimensions, and color count.
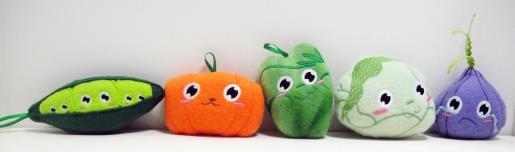
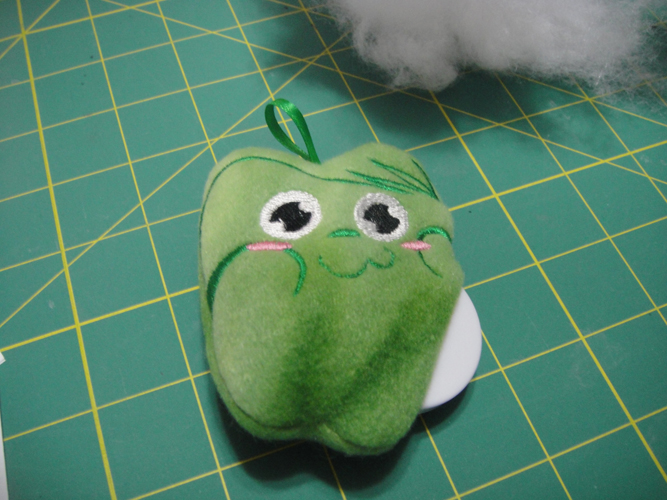
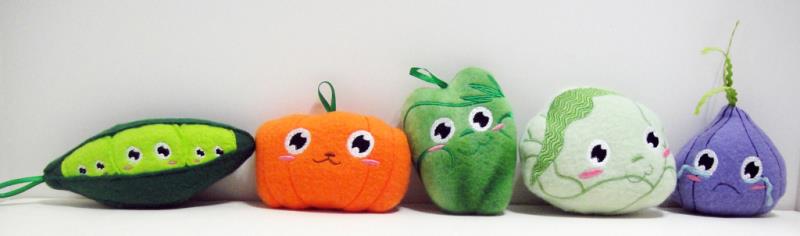
These delightful stuffed vegetable baby rattles are fun and easy to make. Perfect for new moms focused on healthy eating, these cute veggies are sure to entertain and engage little ones. Step-by-step instructions are included.
These fabric requirements will make several of each vegetable as they only require small pieces of each. If you have scraps of fleece see the individual instructions for exact fabric requirements.
¼ yard Dark Green fleece
¼ yard pale celery fleece
¼ yard orange fleece
¼ yard mottled green fleece
¼ yard mottle purple fleece
¼ yard lime green fleece
Partial bag of polyester stuffing
Small amounts of 1/8th“green ribbon
12” of small lime green rickrack
Rattle Noise Maker For Dolls and Novelties (Pkg/10) by National Artcraft – Amazon
As each stuffed veggie baby rattle is slightly different so instructions are individually listed below.
Step 1:
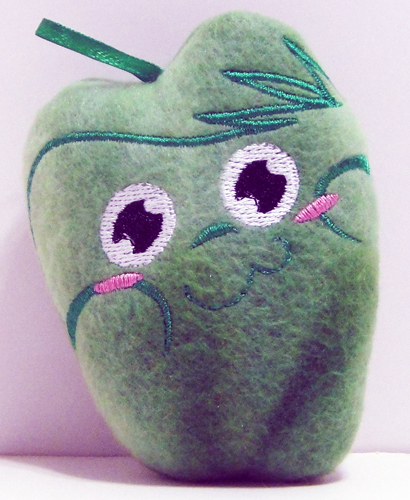
For the Green Pepper STFV01 cut two 5” x 5” squares of mottled green fleece.
Step 2:
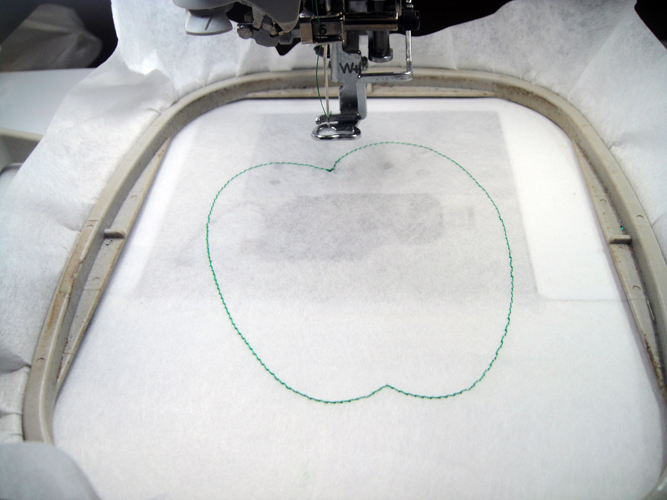
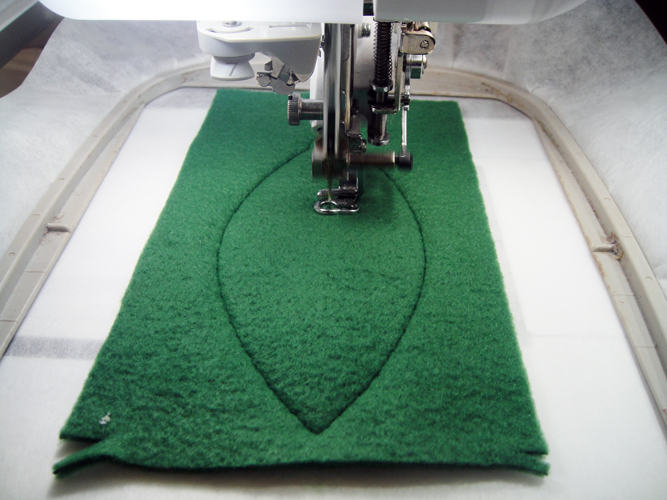
Hoop tear away stabilizer and run color stop (CS) 1 in green thread to outline the rattle
(Click Image to Enlarge)
Step 3:
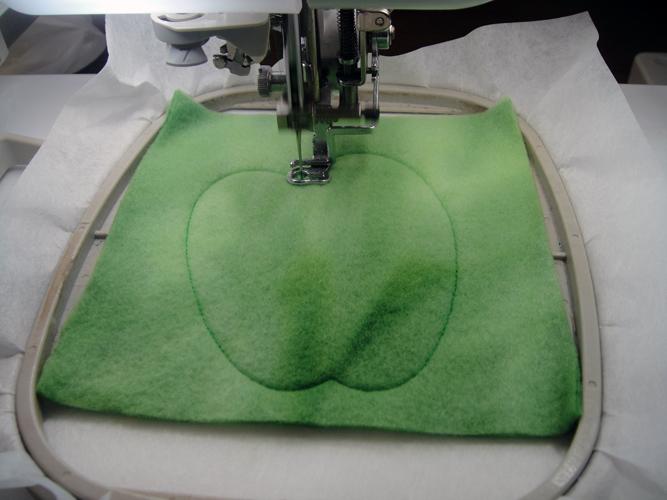
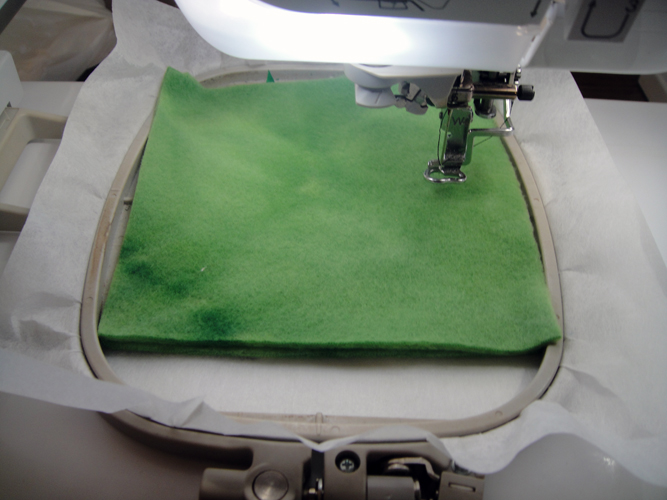
Lay the green mottled fleece square over the outline and run CS 2 to tack it down.
(Click Image to Enlarge)
Step 4:
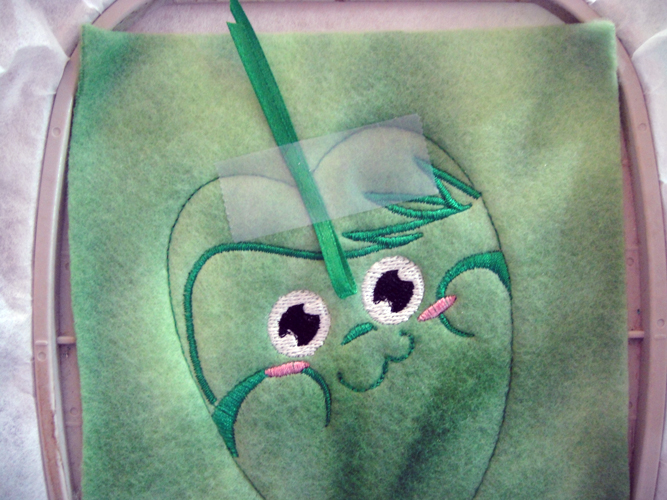
Follow the color chart until the facial features are complete through CS 6; fold a 3” strip of green 1/8th” ribbon in half and place it over the center top outline so that approximately a 1” loop is inside the face and the tails are above the green pepper.
(Click Image to Enlarge)
Step 5:
Lay the second 5” x 5” square of fleece over the outlines; stitch the final seam stitches in green.
(Click Image to Enlarge)
Step 6:
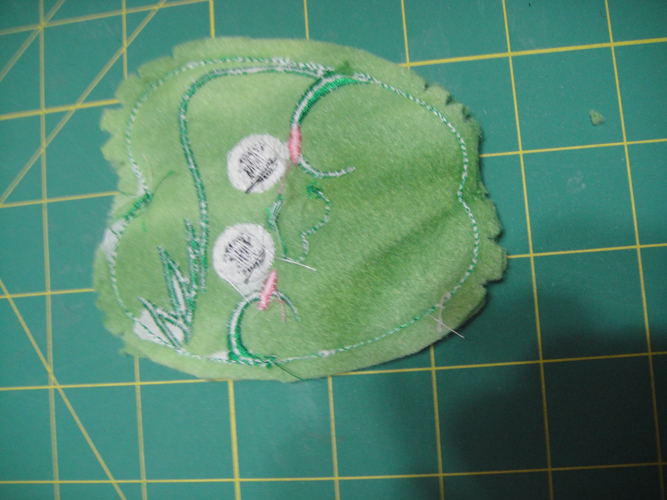
Remove the project from the hoop; remove the tear away stabilizer; cut around the outline stitches leaving a ¼” seam allowance; clip the curves.
(Click Image to Enlarge)
Step 7:
Turn the pepper right side out and start adding small amounts of stuffing to the top and bottom curves as well as the left hand side of the pepper.
(Click Image to Enlarge)
Step 8:
Insert the Rattle Noise Maker – I’m very pleased with the ones purchased listed in the materials above as the container is sealed so there is no way for the noise maker beads to get outside of the container.
(Click Image to Enlarge)
Step 9:
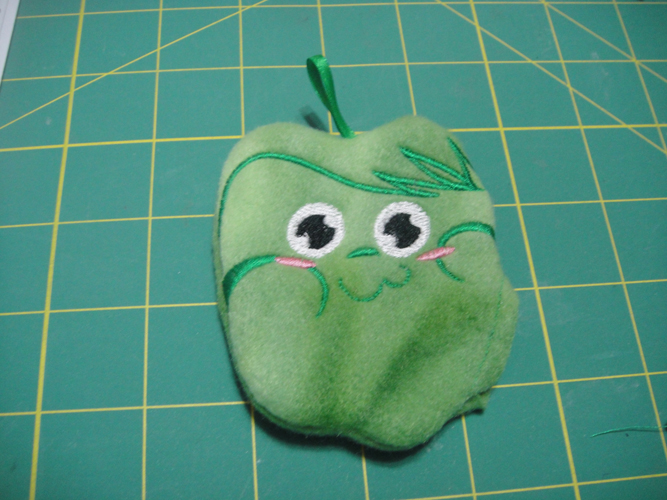
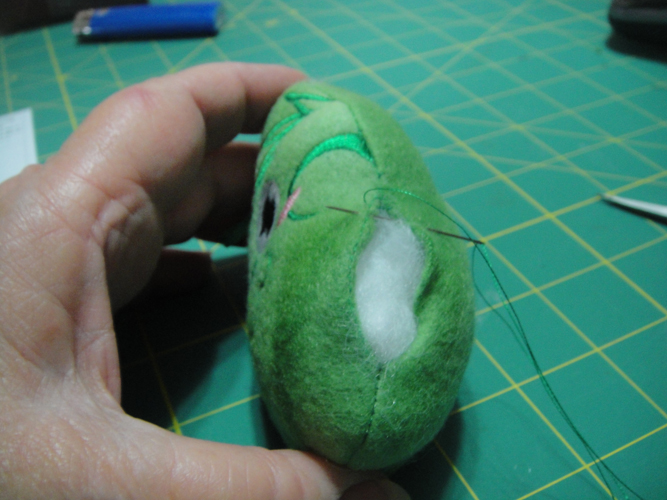
Continue adding stuffing on all sides of the noise maker until the pepper is firm; turn under the seam allowances and whip stitch together; the stitches will sink right into the fleece and will be virtually invisible.
(Click Image to Enlarge)
Step 10:
(Click Image to Enlarge)
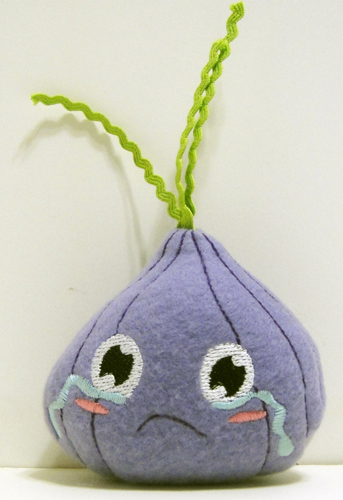
For the Shallot, STFV02, cut two 5” x 5” squares of mottled purple fleece and 3 3” strips of baby lime green rickrack.
Step 11:
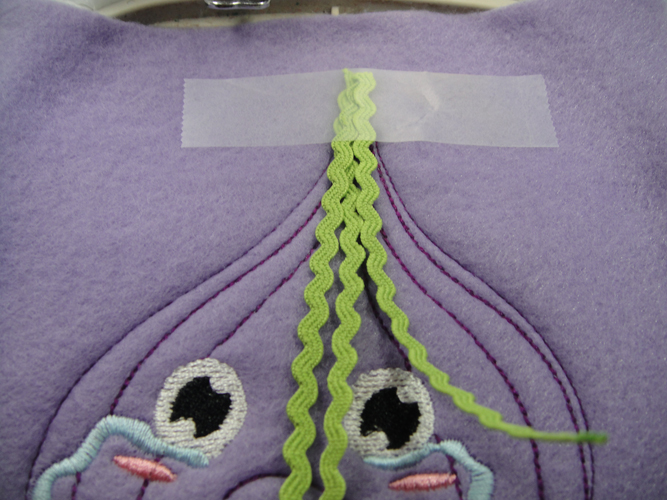
Construct the shallot the same as you did the pepper using dark purple thread for the outlines and following the color chart through CS 7; tape the 3 strands of rick rack, long strands placed over the face; lay the second square of fleece over the outlines and stitch the last CS in purple; cut out using a ¼” seam allowance and stuff, inserting the noise maker as you did for the pepper.
(Click Image to Enlarge)
Step 12:
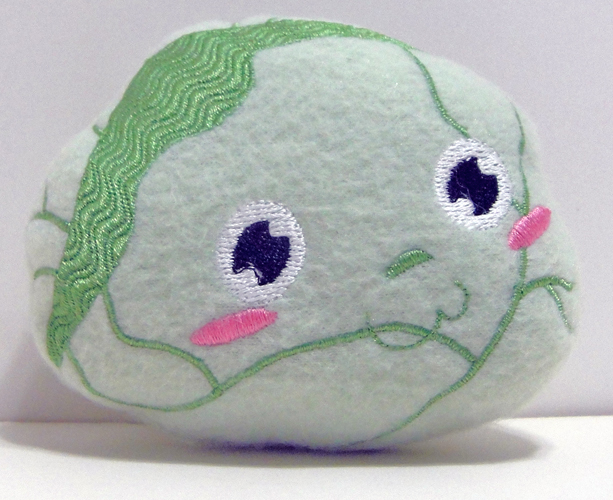
For the Cabbage, STFV03, cut two 6” x 6” squares of celery fleece; this design needs a 5” x 7” hoop; no ribbons are attached to this design so follow Steps 2 through 9 omitting the addition of the ribbon.
(Click Image to Enlarge)
Step 13:
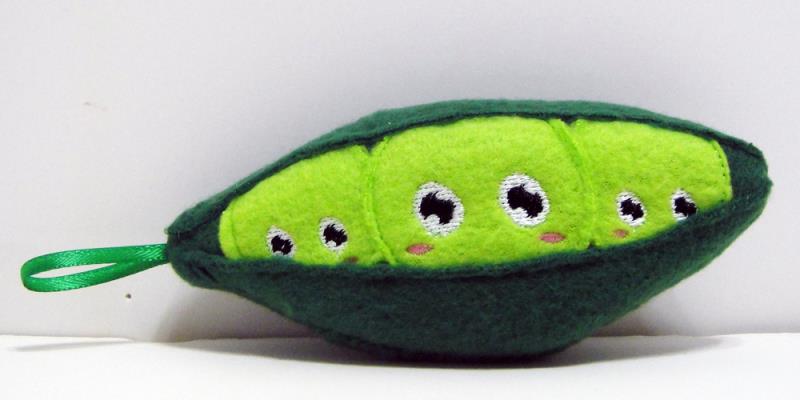
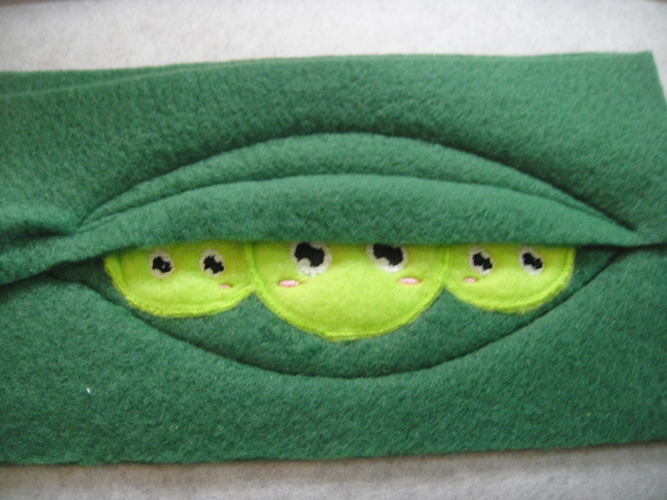
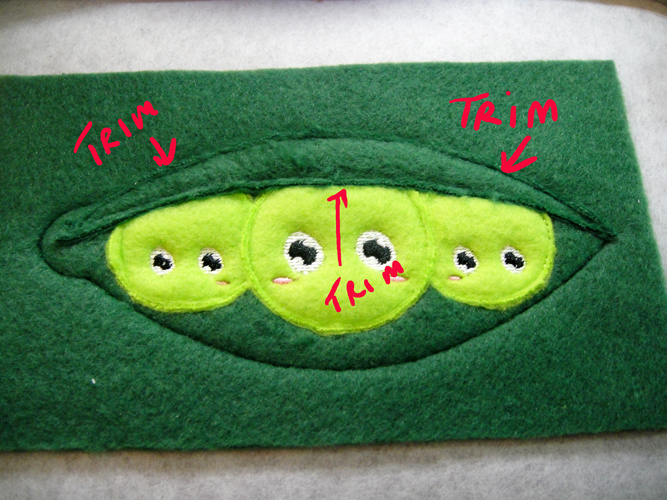
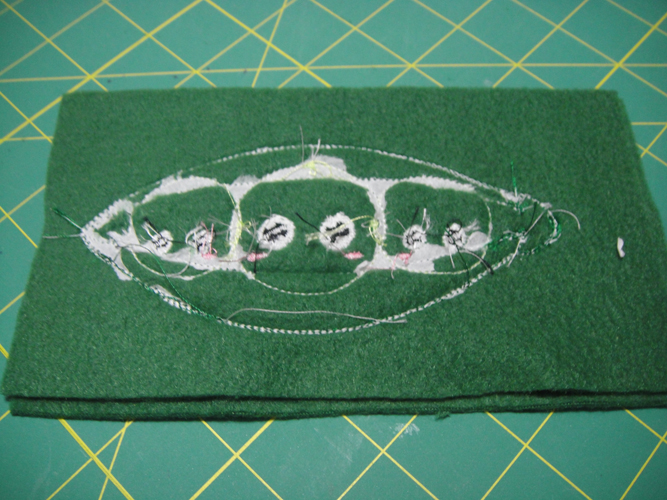
For the peas in a pod, STFV04, there are a few more steps to execute; first cut 3 5” x 7” rectangles of dark green fleece, split one dark green rectangle in half lengthwise so that you have 2 2.5” x 7: rectangles; cut 1 2.5” x 7” rectangle of lime green fleece; cut a 3” length of ribbon.
(Click Image to Enlarge)
Step 14:
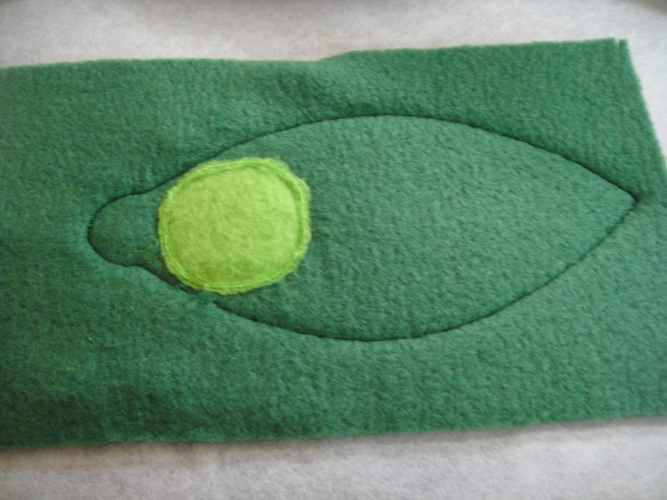
Depending on the hoop orientation and the embroidery format of your machine you made need to rotate this design to run in your 5” x 7” hoop. Hoop the tear away stabilizer and run CD 1 in green thread for an outline; place a dark green fleece rectangle over the outline and stitch CS 2 to tack it down.
(Click Image to Enlarge)
Step 15:
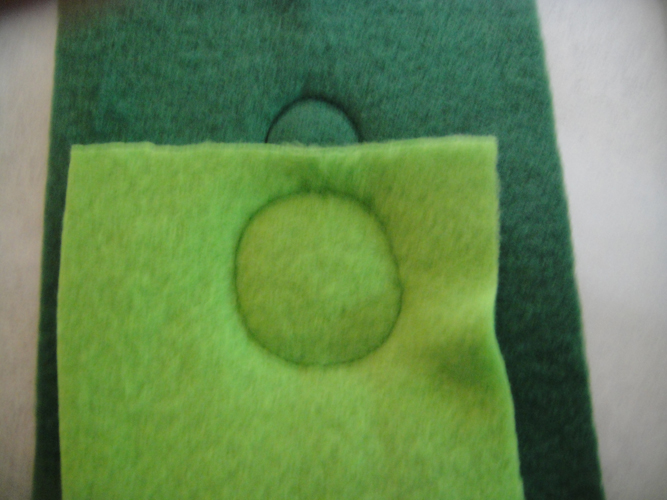
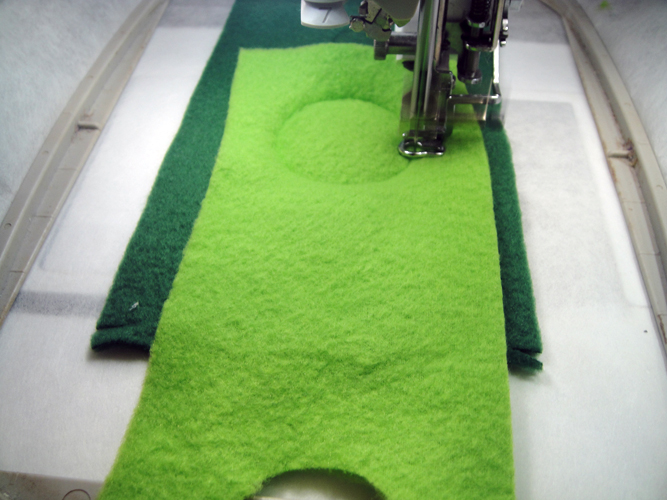
Change to lime green thread for CS 3 through 8; CS 3 is an outline for the first pea; place the end of your lime green rectangle of fleece over the outline and run CS 4 to tack it down.
(Click Image to Enlarge)
Step 16:
Remove the hoop; do not unhoop; trim the excess fabric around the pea as close as possible.
(Click Image to Enlarge)
Step 17:
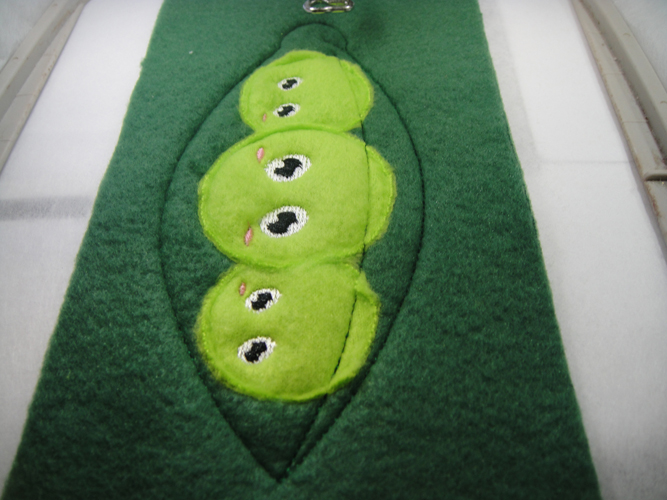
Repeat steps 15 and 16 twice to place the other two peas in the pod.
(Click Image to Enlarge)
Step 18:
Run CS 9 in white; CS 10 in black and CS 11 in pink to stitch the faces; then switch back to dark green thread to run the rest of the design; CS 12 will run an outline for the top flap of the pod.
(Click Image to Enlarge)
Step 19:
Place a 2.5” x 7” dark green fleece over the outline and run CS 13 to tack it down.
(Click Image to Enlarge)
Step 20:
Remove the hoop from the machine; do not unhoop; and trim all the way around the pod flap.
(Click Image to Enlarge)
Step 21:
CS 14 and 15 will make the flap on the bottom of the pod; use the same techniques as in steps 19 and 20.
(Click Image to Enlarge)
Step 22:
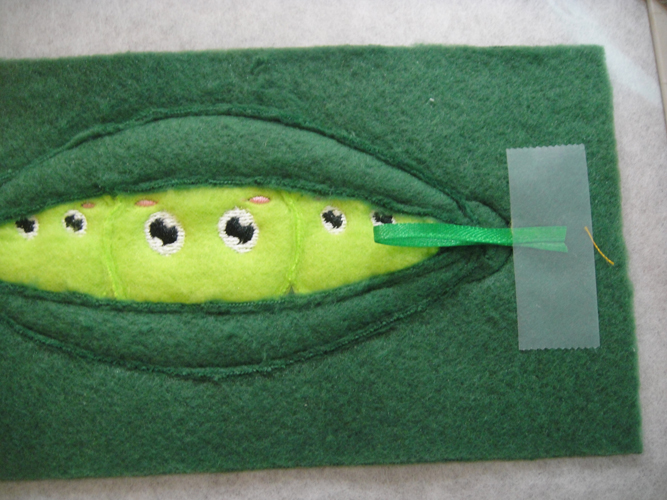
Fold a 3” piece of green ribbon in half and tape it at least ¼” over the outline at the top of the pod.
(Click Image to Enlarge)
Step 23:
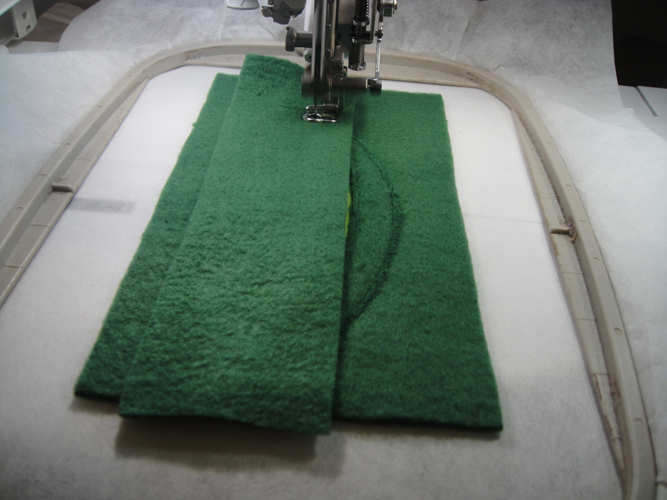
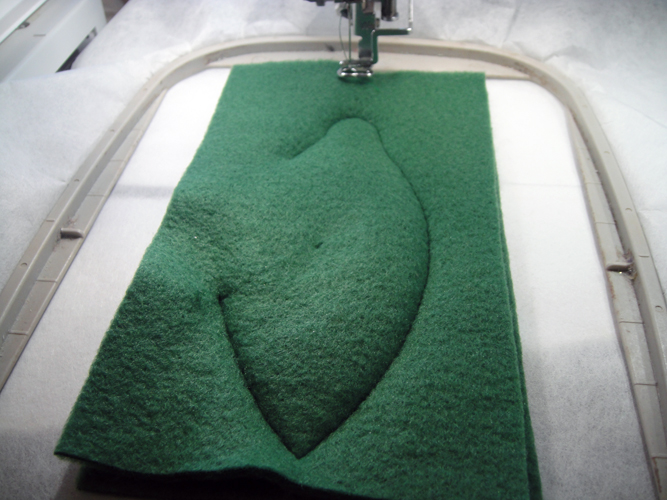
Lay the remaining piece of green fleece over the whole outline and stitch the final CS to seam the front to the back.
(Click Image to Enlarge)
Step 24:
Remove as much of the tear away stabilizer as possible; clip the seams; turn right side out; stuff and insert the noise maker as in the other veggies.
(Click Image to Enlarge)
Step 25:
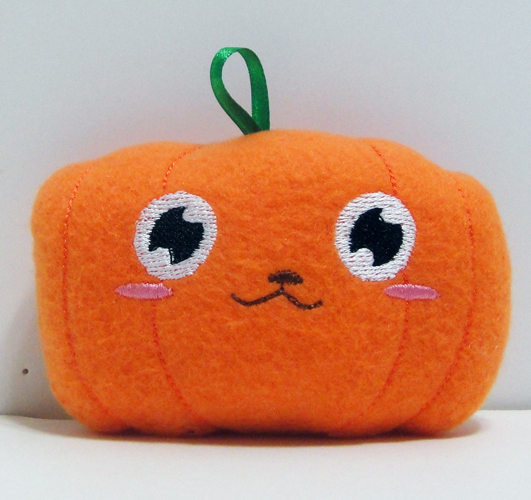
The pumpkin, STFV05, uses a 5” x 7” hoop and two 6” square pieces of orange fleece; orange thread is used for the outlines and tack downs; this one is made the same as the pepper in steps 2 through 9.
(Click Image to Enlarge)
Step 26:
Congratulations your Stuffed Veggie Baby Rattles are complete and sure to please the new baby as well as the Mom that is into healthy eating.
Award winning Digitizer, Embroidery Educator, Author and a Consultant to the Industry, Pat Williams has 30 years of experience in the embroidery industry. Pat has won multiple awards for her digitizing expertise including the 2007 Impressions Awards Grand Championship, Best of Show as well as the 1st and 2nd Place Awards. Pat’s love of digitizing has afforded her the opportunity to write numerous articles for Impressions magazine in the United States and Images Magazine in Europe. In 2001 Pat was named “Embroidery Educator of the Year.” For many years Pat taught digitizing seminars at the ISS Shows in Long Beach, CA and for Compucon software. She now resides in Tucson, AZ.