Border OptionsHugging border, circle, square, or rectangle — with a 3mm satin stitch.
Backing OptionsAvailable with iron-on, sew-on, or velcro backing.
Fast ShippingShipped quickly from the USA.
Free Online Tools
Powerful embroidery utilities that save time and prevent costly mistakes.
Stitch AssistantRECOMMENDED
Get the exact stabilizer, machine settings, needle, and thread color sequence for every embroidery design you purchase — based on that design's stitch density, dimensions, and color count.
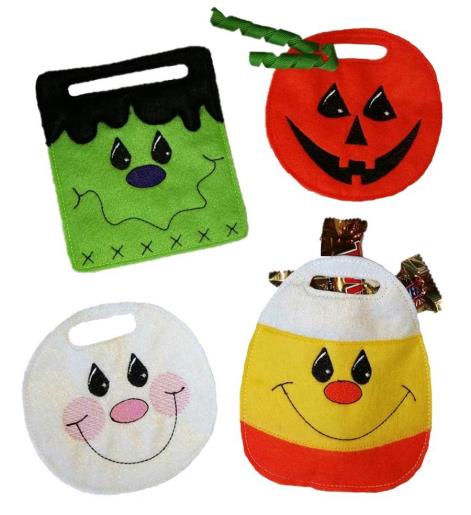
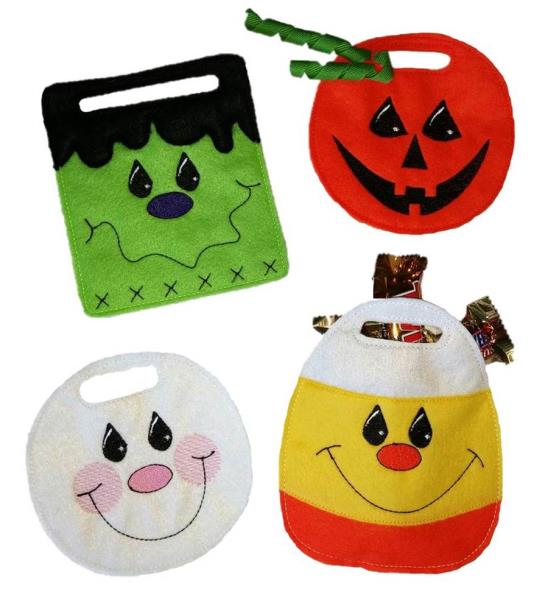
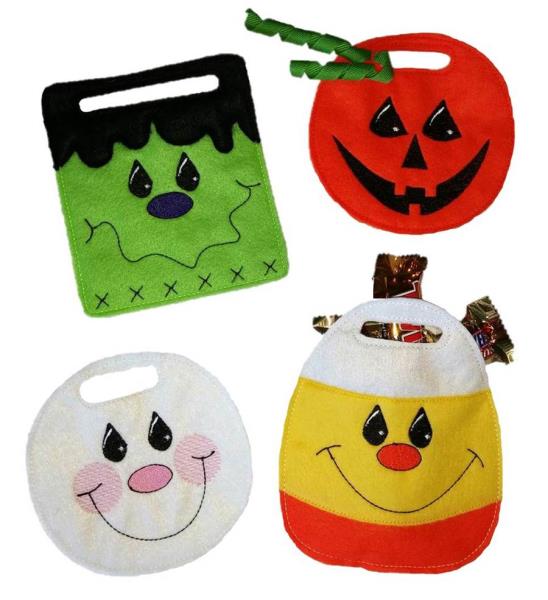
Create these charming in-the-hoop Halloween Candy Treat Bags featuring fun and festive designs. Perfect for trick-or-treaters or as cheerful gifts for colleagues, these bags are quick to make and sure to bring a smile. Step-by-step instructions are included.
There are four “Candy Treat Bag” designs available and sold separately: Ghost, Pumpkin, Monster, and Corn Candy. These instructions will show the “Ghost Candy Bag”, but the others follow the basic sequence. The materials and basic steps for each bag will be shown within these instructions because each one varies just a little. There are two files for each bag: the back and the front. The back of each bag is sewn first and then trimmed. The front of each bag is stitched second and before the final thread color, the back piece is place behind the hoop so the bag can be stitched together with the last color (with bobbin wound in the same color). After the front and back are stitched together, the bag is trimmed and ready for the candy snacks. The “Ghost” and “Candy Corn” bags don’t have to be used just for Halloween. It was suggested by friends of mine that the “Candy Corn” bag could be used through Thanksgiving, and the white “Ghost” candy bag could also double as a “snowman” through the winter! It’s nice to have such clever friends.
Step 1:
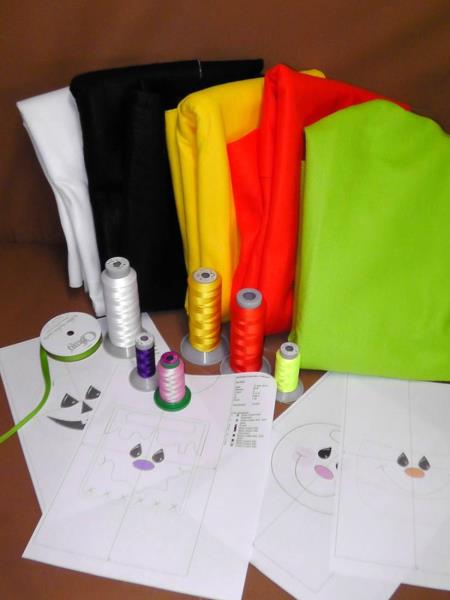
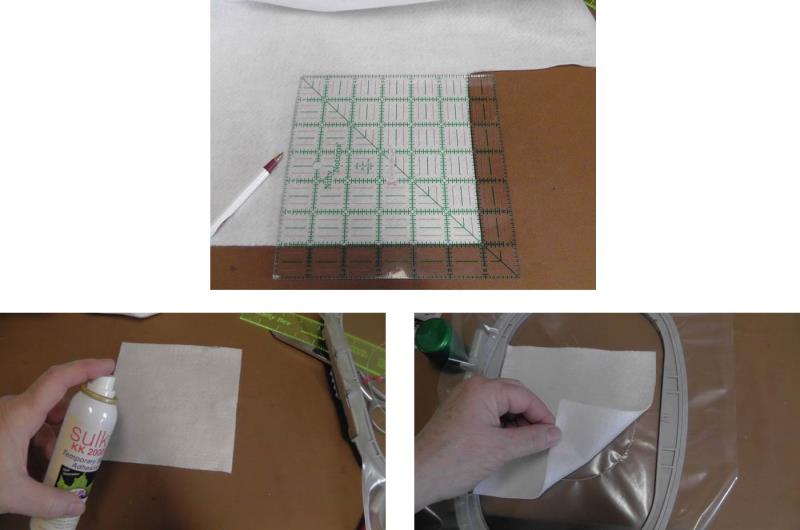
Decide on which Candy Bags you would like to purchase and download the files. There will be two files for each bag: the back (01 file) and the front (02 file). Look at the materials list for cutting the felt squares and determine which thread colors to use (the embroidery thread should match the felt for the placement, tack down, handles and outlines. Gather all the materials and read through all the instructions before beginning. Wind a bobbin with embroidery thread to match the last color to be sewn (this sews the bag sections together). Print the paper template for the design.
(Click Image to Enlarge)
Step 2:
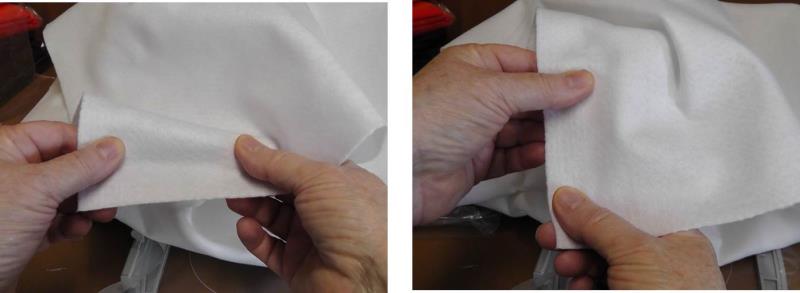
Purchase good quality felt. For the project, felt from Nu-Source was used. Note that felt may stretch in one or both directions. Have the directions with the least amount of stretch run up and down in the hoop for each design.
(Click Image to Enlarge)
Step 3:
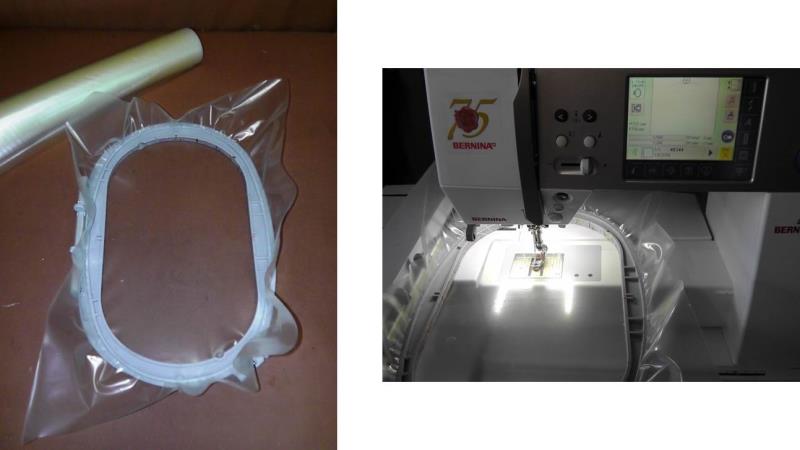
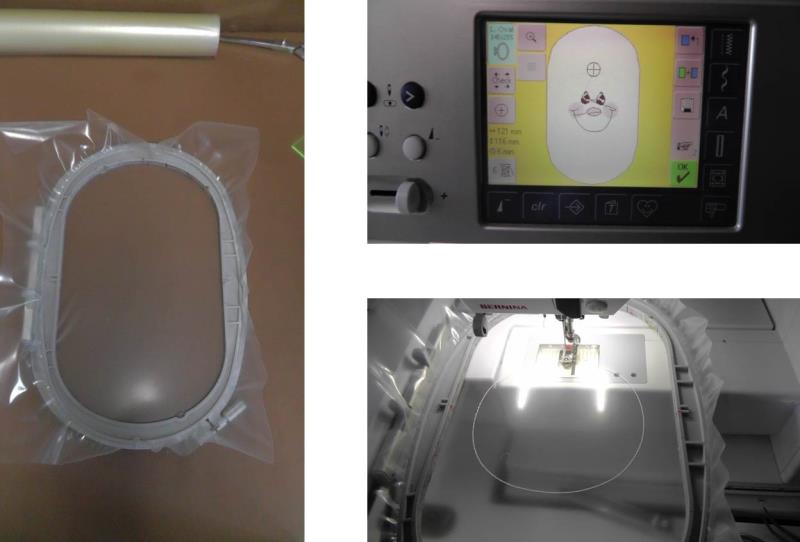
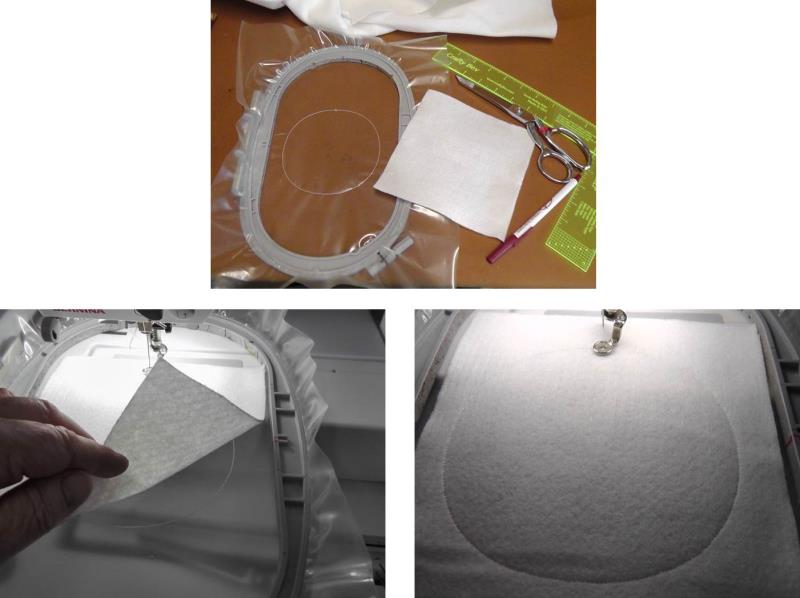
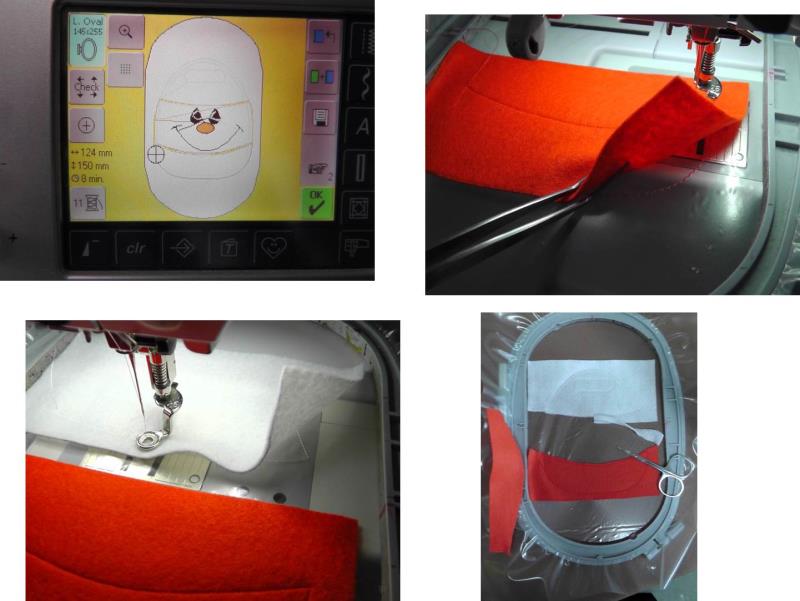
Hoop one layer of water soluble stabilizer. Load the design “Ghost Candy Bag Back” on the machine. Stitch the first color which is the placement line (match the thread color to the felt).
(Click Image to Enlarge)
Step 4:
Cut two pieces of white felt 6” x 6”, one for the back and one for the front. Spray the back side of one of white felt and place it over the stitched placement line.
(Click Image to Enlarge)
Step 5:
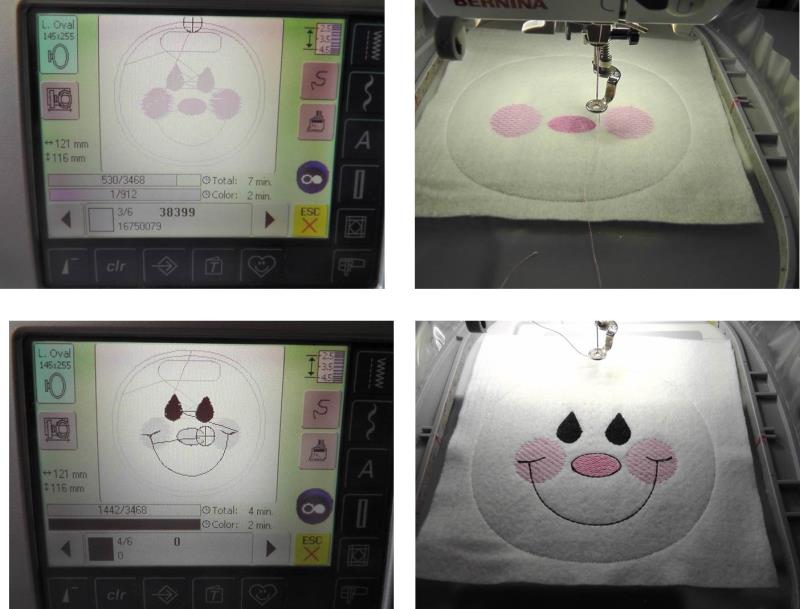
Stitch color 2, Tack down and color 3 which will stitch the handle and decorative stitching (match the thread color to the felt).
(Click Image to Enlarge)
Step 6:
Remove the embroidery from the hoop and trim the felt to the outside of the tack down stitching line, leaving about an additional 1/4” and set aside until needed.
(Click Image to Enlarge)
Step 7:
Hoop a piece of heavy water soluble stabilizer. Load design “Ghost Candy Bag Front” onto the machine. Stitch the first color which is the placement line (match thread color to felt).
(Click Image to Enlarge)
Step 8:
Place the second 6: x 6” piece of felt sprayed with a little KK2000 over the placement line and stitch the second color which will tack the felt in place (match thread to felt color).
(Click Image to Enlarge)
Step 9:
Stitch color 3, the nose and cheeks. Stitch color 4, the nose outline, eyes and mouth.
(Click Image to Enlarge)
Step 10:
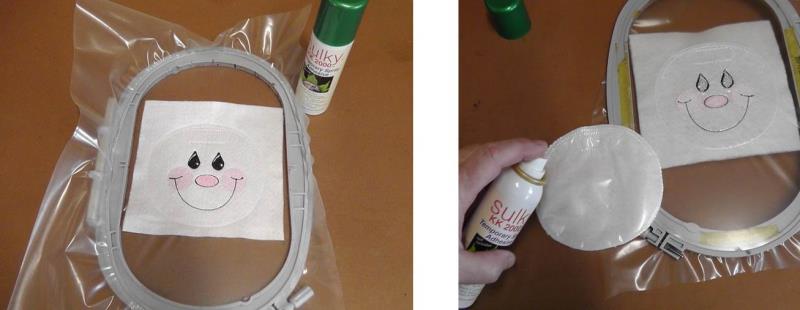
Stitch color 5. Remove the hoop from the machine, but do not remove the project from the hoop. Flip the hoop over. Spray the back side of the trimmed “Ghost Candy Bag Back” piece very lightly with KK2000.
(Click Image to Enlarge)
Step 11:
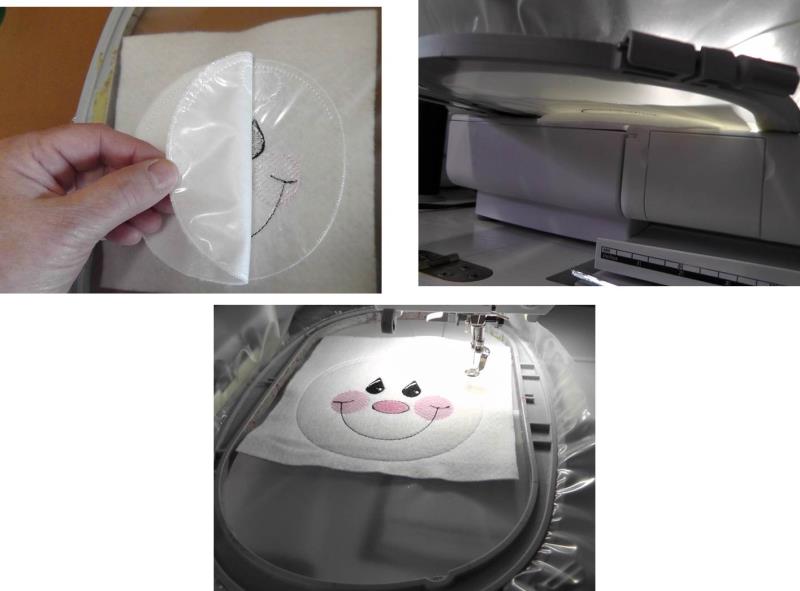
Place the wrong side of the “Ghost Candy Bag Back” over the underside of the “Ghost Candy Bag Front” (on the back side of the hoop), carefully aligning the handles and tack down stitching lines. Place the hoop back on the machine; make sure the “Candy Bag Back” lies smoothly in place.
(Click Image to Enlarge)
Step 12:
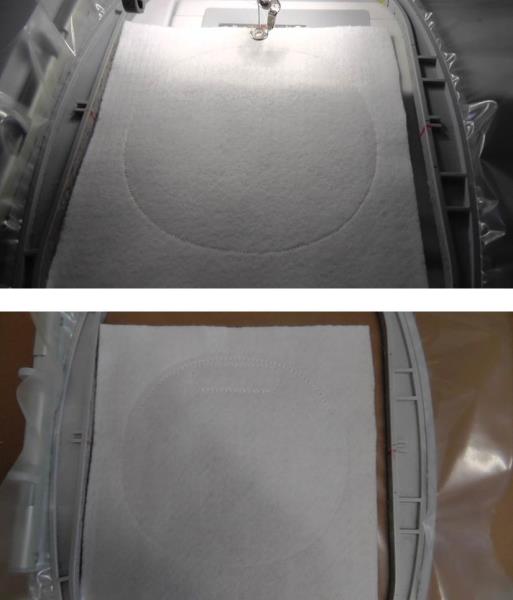
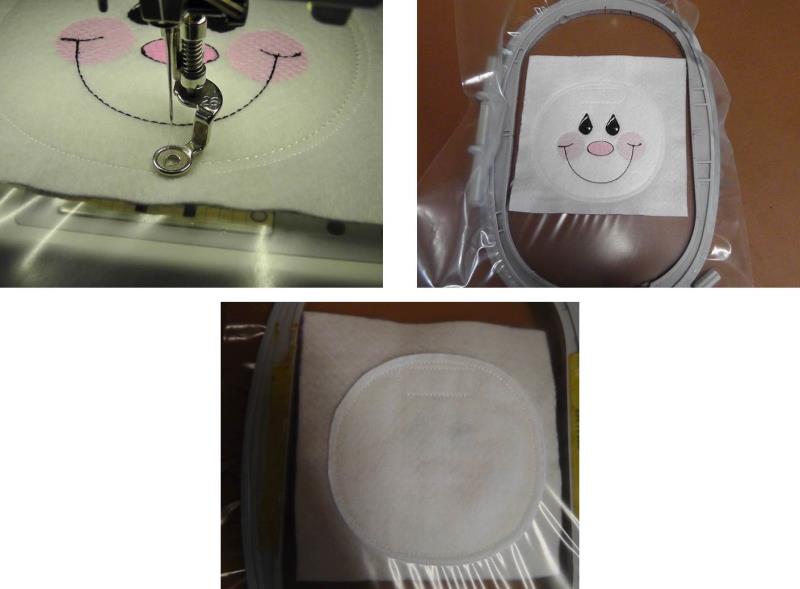
Place the bobbin wound with the embroidery thread color in the machine. Stitch the last color which will stitch both bag pieces together through all layers. Here is the bag from the front and back side of the hoop after the stitching is completed.
(Click Image to Enlarge)
Step 13:
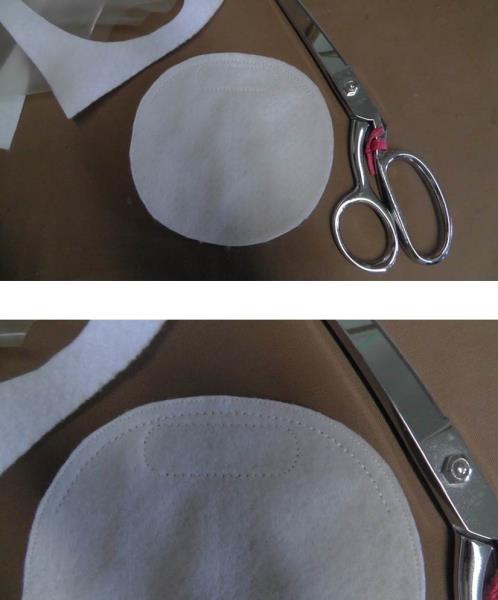
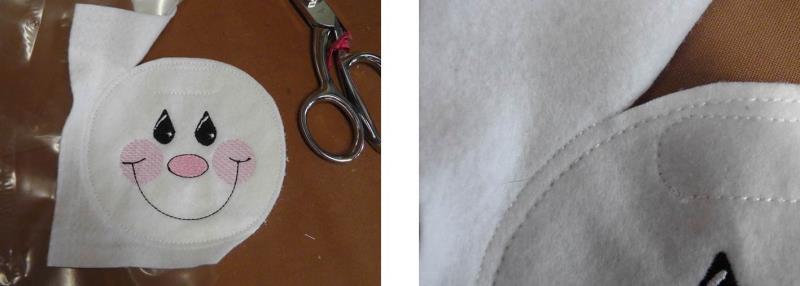
Remove the project from the hoop. Carefully cut just inside the tack down line, cutting through both bag pieces at the same time.
(Click Image to Enlarge)
Step 14:
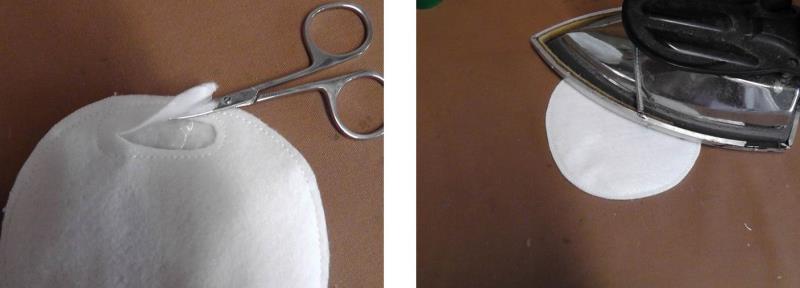
With small sharp scissors, cut within each handle area leaving about ¼” as shown. KK2000 dissipates with dry heat. Using a warm, dry iron (no steam), press the candy bag from the wrong side for a few seconds. There is no need to try and remove the water soluble stabilizer from the inside of the bag.
(Click Image to Enlarge)
Step 15:
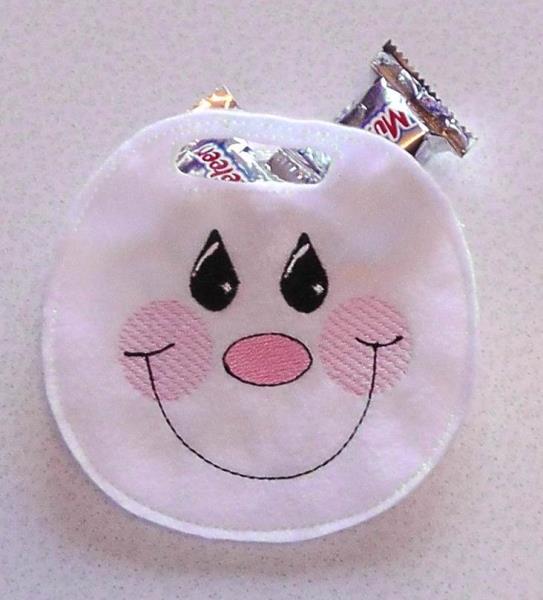
Fill the bag with the individually wrapped candy snacks and you’ve got a “Ghost Candy Bag” ready for the little trick-or-treaters who come to call. These bags stitch up so fast you’ll want to make several of each kind! They would even be a welcome gift for office or school mates.
(Click Image to Enlarge)
Step 16:
The other three Candy Treat Bags are done basically using the same steps. There are some small changes that will be noted in the following instructions. Please read through the instructions for the other bags that you’d like to construct before beginning.
(Click Image to Enlarge)
Step 17:
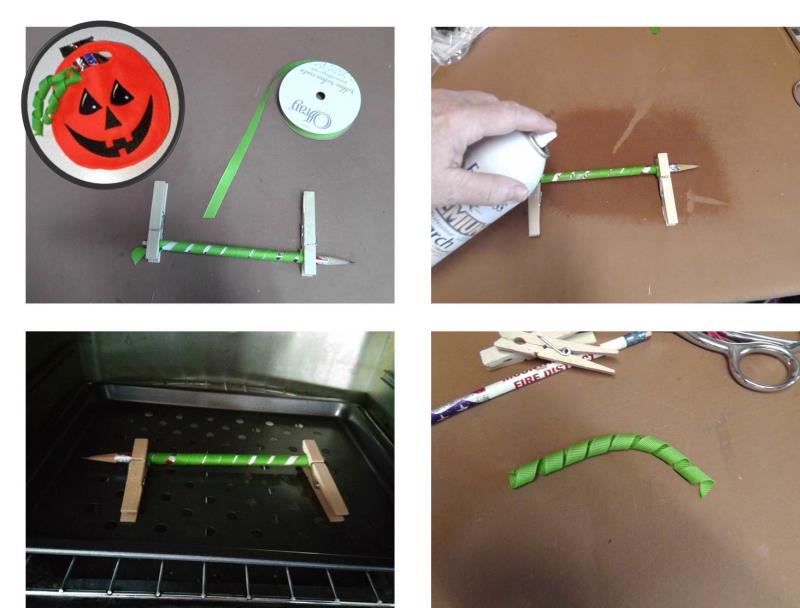
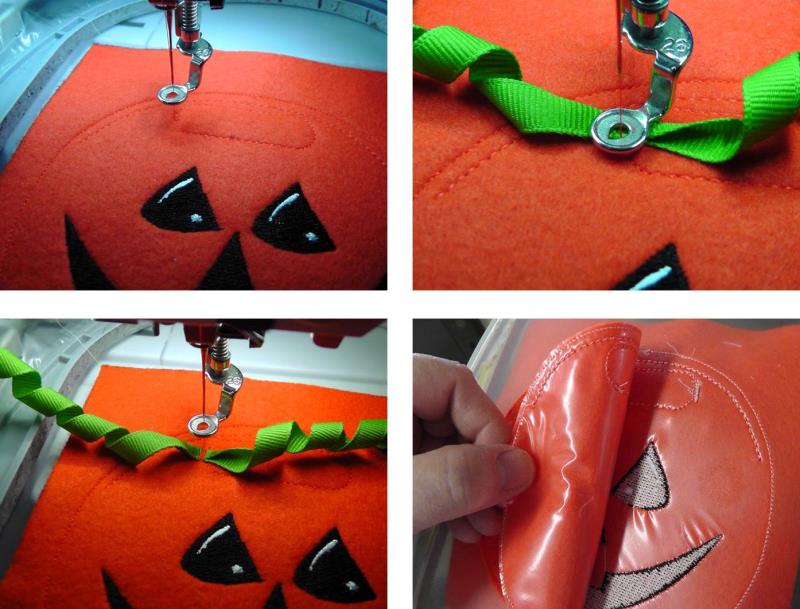
For the “Pumpkin Candy Treat Bag”, a small curled ribbon needs to be created first so it is ready when it is needed during the stitching process. Use about ½ yard of polyester grosgrain ribbon. Cut the ribbon he length needed and wrap it around a dowel or pencil as shown, affixing each end with a clothespin to hold it in place. Saturate the ribbon with spray starch. Place the ribbon with the clothespins in a 400 degree oven for about 20 minutes. Shut off the oven and let the ribbon cool down completely. Remove the clothespins and then slide the ribbon off the pencil; cut the ends on the bias to prevent raveling. Set the curled ribbon aside until needed in the stitching sequence. Note: the ribbon will remain curled unless it becomes wet.
(Click Image to Enlarge)
Step 18:
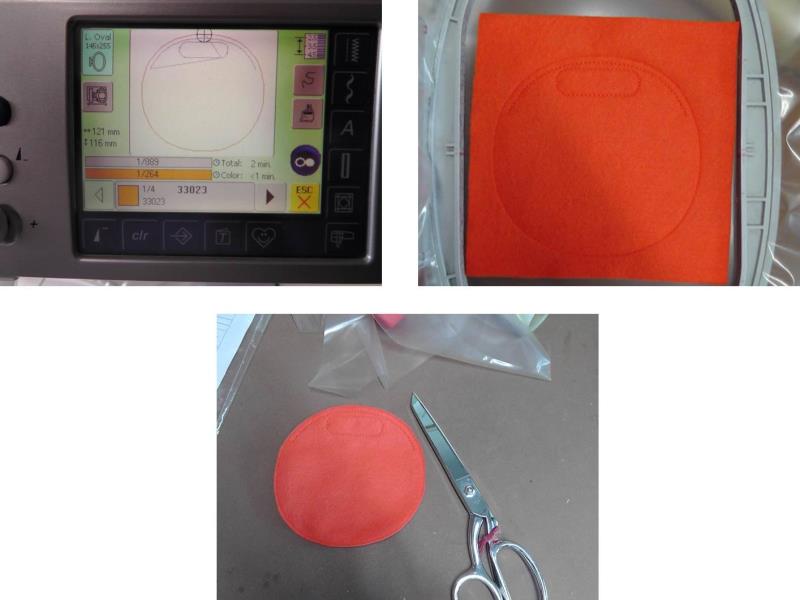
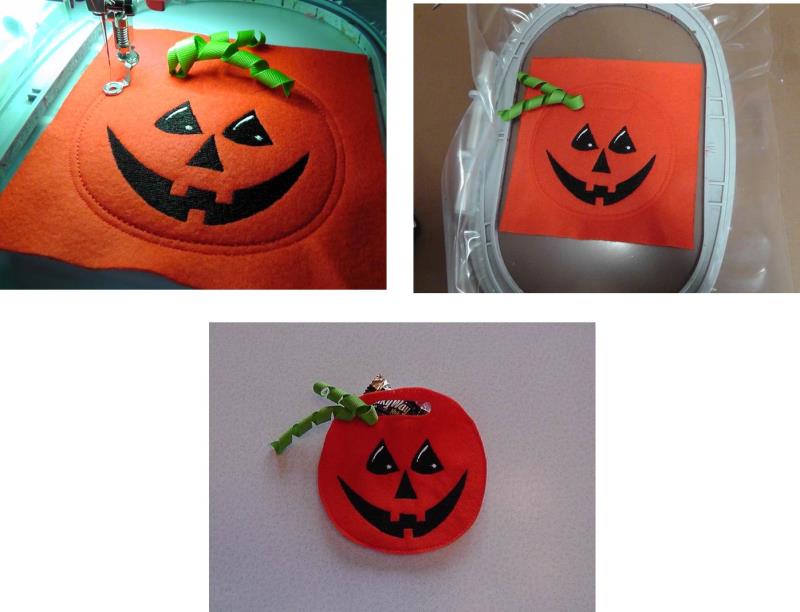
Load and stitch the “Pumpkin Candy Bag Back”. Trim around the outside of the tack down line. Set aside until the last step of the “Pumpkin Candy Bag Front” design.
(Click Image to Enlarge)
Step 19:
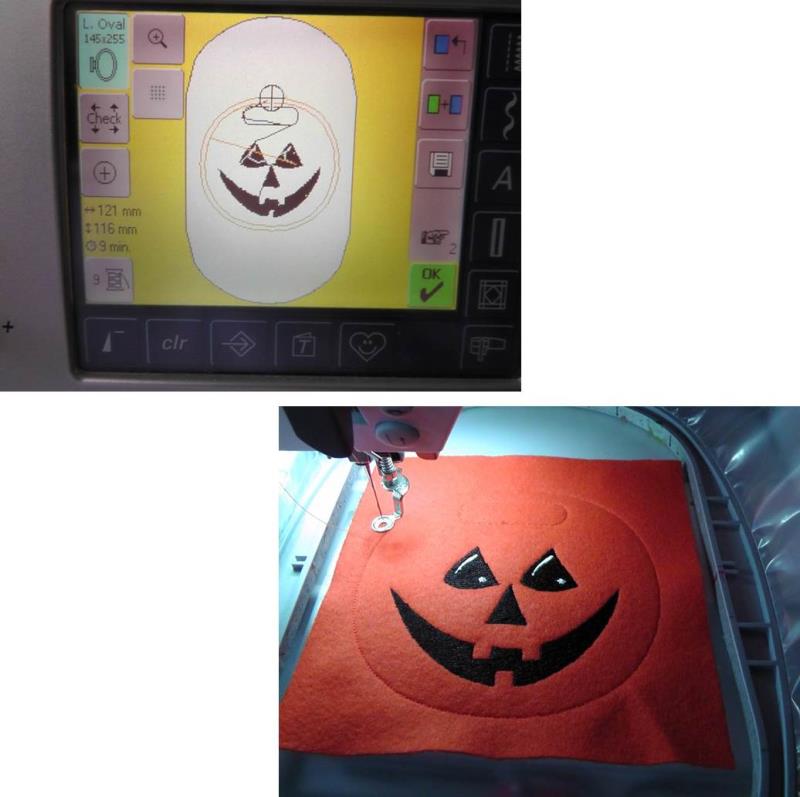
Load “Pumpkin Candy Bag Front” design on the machine and stitch following the color sequence (match the thread color to the felt color at the points indicated in the sequence).
(Click Image to Enlarge)
Step 20:
After the handle sews, color stop 7 will be a placement line for the ribbon. Divide the ribbon in half and then pinch the middle and slide it under the presser foot. Stitch the color stop 8 which will satin stitch the ribbon in place. Before stitching the last color (9), spray and place the “Pumpkin Candy Bag Back” to the underside of the “Pumpkin Candy Bag Front”, aligning the handle and tack down stitching lines.
(Click Image to Enlarge)
Step 21:
Place the hoop back on the machine and stitch the last color (9) which will stitch the bag front and back together. Remove the “Pumpkin Candy Bag” from the hoop and trim just inside the tack down line. Fill the bag with individually wrapped candy snacks.
(Click Image to Enlarge)
Step 22:
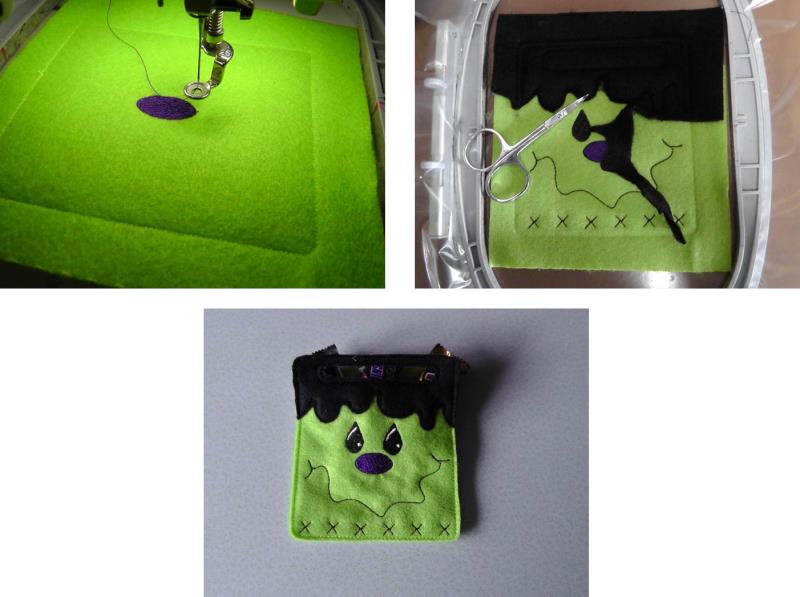
For the “Monster Candy Bag”, stitch the “Monster Candy Bag Back” like was done for the ghost and set aside. Load the “Monster Candy Bag Front” on the machine. Stitch the placement line, place down the lime green felt, and stitch the tack down. Trim the felt at the top close to the stitching line (this removes the excess felt from under the hair area). Stitch colors 3 and 4. Color 5 is the placement line for the hair. Stitch it and then place down the black felt and stitch color 6 which will tack the hair in place. Remove the hoop from the machine and use small scissors to cut around the face portion of the hair next to the decorative stitching line at the lower edge of the hair. Place the hoop back on the machine and stitch colors 7 and 8. Spray and place the “Monster Candy Bag Back” on the back of the hoop, aligning the handle and tack down lines as was done for the other candy bags. Remove the bag from the hoop and trim.
(Click Image to Enlarge)
Step 23:
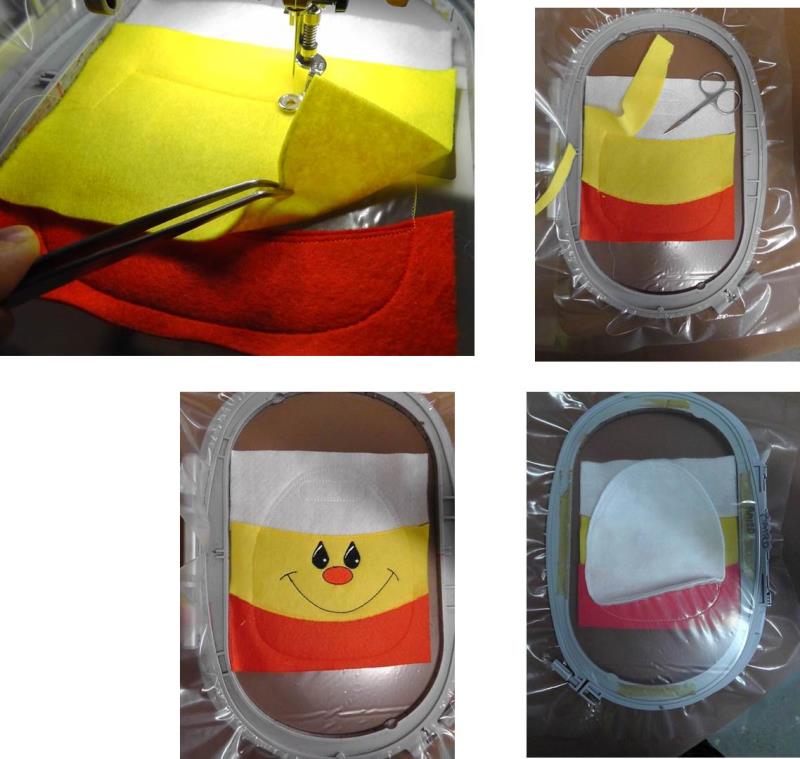
For the “Candy Corn Candy Bag” stitch the bag back, trim and set aside until needed. Load “Candy Corn Candy Bag Front” on the machine. The lower orange and upper white sections will be stitched first (colors 1-5). After both are stitched then trim the inside edge of both pieces close to the tack down line.
(Click Image to Enlarge)
Step 24:
Stitch colors 6 and 7, placing the yellow felt in place. Trim the yellow felt along the upper and lower decorative stitching lines. Place the hoop back on the machine and stitch colors 8-10. Remove the hoop from the machine and spray and place the “Candy Corn Candy Bag Back” to the backside of the hooped piece.
(Click Image to Enlarge)
Step 25:
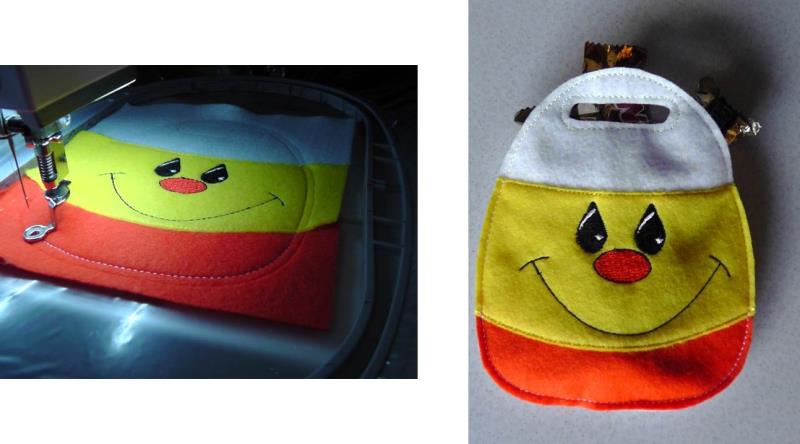
Place the hoop back on the machine and stitch the last color (9) (white thread was used in both the bobbin and top) to stitch both bag pieces together. Remove the bag from the machine and trim. Fill with individually wrapped candy snacks.
(Click Image to Enlarge)
Step 26:
You’ll have lots of fun making and giving these quick-to-stitch “Candy Treat Bags”. Watch the little one’s eyes light up and get oodles of compliments on how “cute” your creations are!
Ramona Baird has been in the embroidery industry for over 23 years. She and her husband owned a commercial and retail embroidery store in Arizona for many years. She is an experienced digitizer having been mentored by award-winners Pat Williams and Lindee Goodall. Ramona is a contributor to “Creative Machine Embroidery” magazine having 5 covers to her credit. Ramona has worked for Wilcom America and served many years as Education Director for the American Sewing Guild. With a degree in fashion design, she is able to design and execute patterns which Pat Williams says are “out of the box” in creativity and application. Ramona likes to challenge the boundaries of embroidery and bring new and exciting designs, ideas, and projects to EmbroideryDesigns.com. She wants embroiderers of all levels to increase their skills and enjoyment in using their embroidery machine for gift-making and personal pleasure.