Border OptionsHugging border, circle, square, or rectangle — with a 3mm satin stitch.
Backing OptionsAvailable with iron-on, sew-on, or velcro backing.
Fast ShippingShipped quickly from the USA.
Free Online Tools
Powerful embroidery utilities that save time and prevent costly mistakes.
Stitch AssistantRECOMMENDED
Get the exact stabilizer, machine settings, needle, and thread color sequence for every embroidery design you purchase — based on that design's stitch density, dimensions, and color count.
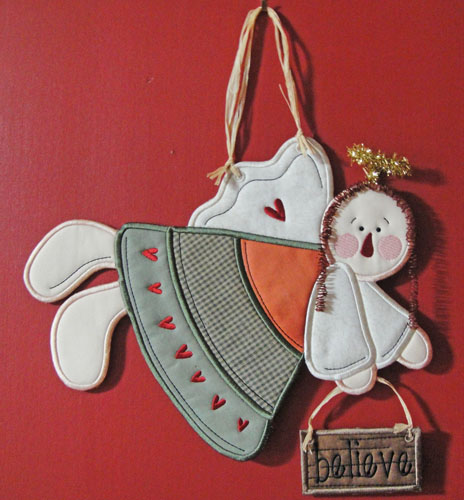
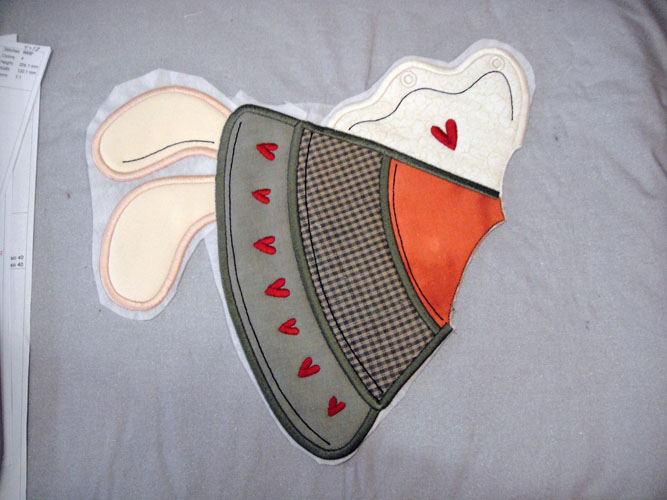
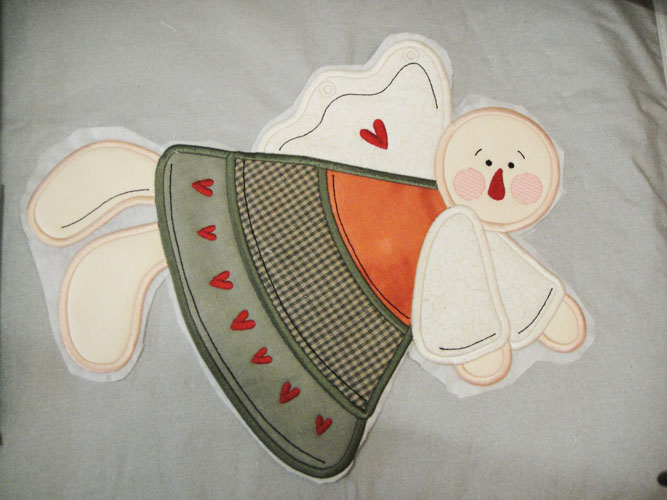
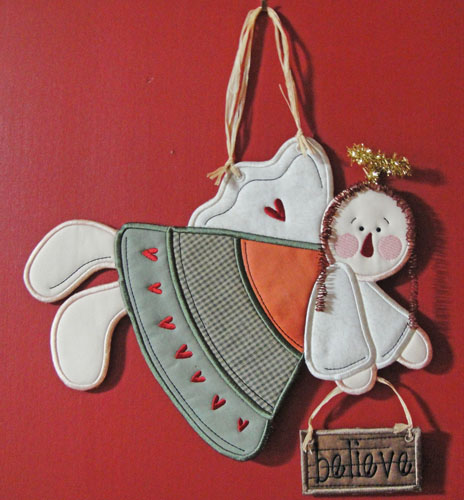
Create a charming country angel wall hanging with this in-the-hoop project. This delightful angel is crafted in sections and joined in the hoop, with additional raffia and halo details. Perfect for adding a touch of warmth and protection to any room. Step-by-step instructions are included.
The photos used to illustrate this project are in an 8” x 12” hoop, as that is what I have. However based upon the measurements of each piece of the project you should be able to do this in a 6” x 10” or 7” x 12” hoop too. Please make each piece in the order directed as the individual sections are joined together in the hoop. The size given is the size of the angel and excludes the raffia hanger.
Step 1:
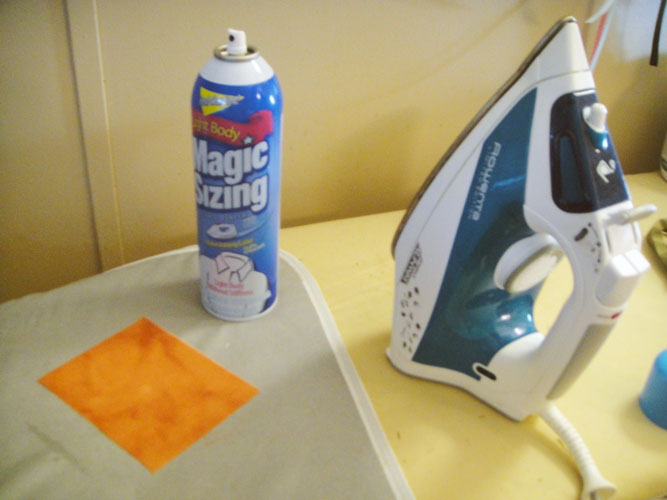
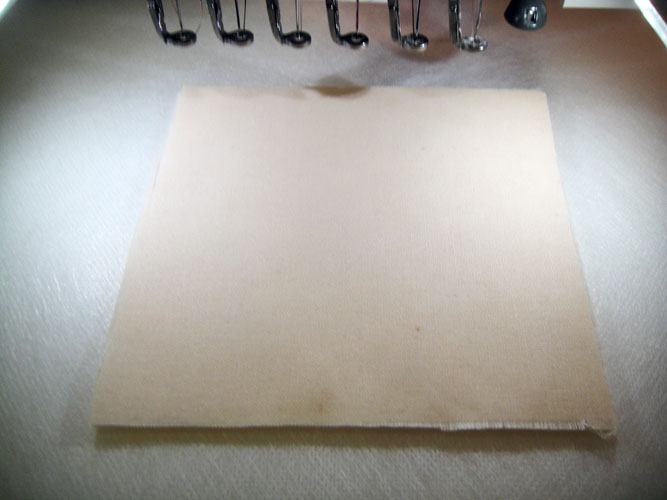
Prepare all fabrics by ironing 4 times with Magic Sizing® - this will prevent fraying when trimming the appliques; Cut the fabric back material into 3 8” x 18” strips and apply Pellon Craft Fuse 808® to the wrong side of the back fabric following the manufacturer’s instructions.
(Click Image to Enlarge)
Step 2:
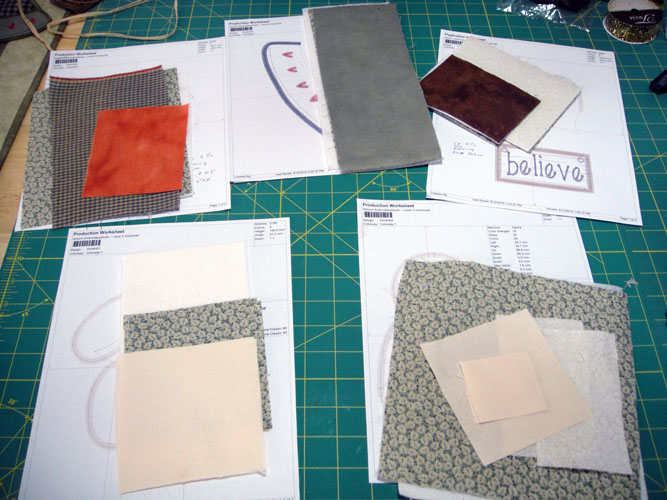
Print out production worksheets for each of the five project designs and arrange your fabrics on them as follows:
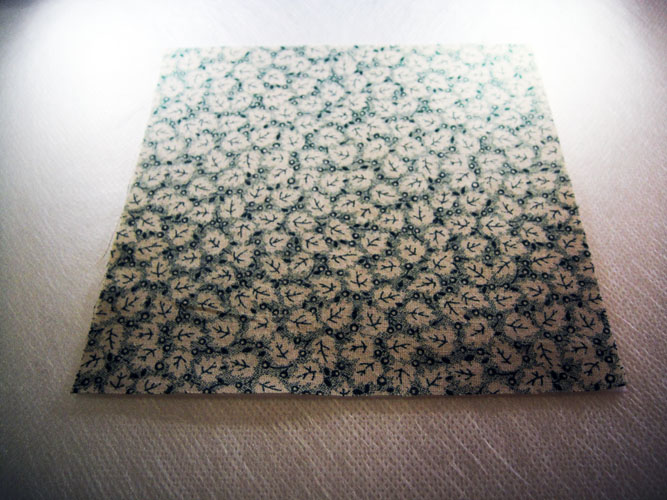
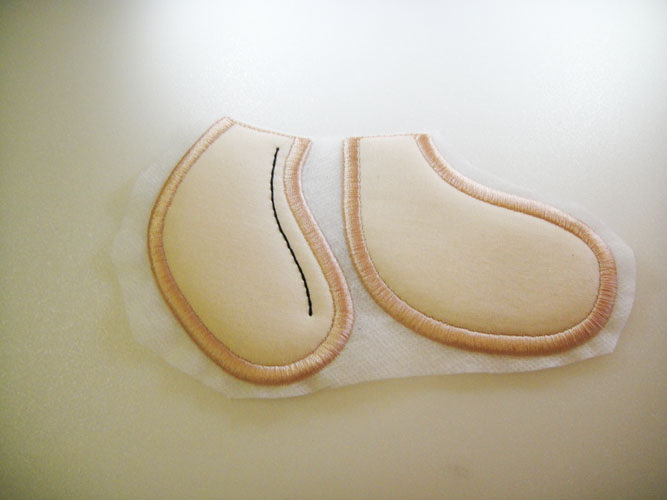
a. For the feet design, PAWH01, cut two 4 ½” squares of the flesh color fabric; Battilizer® and back fabric.
b. For the wing and sign design, PAWH02 cut 5” x 6” rectangles of the crackle white fabric; Battilizer® and back fabric for the wing. Cut 5” x 3.5” rectangles of the brown fabric; Battilizer® and back fabric for the sign.
c. For the 1st skirt panel, PAWH03, cut an 11” x 14” rectangle of the dusty green fabric; Battilizer® and back fabric.
d. For the middle skirt panel and bodice, PAWH04, cut a 7.5” x 6.5” rectangle of the Battilizer® and back fabric; an 8” x 5” rectangle of the dusty green check and a 5” x 4” rectangle of the mottled rust fabric.
e. For the face and arms design, PAWH05, cut an 8” x 7” rectangle of the Battilizer® and back fabric; from the flesh fabric cut a 4 ¼” x 4” rectangle for the face and 2 2” x 2” squares for the hands; for the sleeves cut 2 5” x 3” rectangles of the crackle white fabric.
(Click Image to Enlarge)
Step 3:
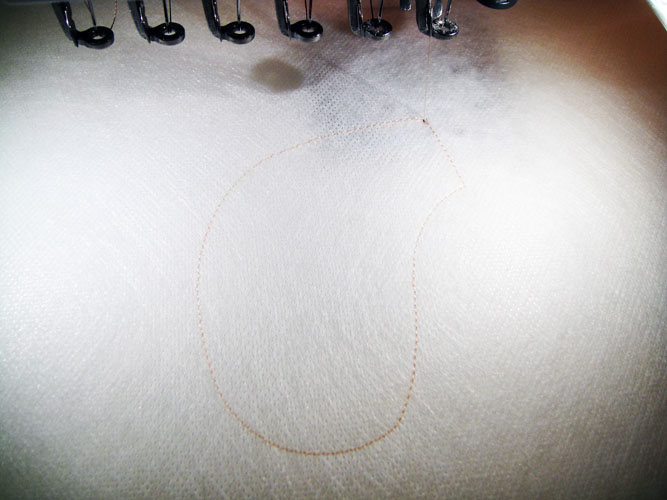
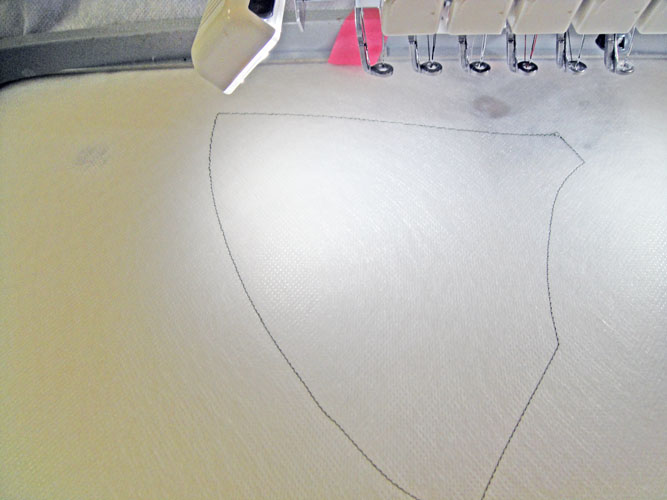
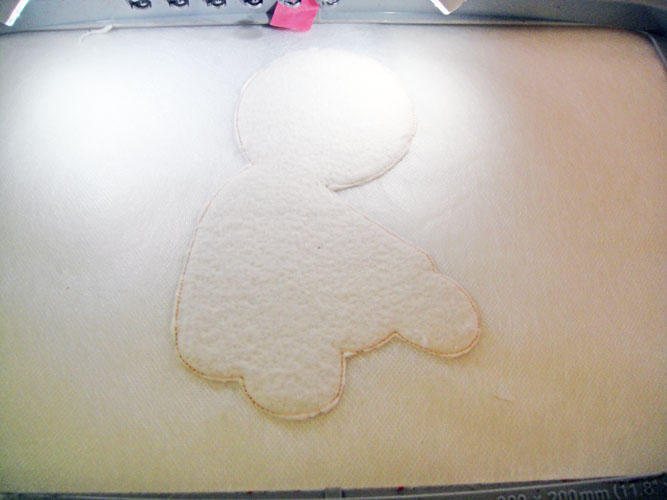
Hoop two layers of fibrous water soluble; Load design PHAW01; run CS 1 (color stop) for an outline for the placement of the applique fabric.
(Click Image to Enlarge)
Step 4:
Spray a 4 ½” square of Battilizer® with adhesive and lay over the outline; spray a 4 ½” square of the flesh fabric and place over the Battilizer®.
(Click Image to Enlarge)
Step 5:
Remove the hoop from the machine – do not unhoop-; turn the hoop over and spray a 4 ½” square of the back fabric with the fused Pellon 808® over the outlines on the back of the hoop.
(Click Image to Enlarge)
Step 6:
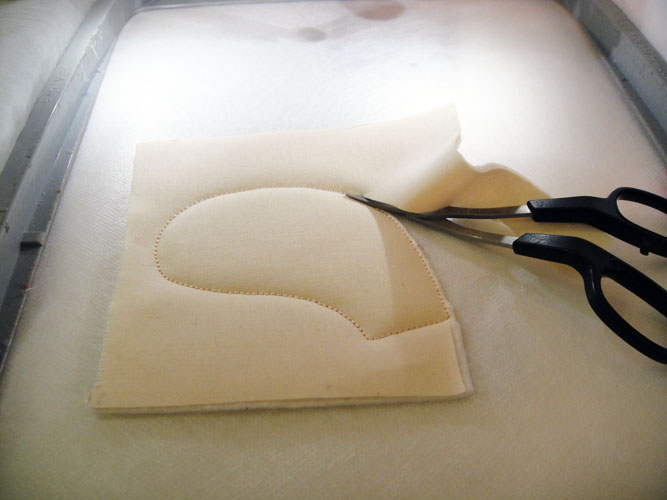
Return the hoop to the machine and run CS 2 to tack down the fabrics. Trim the fabric ad Battilizer® right up next to the tack down line.
(Click Image to Enlarge)
Step 7:
Remove the hoop – do not unhoop- trim the back fabric right next to the outline.
(Click Image to Enlarge)
Step 8:
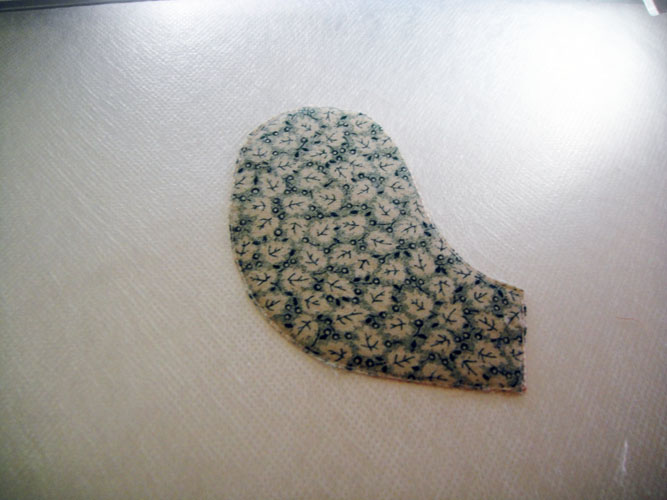
Return the hoop to the machine and repeat the steps for the second foot; the second foot has one last CS in Black for the detail line on that foot; Cut the excess stabilizer away from the feet as one unit to maintain the spacing between the feet; trim very close to the top of the feet. Set this unit aside.
(Click Image to Enlarge)
Step 9:
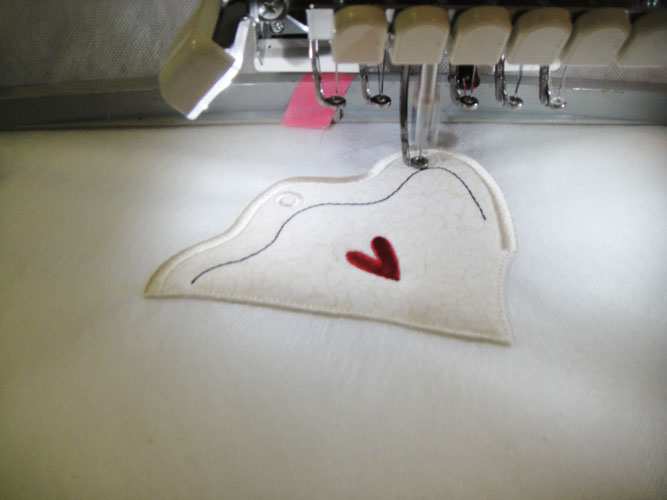
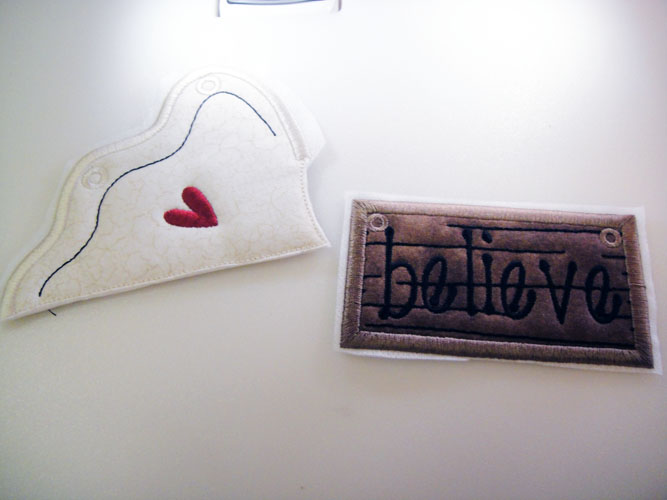
Hoop two layers of fibrous water soluble stabilizer for this an all subsequent sections; Load design PAWH02 in your machine; stitch the outline for the wing and place the Battilizer and top fabric on top and the backing fabric on the back as you did for the feet; trim the top and bottom fabrics; follow the color chart through CS 5to complete the wing; CS 6 is the outline for the sign; place the Battilizer® and brown fabric to the top and back fabric on the back side of the hoop; trim as all other pieces and follow the color chart to complete the sign.
(Click Image to Enlarge)
Step 10:
Trim both pieces from the stabilizer; trim very close to the long smooth edge of the wing.
(Click Image to Enlarge)
Step 11:
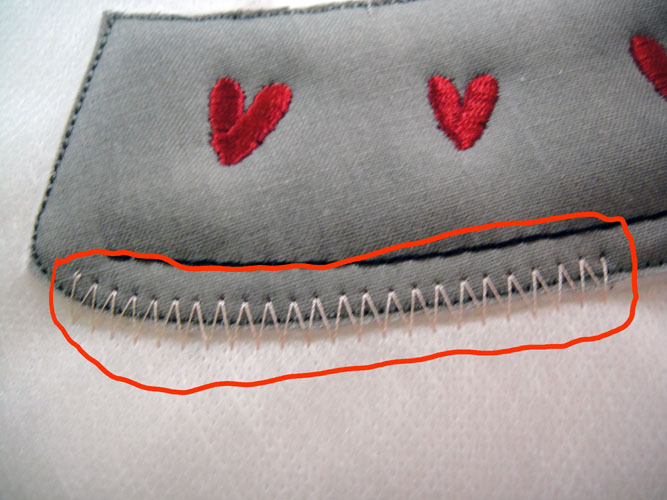
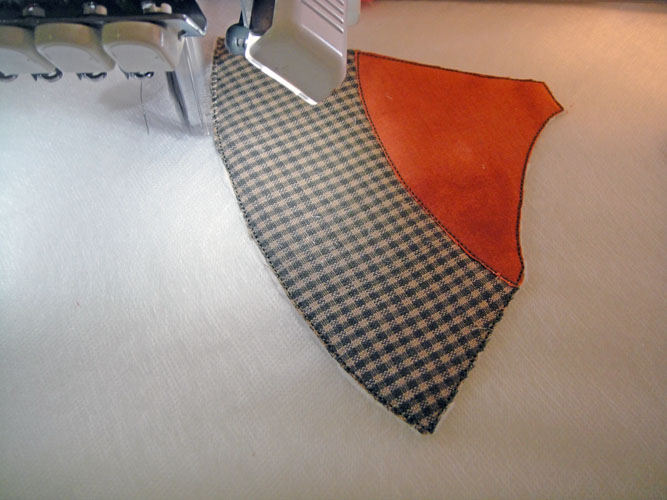
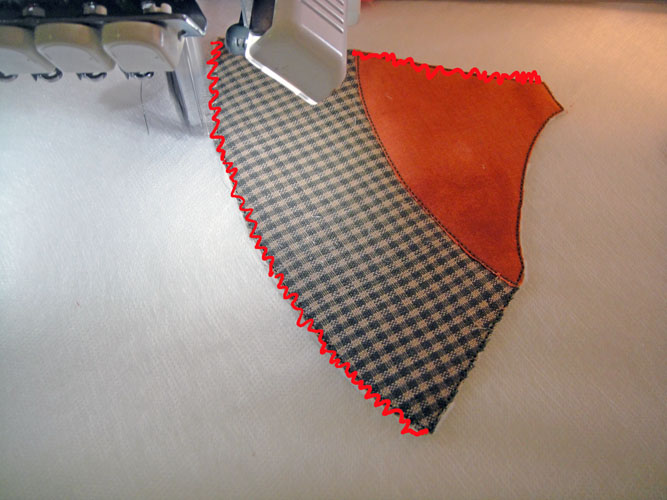
Load design PAWH03 for the first section of the skirt; rotate the design if necessary to fit in the hoop, in these pictures the skirt is rotated 270 degrees; follow the color chart applying the applique and back fabric and trimming as before; follow the color chart through CS 5 until the zigzag stitches are sewn (you can sew these in the same thread as the skirt color, they are in a different color for this picture to get them to show up better in the picture).
(Click Image to Enlarge)
Step 12:
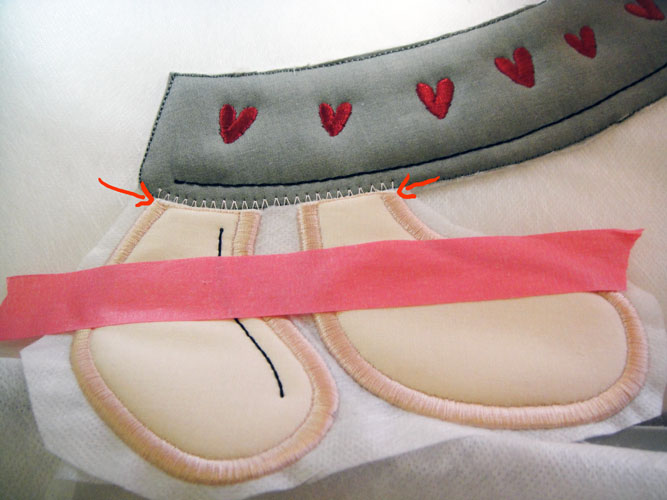
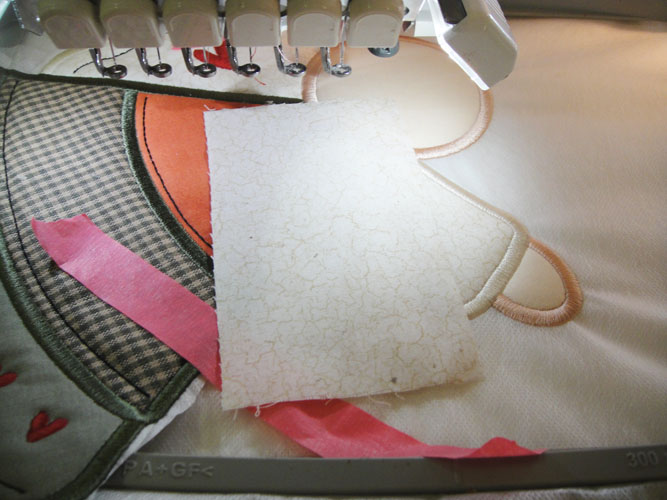
The zigzag stitches serve as a placement line for the feet; spray the tops of the feet with spray adhesive and align the top of the feet over ½ of zigzag stitches; the outside of the satin border of the feet will align with the beginning and the end of the zigzag stitches; tape down with embroidery tape to further secure the feet.
(Click Image to Enlarge)
Step 13:
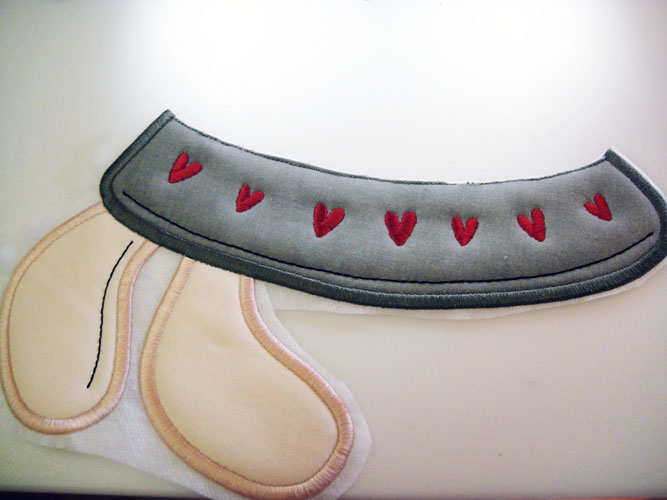
Run the last color stop in the color for the border; remove the design from the hoop and cut away the excess stabilizer; trim very close to the top of the skirt section.
(Click Image to Enlarge)
Step 14:
Load design PAWH04 into your machine; the applique sequence is a different for this one and for PAWH05; stitch the 1st outline stitch which is for the whole shape of this section; spray with adhesive and lay the Battilizer® over the outlines on the top of the hoop; spray and place the back fabric on the back side of the hoop; no top fabric is used at this time. Trim the Battilizer® and back fabric.
(Click Image to Enlarge)
Step 15:
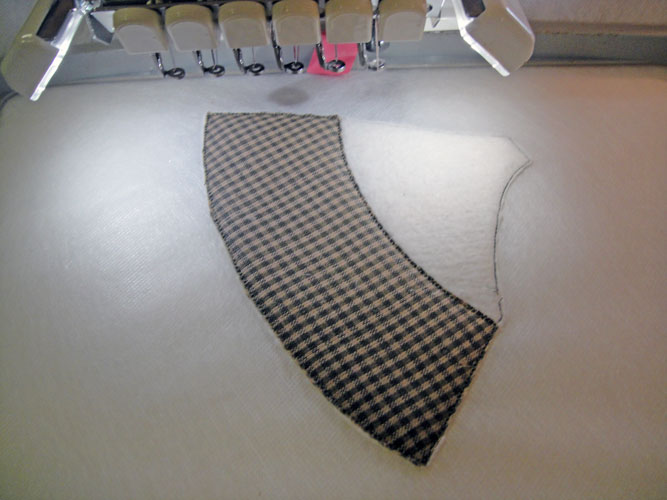
CS 3 is an outline for the middle section of the skirt; spray with adhesive and place the skirt fabric on the top of the Battilizer®; stitch the tack down line with CS 4; trim the applique as close as possible to the tack down stitches.
(Click Image to Enlarge)
Step 16:
Run CS 5 for an outline for the bodice section; spray and attach the bodice section; CD 6 will take down the bodice; trim the bodice close to the tack down stitches.
(Click Image to Enlarge)
Step 17:
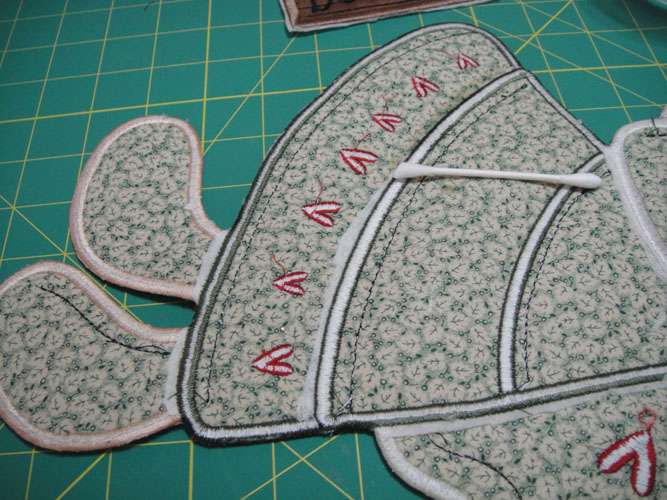
CS 7 stitches zigzag stitches where the lower skirt will join to the upper skirt and where the wings will join the back of the bodice and skirts.
(Click Image to Enlarge)
Step 18:
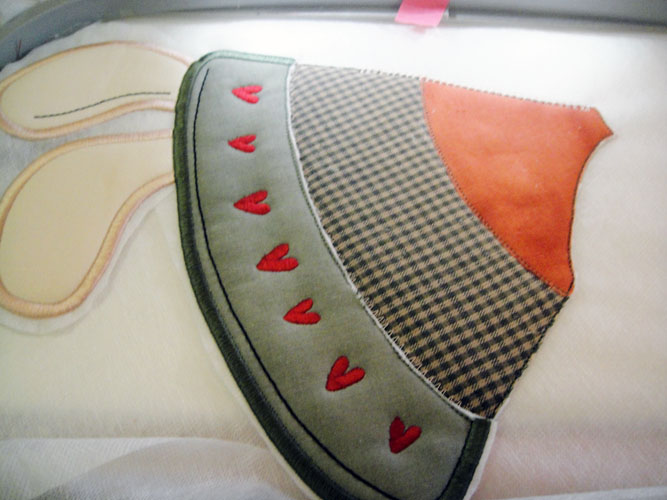
Spray and align the lower skirt piece being sure that you cover at least half of the width of the zigzag stitches; the border stitch is going to sew right on top of the zigzag stitches so we want to make sure it will cover fabric on both skirts.
(Click Image to Enlarge)
Step 19:
Spray and align the wings at the neck edge in the same manner; the zigzag is not quite as long as the wing but start at the neck edge and align the wing as far as it goes down the back of the bodice and skirt; embroidery tape may be used to further secure the bottom skirt and wings.
(Click Image to Enlarge)
Step 20:
Run CS 8 in black for detail stitching and CD 9 in Army Fatigue to complete the dress borders. Cut out the design from the stabilizer trimming very close at the head and sleeve borders.
(Click Image to Enlarge)
Step 21:
Load PAWH05 into your machine; like PAWH04 this file will stitch and outline for the whole section; place just the Battilizer® and the back fabric over the whole outline; run CS2 to tack down the fabrics and then trim the front and back as close as possible to the tack down stitches.
(Click Image to Enlarge)
Step 22:
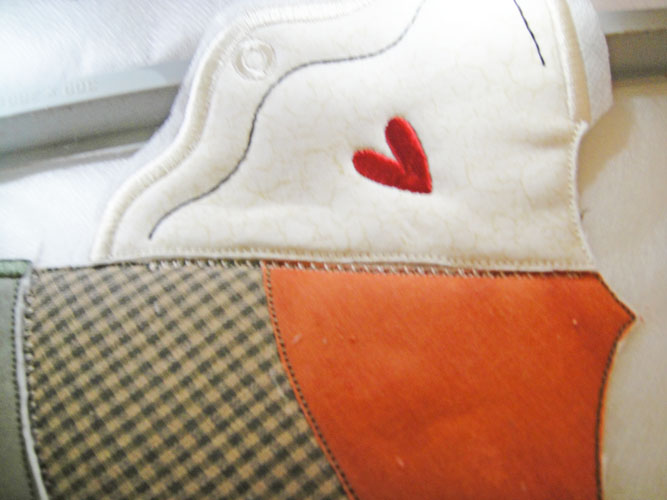
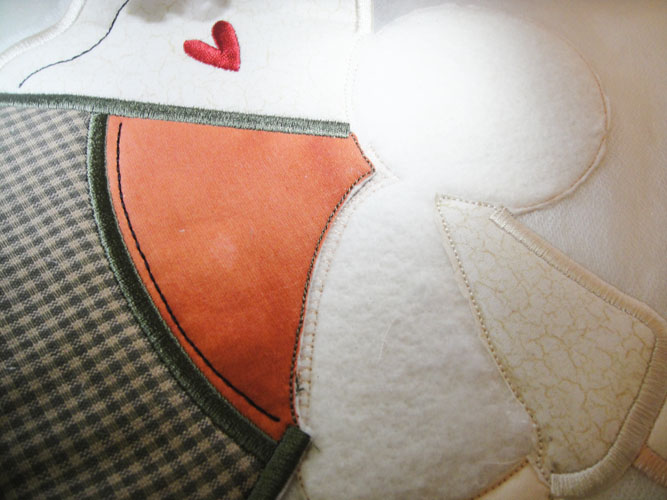
Follow the color chart though CS 11 to sew outlines for the hands, use flesh fabrics for the hands; use white crackle fabric for the sleeve; CS 11 will stitch alignment stitches to align the body to the face and arms; align the body making sure that half of the zigzag stitches are covered by the body, making particularly sure that the point of the neck is properly placed over half of the zigzag stitches.
(Click Image to Enlarge)
Step 23:
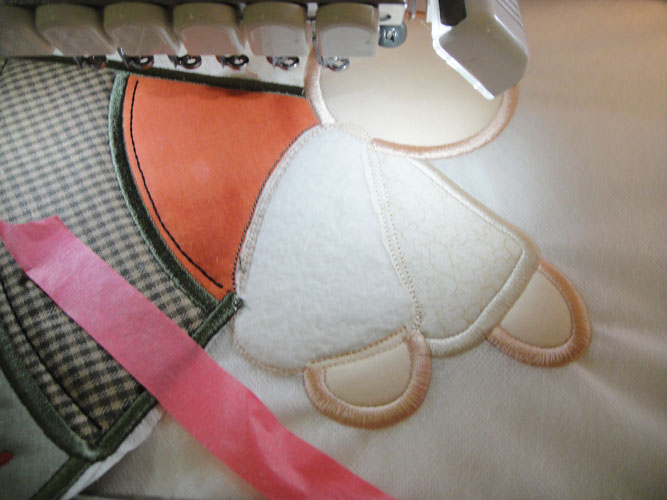
CS 12 and CS and 13 are the outline and tack down for the head; CS 14 is the head border.
(Click Image to Enlarge)
Step 24:
CS 15, 16, and 17 will outline tack down and border the final sleeve.
(Click Image to Enlarge)
Step 25:
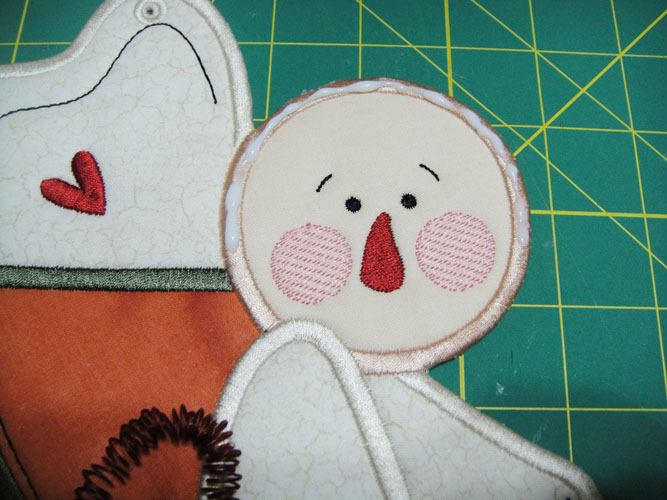
Stitch CS 18 in black, CS 19 in rust and CS 20 in rustic pink to complete the face; remove the angel from the hoop and trim away the excess stabilizer.
(Click Image to Enlarge)
Step 26:
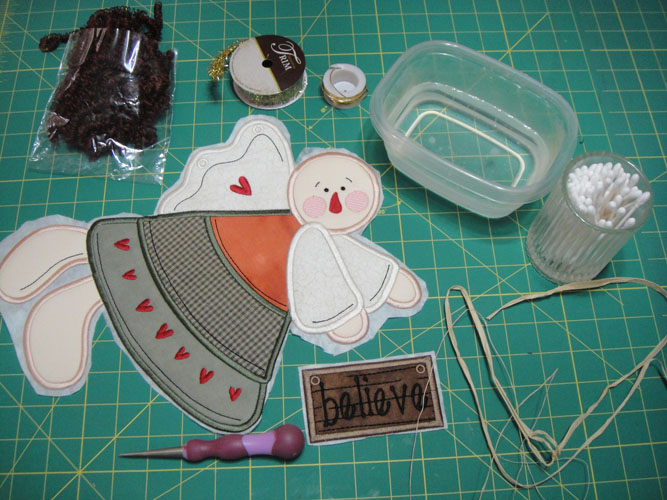
Gather the items you will need to complete the angel; a small bowl of hot water; an awl; gold metallic trim; raffia; scotch tape and cotton swabs.
(Click Image to Enlarge)
Step 27:
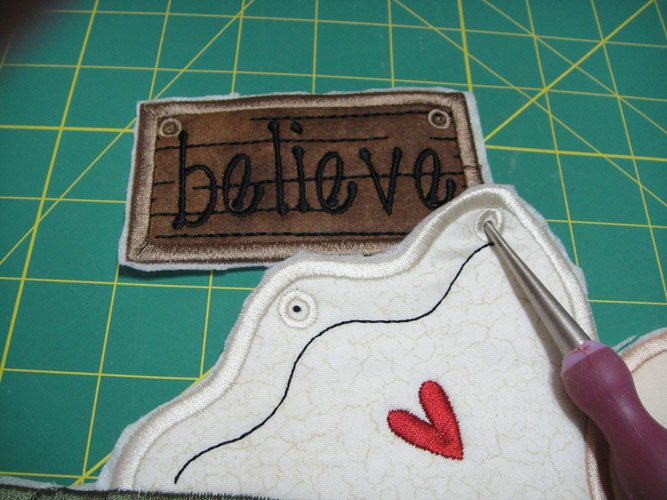
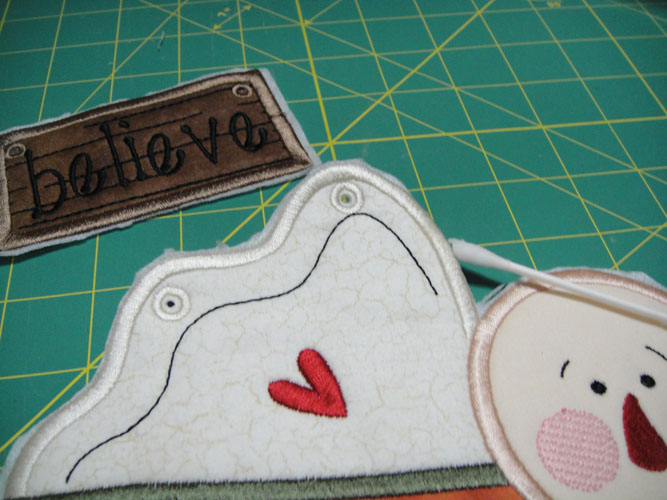
Use the awl to punch holes in the eyelets in the sign and at the top of the wing.
(Click Image to Enlarge)
Step 28:
Trim the water soluble stabilizer from around the angel as close as possible without snipping any of the satin borders; dip the cotton swabs in the water and rub away the remaining stabilizer; do not make the swabs too wet as you do not want the water to bleed into the fabrics.
(Click Image to Enlarge)
Step 29:
Remove the stabilizer from the back of the angel as well.
(Click Image to Enlarge)
Step 30:
Run a thin bead of craft glue around the sides and top of the head.
(Click Image to Enlarge)
Step 31:
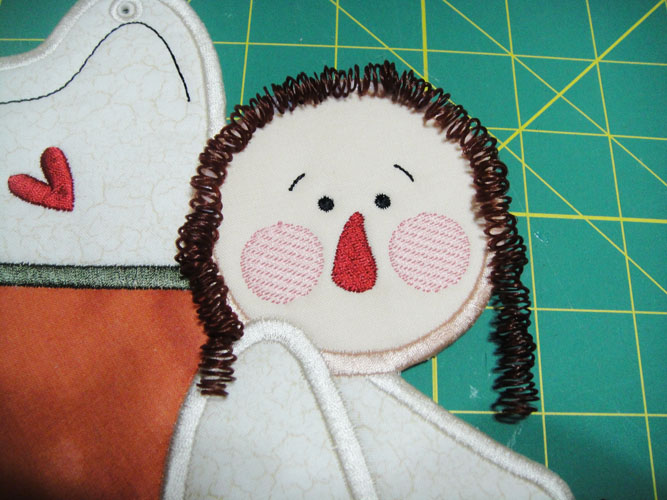
Cut a 12” strip of the curly hair and arrange over the glue, let it dry.
(Click Image to Enlarge)
Step 32:
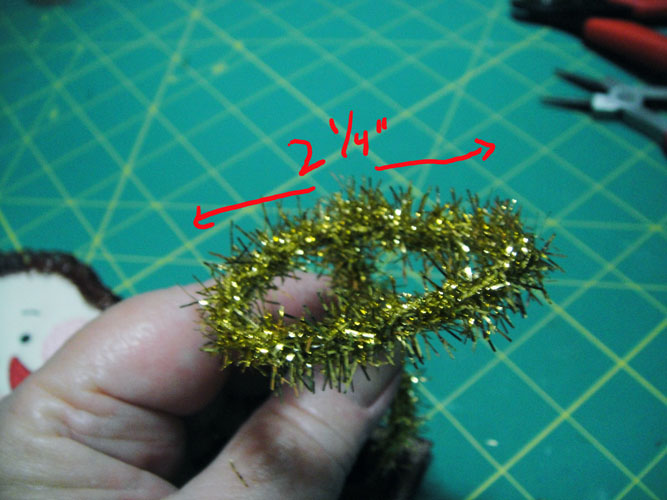
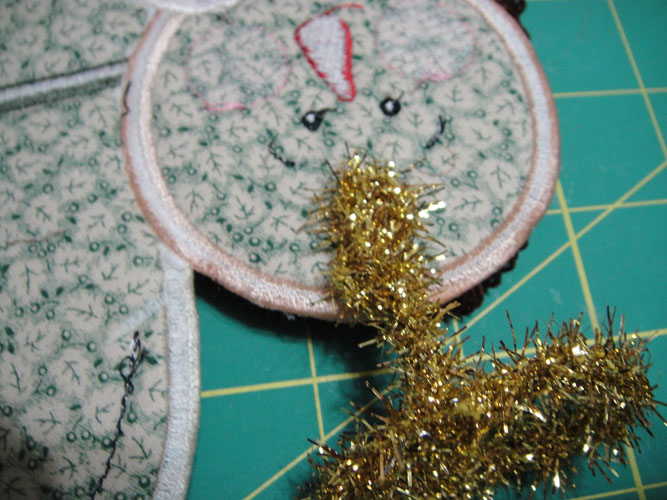
Cut a 8” strip of the wired gold metallic trim and wrap the end around two fingers to form a loop for the halo that is approximately 2 ¼” wide twist the loop end wire to join; fold up the tail end of the trim about 1” to and twist the trim upon itself to give a little weight to the end.
(Click Image to Enlarge)
Step 33:
Glue the halo to the back of the head and let dry.
(Click Image to Enlarge)
Step 34:
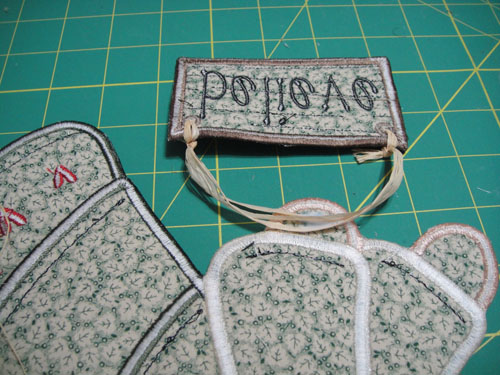
Wrap a tiny bit of scotch tape around the end of a strip of raffia to make it easier to push it through the holes on the sign, adjust the length to your liking and knot the ends over the sign.
Step 35:
Glue the sign handle to the back of the angel’s right hand.
Step 36:
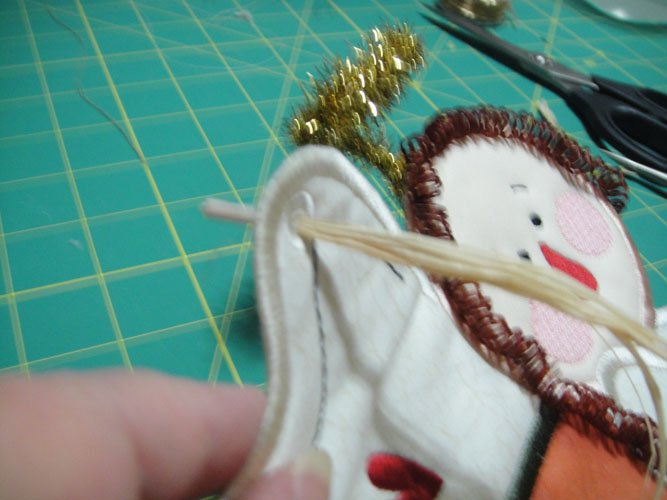
Feed several strands of raffia though the eyelets in the wing for hanging the angel; adjust to desired length; knot and trim at both ends.
(Click Image to Enlarge)
Step 37:
Congratulations your Prim Country Angel Wall Hanging is complete!
Award winning Digitizer, Embroidery Educator, Author and a Consultant to the Industry, Pat Williams has 30 years of experience in the embroidery industry. Pat has won multiple awards for her digitizing expertise including the 2007 Impressions Awards Grand Championship, Best of Show as well as the 1st and 2nd Place Awards. Pat’s love of digitizing has afforded her the opportunity to write numerous articles for Impressions magazine in the United States and Images Magazine in Europe. In 2001 Pat was named “Embroidery Educator of the Year.” For many years Pat taught digitizing seminars at the ISS Shows in Long Beach, CA and for Compucon software. She now resides in Tucson, AZ.