Border OptionsHugging border, circle, square, or rectangle — with a 3mm satin stitch.
Backing OptionsAvailable with iron-on, sew-on, or velcro backing.
Fast ShippingShipped quickly from the USA.
Free Online Tools
Powerful embroidery utilities that save time and prevent costly mistakes.
Stitch AssistantRECOMMENDED
Get the exact stabilizer, machine settings, needle, and thread color sequence for every embroidery design you purchase — based on that design's stitch density, dimensions, and color count.
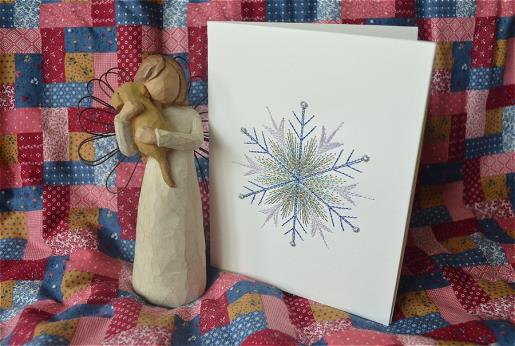
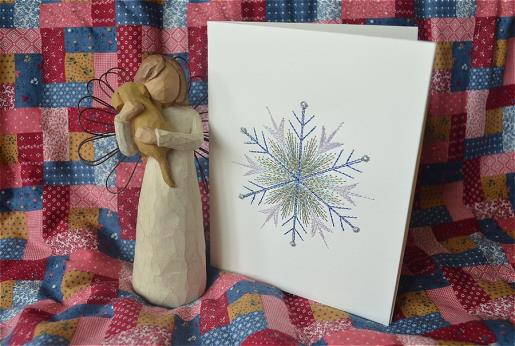
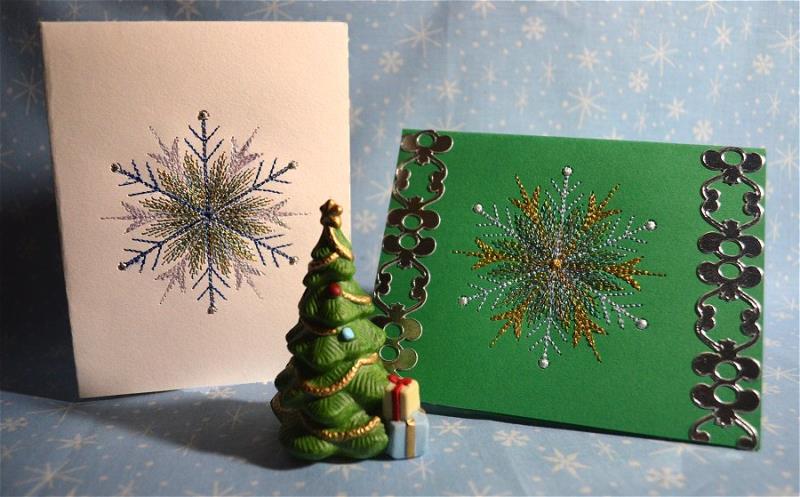
Embroider your own greeting cards in minimal time and trouble. This particular design was digitized specifically for use of a variegated color with a sewing path that results in a beautiful blend. But, for this project you can use any design created in line stitches, such as Redwork, if it fits within a 4 x 4” hoop and by following these basics for stitching on cardstock.
Step 1:
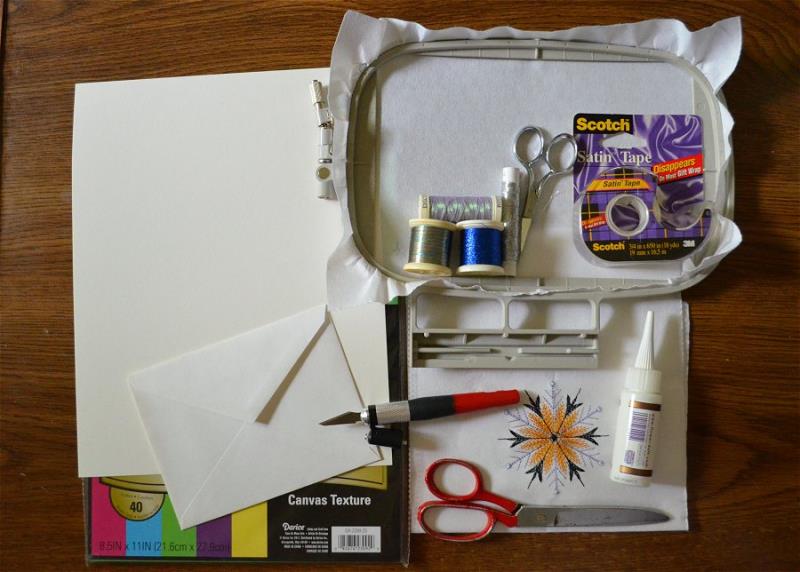
Gather the materials. To begin you will need cardstock, tear-away stabilizer and your choice of four thread colors to complete the embroidery. If you use the Feather Snowflake design, choose a variegated color for the first color for the best results. When you watch this design stitch out, you will see how the digitizer carefully chose a sewing path that will produce the best blend of the variegated colors. Stitch a sample on three layers of tear-away or two layers of cut-away stabilizer. When stitching samples you can use any colors of threads to experiment; the main reason to stitch a sample on stabilizer or extra cardstock is to be sure that the design is not too stitch intensive for paper. For the white cardstock I’ve chosen to use a Madeira FS, metallic, variegated thread of blue and gold shades as the first color and metallic silver, metallic blue and metallic pink for the remainder of colors. The green cardstock is stitched with the same Madeira FS, metallic variegated thread, followed by white rayon, metallic silver and metallic gold.
(Click Image to Enlarge)
Step 2:
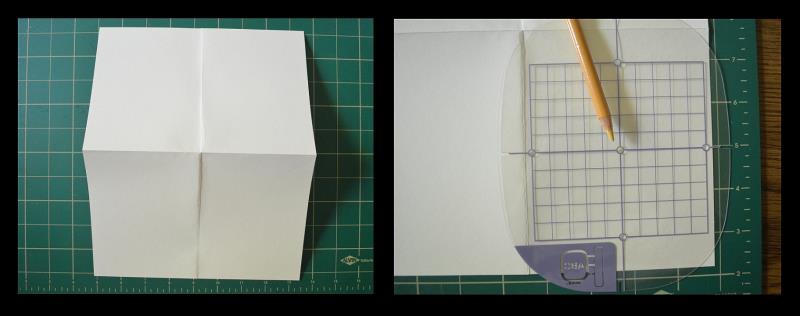
If you do not have pre-folded cardstock, fold the piece in half, matching the corners carefully prior to creasing the fold, and then fold again at the center. Unfold the card to reveal the four divided panels. Find and mark the center of the panel to stitch. You will want to embroider the panel that will result with a fold at the left and top when the card is folded into place. I’ve used a yellow water color pencil to mark the center, but you could also use a pin to poke a small hole at center, which may make it easier to line it up with the center mark that will be made on the hooped tear-away.
(Click Image to Enlarge)
Step 3:
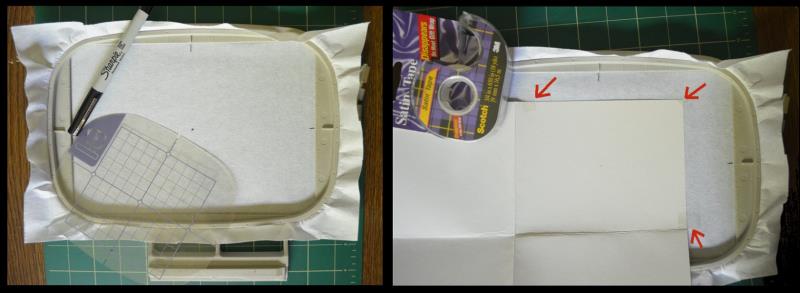
The Feather Snowflake design is 3.04 x 3.06” so it will fit in a 4 x 4” hoop, but there is less of a chance of creating unwanted creases in the cardstock if you are able to use a 5 x 7” hoop or larger. Hoop the sheet of tear-away and mark the center point. If you prefer, add marks on the stabilizer, next to the guide lines on the hoop to help judge the center axis. Set the panel to be embroidered into the hoop with the majority of the cardstock at the left for a side opening card (as seen in image) or the majority towards the back for a bottom opening card. Line up the center mark of the card with the center mark on the tear-away, make sure the sides of the card match straight with the sides of the hoop and then fasten with removable tape at three sides as indicated with red arrows in the image.
(Click Image to Enlarge)
Step 4:
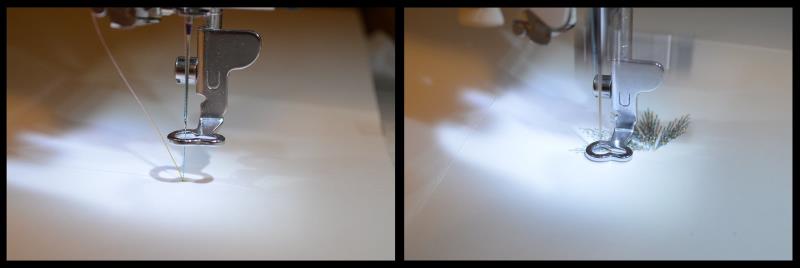
Drop the needle to check if the card is placed correctly. The needle should meet with the center mark; if not, move the hoop to line it up. If your machine does not allow moving the hoop, remove the tape carefully from the cardstock (removing the tape will rip the tear-away, but removes easily from cardstock); adjust the card, making sure it’s straight when compared to the edge of the hoop, and then tape and check the needle position again. When you are satisfied with placement, start the machine.
(Click Image to Enlarge)
Step 5:
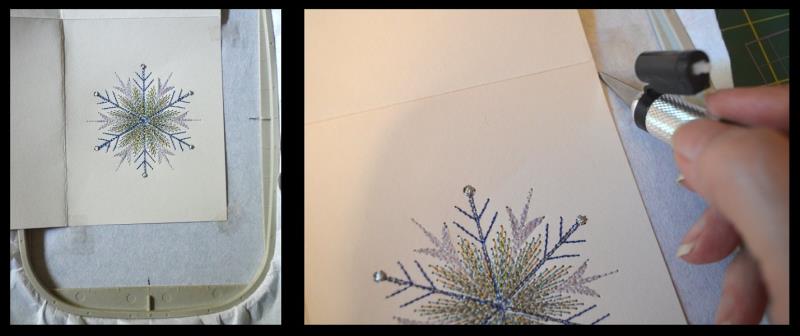
After stitching, I like to leave the embroidery hooped until I trim away most of the excess stabilizer using the craft blade by slicing up against the edge of the card. I cut away the stabilizer leaving a full piece on the back side to cover only the panel that is stitched. Alternatively, you can remove most of the stabilizer by cutting about ¼” from the stitches at the outside of the design, and this might be best if using a cut-away stabilizer to prevent a heavy, thick panel. Whether you use a cut-away or a tear-away, do not rip away the stabilizer when done to prevent pulling the embroidery from the cardstock.
(Click Image to Enlarge)
Step 6:
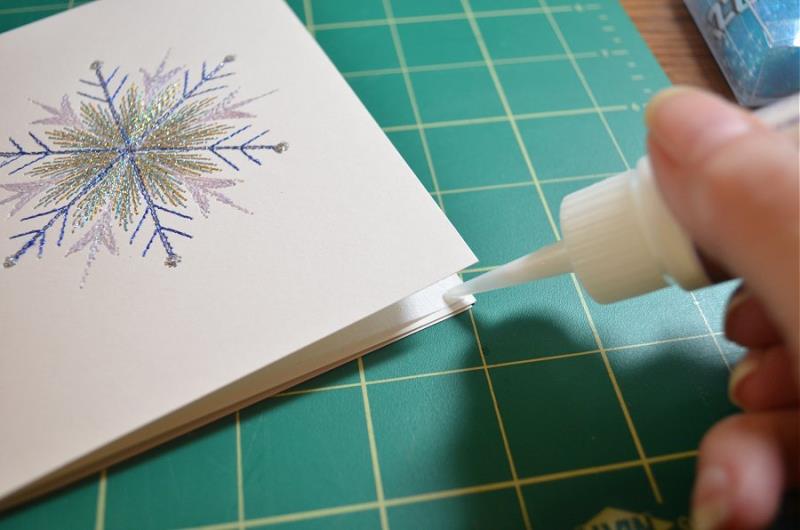
Fold the card into place. If you have chosen to cut the stabilizer the same size as the panel, you can use a very small drop of clear drying glue or dab a glue stick at the corners on the stabilizer or in a few small spots along the edge that will adhere to the cardstock outside and inside panels. This step is only necessary if you’d like the recipient to not investigate the backside of your embroidery.
(Click Image to Enlarge)
Step 7:
Optional decoration: I applied scrapbook adhesive border to the green card, but when using metallic threads, this design needs little else to help it pop. Experiment with different colors and types of threads, and if preferred, embellish with gems and glitter to make each card unique for the recipient.
Bonnie Landsberger has been a crafter and hand embroiderer since childhood and a machine embroiderer and digitizer since 1986. She was the in-house head digitizer for a 50-head embroidery shop for 11 years and later offered custom digitizing services and stock design sales through her web site for Moonlight Design since 1993. She currently also holds a position as a customer service representative at EmbroideryDesigns.com.
Bonnie has won several awards for digitizing, including a gold medal in the 2002 Digitizing Olympics and grand prize in all categories & first place for Winter Holidays category in the Stitches Magazine Great Greeting Card Contest 2003.
Her embroidery and digitizing technical articles can be found in various trade magazines and she is currently a contributing writer and Editorial Advisory Board Member for Stitches Magazine. You can also find more of her articles online at EmbroideryDesigns.com and will continue to contribute articles to our Learning Center.