FSL Floral Accent Hat

FSL Floral Accent Hat Embroidery Project

By   Ramona Baird   on   June 30, 2015
  • SKILL LEVELSome Experience
  • TIME REQUIRED06:00
Description

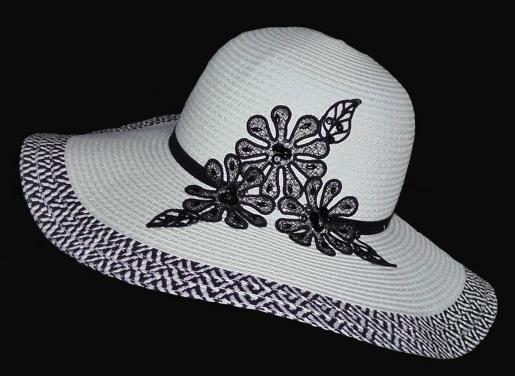
This elegant black and white hat features freestanding lace flowers accented with sequins and beads. It's perfect for making a statement at special occasions or gatherings. Step-by-step instructions are included.

Step of

Materials

Project Preview Video

Materials
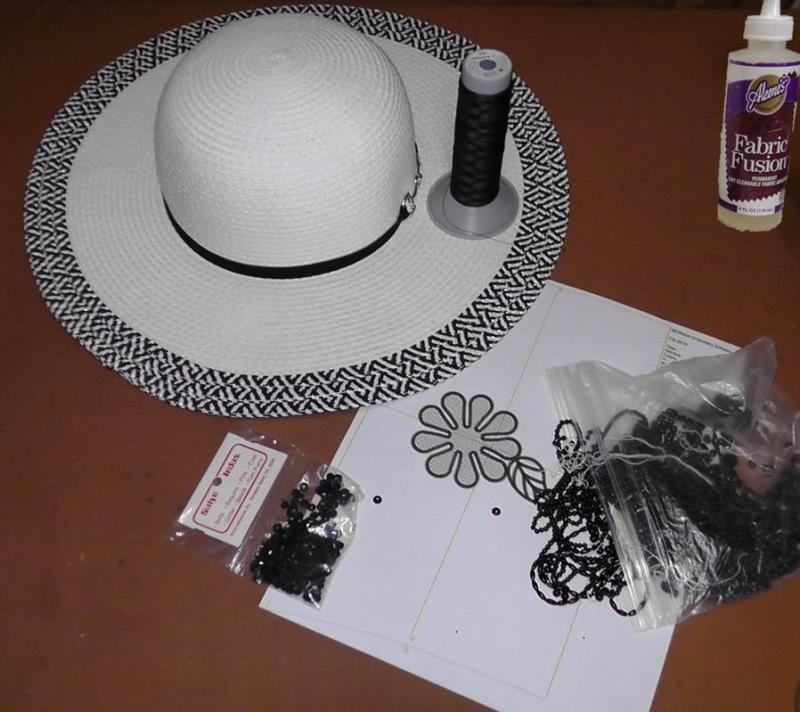
  • White hat accented with black
  • Black embroidery thread
  • Two layers water soluble stabilizer
  • Black sequins (2mm and 4mm)
  • Black beads (elongated and 4mm pears)
  • Aleene’s Fabric Fusion glue (or glue that will work with what you are using)

  • Designs used in this project

    Final Product: What You Will Create

    Preface:
    Begin with a purchased hat and embroidery “FSL Flowers” on water soluble stabilizer. Rinse out the water soluble and let the embroidery dry. Use glue to apply the embroidered flowers to the hat and then sequins, and beads to the flowers.


    Step 1:
    Gather the supplies and read through the instructions before beginning. Print a paper template of the embroidery design. The time specified in the project includes drying time for the flowers but does not include the time needed for the glue to set up and then dry completely. Use fabric glue that is permanent for fabric and other materials as well. For this project, Fabric Fusion worked very well.

    (Click Image to Enlarge)


    Step 2:
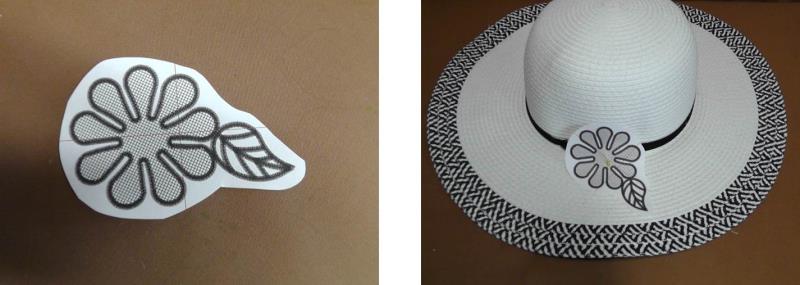
    Cut out the design from the paper. Generally plan the placement for the flowers. For the project, three flowers were sewn out. Add more as you’d like for your project.

    (Click Image to Enlarge)


    Step 3:
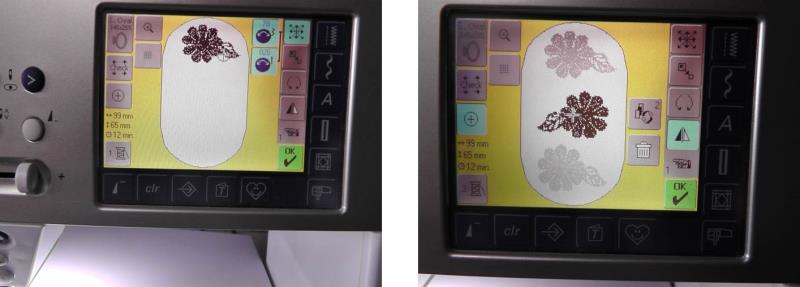
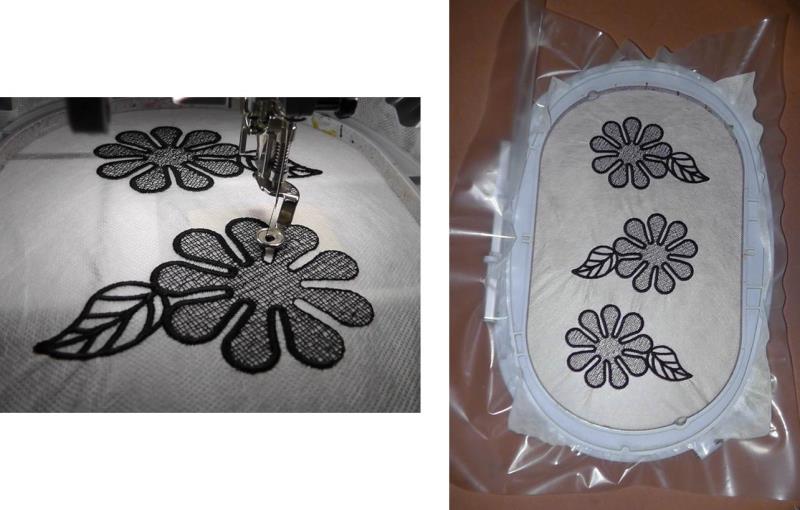
    Use the large embroidery hoop so more than one flower may be stitched at one time. Load the design “FSL Flower” on the machine. Move the flower to the top of the hoop on the screen. Add two more flowers. Flip and mirror the flowers as desired so they will fit on the hat as planned.

    (Click Image to Enlarge)


    Step 4:
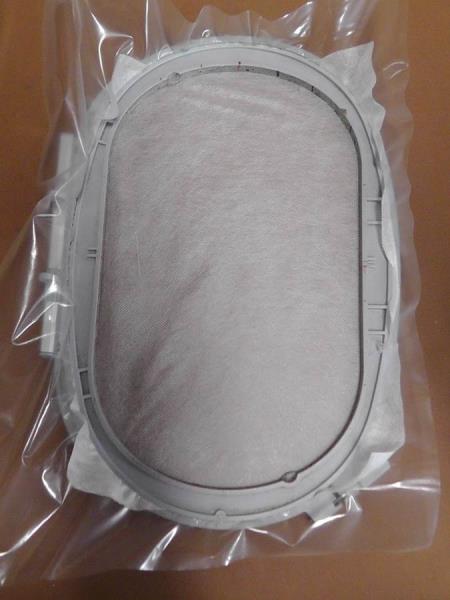
    Hoop two layers of water soluble stabilizer. I prefer the fibrous type for FSL stitching, but only had one sheet left, so for the project the bottom stabilizer was heavy water soluble and the top was one sheet of the fibrous type. 

    (Click Image to Enlarge)


    Step 5:
    Stitch the flowers as planned.

    (Click Image to Enlarge)


    Step 6:
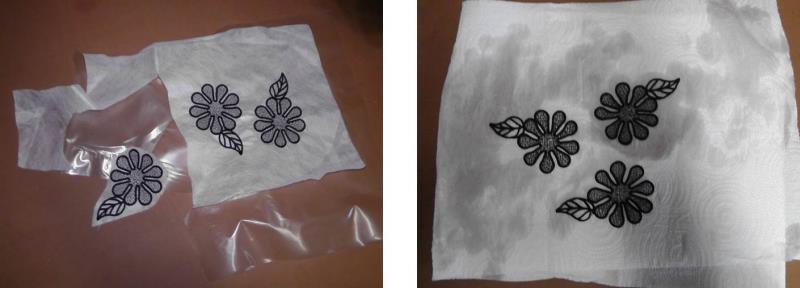
    Cut out around each flower section. Follow the manufacturer’s directions for rinsing with water. Rinse only until the water soluble is dissolved leaving enough remaining in the embroidery so when the flowers are dry, the FSL Flowers are stiff. Set the flowers aside to dry completely.

    (Click Image to Enlarge)


    Step 7:
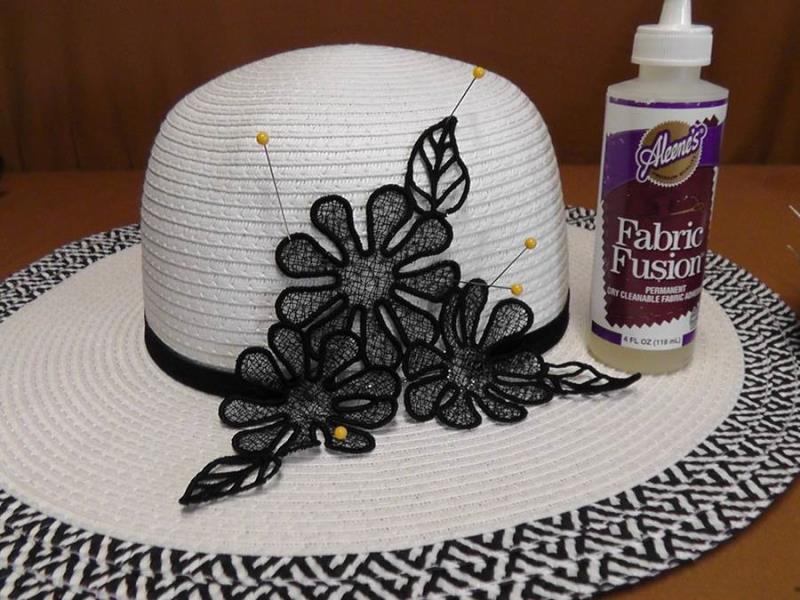
    Pin the dried FSL Flowers into position on the hat as planned. 

    (Click Image to Enlarge)


    Step 8:
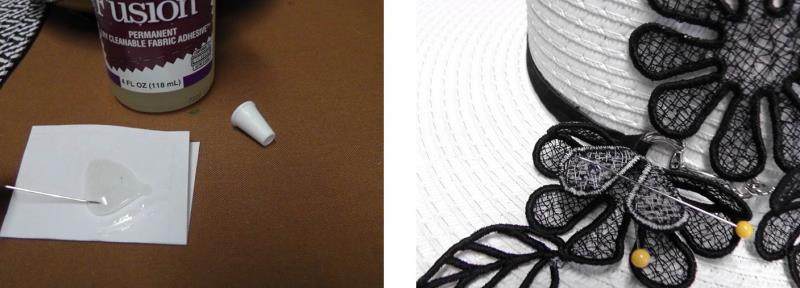
    Place a small amount of glue on a scrap piece of paper. Dip the tip of a pin in the glue and then apply it in a smooth layer on the backs of the petals and leaves (the glue dries clear). Allow the glue to set up before proceeding to add the beads and sequins.

    (Click Image to Enlarge)


    Step 9:
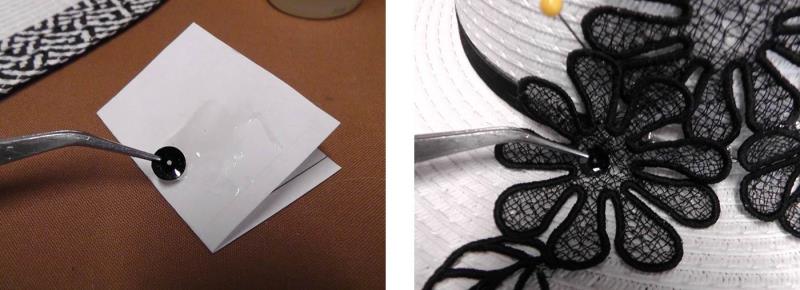
    To apply the sequins, pick up one sequin with tweezers, dip the back of the sequin in glue, and then apply it to the center of the flower. Repeat two more times to apply three of the 4mm sequins in each flower center. Allow the glue to set up before proceeding. Apply glue to the back of the 2mm sequins in the same manner placing them within the open areas of the leaves.

    (Click Image to Enlarge)


    Step 10:
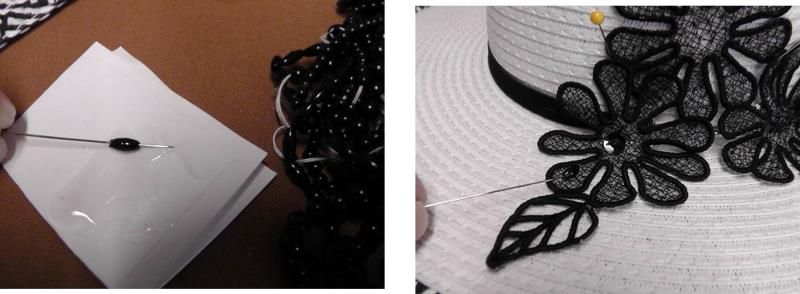
    To apply the beads, slip a bead or pearl onto a pin. Dip one side of the bead into the glue and lay it into position on the flower, then slide the pin out of the bead. Repeat this process to apply the beads and pearls as you wish. Allow the glue to set up as needed.

    (Click Image to Enlarge)


    Step 11:
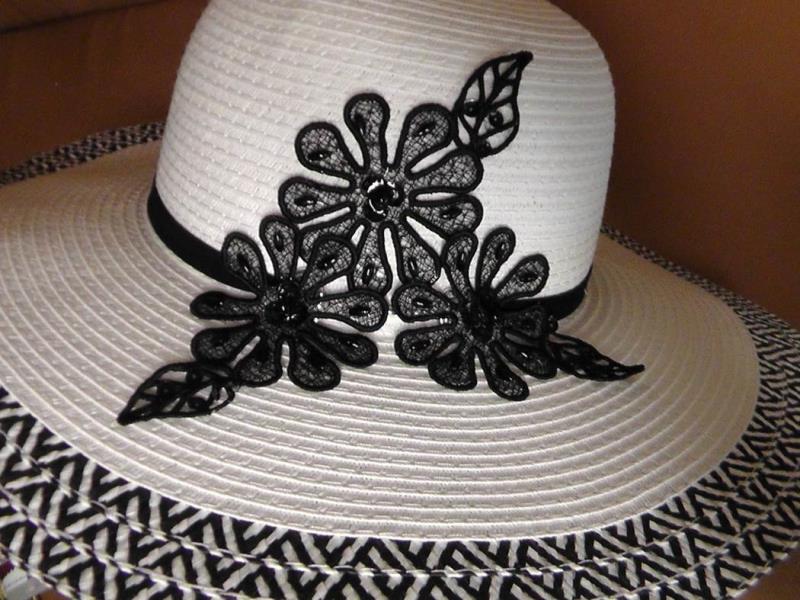
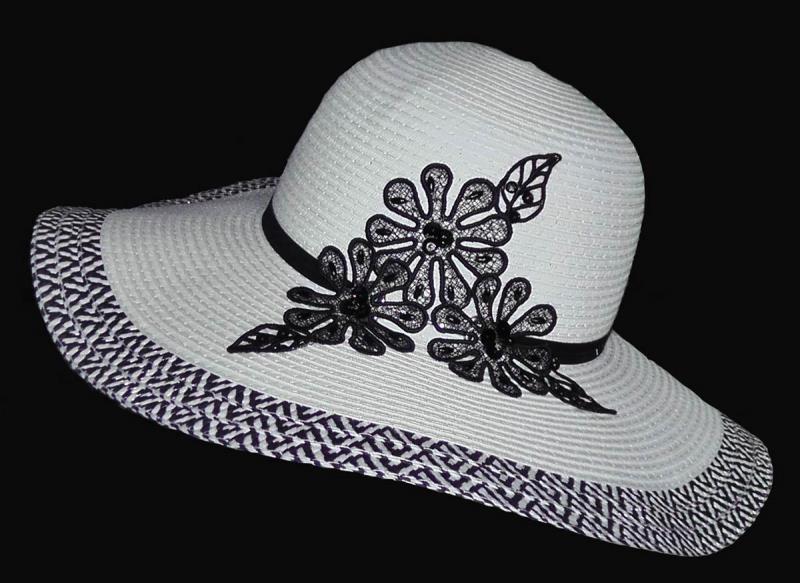
    For the project, elongated beads were applied to each petal, small sequins inside the leaves, and three larger sequins in the center of the flower with a pearl applied on top. Be sure to throw away any pins used with the glue; they are no longer suitable for use with sewing projects.

    (Click Image to Enlarge)


    Step 12:
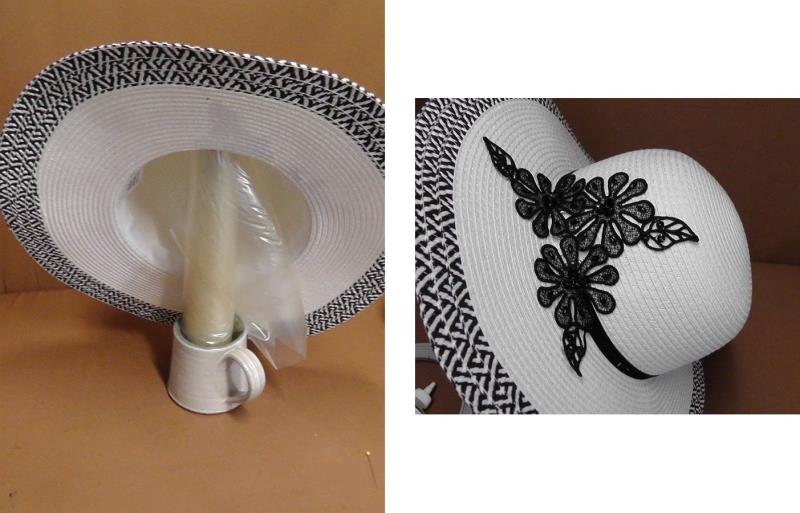
    Let the hat dry overnight. I found by sticking a roll of stabilizer in a cup I was able to prop the hat on the roll and place a fan blowing toward the hat to aid in drying (if using a roll of water soluble stabilizer be sure the moisture in the air will not affect the roll of water soluble stabilizer; it is best to use a different type of stabilizer or an empty roll.) 

    (Click Image to Enlarge)


    Step 13:
    Congratulations on creating a stylish, classic hat for a new outfit.

    (Click Image to Enlarge)

    Meet the Author: Ramona Baird
    Ramona Baird
    Ramona Baird has been in the embroidery industry for over 23 years. She and her husband owned a commercial and retail embroidery store in Arizona for many years. She is an experienced digitizer having been mentored by award-winners Pat Williams and Lindee Goodall. Ramona is a contributor to “Creative Machine Embroidery” magazine having 5 covers to her credit. Ramona has worked for Wilcom America and served many years as Education Director for the American Sewing Guild. With a degree in fashion design, she is able to design and execute patterns which Pat Williams says are “out of the box” in creativity and application. Ramona likes to challenge the boundaries of embroidery and bring new and exciting designs, ideas, and projects to EmbroideryDesigns.com. She wants embroiderers of all levels to increase their skills and enjoyment in using their embroidery machine for gift-making and personal pleasure.
    More From This Author
    Link is Broken, Please check the URL
    Exclusive Embroidery Offers!
    Copyright © {{ currentDate | date:'yyyy'}} - EmbroideryDesigns.com
    GET 50% OFF! ×