Sunny Day Outfit with Embroidered Accents

Sunny Day Outfit with Embroidered Accents Embroidery Project

By   Ramona Baird   on   April 27, 2015
  • SKILL LEVELSome Experience
  • TIME REQUIRED02:30
Description

Create a charming outfit starting with a purchased top and shorts, embellished with sunny designs for a cheerful look. Ideal for casual outings or playdates, this ensemble is both stylish and comfortable. Step-by-step instructions are included.

Step of

Materials

Project Preview Video

Materials
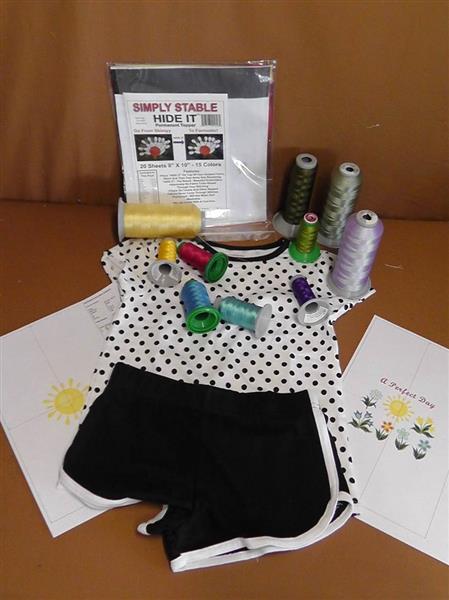
  • Knit shirt and short outfit in the size needed
  • Embroidery thread in chosen colors
  • Tearaway stabilizer
  • Hide It cover-up
  • Temporary embroidery spray adhesive
  • Optional: embroidery software

  • Designs used in this project

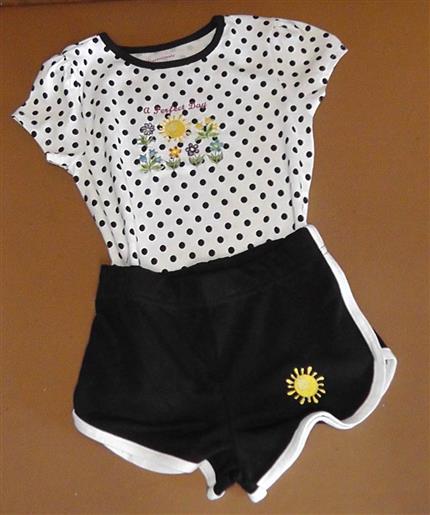
    Final Product: What You Will Create

    Preface:
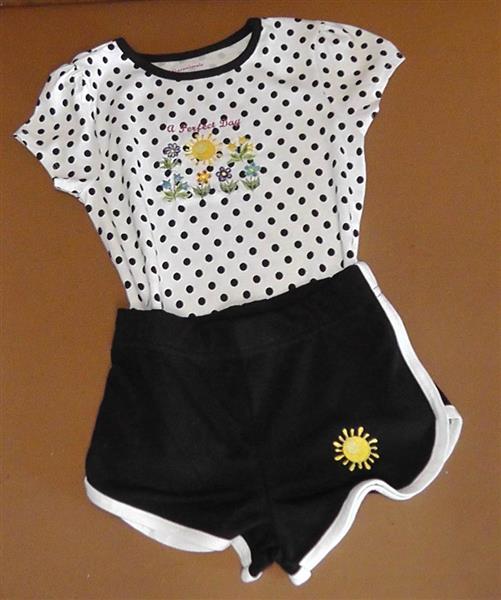
    This project is simple and fast to create. Simply purchase an outfit of a knit shirt and coordinator shorts and embroider the designs to make an outfit fit for “A Perfect Day”.


    Step 1:
    Gather the supplies and read through the instructions before beginning. 

    (Click Image to Enlarge)


    Step 2:
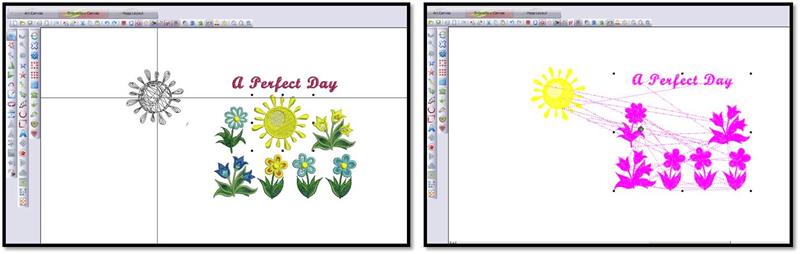
    In software, insert the “A Perfect Day Design”. Save it as a new file named “sun”. Ungroup the design if it is grouped and select the sun portions of the design and move it to the side. Select all other elements of the design and delete them. This step is optional. The same thing can be accomplished at the machine by advancing through colors and only sewing the colors for the sun.

    (Click Image to Enlarge)


    Step 3:
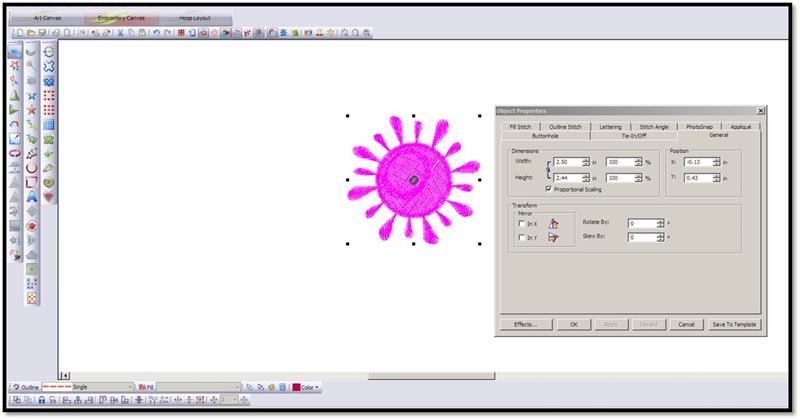
    All that should remain is the two colors of the sun. Save the design. Check the size of the design.

    (Click Image to Enlarge)


    Step 4:
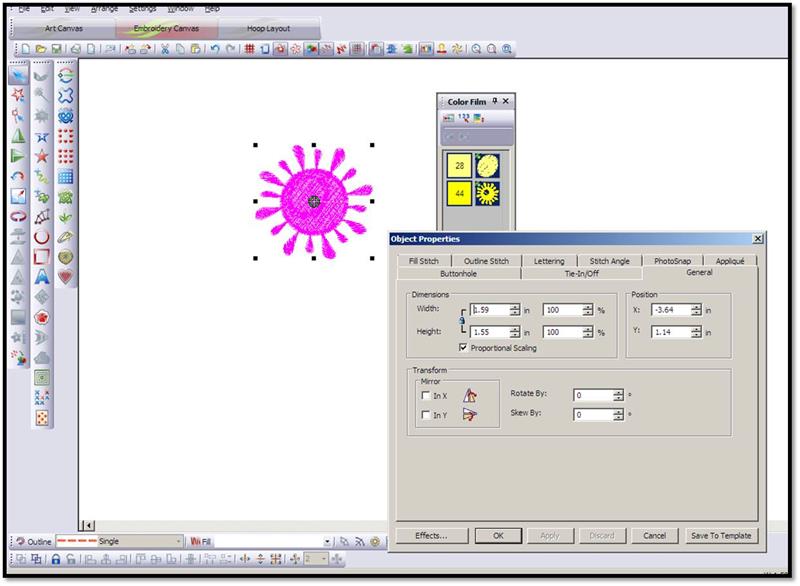
    Depending on the size of the outfit, you may wish to resize the sun making it larger. Print templates of both designs.

    (Click Image to Enlarge)


    Step 5:
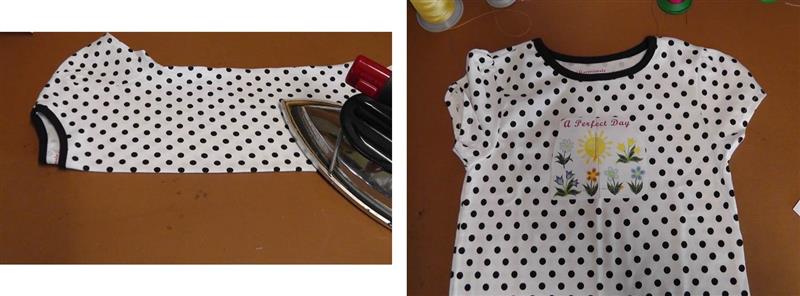
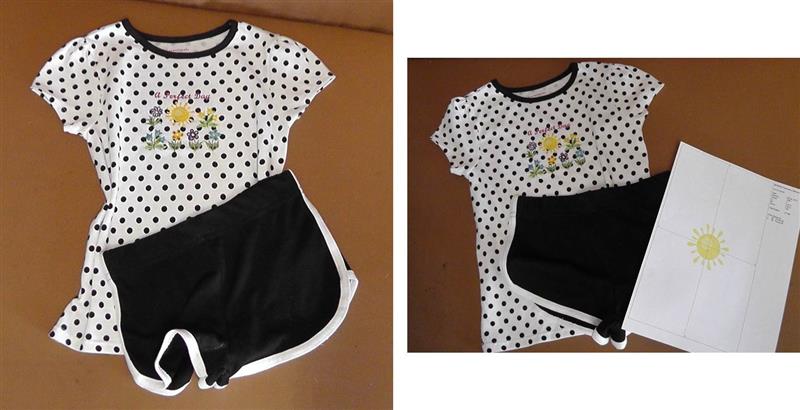
    Press the shirt and shorts. To find the center of the shirt, fold the shirt in half lengthwise matching shoulder seams and side seams. Lightly crease with a warm iron. Loosely cut out the paper template of the “A Perfect Day” design. Using the crosshairs, align the design as desired on the shirt. Align the vertical line on the paper template to the center crease on the shirt.

    (Click Image to Enlarge)


    Step 6:
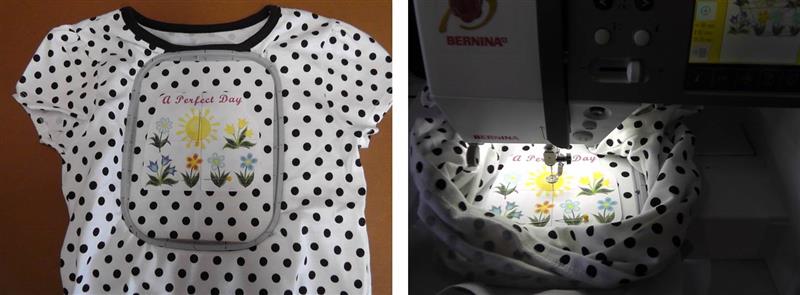
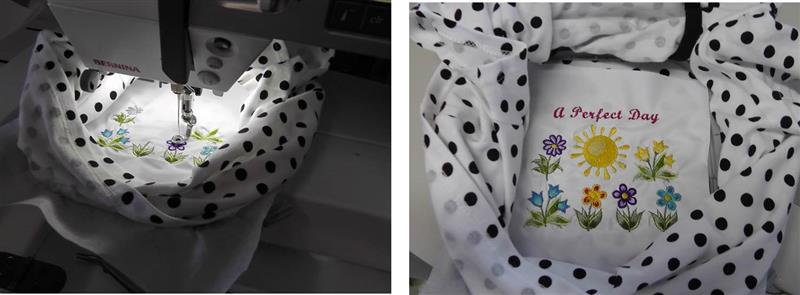
    Hoop the shirt front with one layer of tearaway stabilizer. Place the hoop on the machine and load the embroidery design on the machine. Align the needle to the center of the paper template.

    (Click Image to Enlarge)


    Step 7:
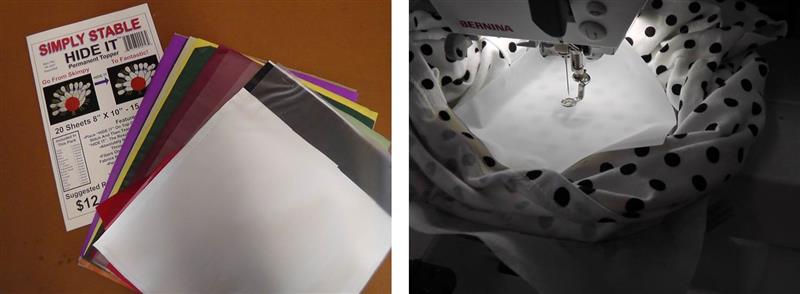
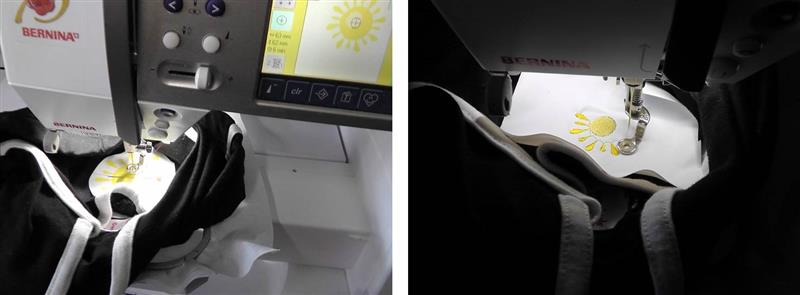
    There are several products on the market like Simply Stable Hide It. When a fabric has dark colors that may show through an embroidery design, placing a piece of Hide It over the fabric before the embroidery is started eliminates any fabric color showing through the embroidery. Simply cut a piece of Hide It large enough to cover the area to be embroidered. Place it over the fabric and press the start button.

    (Click Image to Enlarge)


    Step 8:
    The Hide It will be stitched down as the design embroiders. Continue stitching the design following the color sequence. Watch carefully at all times to be sure the shirt doesn’t get caught in the stitching process.

    (Click Image to Enlarge)


    Step 9:
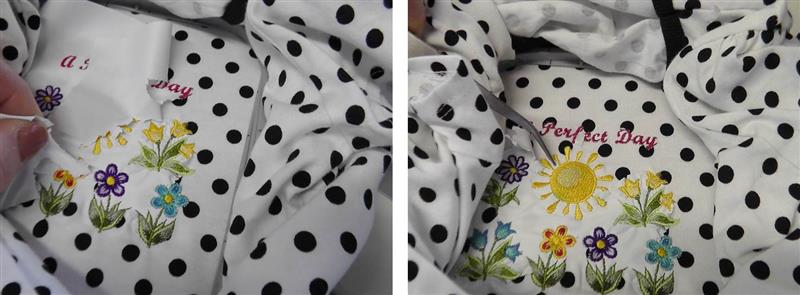
    While the fabric is still hooped, carefully rip away the excess Hide It. The stitching perforates the product allowing it to be removed easily; use tweezers to remove the Hide It from smaller areas of the design. 

    (Click Image to Enlarge)


    Step 10:
    Remove the fabric from the hoop and remove the excess stabilizer. Now it is time to stitch the sun on the shorts.

    (Click Image to Enlarge)


    Step 11:
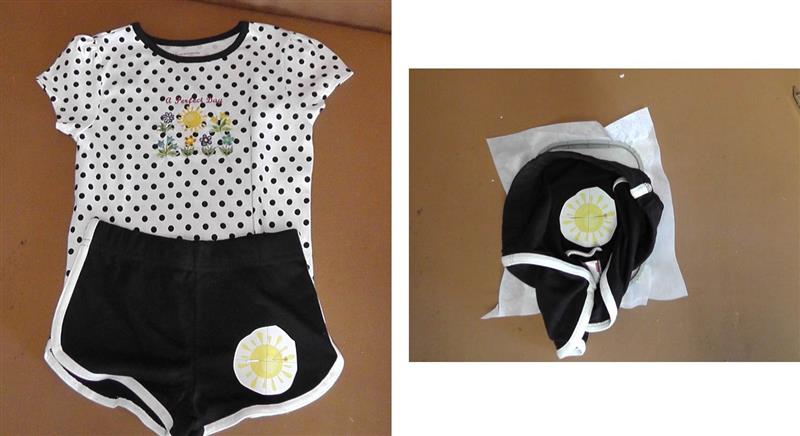
    Cut out the paper template of the sun design and place it as desired on the shorts. Hoop one layer of tearaway stabilizer. Spray the stabilizer with the temporary spray adhesive and position the shorts, centering the design in the hoop. 

    (Click Image to Enlarge)


    Step 12:
    Load the “sun” design in the machine and place the hooped shorts on the machine. Center the needle over the template. Remove the paper template and place down a piece of Hide It. Start the machine stitching and stitch both colors. Repeat the process of removing the excess Hide It and stabilizer.

    (Click Image to Enlarge)


    Step 13:
    Give the outfit a final pressing and watch as your little ones enjoys wearing her new outfit fit for “A Perfect Day”.

    (Click Image to Enlarge)

    Meet the Author: Ramona Baird
    Ramona Baird
    Ramona Baird has been in the embroidery industry for over 23 years. She and her husband owned a commercial and retail embroidery store in Arizona for many years. She is an experienced digitizer having been mentored by award-winners Pat Williams and Lindee Goodall. Ramona is a contributor to “Creative Machine Embroidery” magazine having 5 covers to her credit. Ramona has worked for Wilcom America and served many years as Education Director for the American Sewing Guild. With a degree in fashion design, she is able to design and execute patterns which Pat Williams says are “out of the box” in creativity and application. Ramona likes to challenge the boundaries of embroidery and bring new and exciting designs, ideas, and projects to EmbroideryDesigns.com. She wants embroiderers of all levels to increase their skills and enjoyment in using their embroidery machine for gift-making and personal pleasure.
    More From This Author
    Link is Broken, Please check the URL
    Exclusive Embroidery Offers!
    Copyright © {{ currentDate | date:'yyyy'}} - EmbroideryDesigns.com
    GET 50% OFF! ×