Border OptionsHugging border, circle, square, or rectangle — with a 3mm satin stitch.
Backing OptionsAvailable with iron-on, sew-on, or velcro backing.
Fast ShippingShipped quickly from the USA.
Free Online Tools
Powerful embroidery utilities that save time and prevent costly mistakes.
Stitch AssistantRECOMMENDED
Get the exact stabilizer, machine settings, needle, and thread color sequence for every embroidery design you purchase — based on that design's stitch density, dimensions, and color count.
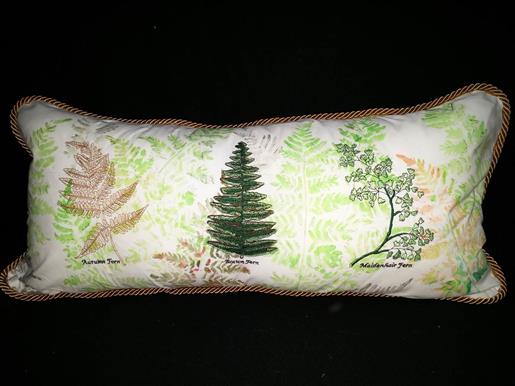
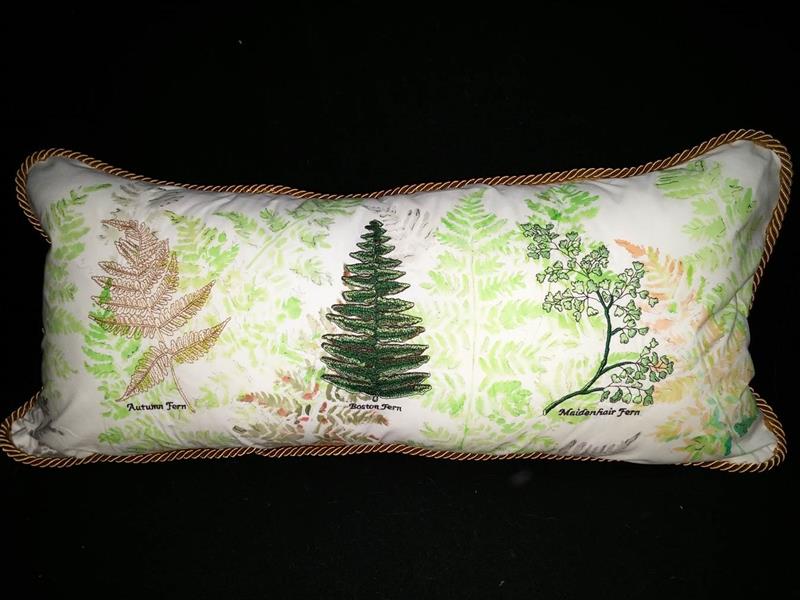
This pillow features a beautiful blend of fern designs stitched over hand-stenciled fabric. Its unique combination of techniques creates an eye-catching decorative piece for your home. Step-by-step instructions are included.
Cotton fabric is hand-stenciled then the embroidery designs are stitched. Piping is added around the edge, the back sewn on, the pillow inserted, and the opening hand-sewn closed.
Step 1:
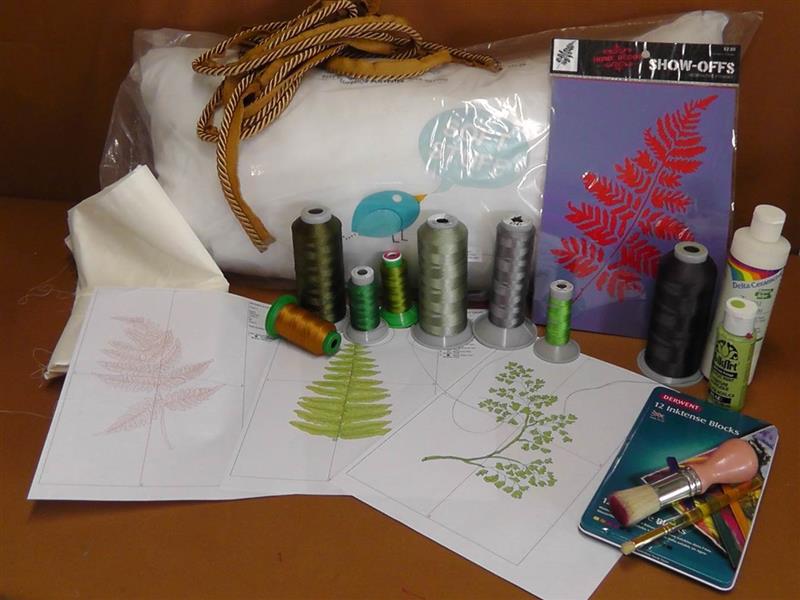
Gather the materials and read through the instructions before beginning. If a smaller or larger pillow form is used, adjust the measurements as needed. Inktense paint sticks were used for this project, but use whatever paint you prefer for stenciling the fabric. Read and follow the manufacturer’s directions for preparing the fabric and using the paint product, including drying time and heat setting the stenciled artwork. Print out paper templates of the embroidery designs.
(Click Image to Enlarge)
Step 2:
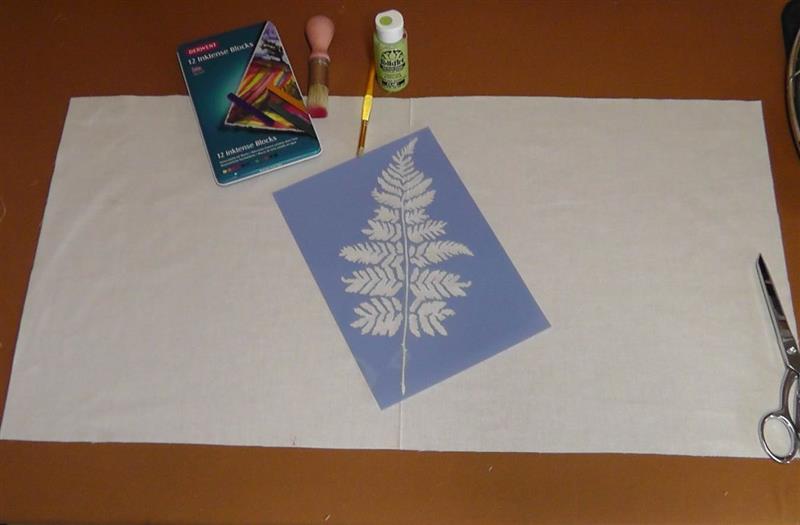
Cut two pieces of the prepared white cotton fabric the size of the pillow plus ½” all the way around for seam allowances. Press the fabric well (do not use any pressing products that would interfere with the adhesion of the paint). Fold the fabric in half lengthwise and widthwise and press to lightly crease. Beginning at the center, loosely plan the stencil designs. Use paint colors that will give a nice stenciled surface and coordinate with the thread colors being used. The stenciling should be very free-form, stenciling areas, flipping the stencil, and using just small sections of the stencil to fill in the areas.
(Click Image to Enlarge)
Step 3:
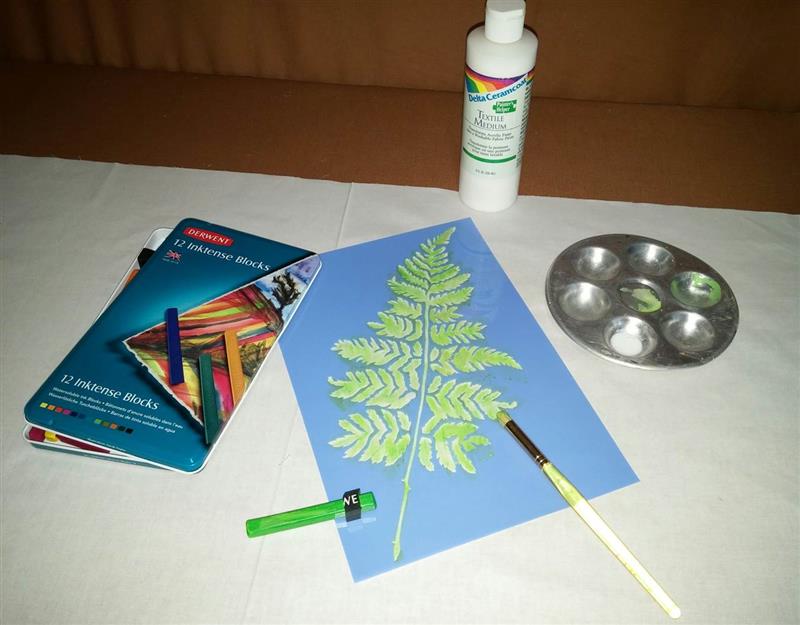
In using the Inktense paint sticks, a small stencil brush was used. A small amount of textile medium was placed in a small pallet dish and the brush dipped in the textile medium then swiped across the stick. More stencil medium was applied to the brush and the paint on the brush mixed in. The paint was then dry-brushed onto the fabric; heavier in some areas, lighter in others, and some areas left without paint. Allow a few minutes for the paint to dry but because the paint was dry-brushed on, this should only be a minute or two of waiting time.
(Click Image to Enlarge)
Step 4:
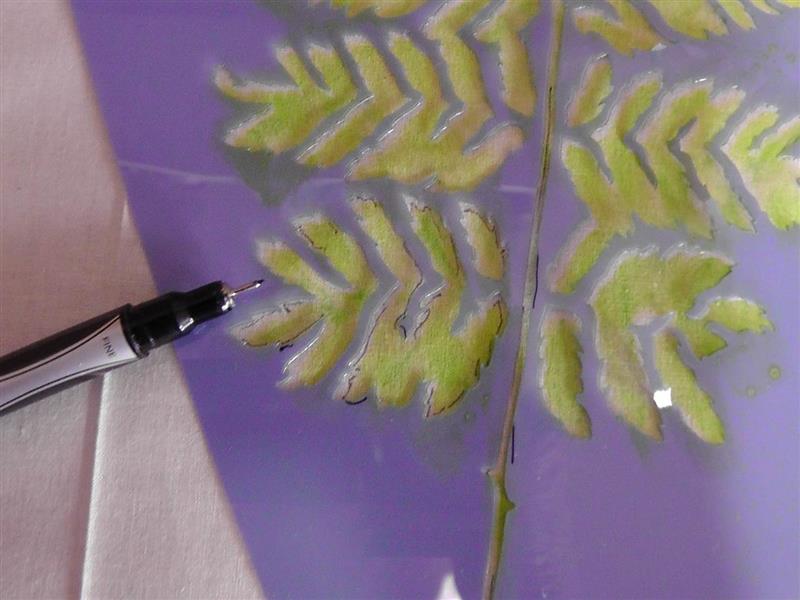
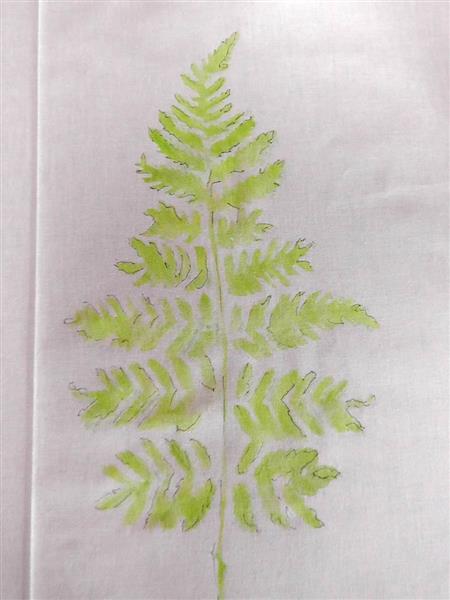
Using the fine tip black Sharpie pen, loosely and artfully draw in very light lines here and there throughout the stenciled design. Don’t trace along the stencil but instead just use it as a guide for drawing marks as shown.
(Click Image to Enlarge)
Step 5:
The lines should not fill the stenciled are, just add to the definition of the design.
(Click Image to Enlarge)
Step 6:
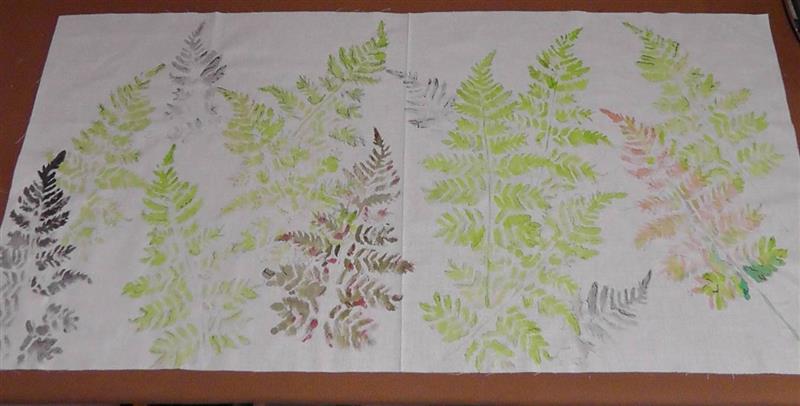
Repeat the process of dry-brushing paint colors, turning the stencil, and using the Sharpie pen to highlight design areas. Use as many or as few colors as you wish. Allow the fabric to dry thoroughly before proceeding to the embroidery.
(Click Image to Enlarge)
Step 7:
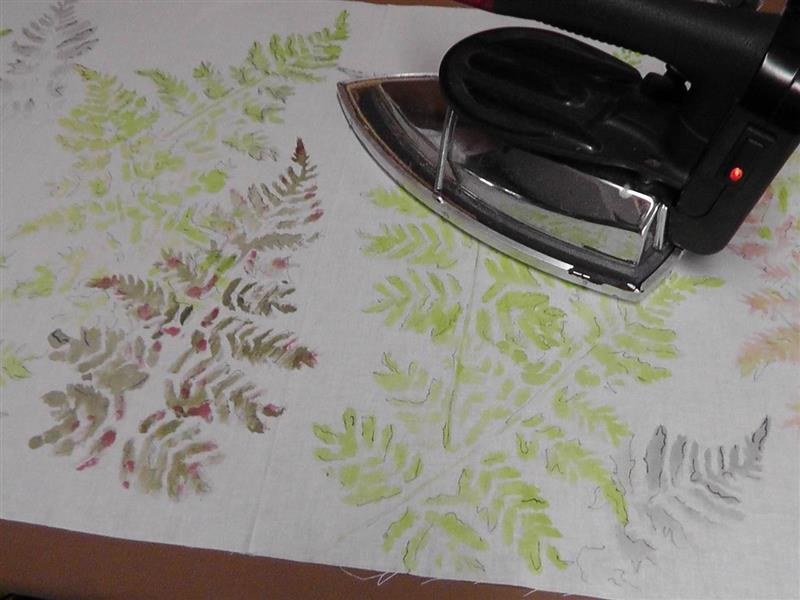
Follow the manufacturer’s directions for heat-setting the fabric.
(Click Image to Enlarge)
Step 8:
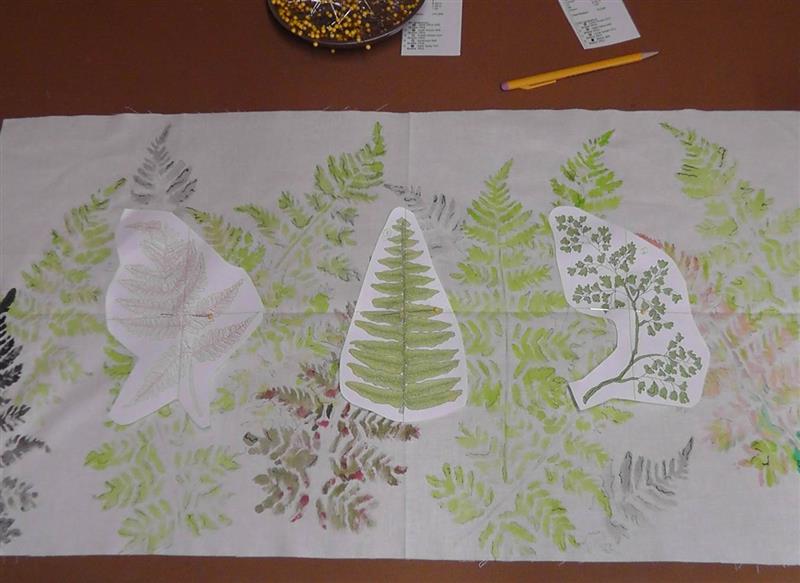
Cut out loosely around the printed embroidery design templates. Decide on the placement. For the project, the “Boston Fern” design was placed in the center, the “Autumn Fern” was placed to the left and the “Maidenhair Fern” was placed to the right; the designs were placed 7” apart.
(Click Image to Enlarge)
Step 9:
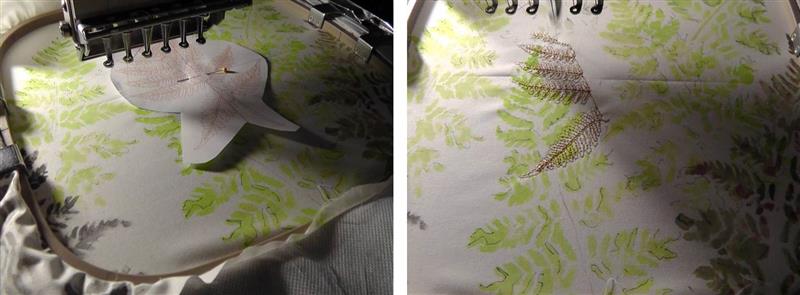
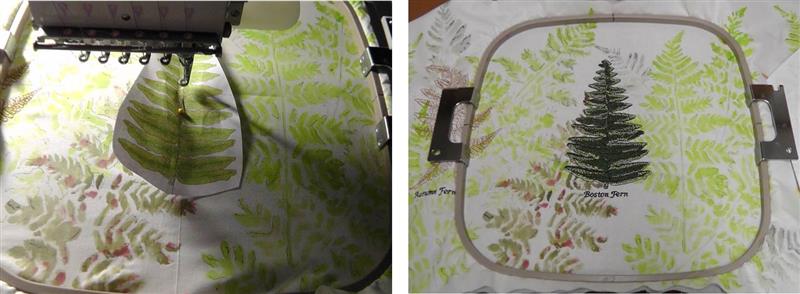
Beginning with the left most design, hoop one layer of fibrous water soluble stabilizer with the fabric. Load the “Autumn Fern” design on the machine and align the needle over the center of the paper template. Start the machine and stitch the design.
(Click Image to Enlarge)
Step 10:
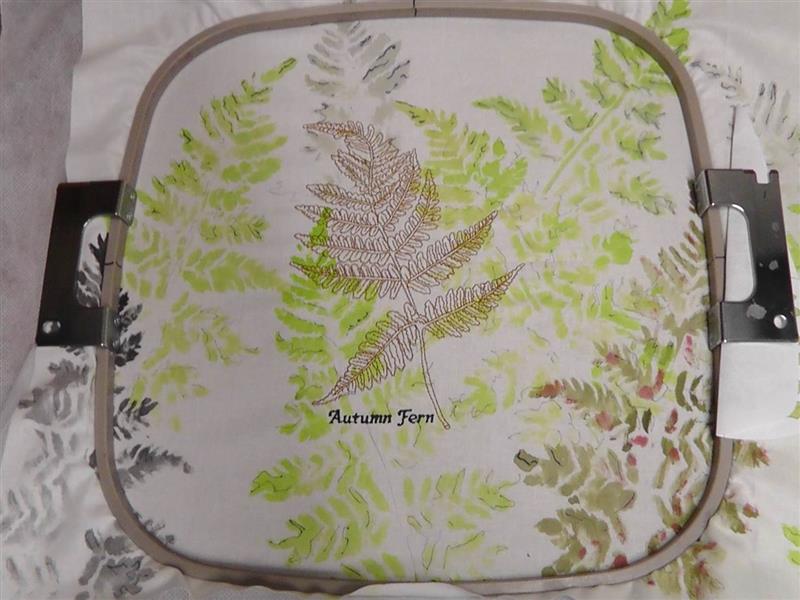
The design has finished stitching.
(Click Image to Enlarge)
Step 11:
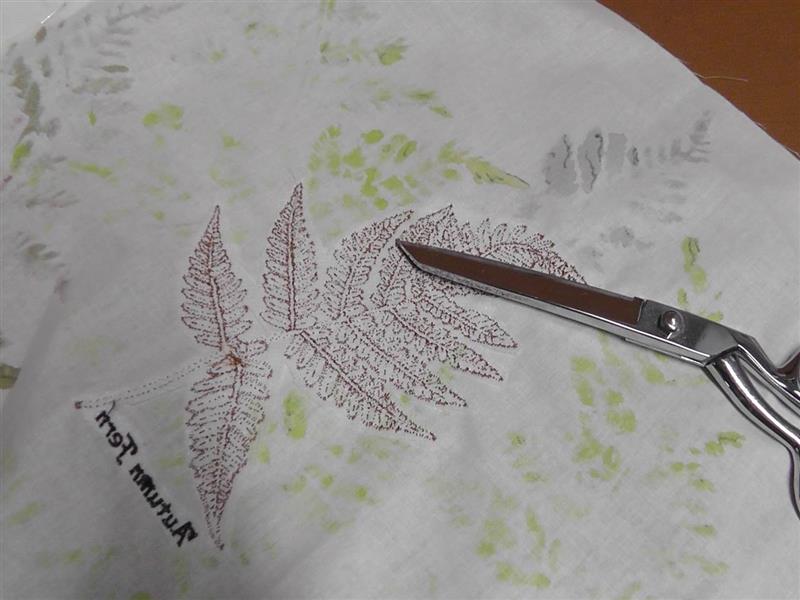
Remove the fabric from the hoop and trim away the excess stabilizer close to the stitching.
(Click Image to Enlarge)
Step 12:
Repeat for the remaining two designs. Hoop one layer of fibrous water soluble stabilizer, centering the “Boston Fern” design in the hoop. Align the needle to the center of the paper template and stitch the fern following the color sequence. Remove the fabric from the hoop and remove the excess stabilizer.
(Click Image to Enlarge)
Step 13:
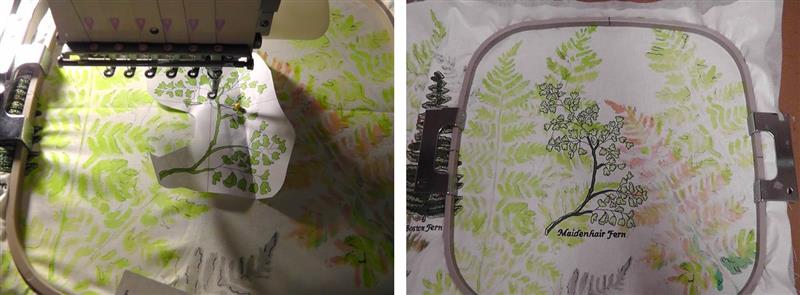
Repeat for the “Maidenhair Fern” design, hooping, stitching, and removing the excess stabilizer.
(Click Image to Enlarge)
Step 14:
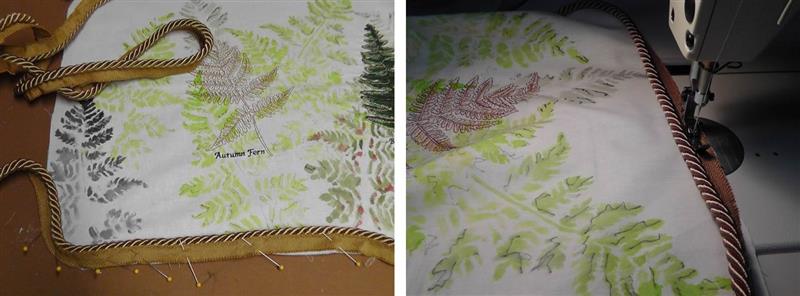
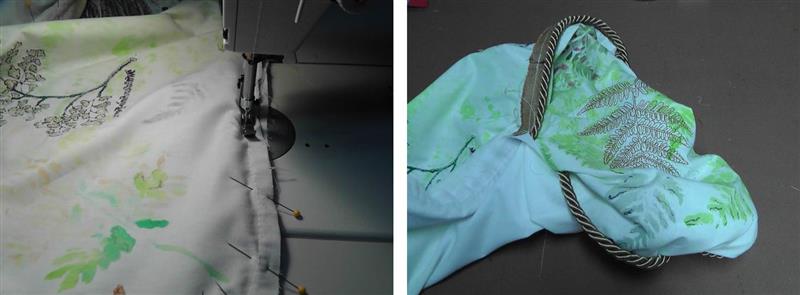
Press the fabric well and round the corners of the stenciled fabric and the pillow back fabric. Beginning at the bottom left, pin the corded trim to the stenciled fabric, easing the trim into the corners and leaving about a 4” tail at the beginning. Use a zipper foot or cording foot to baste the trim to the pillow top, removing pins as you sew. At the end, overlap the end over the beginning and cut off the remaining trim leaving a 4” tail at the end as well.
(Click Image to Enlarge)
Step 15:
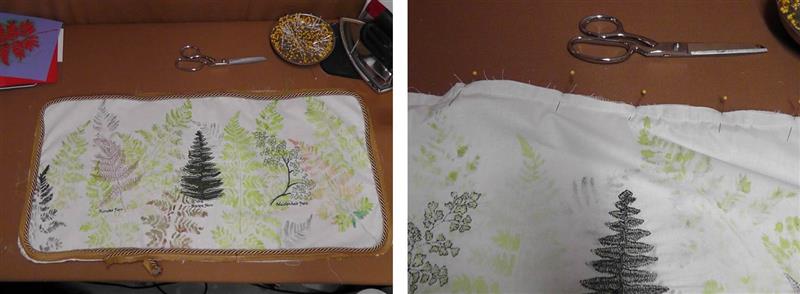
Place the fabric back over the front. Pin the fabrics together matching corners.
(Click Image to Enlarge)
Step 16:
Using the basting stitching line as a guide, stitch the back to the front. Be sure the cording is snugged up against the foot and the stitching line is close to the cording. Leave an area at the bottom through which to turn the pillow right side out forming the corners well.
(Click Image to Enlarge)
Step 17:
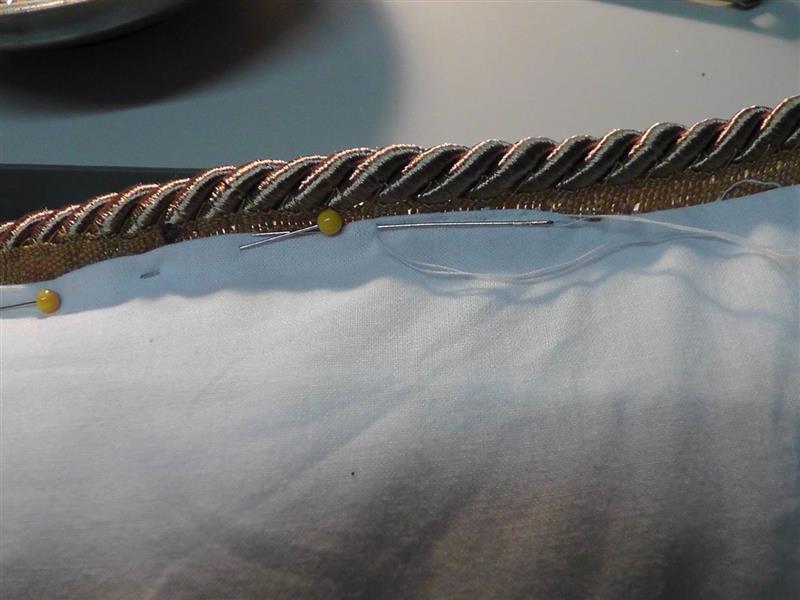
Insert the pillow. Fold under the seam allowance of the open edge, pin in place, and hand-stitch closed.
Ramona Baird has been in the embroidery industry for over 23 years. She and her husband owned a commercial and retail embroidery store in Arizona for many years. She is an experienced digitizer having been mentored by award-winners Pat Williams and Lindee Goodall. Ramona is a contributor to “Creative Machine Embroidery” magazine having 5 covers to her credit. Ramona has worked for Wilcom America and served many years as Education Director for the American Sewing Guild. With a degree in fashion design, she is able to design and execute patterns which Pat Williams says are “out of the box” in creativity and application. Ramona likes to challenge the boundaries of embroidery and bring new and exciting designs, ideas, and projects to EmbroideryDesigns.com. She wants embroiderers of all levels to increase their skills and enjoyment in using their embroidery machine for gift-making and personal pleasure.