Border OptionsHugging border, circle, square, or rectangle — with a 3mm satin stitch.
Backing OptionsAvailable with iron-on, sew-on, or velcro backing.
Fast ShippingShipped quickly from the USA.
Free Online Tools
Powerful embroidery utilities that save time and prevent costly mistakes.
Stitch AssistantRECOMMENDED
Get the exact stabilizer, machine settings, needle, and thread color sequence for every embroidery design you purchase — based on that design's stitch density, dimensions, and color count.
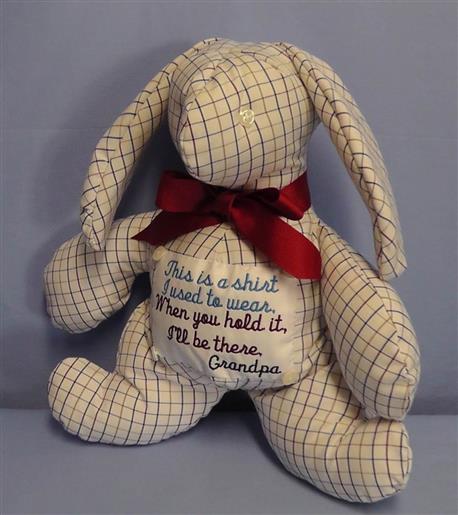
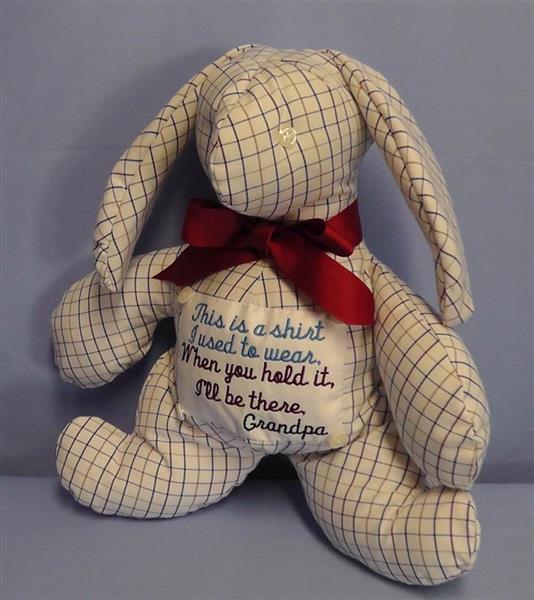
Craft a cherished memory by transforming an old shirt from Grandpa into a delightful bunny keepsake. This project beautifully combines sentimental value with a charming design, perfect for preserving family memories. Step-by-step instructions are included.
Step
of
Grandpa's Shirt Memory Bunny Keepsake
By Ramona Baird
Choose a pattern that is simple. The pattern used in the project has only two pieces to create the animal. The pattern pieces are first cut from the shirt then the muslin; if the shirt is thin use muslin to back it if the shirt fabric is sturdy the muslin is optional. There are curves at the front of the animal used in the project, so the embroidery is done on a separate piece of fabric then sewn on the animal after it is stuffed. Use buttons from the shirt for the “eyes” for the animal and to affix the embroidery to the belly.
Step 1:
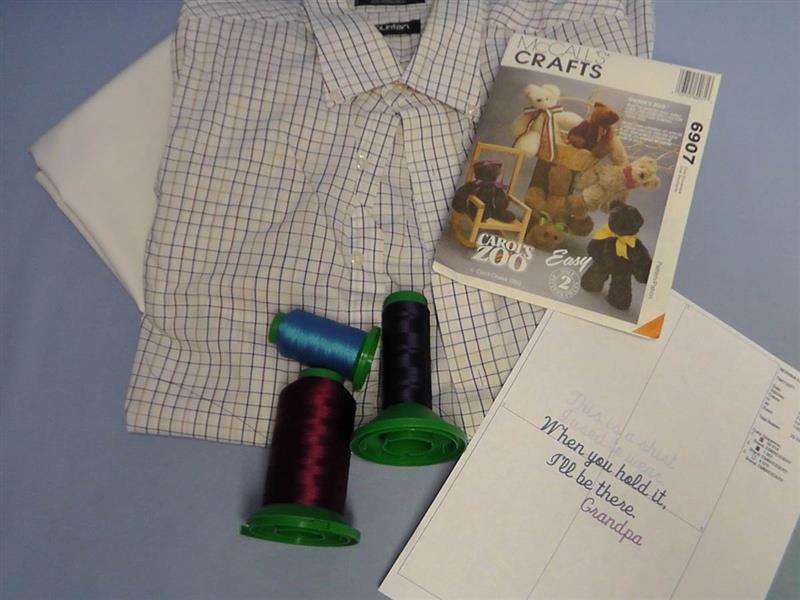
Gather the supplies and read through the instructions before beginning. Print the template of the embroidery design.
(Click Image to Enlarge)
Step 2:
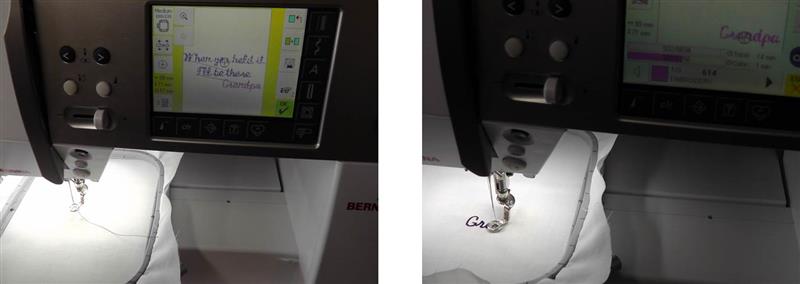
Hoop the white cotton fabric with the stabilizer. Load the design “My Shirt Grandpa” on the machine. Stitch the embroidery design following the color sequence.
(Click Image to Enlarge)
Step 3:
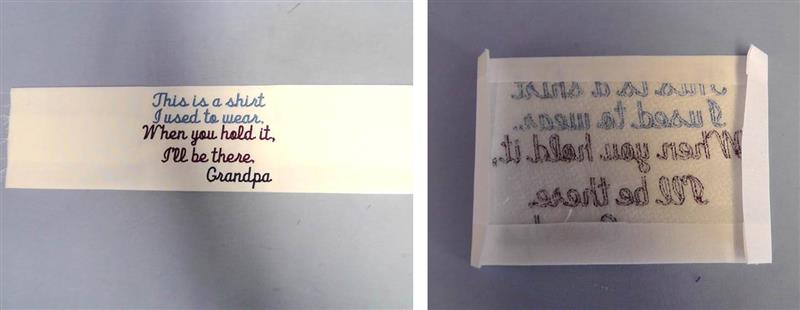
The embroidery is three colors but certainly could be sewn in two colors or all in one color. Remove the hoop from the machine. Trim the stabilizer around the stitching. Fold back the fabric around the top and bottom of the embroidery, leaving about a ¼” above and below. Repeat for the sides by folding back and leaving about a ¼” beyond the stitching.
(Click Image to Enlarge)
Step 4:
From the back of the embroidery, cut away the excess fabric. Set this prepared “patch” aside until it is needed in the final step.
(Click Image to Enlarge)
Step 5:
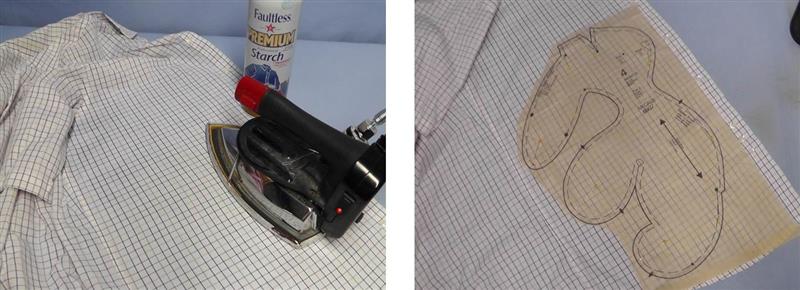
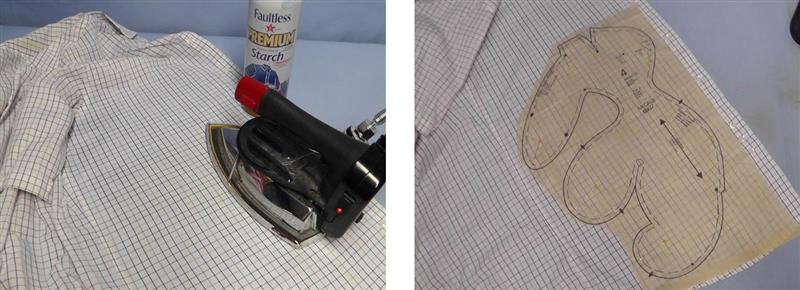
Be sure the shirt is freshly washed and dried. Press the shirt well. Cut out loosely around the pattern pieces needed. This shirt has a small plaid fabric so each piece will be cut separately to try and match the plaids as much as possible. Place the animal pattern pieces on the fabric aligning the grainline of the pattern to the grainline of the shirt fabric. Before cutting anything, do a general layout of all the pattern pieces on the shirt to be sure there is enough fabric. Pin the pattern pieces to the shirt fabric.
(Click Image to Enlarge)
Step 6:
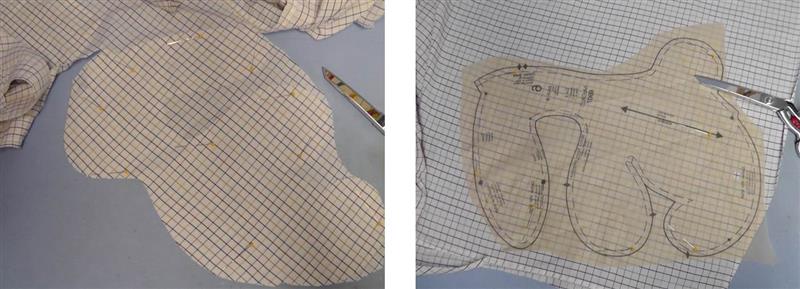
Cut out the fabric; be sure to flip and mirror the pattern pieces so there is a left and right side to each pattern piece. Repeat for the animal back pattern piece.
(Click Image to Enlarge)
Step 7:
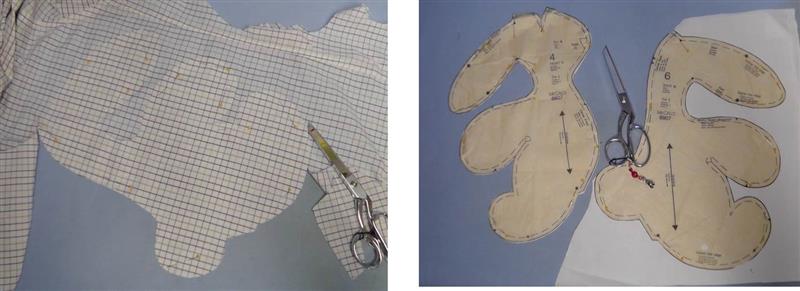
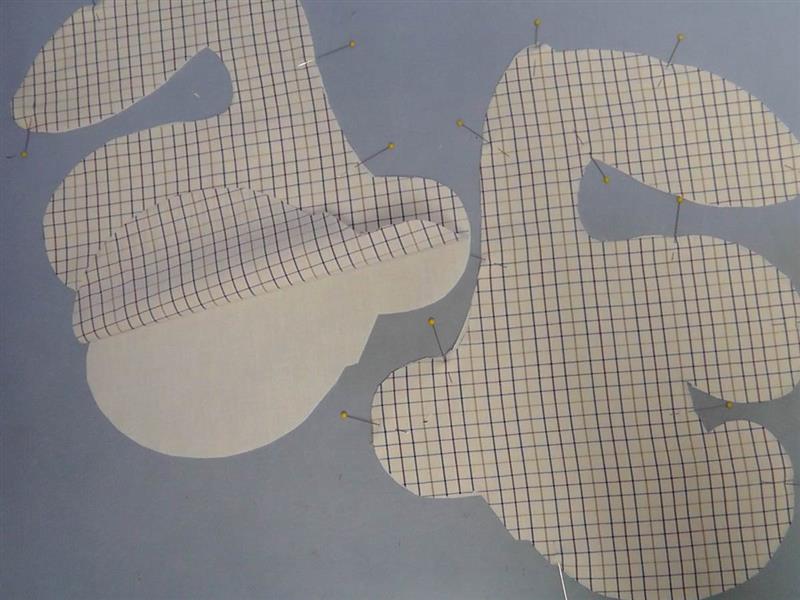
Cut a left and right back as well. Then cut two of each from the muslin. This shirt fabric is very thin so muslin is used to back the shirt fabric. If the fabric is stable, this step may be omitted.
(Click Image to Enlarge)
Step 8:
Place the wrong side of each shirt piece to the right side of each muslin piece aligning all the cut edges and pin together.
(Click Image to Enlarge)
Step 9:
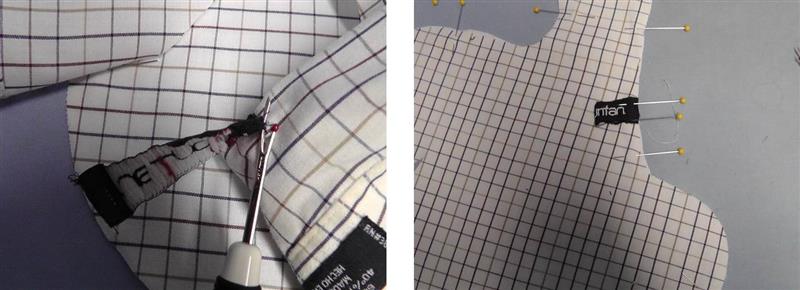
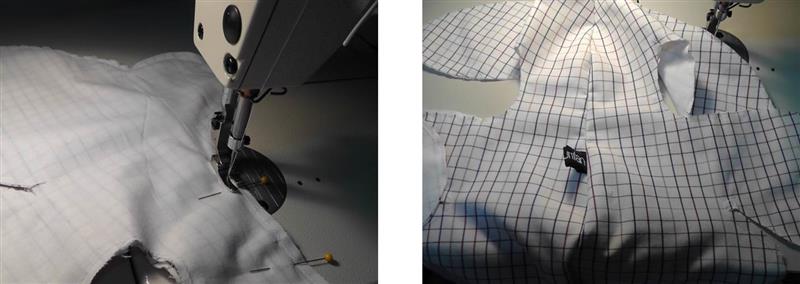
Remove the tag from the shirt, press well, and pin into place at the center back so it will be sewn in when the seam is sewn. (This step is optional but shows it was indeed a shirt from Grandpa.)
(Click Image to Enlarge)
Step 10:
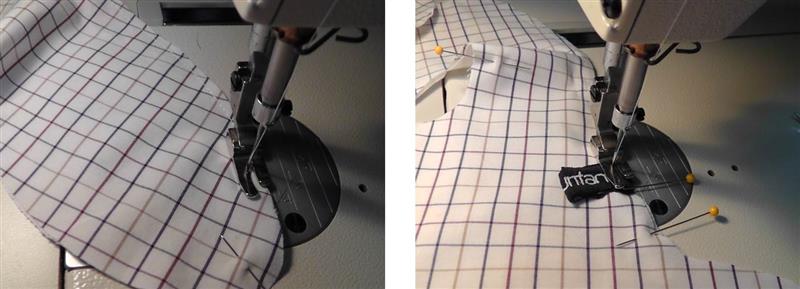
Baste the muslin and shirt pieces together removing the pins as you sew. This pattern calls for ¼” seam allowances, so the basting around each piece was done scant ¼” so the basting will not show once the seams are sewn.
(Click Image to Enlarge)
Step 11:
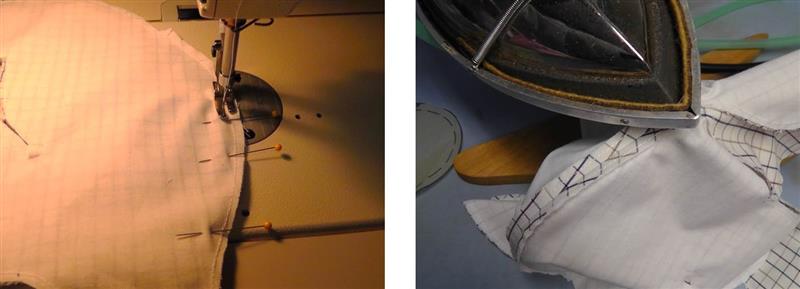
Follow the pattern directions for constructing the animal. Pin the pieces together and clip press seams open where possible.
(Click Image to Enlarge)
Step 12:
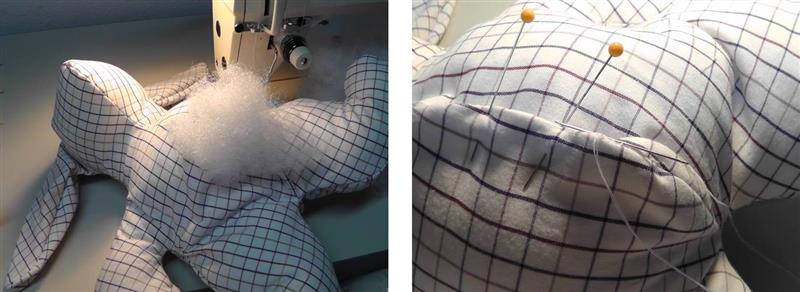
The instructions in this pattern say to leave the center back seam open for stuffing, but I chose to sew the entire back seam closed and leave an opening in the front seam for stuffing. The front seam will be covered with the embroidered patch.
(Click Image to Enlarge)
Step 13:
Turn the animal right side out through the opening and stuff according to the pattern directions. For this pattern the animal is lightly stuffed with the ears left un-stuffed. Hand stitch the opening closed.
(Click Image to Enlarge)
Step 14:
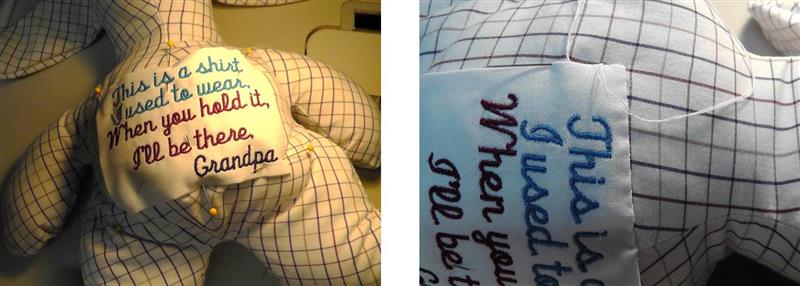
Center and pin the embroidered patch over the center front seam and hand stitch the patch around all the edges.
(Click Image to Enlarge)
Step 15:
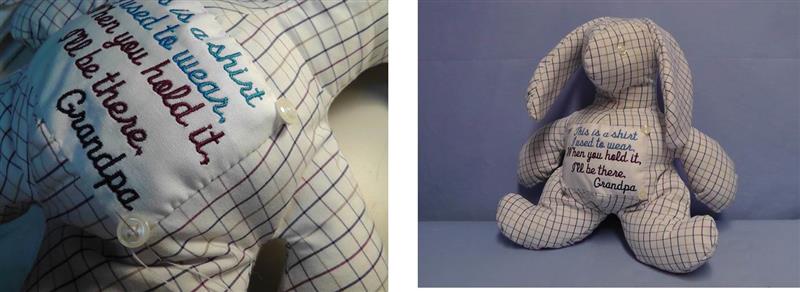
Cut the buttons off the front of the shirt and sew one on each corner of the patch. Use two of the buttons and sew them to the eye placement indicated on the pattern.
(Click Image to Enlarge)
Step 16:
Add a ribbon bow and the “Grandpa’s Shirt” Keepsake is complete.
Ramona Baird has been in the embroidery industry for over 23 years. She and her husband owned a commercial and retail embroidery store in Arizona for many years. She is an experienced digitizer having been mentored by award-winners Pat Williams and Lindee Goodall. Ramona is a contributor to “Creative Machine Embroidery” magazine having 5 covers to her credit. Ramona has worked for Wilcom America and served many years as Education Director for the American Sewing Guild. With a degree in fashion design, she is able to design and execute patterns which Pat Williams says are “out of the box” in creativity and application. Ramona likes to challenge the boundaries of embroidery and bring new and exciting designs, ideas, and projects to EmbroideryDesigns.com. She wants embroiderers of all levels to increase their skills and enjoyment in using their embroidery machine for gift-making and personal pleasure.