Border OptionsHugging border, circle, square, or rectangle — with a 3mm satin stitch.
Backing OptionsAvailable with iron-on, sew-on, or velcro backing.
Fast ShippingShipped quickly from the USA.
Free Online Tools
Powerful embroidery utilities that save time and prevent costly mistakes.
Stitch AssistantRECOMMENDED
Get the exact stabilizer, machine settings, needle, and thread color sequence for every embroidery design you purchase — based on that design's stitch density, dimensions, and color count.
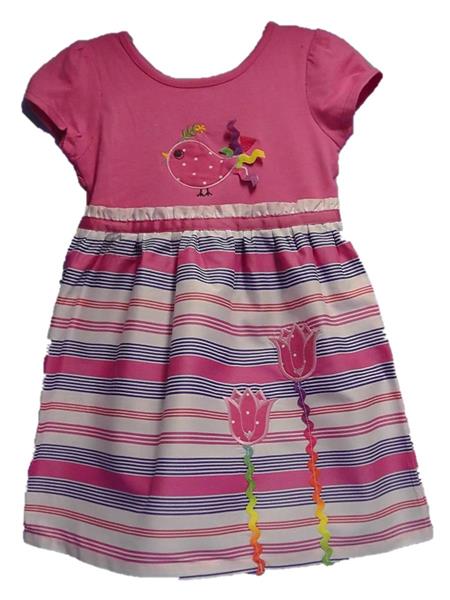
Transform a simple purchased dress into a charming toddler's spring dress with delightful applique details. Perfect for adding a touch of personalized flair to your child's wardrobe. Step-by-step instructions are included.
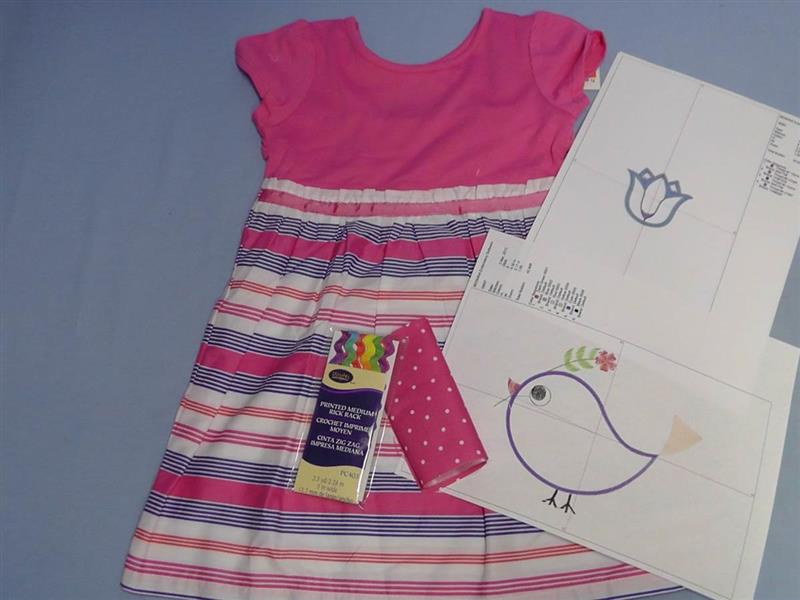
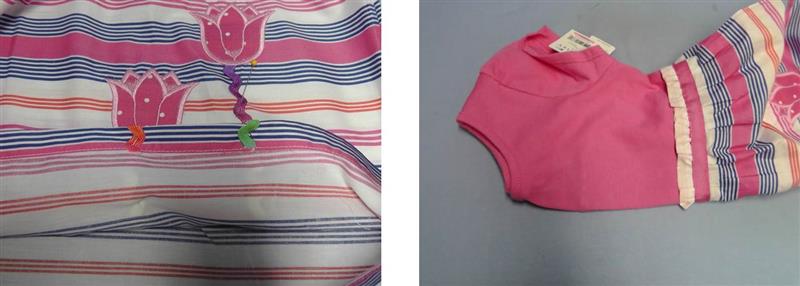
Purchase a dress in the size needed. The dress in this project has a knit top and cotton skirt and is a size 4T. Use stabilizer appropriate for the fabric in the dress. In the project a cutaway was used for the knit top and tearaway was used for the cotton woven skirt. Thread colors were used to coordinate with the fabrics and rick rack. The rick rack is tucked under each flower on the skirt as a stem and small pieces were cut, doubled over and tucked under the tail area of the bird applique on the top. Depending upon the size of the dress, the bird for the top may have to be re-sized to fit the top area. The text was omitted from the "Happy Easter Tulip Applique" designs used on the skirt. Use embroidery editing software to remove the text from the design before beginning.
Step 1:
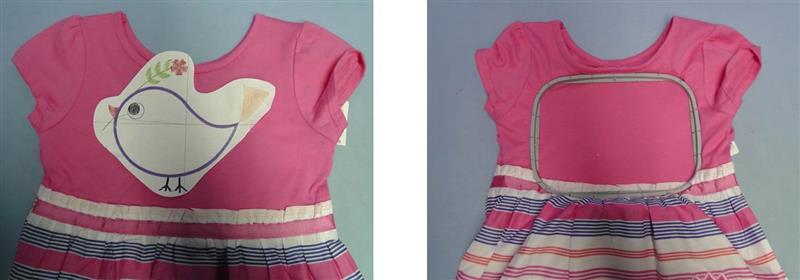
Gather the supplies and read through the instructions before beginning. Starch and press the applique fabric and press the skirt and top on the dress. Print two templates of the “Tulip Applique” design and one of the “Applique Bird” design.
(Click Image to Enlarge)
Step 2:
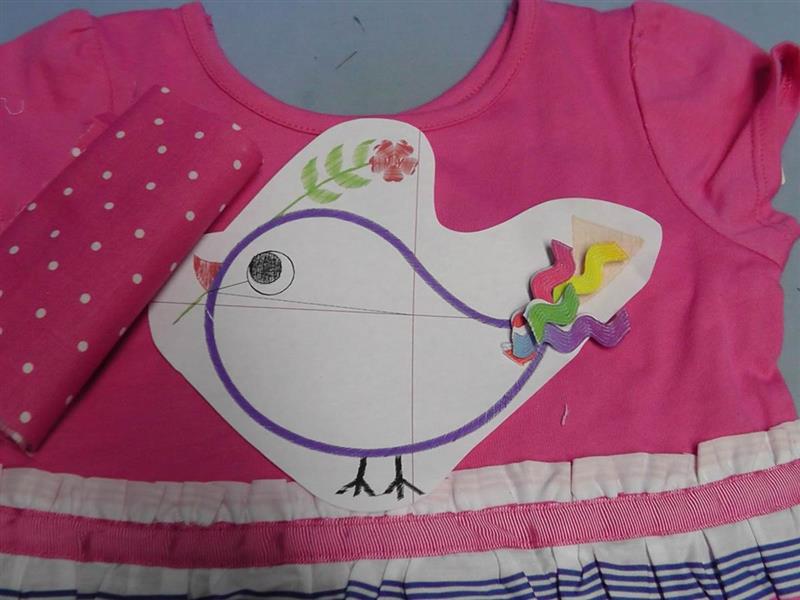
Determine whether the "Bird Applique" on the top needs to be re-sized. Here you can see at the original size this design would be too large. Re-sizing may be done in embroidery software or at the machine. Cut various small lengths of rick rack, fold it over, and determine where it will be in the tail area. The rick rack can get thick, so this may have to be an option if you don’t think your machine will stitch through all the thicknesses.
(Click Image to Enlarge)
Step 3:
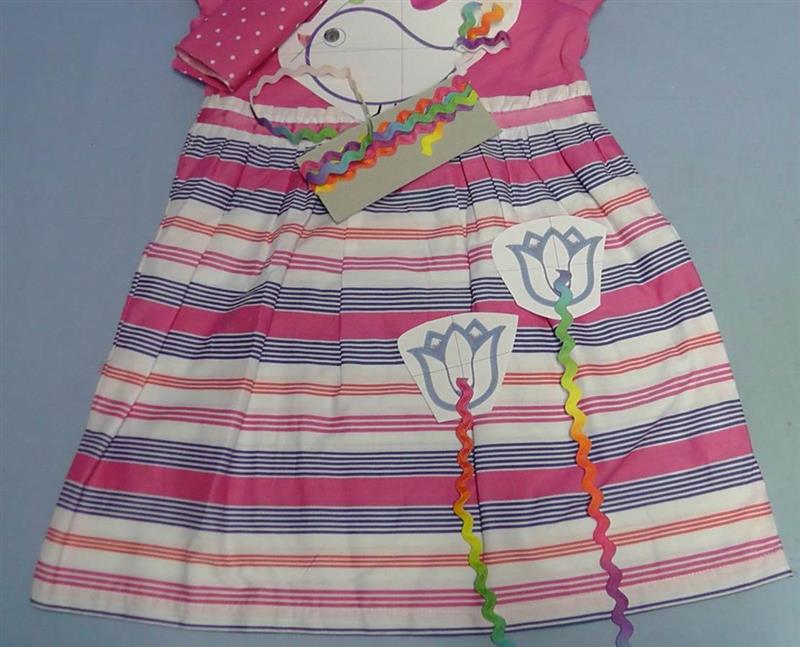
Cut out around the “Tulip Applique” templates and determine the placement on the skirt. Cut two lengths of rick rack long enough to tuck under the applique of the tulip and also to turn under the skirt at the hem.
(Click Image to Enlarge)
Step 4:
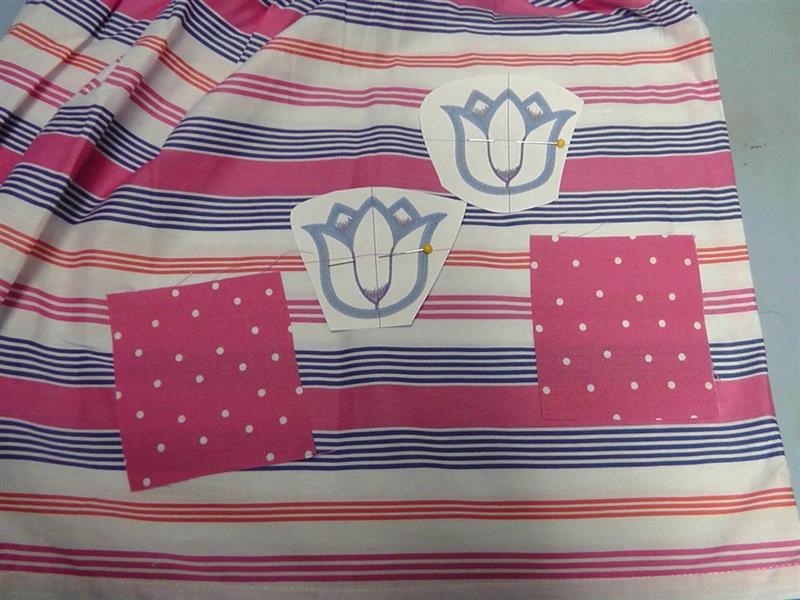
Cut and starch two pieces of applique fabric for the tulips.
(Click Image to Enlarge)
Step 5:
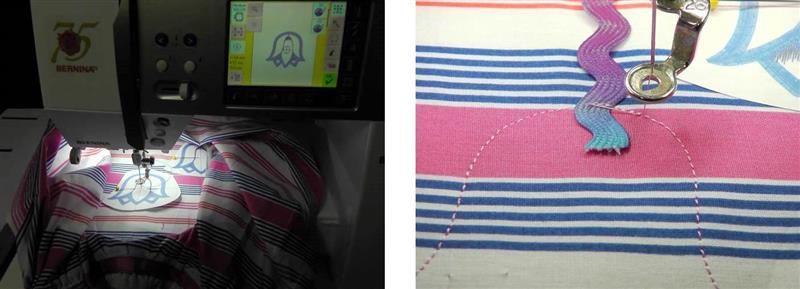
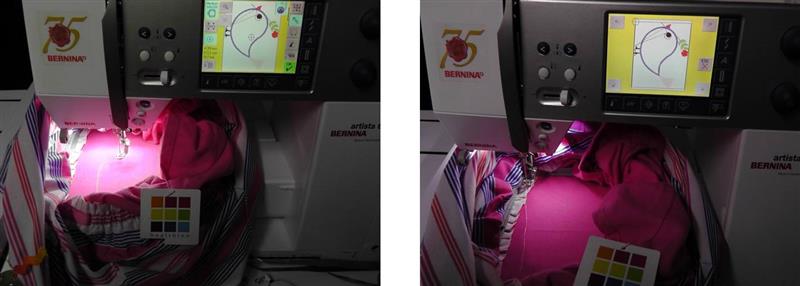
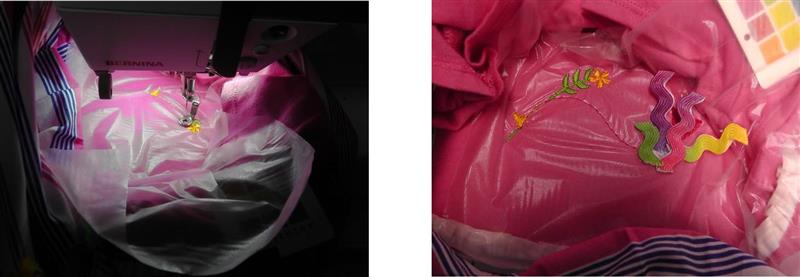
Hoop the fabric with the appropriate stabilizer. For this machine and project, the fabric had to be hooped upside down and the design rotated 180 degrees. The outline stitches first. Stop the machine after the outline stitches. Back up the design to the beginning. Place down the rick rack for the stem, extending the end into the “Tulip Applique” flower area approximately ½”. Re-stitch the placement line catching the end of the rick rack in the stitching.
(Click Image to Enlarge)
Step 6:
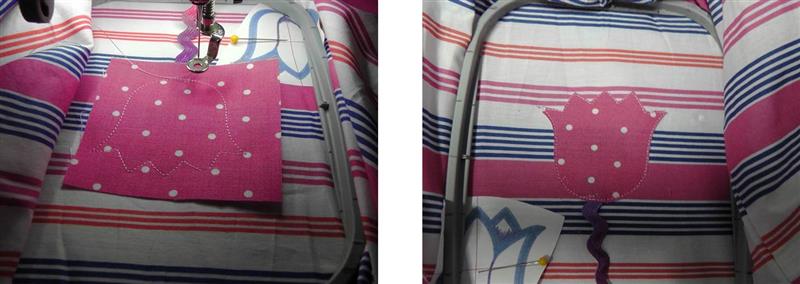
Place down the applique fabric and stitch down the tack down line. Trim the fabric close to the stitching.
(Click Image to Enlarge)
Step 7:
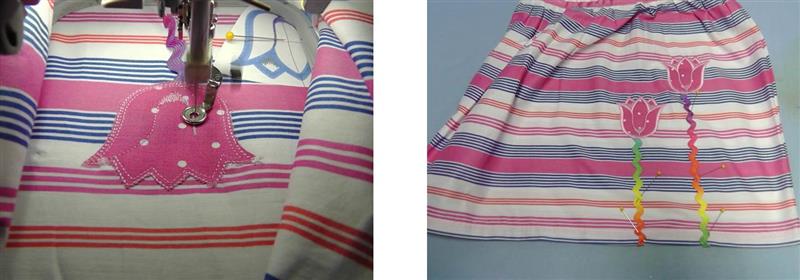
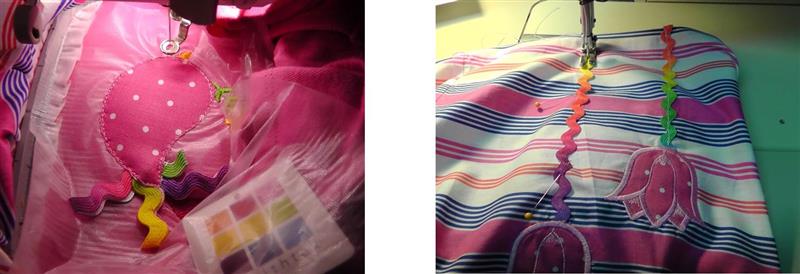
Place the hoop back on the machine and finish stitching the flower. Repeat the steps of hooping and stitching for the second flower. An option is to hoop the fabric and both flowers in one hooping if there is a hoop large enough for the machine and the size of the dress is large enough to accommodate the hoop size. After the stitching is finished, remove the fabric from the hoop and remove the excess stabilizer. Pin the rick rack stems straight down the skirt toward the hemline.
(Click Image to Enlarge)
Step 8:
Turn the ends of the rick rack under the hemline to be caught when the stems are stitched down. Prepare the top for the embroidery. Fold the top in half to find the center front; press lightly.
(Click Image to Enlarge)
Step 9:
Align the design and hoop the fabric with the appropriate stabilizer.
(Click Image to Enlarge)
Step 10:
Place the hoop on the machine. Resize the design to fit the area if it was not done in software. Check to be sure the design will fit the area. Make any editing of position and size as necessary.
(Click Image to Enlarge)
Step 11:
Stitch the design following the color sequence. The top on the project dress is knit, so cutaway stabilizer with a water soluble topping was used. Stitch the placement line for the applique. Stop the machine; back it up to the beginning of the placement line stitching. Place down the rick rack tail pieces. Re-stitch the placement line catching in the rick rack pieces (slow the machine down over this area and carefully watch the machine so it doesn't have problems stitching this thicker area).
(Click Image to Enlarge)
Step 12:
Continue stitching applying the applique when indicated. Remove the hoop from the fabric and trim the stabilizers. To complete the project, use a regular sewing machine to straight stitch the rick rack stems of the flowers, catching the lower edge that was turned under the hem.
(Click Image to Enlarge)
Step 13:
Congratulations on completing the “Toddler’s Spring Dress”.
Ramona Baird has been in the embroidery industry for over 23 years. She and her husband owned a commercial and retail embroidery store in Arizona for many years. She is an experienced digitizer having been mentored by award-winners Pat Williams and Lindee Goodall. Ramona is a contributor to “Creative Machine Embroidery” magazine having 5 covers to her credit. Ramona has worked for Wilcom America and served many years as Education Director for the American Sewing Guild. With a degree in fashion design, she is able to design and execute patterns which Pat Williams says are “out of the box” in creativity and application. Ramona likes to challenge the boundaries of embroidery and bring new and exciting designs, ideas, and projects to EmbroideryDesigns.com. She wants embroiderers of all levels to increase their skills and enjoyment in using their embroidery machine for gift-making and personal pleasure.