{{superHeaderAds.title}}
Live Chat
Embroidery Designs
Welcome, Embroiderer
Login
Holiday Cocktail Coasters
{{mainImageAlt || (productInfo._source && productInfo._source.name) || ''}}

Holiday Cocktail Coasters Embroidery Project

By   Stitchitize   on   March 02, 2015

PROJECT DETAILS

SKILL LEVEL
Some Experience
TIME REQUIRED
03:00
Description

This wonderful set of linen coasters is sure to add elegance to any table setting, or holiday get-together.

Project Preview Video

Materials
  • Fabric requirements complete a set of 4 coasters, each 5" square. For best laundering and pressing results, White Linen or Cotton Fabric (or a blend of both) and Polyester Embroidery Thread are recommended. Preshrink the fabric for best results. Also, the finishing stitches are sewn with coaster upside down, therefore, polyester bobbin will help to keep a uniform, finished look.
  • (4) 7.5" (19cm) squares White Linen, Cotton, or a blend of both.
  • (4) 5" (12.5cm) squares White Linen, Cotton, or a blend of both.
  • (4) 8” squares Iron-on Fusible Interfacing (iron to wrong side of each 7.5” square)
  • White Polyester Thread (roll 1-2 bobbins to match)
  • Minimum Embroidery Hoop 3" x 3" (7.5cm x 7.5cm)
  • (4) 5" (12.5cm) squares Medium weight Tear-away Stabilizer
  • Embroidery Foot
  • Adjustable Zipper Foot
  • Grid Cutting Mat
  • Point Turner
  • Scissors - fabric and embroidery
  • Steam Iron
  • Chalk Marker (contrasting color to fabric)
  • Masking or Painters Tape
  • 12" (30cm) Ruler
  • **Optional quilt spray adhesive or temporary basting glue (be sure to test on scrap of fabric for marks, etc.)

  • Designs used in this project

    Final Product: What You Will Create

    Preface:
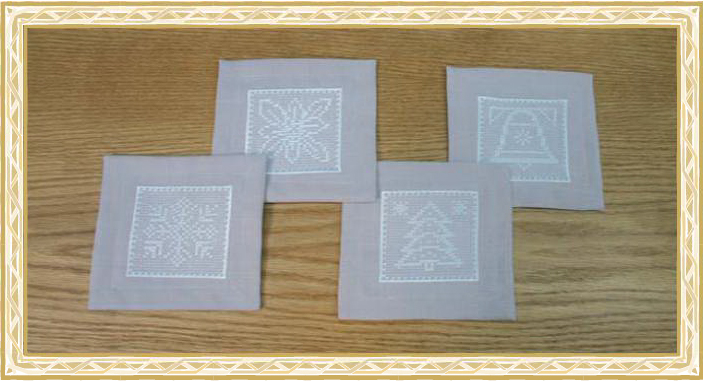
    This wonderful set of linen coasters is sure to add elegance to any table setting, or holiday get-together. Tuck a set into that special holiday hostess gift, in each tin of your holiday baking, or wrapped around a gift of "holiday cheer". Their ease of laundering will allow you to scatter them at all of your holiday soiree's without fear of even red wine. Each of the four coasters has a different embroidery design and the back is beautifully finished with crisp mitered corners. All 4 of the embroidery designs for Bee #11 are one color. Traditional hand sewn filigree embroidery is "tone on tone". This means that the embroidery thread color matches the fabric for a very subtle look. Our sample is shown with pale pink linen and white embroidery for photography and visibility in the instructions.


    Embroidery
     
    It is important that the fabric is hooped precisely for a desirable finished set. Be sure to use your grid mat and your plastic template insert on your embroidery hoop as guides in the hooping process. 


    Step 1:
    Prepare fabric for embroidery by centering and fusing an 8” Iron-on Fusible Interfacing square to the wrong side of each large (7.5”) square of fabric. There will be 1/4” of exposed fusible at the edges. Note: For visibility of embroidery etc. our sample does not have fusible on the back.


    Step 2:
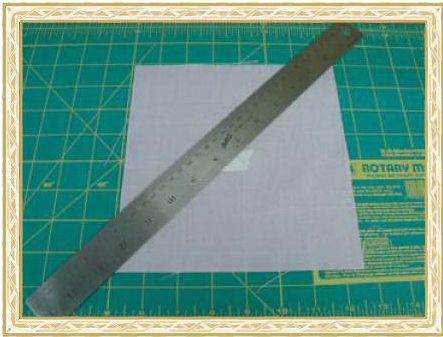
    Place a small piece of tape at approx. center of each (fused) large (7.5") square of fabric. Place ruler on diagonal corners to mark exact center of the square.


    Step 3:
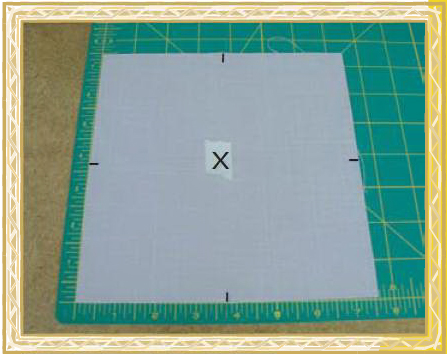
    Use a ruler and cutting mat to chalk mark exact center (3.75" from corner) of 4 sides of the square. Mark a 1/4" line at each edge center. These are your hooping guides.


    Step 4:
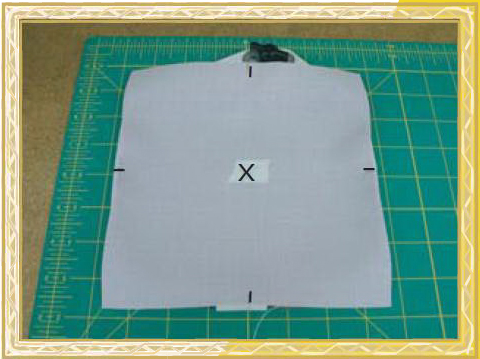
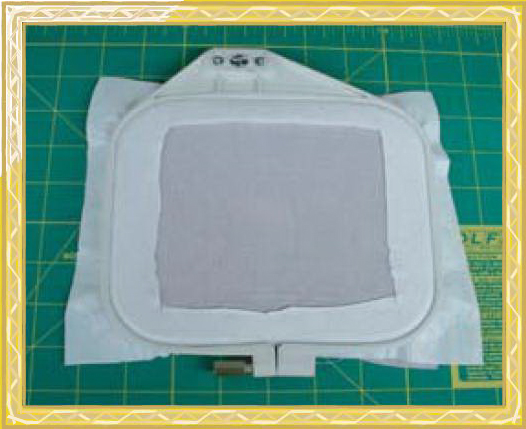
    Align the base/bottom part of your embroidery hoop with the grid on your cutting mat. Place a fabric square on the hoop base and align the side guide marks with the lines on your cutting mat. Hoop the fabric being very careful not to move the fabric at this stage. If the marked guides do not line up with center marks on the hoop, remove the fabric from the hoop and try again!


    Tip: If extra stabilizer is required, use a "hooping window" of cut-away. Hoop fabric and window together (window on the bottom). Illustration shows view from back of hoop with hooping window.

    (Click Image to Enlarge)


    Step 5:
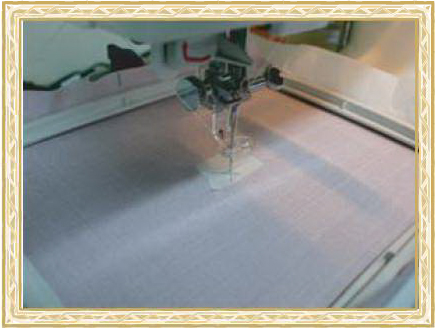
    Attach hoop to machine. Center a piece of medium weight tear-away stabilizer under the hoop. Prepare machine to sew one of the Stitchitize Bee #11 designs. Be sure that the needle is aligned with the center mark on the tape. Remove tape and sew the design.


    Step 6:
    Sew the embroidery design to completion. Repeat for remaining 3 large fabric squares. Gently remove all tear-away stabilizer from the reverse side, trim 1/4” excess fusible from edges (fusible and fabric edge are even) and press each square to remove any hoop marks.


    Construction
     
    The back side of each coaster is finished with mitered corners. Here's how!


    Step 7:
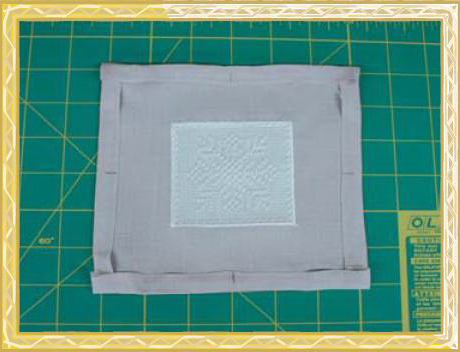
    With embroidered side down, fold each edge of one square 1/2". Press.


    Step 8:
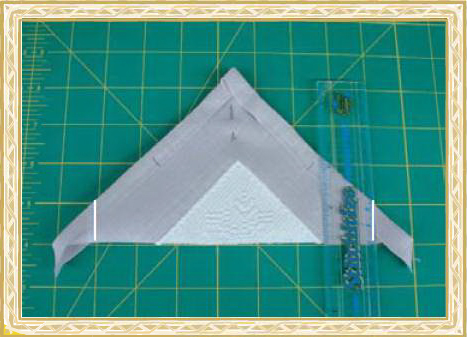
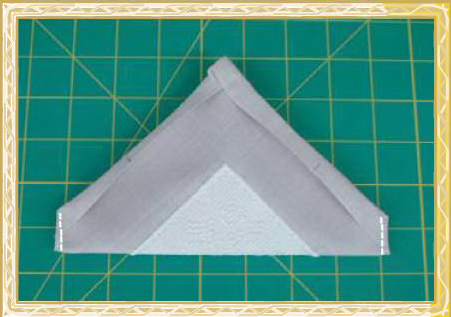
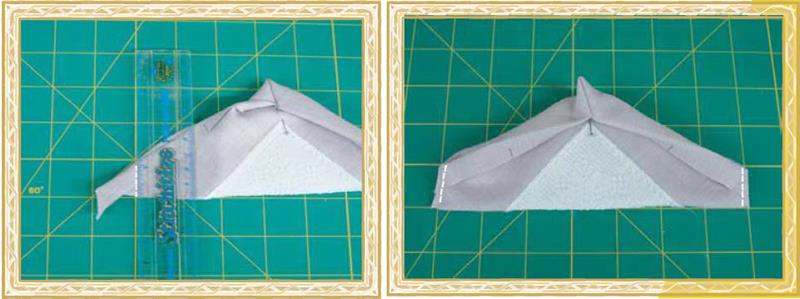
    Turn over (right side up) and fold diagonally to make a triangle. Pin at top point center to secure. Place on cutting mat with fold on a horizontal grid line. Position corner fold (45 angle) on an intersection. Measure 1" from corner on fold and mark from edge to edge with chalk. Repeat for opposite corner.


    Step 9:
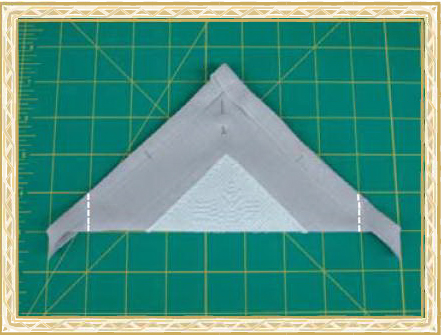
    Prepare machine for regular sewing, attach Zipper foot. Sew along each chalk mark.


    Step 10:
    Trim 2 corners to 1/8" from seam.


    Step 11:
    Open to a square and fold on opposite diagonal. Repeat marking, sewing, and cutting on each corner.

    (Click Image to Enlarge)


    Step 12:
    Open all corners inside out. Lay square embroidered side down.


    Step 13:
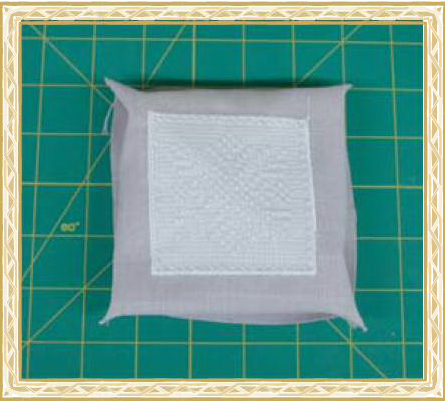
    Place small square on large square, wrong sides together. Line up corners. Small square can be trimmed slightly if needed.


    Step 14:
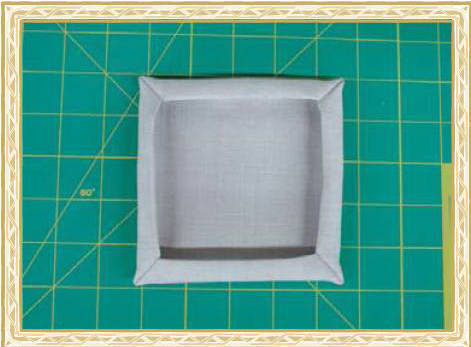
    Turn all 4 mitered corners over, wrapping around small square. Be sure that small square stays put. A small amount of adhesive can be used here to keep the small square in place.


    Step 15:
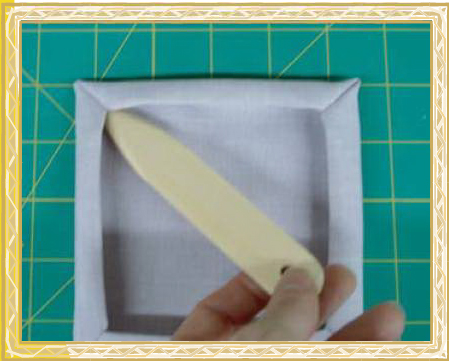
    Use a point turner to form all 4 corners.


    Step 16:
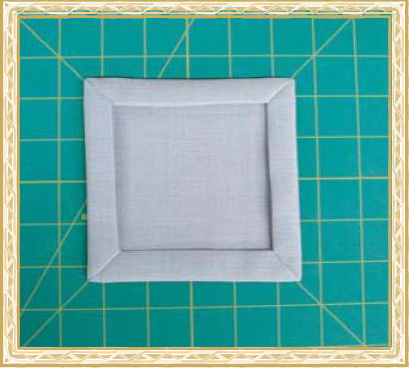
    Steam Press all folds.


    Step 17:
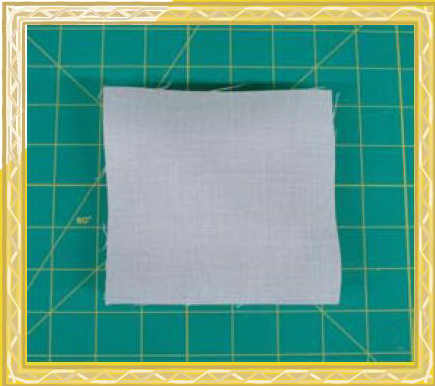
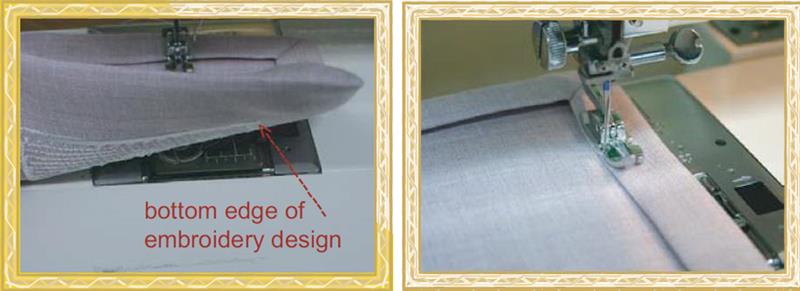
    With embroidery side down, and bottom of embroidery design on the righthand side, align left side of zipper foot with inside fold, approx 1" from mitered corner. Be sure that your needle is very close (1/8") from the fold.

    (Click Image to Enlarge)


    Step 18:
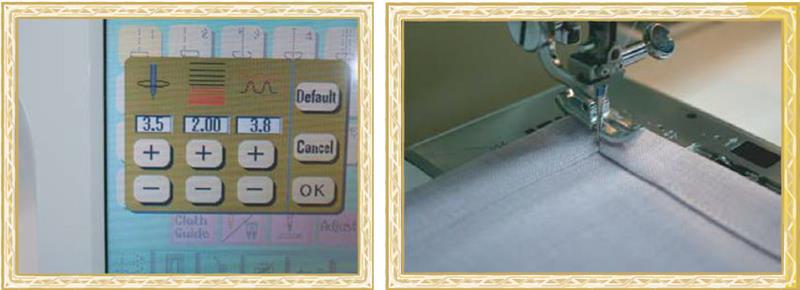
    Sew (2mm stitch length) running stitch around the edge of the folds. Use "needle down" to pivot the corners on the mitered seam. When you return to the start position, backstitch 2-3 stitches to secure.

    (Click Image to Enlarge)


    Step 19:
    Repeat steps 1 - 12 for remaining three embroidered squares.

    (Click Image to Enlarge)


    Ideas: 
    - Make a little envelope style pouch to store or gift wrap the set. Sew one of the designs on the outside of the envelope.
    - Make matching cocktail or dinner napkins, placemats, etc using this formula. Size of smaller square determines the finished size. Large square is always 2.5" larger than small square.
    - Embellish a table cloth, table runner, centerpiece, etc. with the designs to create a dining ensemble.
    - Increase the size of the square and sandwich a layer of thermal or quilt batting between the fabric squares to make a decorative hot pad for the table.
    Meet the Author: Stitchitize
    Stitchitize
    The name Stitchitize was coined and registered in 1988 when the Conquergoods sold their first contract embroidery business. “Stitchitize” was coined as the art of digitizing stitches for machine embroidery. The company actually started developing embroidery designs in 1983 and soon saw the need for Stock Embroidery Designs. By 1988 the company had several thousand Stock Designs to sell, however the majority of their development was still geared towards the commercial embroidery market. It wasn’t until 2001 when Trevor, the Conquergoods eldest son, now managing Stitchitize, saw the opportunity to start developing designs for the emerging domestic embroidery market. In 2002 the Conquergoods opened a Sewing Centre selling domestic machines and embroidery models. The staff members that were hired for the Sewing Centre were all accomplished sewers and they worked very closely with the Stitchitize staff developing new designs. It soon became apparent that project based designs would be well received by the consumers. In late 2003 it was George Conquergood, the patriarch of the family that suggested the poem and storybook “Twas The Night Before Christmas” as a good place to start development. The manager of the Sewing Centre at that time, Brenda, was an accomplished artist and she was given the task to prepare the graphics for the storybook. Her drawings were then given to the digitizing department under direction of Beverley and her sister Linda the actual digitizer to execute. Another Sewing Centre staff member Darlene had the task of sewing the original prototypes, which eventually became an even bigger project. A quilt was also developed and Darlene and graphic artist Colin began the task of photographing and documenting every step of the construction process. Finally the collaborative efforts of eight staff members brought the project to completion and the production of the CD. To have the last word, George decided that as part of the product launch in 2004, Stitchitize would give every dealer a personalized copy of the storybook as a Christmas gift. The Conquergoods commercial production manager Darcy was brought in to discuss the logistics. Some of the pages in the book had over 24 colours and up to 42 color changes. Darcy was given the task to pleasingly reduce this to a maximum of 15 colours per page, as that was the maximum number of colours that their largest commercial machine could handle. He did this and started production of the over 200 books required. Darlene got to assemble all 200+ copies on a domestic sewing machine. The books were completed and sent out to all the dealers for Christmas 2004. The following year George suggested the development of the Mother Goose 1 & 2 Collection, which was so well received that a second collection, Mother Goose 3 & 4 was produced. The graphics and nursery rhymes came from the original book “Mother Goose and her Goslings” which had belonged to George’s mother when she was a child, and read to George as a child. That book is now over 100 years old. Other collaborative works included the FSL – 3D Flowers & Butterflies Collection, Italian Lace Collections, Mardi Gras Masks and the 13 Stitchitize Bees, which were fully tested by consumers in the Creative House Sewing Centre classrooms.
    More From This Author
    Link is Broken, Please check the URL
    Exclusive Embroidery Offers!
    Copyright © {{ currentDate | date:'yyyy'}} - EmbroideryDesigns.com
    GET 50% OFF! ×