Border OptionsHugging border, circle, square, or rectangle — with a 3mm satin stitch.
Backing OptionsAvailable with iron-on, sew-on, or velcro backing.
Fast ShippingShipped quickly from the USA.
Free Online Tools
Powerful embroidery utilities that save time and prevent costly mistakes.
Stitch AssistantRECOMMENDED
Get the exact stabilizer, machine settings, needle, and thread color sequence for every embroidery design you purchase — based on that design's stitch density, dimensions, and color count.
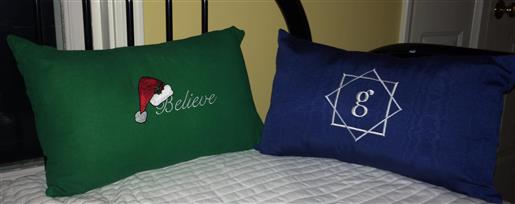
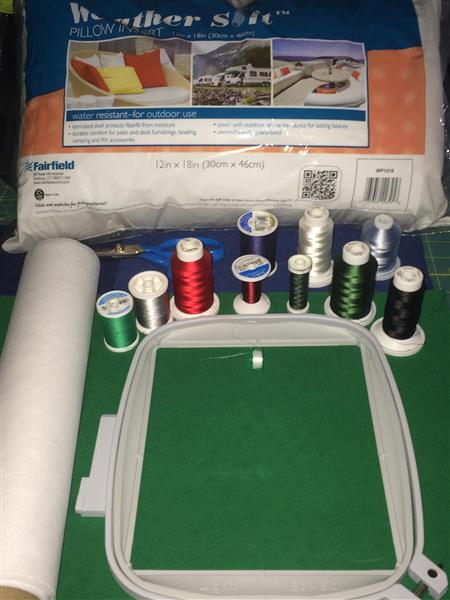
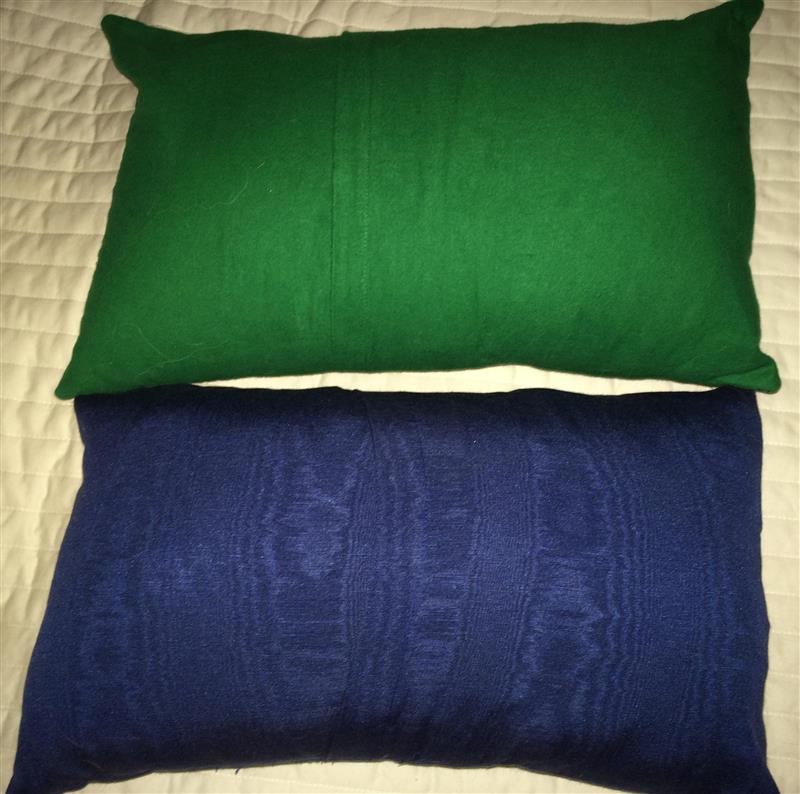
5/8 of a yard of fabric for each pillow (I chose green flannel for the holiday pillow and a blue taffeta for the monogrammed pillow)
At least a 6” x 6” hoop for the monogrammed pillow and a 5” x 7” hoop for the holiday pillow.
Embroidery threads for the monogrammed pillow – contrasting color for the letter and 2 colors for the outside design.
Embroidery threads for the holiday pillow – these are the Madeira Rayon threads provided with the design. Tusk (1149), Peanut Brittle (1273), Christmas Red (1147), Ripe Raspberry (1381), Mud Pie (1129), Forest Green (1390), Christmas Red (1147), Emerald Black (1000)
Matching thread for sewing the pillows together
Tear-away stabilizer or the appropriate stabilizer for your fabric
Bobbin thread
Scissors to cut your fabric
Embroidery software that has merging abilities for the holiday pillow – I am going to demonstrate BuzzEdit for this project.
These pillow cases are so versatile in that you can use them over and over and change them as many times as your imagination lets you. I will normally make 2 similar pillow covers and use the same pillow forms for each pair. You can store them and wash or dry clean them easily because they just slip on and off the pillow form. Also, it seems like everywhere you look, you will see monogrammed pillows, towels and sheets, so it is such a beautiful accent.
I’m going to show you 2 methods of merging 2 designs together to make a third design. For the monogrammed pillow you will do the merging right in your hoop and for the holiday pillow you will need embroidery software that has merging capabilities such as BuzzEdit.
Step 1:
Gather your materials.
(Click Image to Enlarge)
Step 2:
Instructions for the monogrammed pillow:
Cut the front panel of the pillow – cut a piece of fabric (monogrammed side) the exact length and width of your pillow + 1/2" for the length. (You can incorporate these cutting instructions for any size pillow). In this case we will cut a 12” x 18 1/2” piece of fabric for the front.
Cut the 2 pieces for the back of the pillow. You will need 2 pieces of fabric the length of the pillow (18”) divided by 2 and then add 3 inches for the overlap in the back times the width of the pillow (12”). In this case we will cut 2 pieces of fabric 12” x 12” (18/2 + 3 = 12). If you were making a 16” x 16” pillow cover, the 2 back pieces would be the size of 16” x 11” (16/2 + 3 = 11)
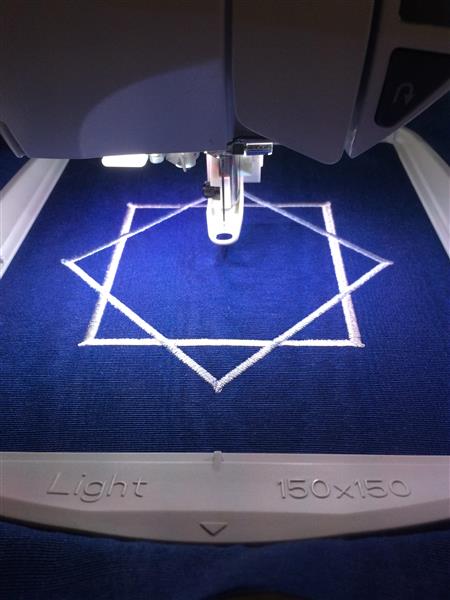
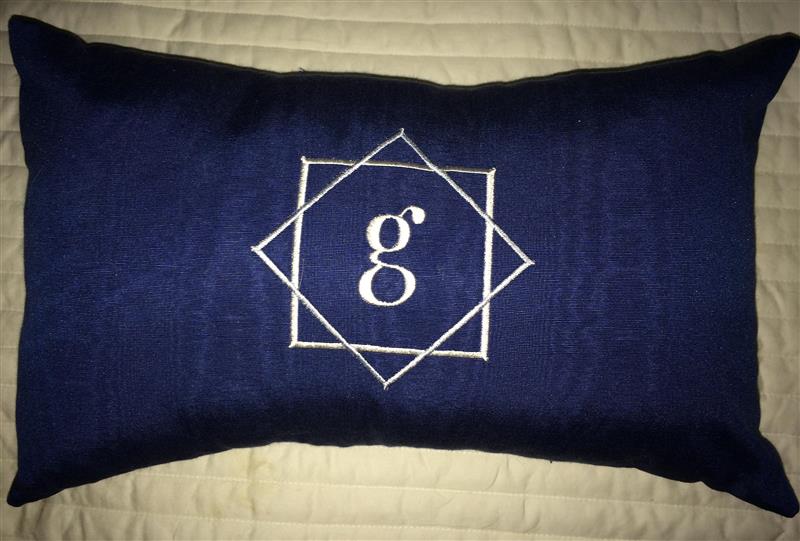
Mark the middle of your top pillow piece and hoop it on top of your stabilizer. Select design Square and Diamond from Grand Slam Designs and embroider that on the hooped fabric.
(Click Image to Enlarge)
Step 3:
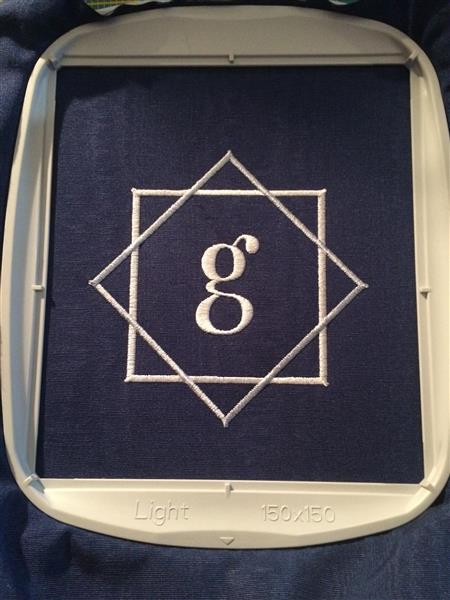
Do not un-hoop your fabric and select design Pretty Penny g from Embroidery Patterns or the initial of your choice and stitch out that design.
(Click Image to Enlarge)
Step 4:
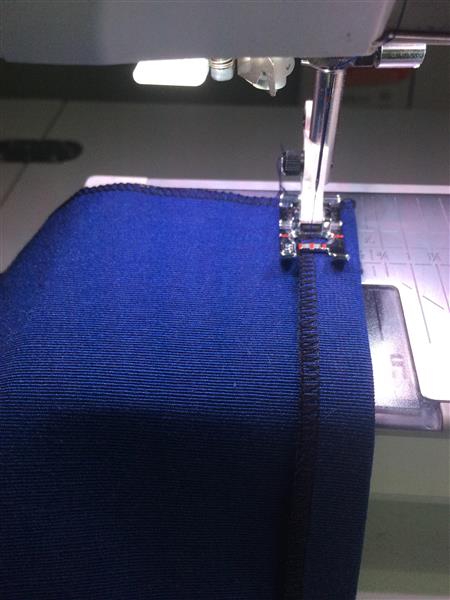
You will now be ready to put the pillow together. I have a serger, so I finish all the edges of the three pieces and I would recommend doing this because you will be sewing a ¼” seam. You will need to finish at least one edge of the 12” x 12” pieces if you do not want to do them all.
Turn under the finished edge of the 12” x 12” piece 1” for a finished hem. Press and sew down the hem in place.
(Click Image to Enlarge)
Step 5:
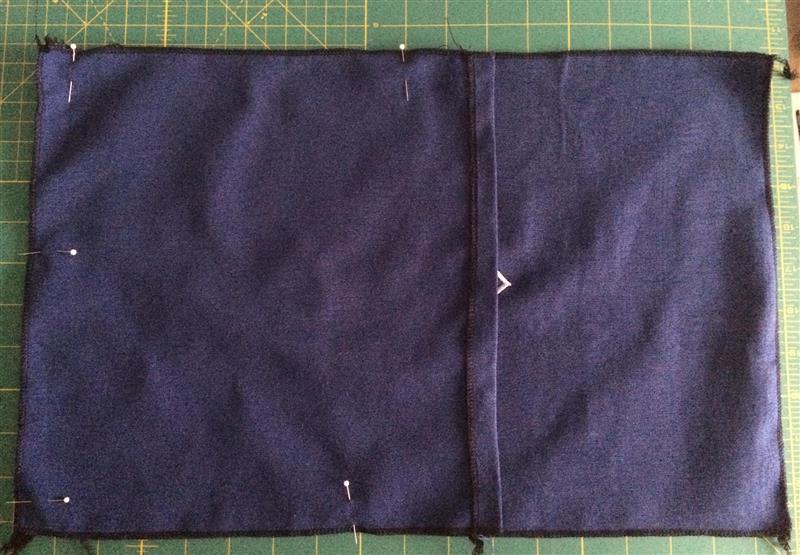
Place the piece with the hem right sides together with 18 1/2” x 12” piece and pin in place.
(Click Image to Enlarge)
Step 6:
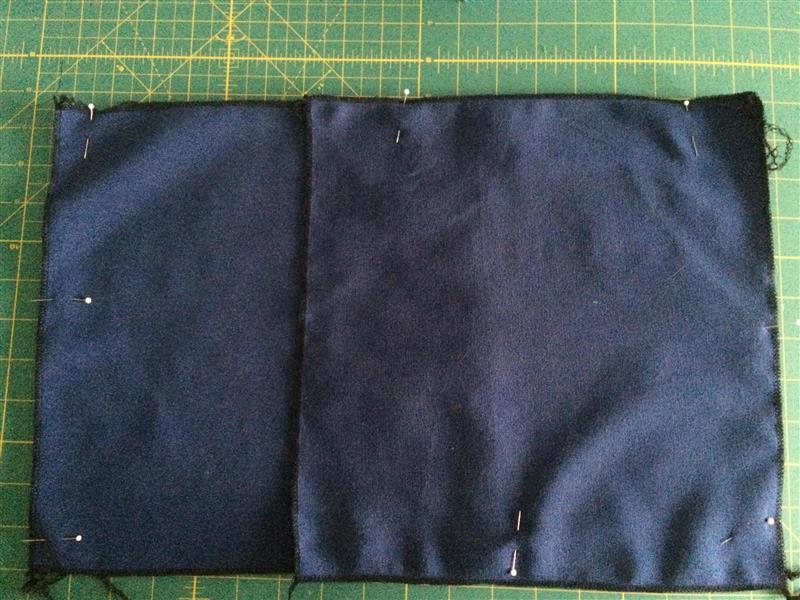
Now place the other 12” x 12” piece of fabric on top of those 2 pieces, right sides together with the 12” x 18 1/2” piece.
(Click Image to Enlarge)
Step 7:
Stitch around the 4 sides using a 1/4” seam stitching through all layers.
Turn inside out, poke out corners and cover the pillow form. All done!
(Click Image to Enlarge)
Step 8:
Instructions for the holiday pillow:
For this pillow you will first need to merge your 2 designs together to make 1 design that you will stitch out on the front. I will demo this in the embroidery software called BuzzEdit.
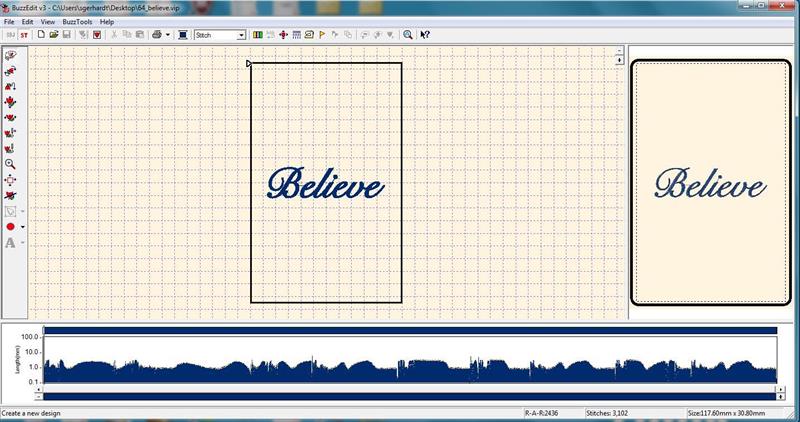
Open up the software and click on ‘Open an existing design’, open up the design Believe from Ann The Gran.
(Click Image to Enlarge)
Step 9:
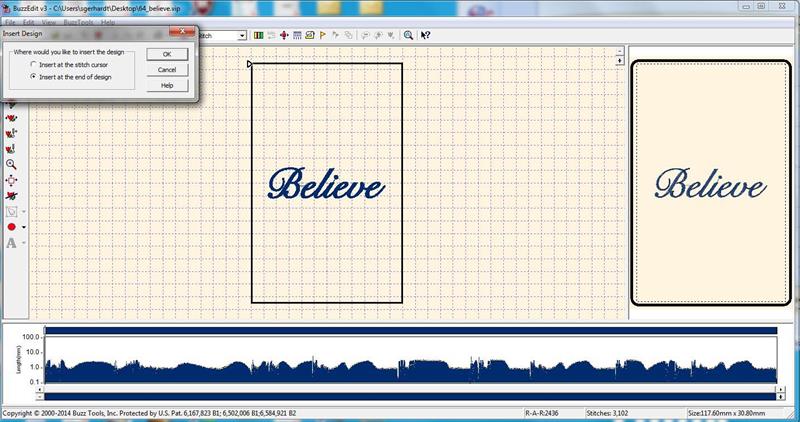
Click on File/Insert Design, then select 'Insert at the end of design'. If you do not select this option the first design will end up on top of the second design. In this case, we want the hat to be stitched out on top of the word 'Believe'. Click on Ok.
(Click Image to Enlarge)
Step 10:
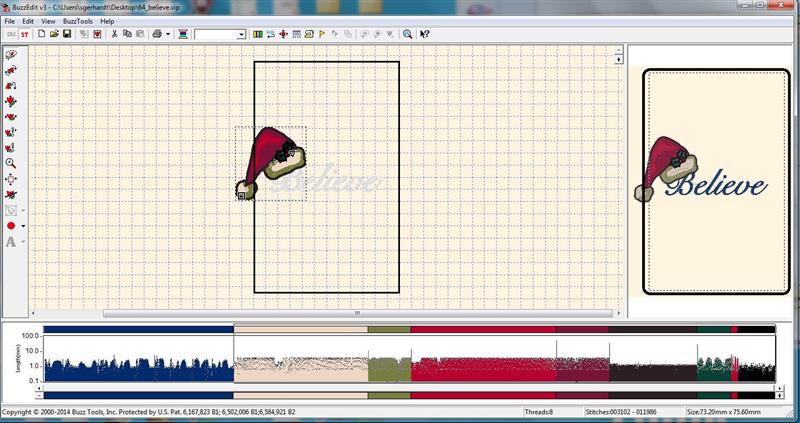
Move the hat on top of the 'B'.
(Click Image to Enlarge)
Step 11:
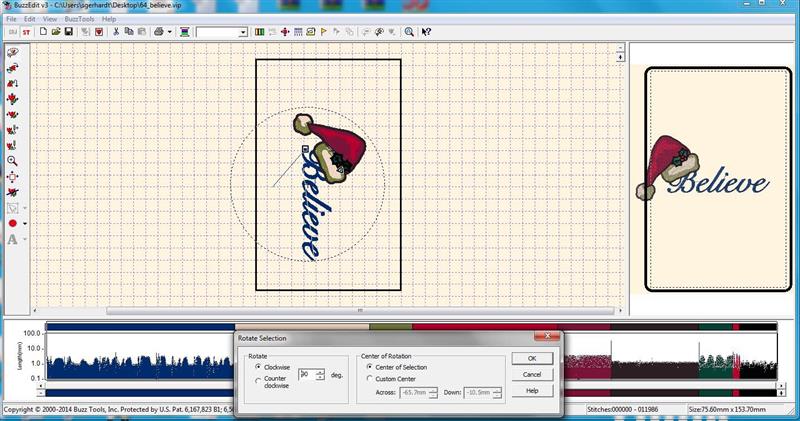
Click anywhere on the word 'Believe' and click on BuzzTools/Rotate. Select 90 degrees and click on ok. You are now ready to save your design, so click on File and then Save As and save your design in a folder on your computer.
(Click Image to Enlarge)
Step 12:
Cut the front panel of the pillow – cut a piece of fabric (monogrammed side) the exact length and width of your pillow + 1/2" (You can incorporate these cutting instructions for any size pillow). In this case we will cut a 12” x 18 1/2” piece of fabric for the front.
Cut the 2 pieces for the back of the pillow. You will need 2 pieces of fabric the length of the pillow (18”) divided by 2 and then add 3 inches for the overlap in the back times the width of the pillow (12”). In this case we will cut 2 pieces of fabric 12” x 12” (18/2 + 3 = 12). If you were making a 16” x 16” pillow cover, the 2 back pieces would be the size of 16” x 11” (16/2 + 3 = 11)
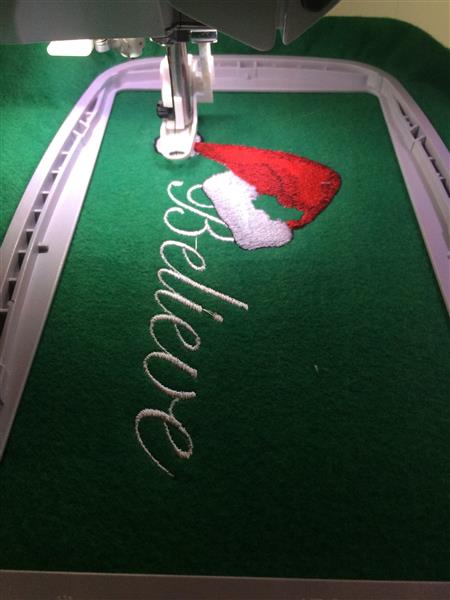
Mark the middle of your top pillow piece and hoop it on top of your stabilizer. Select the design you just created and stitch it out on your fabric. You will need a 5" x 7" hoop for this pillow.
(Click Image to Enlarge)
Step 13:
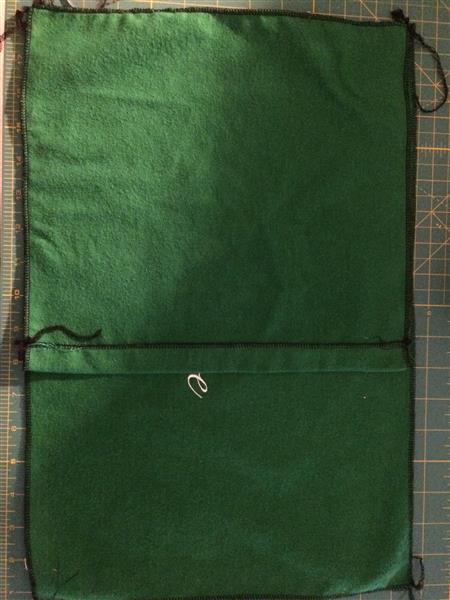
You will now be ready to put the pillow together. I have a serger, so I finish all the edges of the three pieces and I would recommend doing this because you will be sewing a ¼” seam. You will need to finish at least one edge of the 12” x 12” pieces if you do not want to do them all.
Turn under the finished edge of the 12” x 12” piece 1” for a finished hem. Press and sew down the hem in place. Place the piece with the hem right sides together with 18 1/2” x 12” piece and pin in place.
(Click Image to Enlarge)
Step 14:
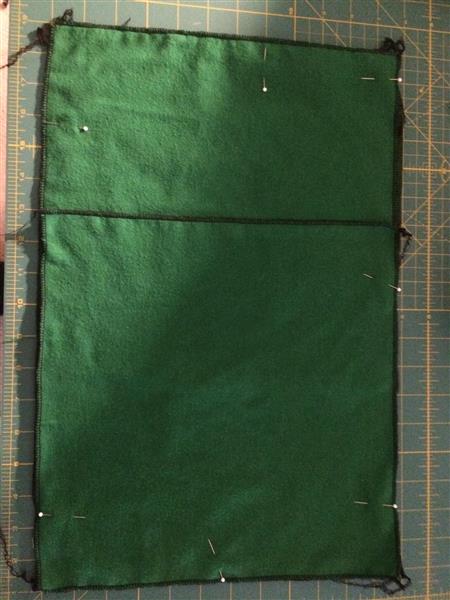
Now place the other 12” x 12” piece of fabric on top of those 2 pieces, right sides together with the 12” x 18 1/2” piece. Stitch a 1/4" seam around the parameter of the pillow.
(Click Image to Enlarge)
Step 15:
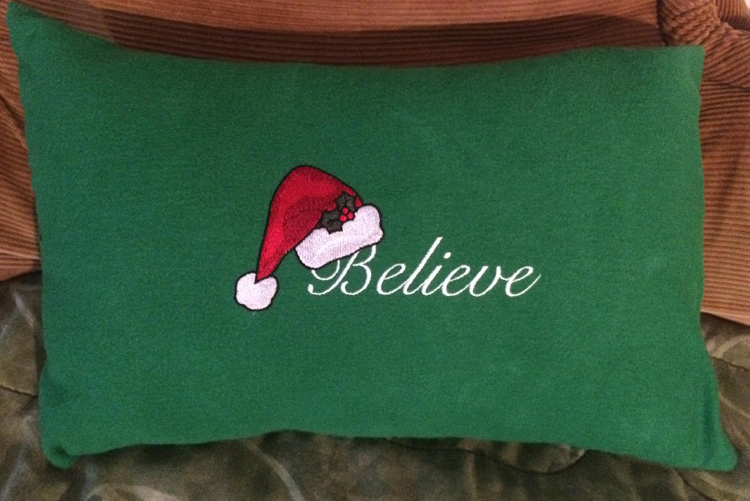
Turn inside out, poke out corners and cover the pillow form. All done with your holiday pillow!
I've been sewing and making clothes from the age of 16 and started machine embroidering 8 years ago. I try to keep up with the latest embroidery trends by attending many classes at my local embroidery shop and just started learning how to quilt. I love to embroider on everything!