Border OptionsHugging border, circle, square, or rectangle — with a 3mm satin stitch.
Backing OptionsAvailable with iron-on, sew-on, or velcro backing.
Fast ShippingShipped quickly from the USA.
Free Online Tools
Powerful embroidery utilities that save time and prevent costly mistakes.
Stitch AssistantRECOMMENDED
Get the exact stabilizer, machine settings, needle, and thread color sequence for every embroidery design you purchase — based on that design's stitch density, dimensions, and color count.
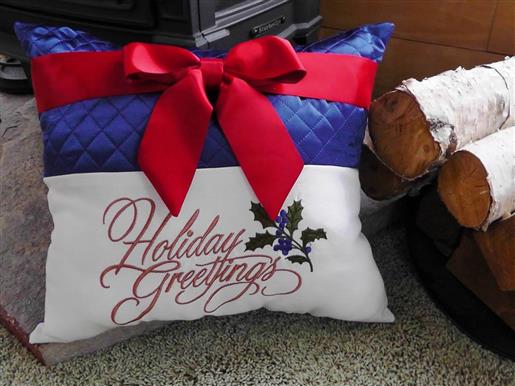
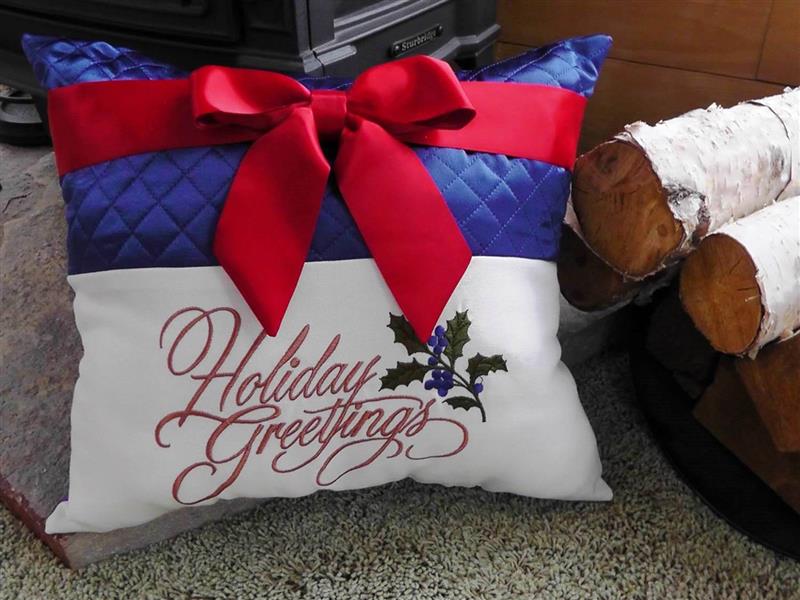
Craft a beautiful pillow adorned with a vibrant red ribbon bow to bring festive charm to your home décor. Ideal for celebrating the holiday season, this pillow adds a touch of elegance to any room. Step-by-step instructions are included.
The embroidery design for this project stitches up fast and beautifully. Match the blue for the berry color to the blue satin fabric. The top portion will be quilted then cut down to size. Red blanket binding is used for the bow and sash and the pillow is stuffed with a purchased pillow form. Be sure to adjust the fabric and cutting measurements given in the project if the size of the pillow you use is different than the one used in the project.
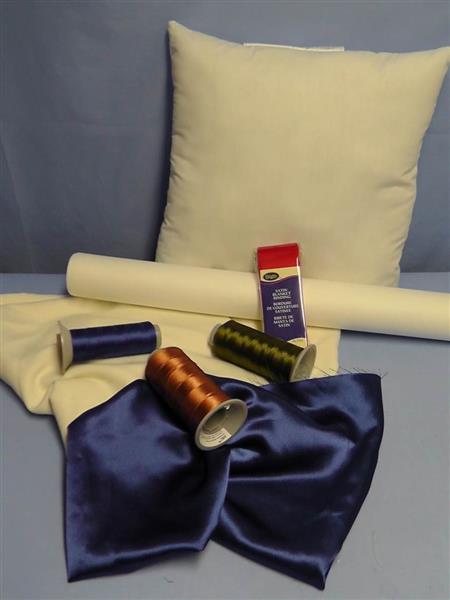
Step 1:
Gather the supplies and read through the instructions before beginning.
(Click Image to Enlarge)
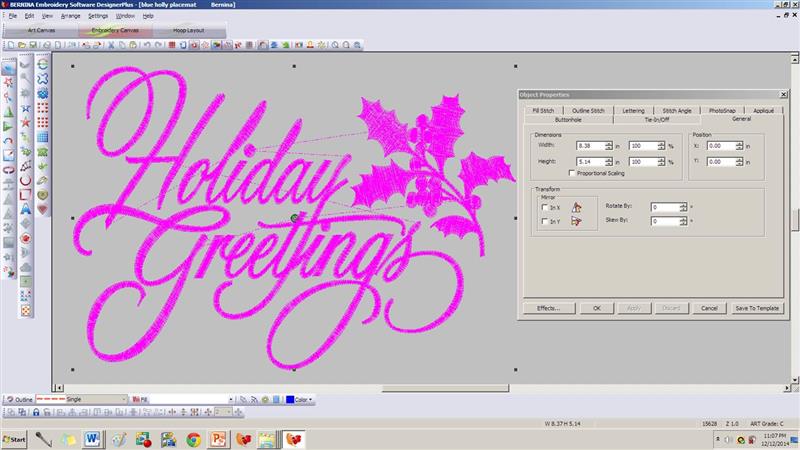
Step 2:
The size of the design is large (5.16” x 8.39”). Be sure the design will fit within the hoop for the machine you have. Print a template of the design.
(Click Image to Enlarge)
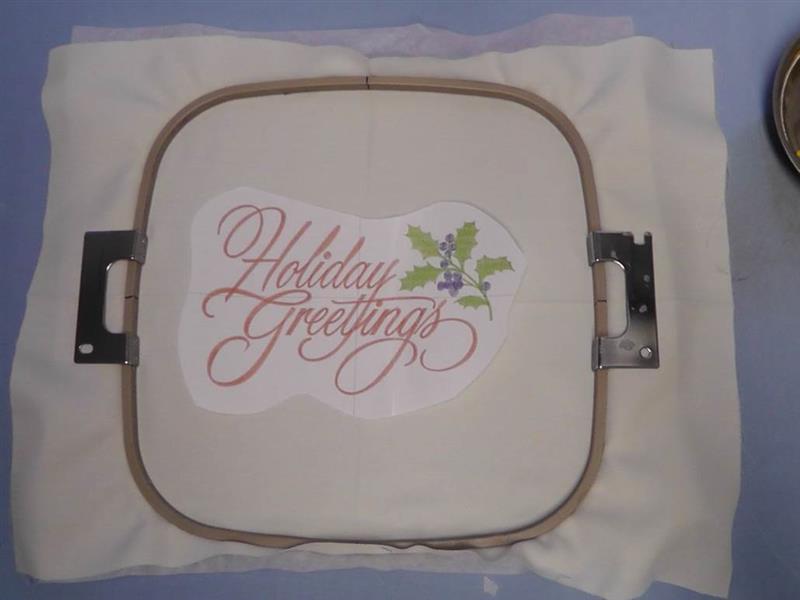
Step 3:
Find the center of the cream colored fabric. Center the printed design on the fabric and pin in place. Hoop the fabric with one layer of tearaway stabilizer.
(Click Image to Enlarge)
Step 4:
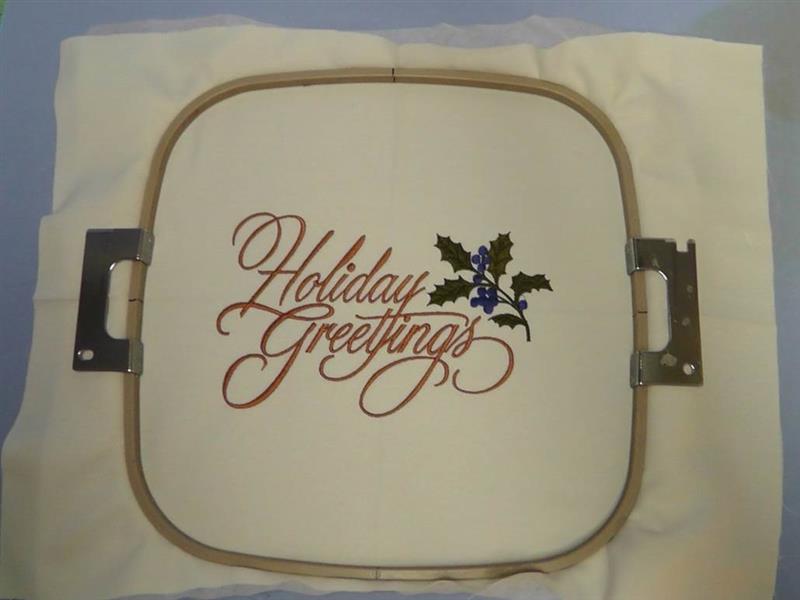
Stitch the design following the color sequence using the royal blue thread to be used for quilting for the berries in the design.
(Click Image to Enlarge)
Step 5:
Remove the fabric from the hoop and remove the excess stabilizer from the back of the design. Use needle nose tweezers to remove the stabilizer from between the lettering. Press the fabric well.
(Click Image to Enlarge)
Step 6:
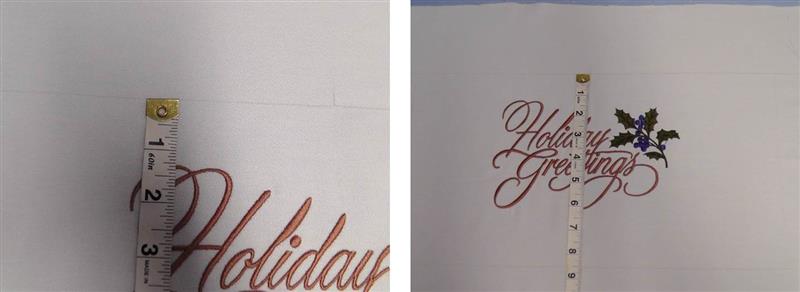
Measure up 1 ½” from the top of the embroidery; square and draw a line at the top of the design. Measure down from the top line 8 ½” and draw a line parallel to the first.
(Click Image to Enlarge)
Step 7:
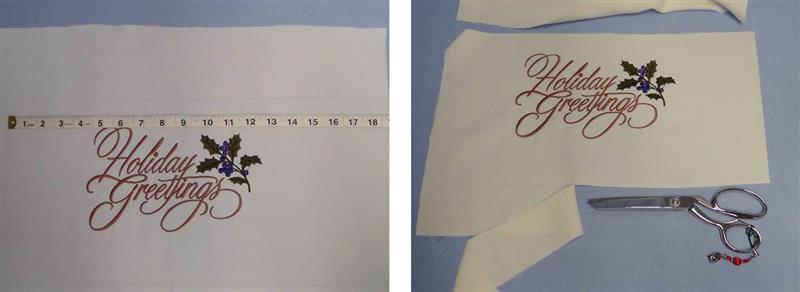
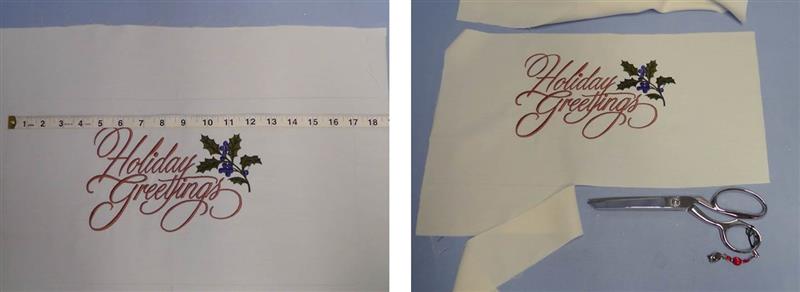
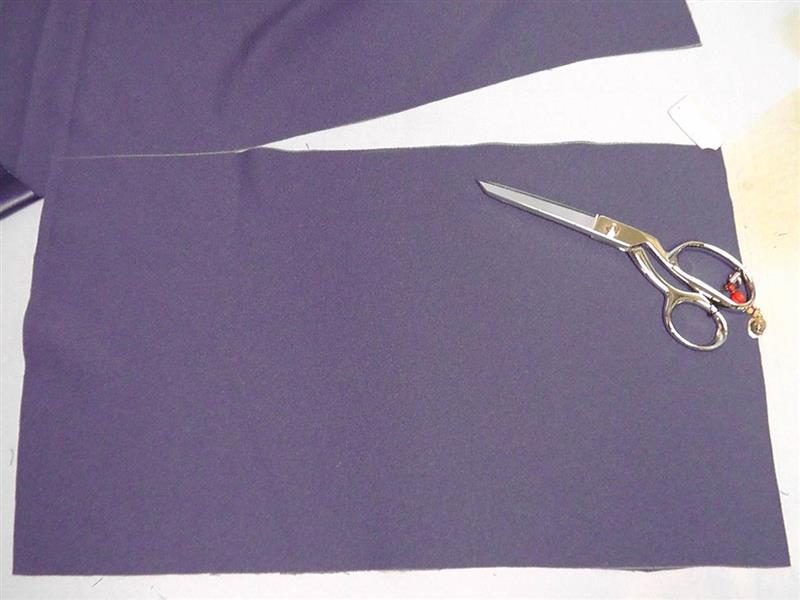
Draw lines to make the fabric 17” wide, keeping the design centered. Cut the fabric along the drawn lines.
(Click Image to Enlarge)
Step 8:
Next cut the royal blue fabric and batting to be quilted. Cut the fabric for quilting 17” high x 20” wide (quilting takes up some of the fabric and batting). After the quilting is done the fabric will be cut to size. Cut the batting 18” x 21”.
(Click Image to Enlarge)
Step 9:
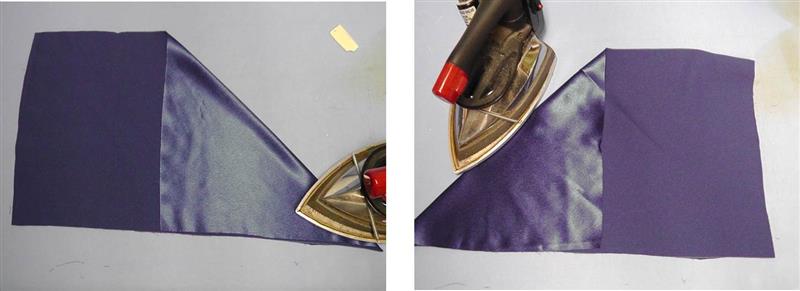
Mark quilting lines on the fabric (test first to be sure the mark will not be permanent) or fold the short cut end to the long cut end along the bias and gently and lightly press in a crease. Repeat for the other short end.
(Click Image to Enlarge)
Step 10:
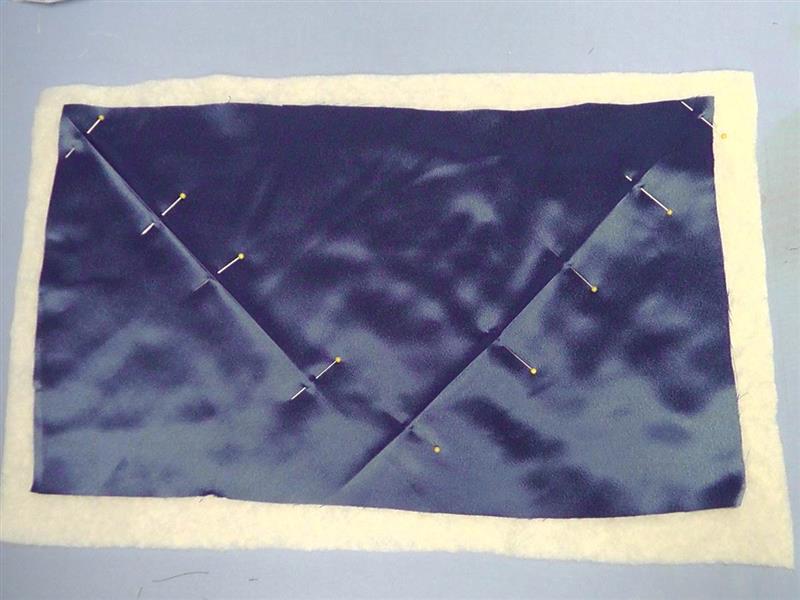
Place the fabric right side up centering it over the batting and pin the two together along the creased lines.
(Click Image to Enlarge)
Step 11:
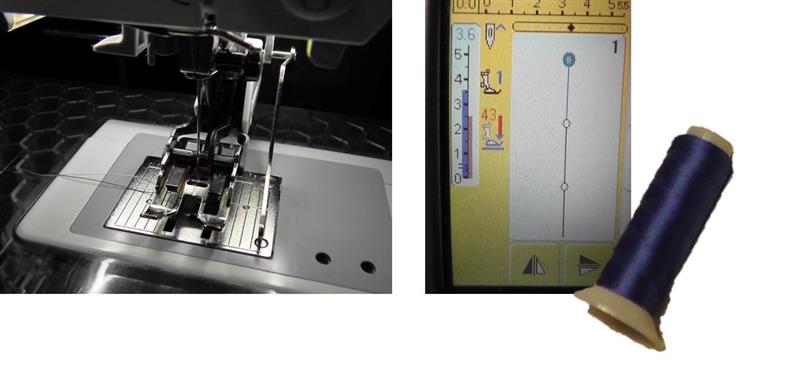
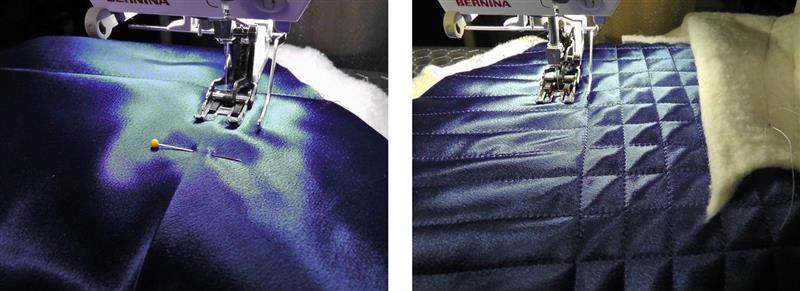
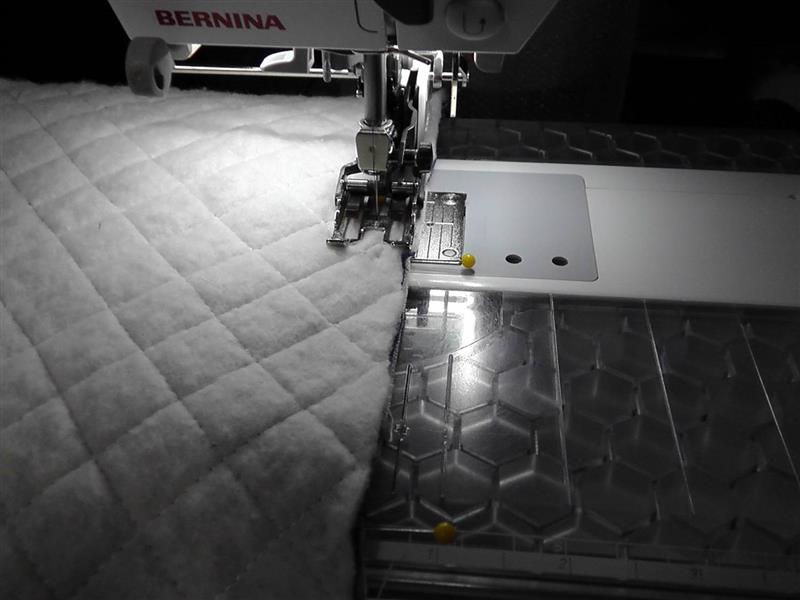
A walking foot for the machine will help feed the fabric and batting evenly preventing wrinkles in the fabric during the quilting process. Set the stitch length to 3.5mm (a long stitch length will cause the light to reflect off the thread) and place the royal blue embroidery thread on the machine (use the embroidery bobbin thread or wind a bobbin of embroidery thread). Set the guide of the walking foot 1” from the center point of the needle.
(Click Image to Enlarge)
Step 12:
Beginning at one corner, carefully and slowly stitch along the creased line removing the pins as you sew. Repeat for the other creased line. After the first lines are stitched, stitch the remaining rows 1” apart using the guide on the foot along the last line stitched to keep the rows spaced evenly.
(Click Image to Enlarge)
Step 13:
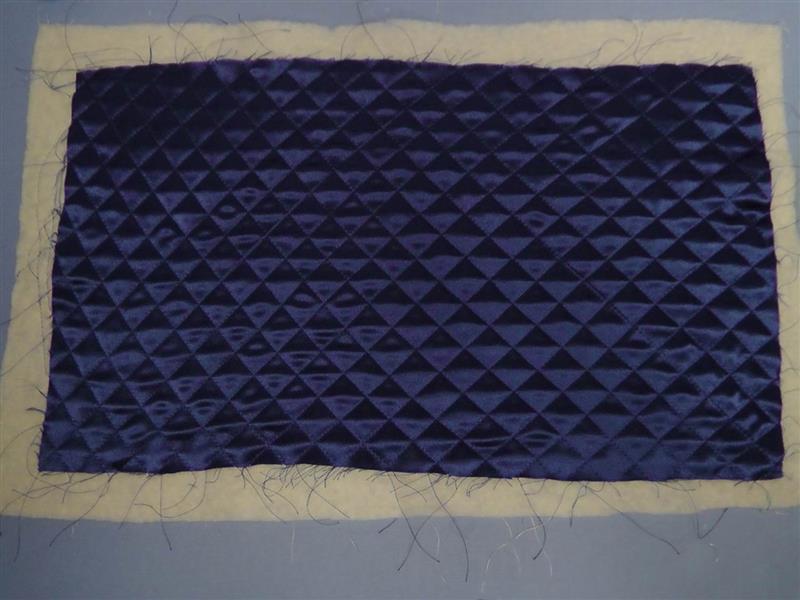
Quilt the entire piece of fabric, creating a diamond quilting pattern.
(Click Image to Enlarge)
Step 14:
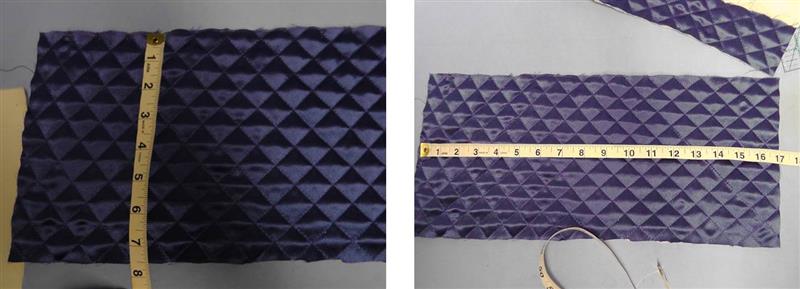
Trim the quilted fabric 7 ½” high by 17” wide. Use the diamond pattern to cut the fabric evenly.
(Click Image to Enlarge)
Step 15:
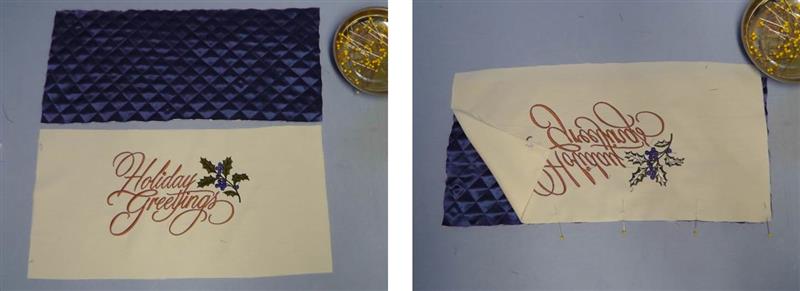
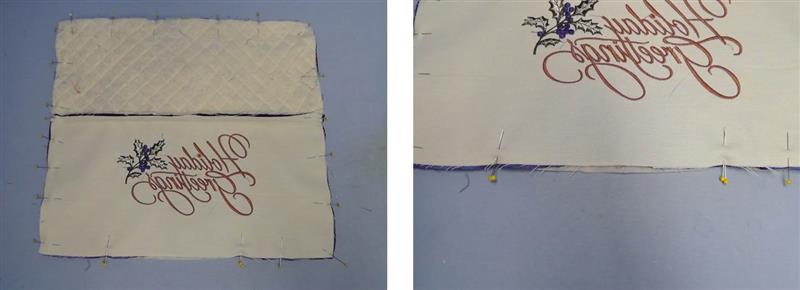
Place the blue quilted fabric right side up on a flat surface with the embroidered fabric right side up below it. To sew the pieces together, flip the embroidered fabric over the quilted fabric, right sides together and pin.
(Click Image to Enlarge)
Step 16:
Sew the seam using a ½” seam allowance.
(Click Image to Enlarge)
Step 17:
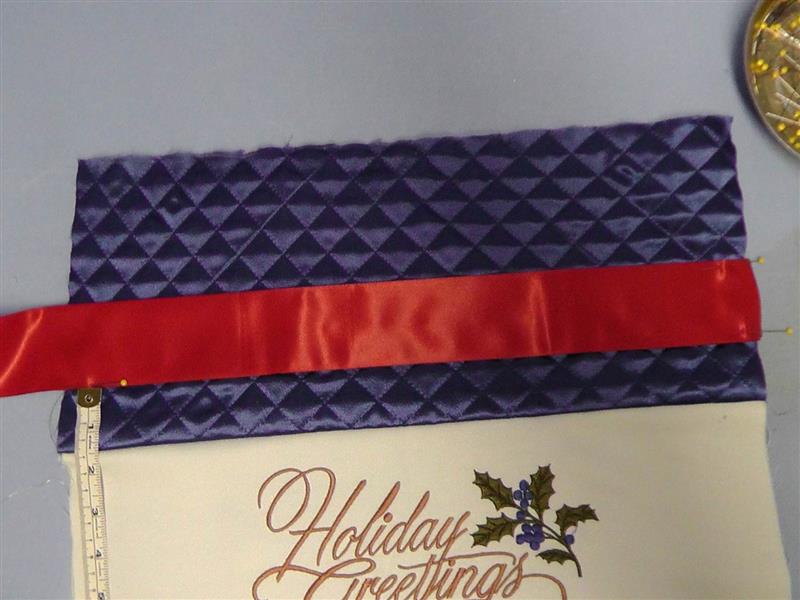
Cut a piece of ribbon 18” wide and pin it to the edges of the quilted fabric. (Initially it was measured up 1 ½” but was later adjusted higher up after the bow was added.)
(Click Image to Enlarge)
Step 18:
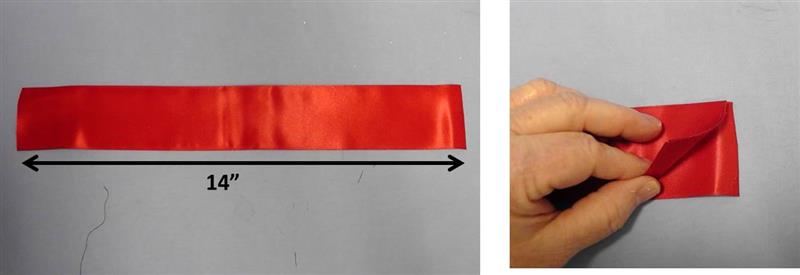
Cut ribbon for a bow 14” long. To create a seam, place right sides together matching the cut edges.
(Click Image to Enlarge)
Step 19:
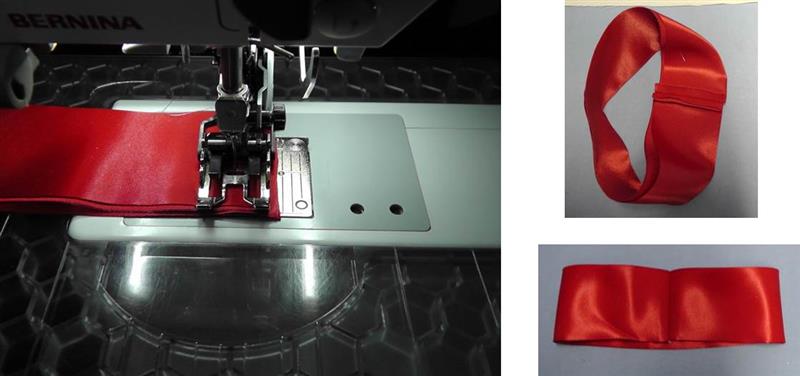
Sew a ¼” seam, press the seam, turn the ribbon right side out and center the seam on the bow.
(Click Image to Enlarge)
Step 20:
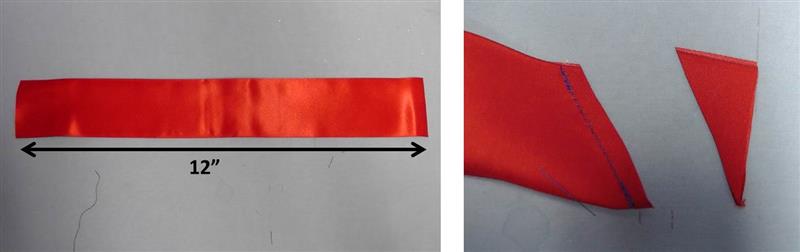
To make the ties, cut a piece of ribbon 12” long. Place right sides together and sew a seam angled from about 1” in from the outer edge at the top to the corner point. Trim the seam to ¼”. Repeat for the other edge.
(Click Image to Enlarge)
Step 21:
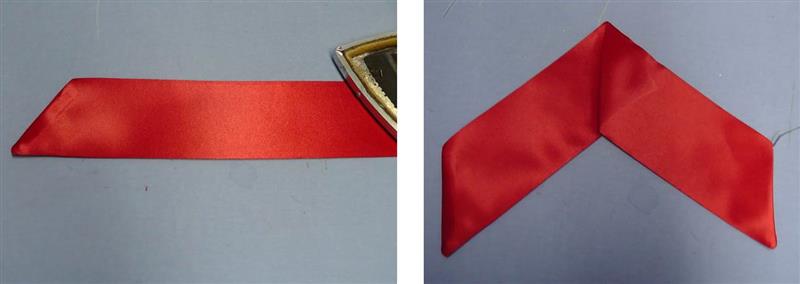
Turn the tie right side out and press the ends well. Fold the tie in half to form a miter.
(Click Image to Enlarge)
Step 22:
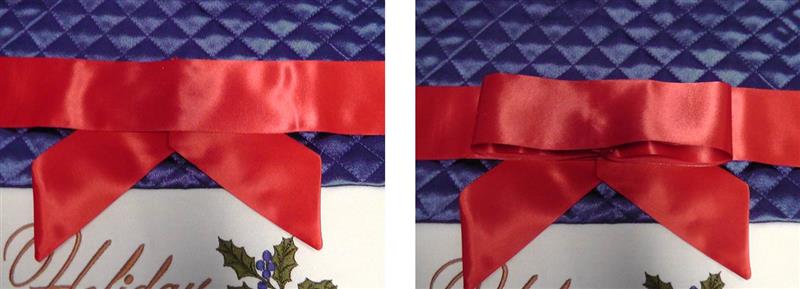
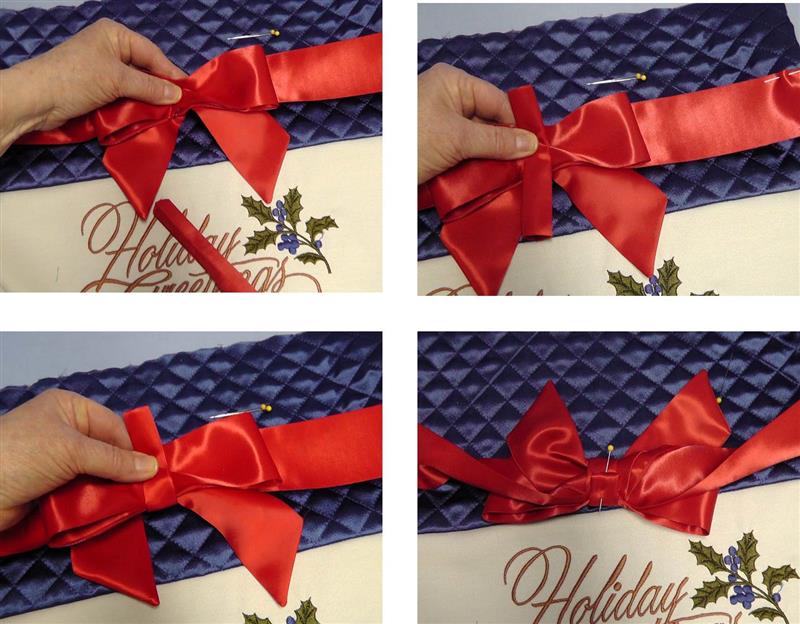
Slide the tie under the halfway point of the sash and then add the bow on top.
(Click Image to Enlarge)
Step 23:
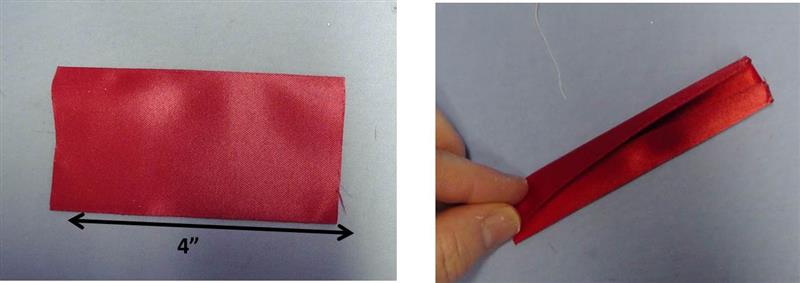
Cut a piece of ribbon 4” long. Press the ribbon in thirds lengthwise to create a knot.
(Click Image to Enlarge)
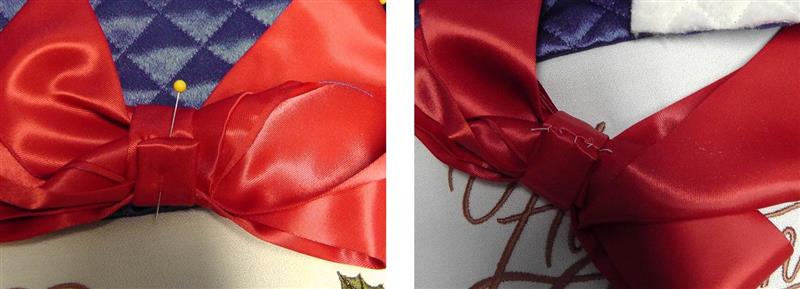
Step 24:
Wrap the knot around the bow, tie and sash, folding under the raw edge and pinning at the back.
(Click Image to Enlarge)
Step 25:
Hand-stitch the knot in place.
(Click Image to Enlarge)
Step 26:
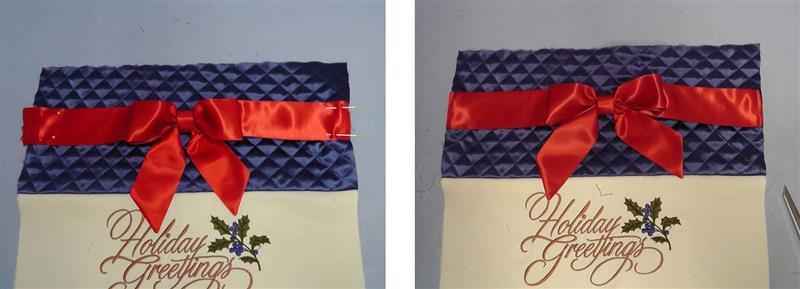
Adjust the ribbon and sash to the desired position on the quilted fabric, pinning the ends in place. For this project, the bottom of the ribbon was place 2 ½” up from the seam and the sash was pulled up slightly smaller than the width of the pillow (this creates tension to keep the sash in place when the pillow is stuffed). Baste the ends of the ribbon to the quilted fabric.
(Click Image to Enlarge)
Step 27:
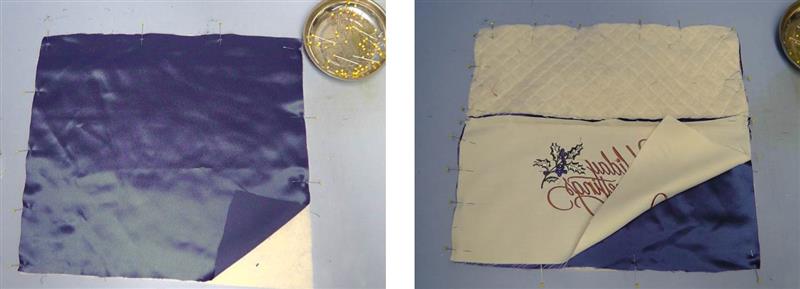
Cut a piece of royal blue fabric 17” x 17” for the pillow back. Cut a piece of batting the same size. Lay the royal blue fabric on top of the batting and pin the two together around the edges. Place the embroidered front, right sides together, over the pillow back fabric. Option: The back fabric may also be quilted like the top was. Just cut the fabric and batting larger, quilt the fabric, then cut to size.
(Click Image to Enlarge)
Step 28:
Pin along all the edges and leave an opening at the bottom through which to insert the pillow form.
(Click Image to Enlarge)
Step 29:
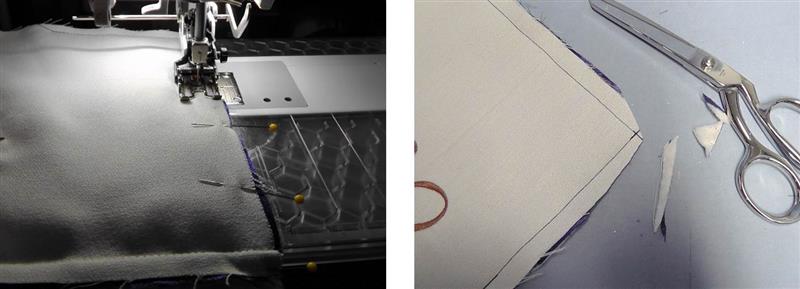
Sew around the pillow using ½” seam allowances, leaving the opening at the bottom unsewn. Clip and trim the corners to eliminate some bulk.
(Click Image to Enlarge)
Step 30:
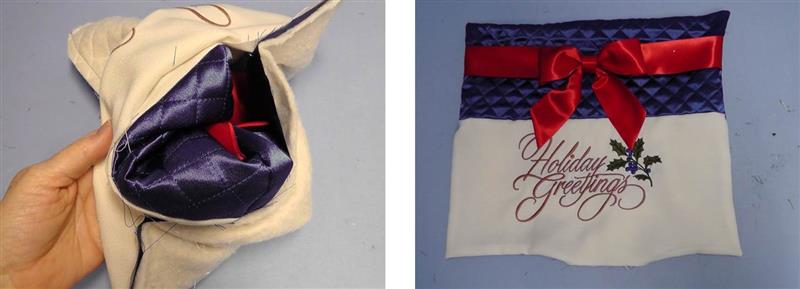
Turn the pillow right side out through the opening, forming the corners. Press the seams.
(Click Image to Enlarge)
Step 31:
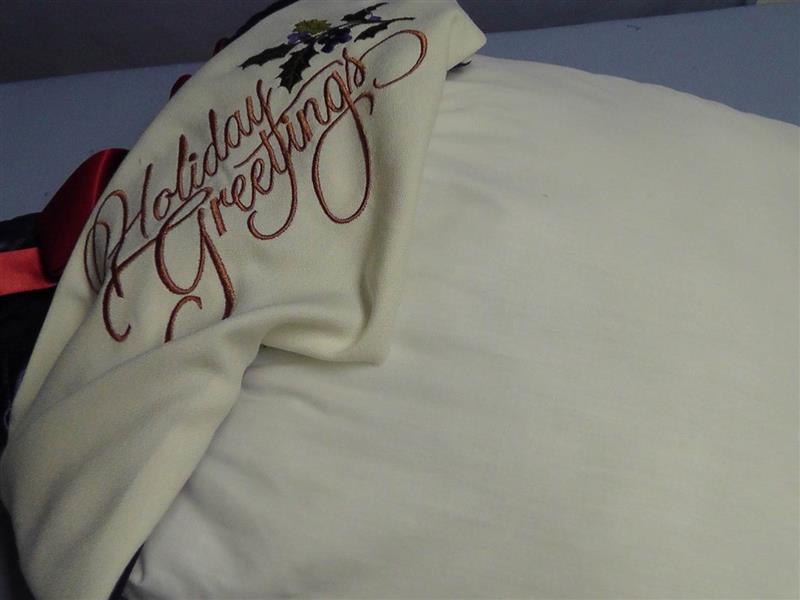
Insert the pillow form through the bottom opening.
(Click Image to Enlarge)
Step 32:
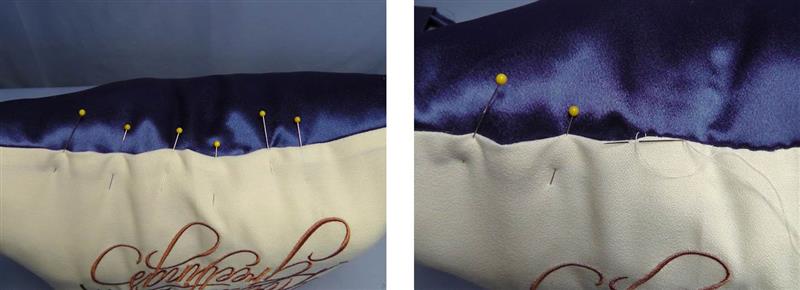
At the opening, fold back a ½” seam on the cream fabric and pin it over the blue pillow back; hand sew the opening closed.
(Click Image to Enlarge)
Step 33:
The pillow looks like the first gift wrapped for the season. Find a special place for your new pillow to give happy “Holiday Greetings”.
Ramona Baird has been in the embroidery industry for over 23 years. She and her husband owned a commercial and retail embroidery store in Arizona for many years. She is an experienced digitizer having been mentored by award-winners Pat Williams and Lindee Goodall. Ramona is a contributor to “Creative Machine Embroidery” magazine having 5 covers to her credit. Ramona has worked for Wilcom America and served many years as Education Director for the American Sewing Guild. With a degree in fashion design, she is able to design and execute patterns which Pat Williams says are “out of the box” in creativity and application. Ramona likes to challenge the boundaries of embroidery and bring new and exciting designs, ideas, and projects to EmbroideryDesigns.com. She wants embroiderers of all levels to increase their skills and enjoyment in using their embroidery machine for gift-making and personal pleasure.