Border OptionsHugging border, circle, square, or rectangle — with a 3mm satin stitch.
Backing OptionsAvailable with iron-on, sew-on, or velcro backing.
Fast ShippingShipped quickly from the USA.
Free Online Tools
Powerful embroidery utilities that save time and prevent costly mistakes.
Stitch AssistantRECOMMENDED
Get the exact stabilizer, machine settings, needle, and thread color sequence for every embroidery design you purchase — based on that design's stitch density, dimensions, and color count.
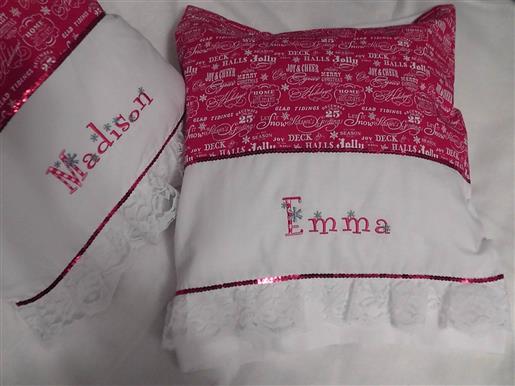
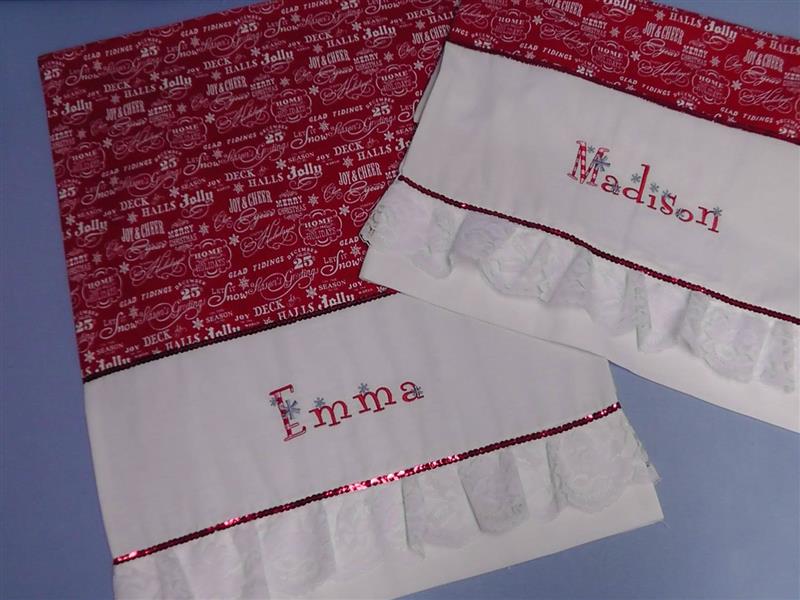
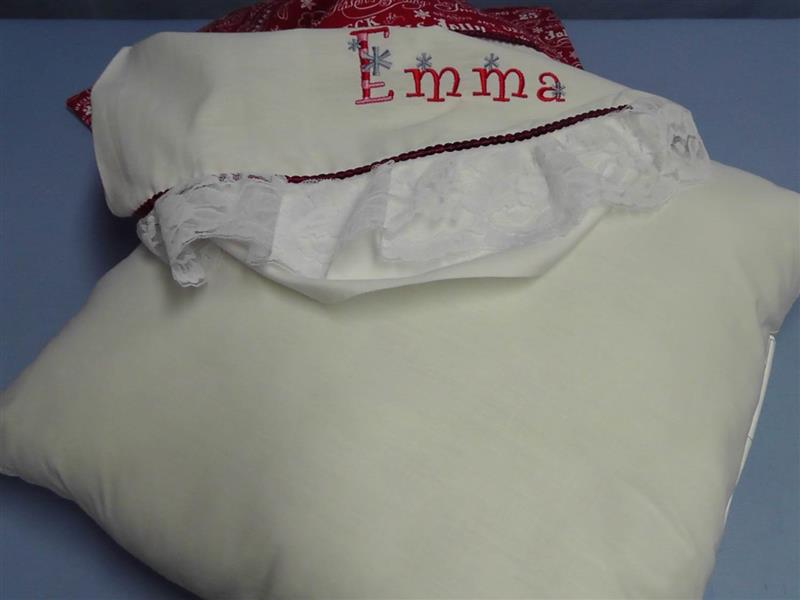
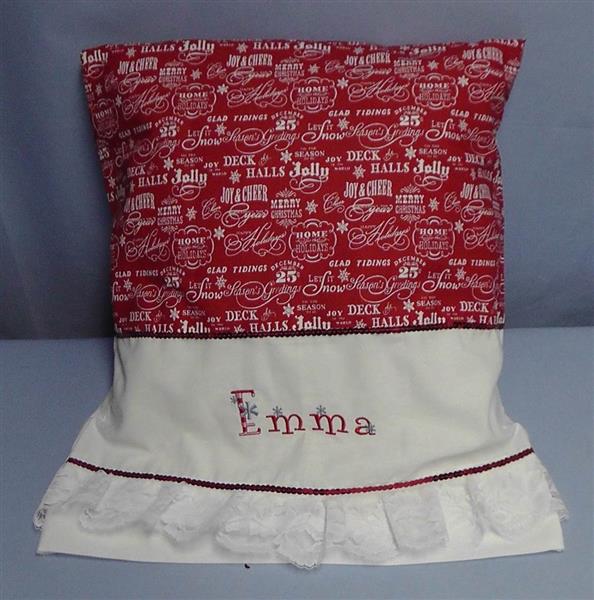
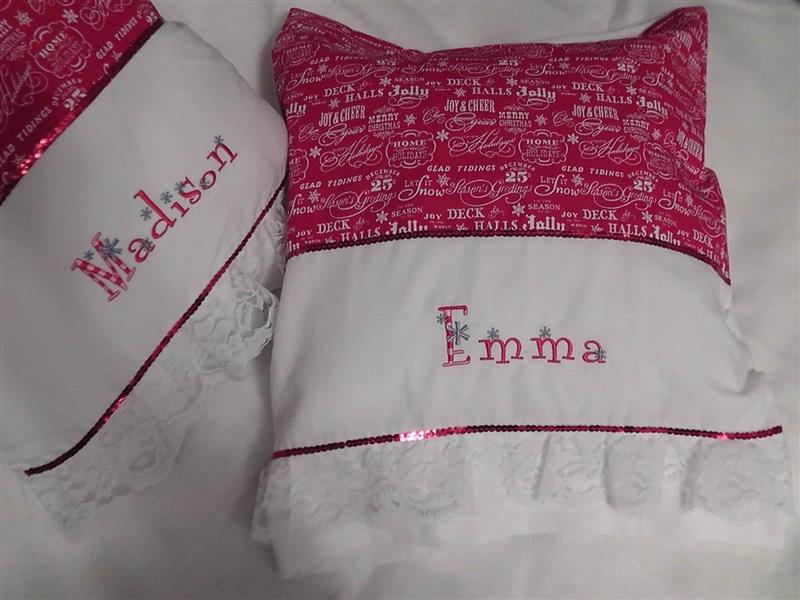
Create personalized pillowcases with festive charm, using the 'Stripes and Snowflakes Font' for a unique touch. Decorate with lace, sequin trim, and Christmas-themed fabric to enhance the holiday spirit. Step-by-step instructions are included.
Step
of
Personalized Christmas Pillowcases
By Ramona Baird
It is easy to create names using this fun and whimsical font design pack. Simply insert each letter needed into the software, kern and align the letters, print out the template and embroider the purchased pillowcase. The pillowcase is cut down to fit a smaller child-sized pillow, trimmed with holiday themed fabric, lace and sequin trim. Any child would delight putting their head down on this pillow case while sweetly dreaming of Santa’s arrival.
Step 1:
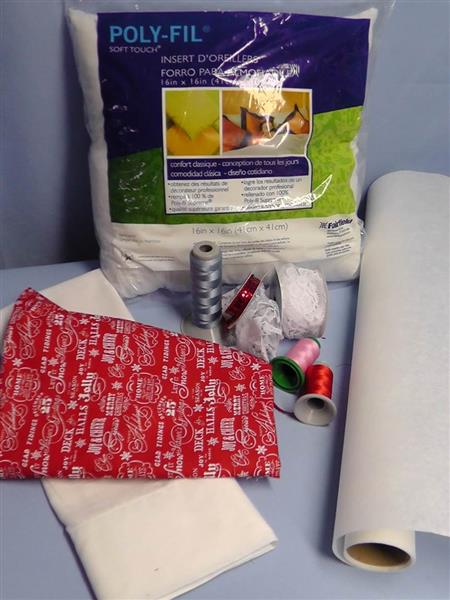
Gather the supplies and read through all the instructions before beginning. Pre-wash the pillowcase to remove any sizing left by the manufacturer. Measure the purchased pillow. In this project, though the bag said 16” x 16”, the pillow actually measured larger so adjustments were made in cutting the fabrics as the pillowcase was made. Make any adjustments necessary for the pillow you will be using.
(Click Image to Enlarge)
Step 2:
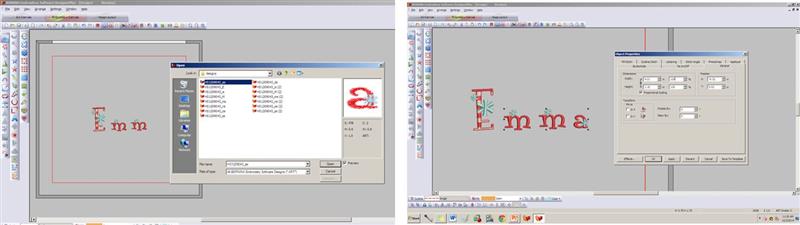
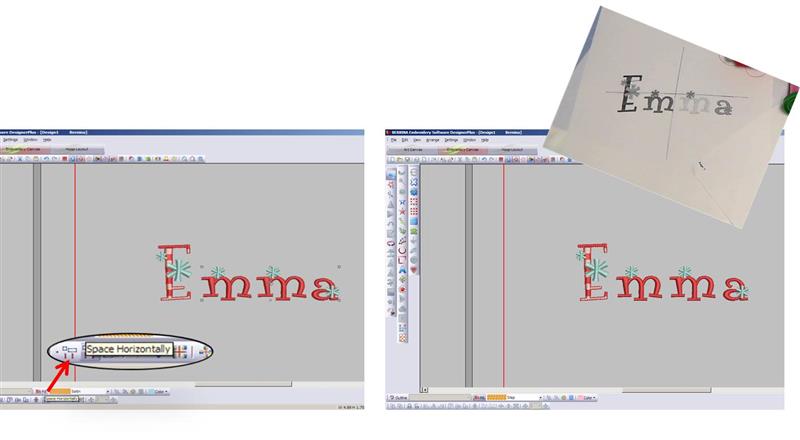
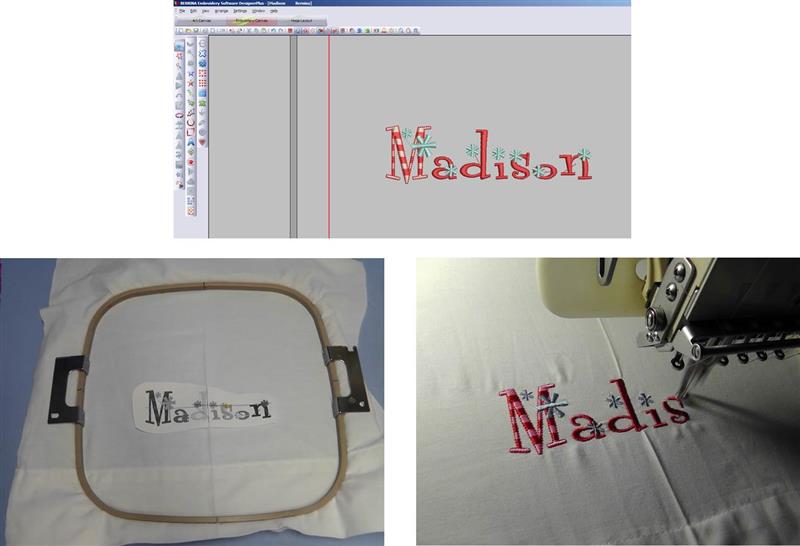
Open the software. Insert the lettering designs needed to create the name you will be making. For the project, the name “Emma” was used. The capital “E” was inserted into the software as was the small “m“ and small “a”, Generally move the letters into position and open up the property window to be sure the entire name will fit into the hoop for the machine.
(Click Image to Enlarge)
Step 3:
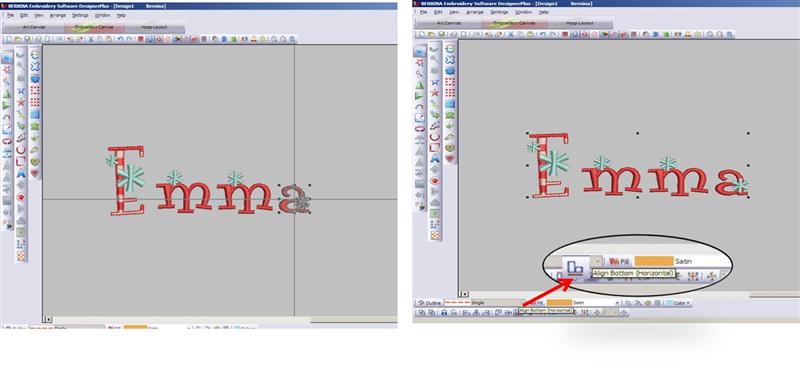
Select each letter and “kern” (move) it along the baseline into position. Select the entire name and using the “align bottom” icon, align all the letters of the name to the bottom base line.
(Click Image to Enlarge)
Step 4:
Select all the letters and choose the “Space Horizontally” icon to evenly space the kerned letters. When you are happy with the way the name looks, do a “slow redraw” in the software to see how the letters will sew out at the machine. Print a paper design template to aid aligning the design on the pillowcase and at the machine. Be sure to save the design.
(Click Image to Enlarge)
Step 5:
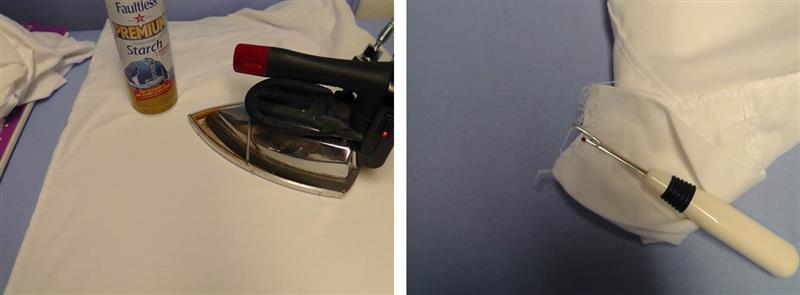
Press the pre-washed pillowcases, using spray starch to help make them crisp. Use a seam ripper to take apart all three seams (sides and bottom). Set aside the pillowcase back until it is needed.
(Click Image to Enlarge)
Step 6:
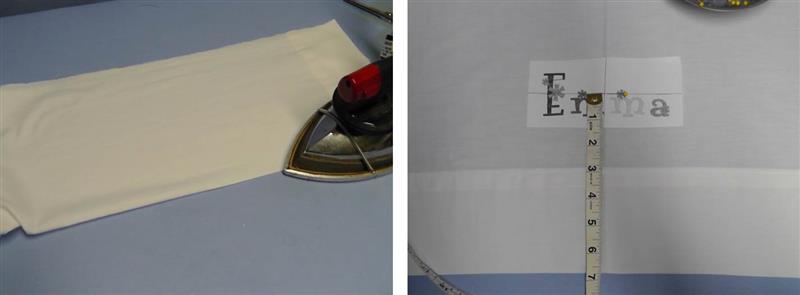
Fold the pillowcase-front in half lengthwise and lightly press in a crease. Use the printed template and align and center the crosshairs along the center fold line, 3” up from the top of the cuff as shown.
(Click Image to Enlarge)
Step 7:
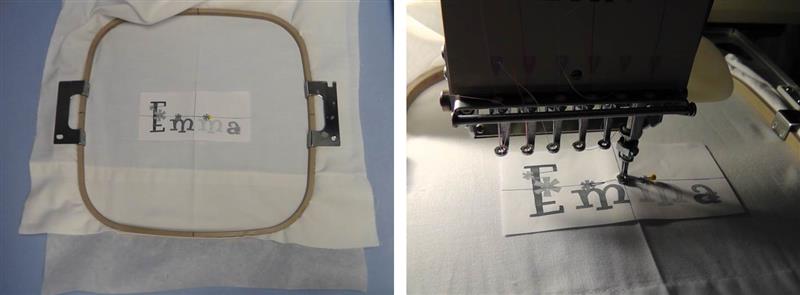
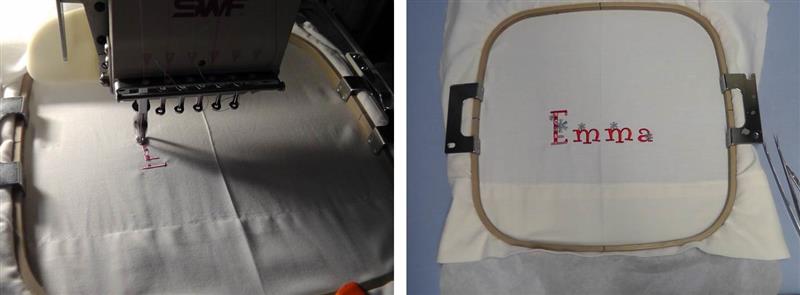
Hoop the pillowcase front with one layer of tearaway stabilizer. Align the needle to the center alignment point of the printed template.
(Click Image to Enlarge)
Step 8:
Remove the pin and paper template and stitch the design following the color sequence. Trim any jump stitches while the fabric is still in the hoop.
(Click Image to Enlarge)
Step 9:
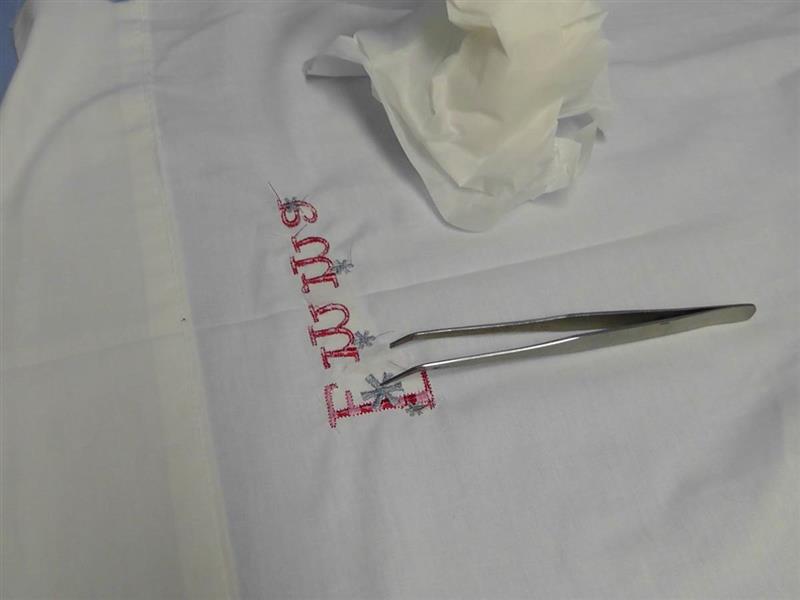
Remove the fabric from the hoop and carefully tear away the excess stabilizer using needle nose tweezers to remove the stabilizer from inside the letters.
(Click Image to Enlarge)
Step 10:
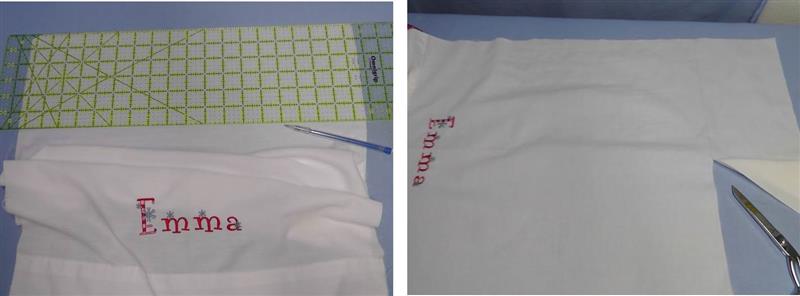
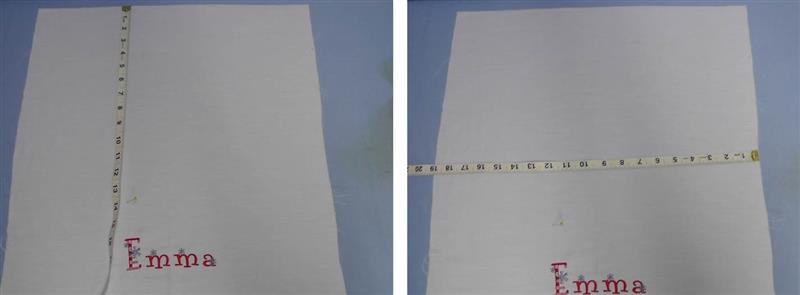
Note: From here, adjust the measurements for the project using the pillow you have chosen if it differs from the project measurements. The standard pillowcase is too long, so it needs to be cut down to the size of the pillow. Measure down and cut 6” off the pillowcase front bottom edge.
(Click Image to Enlarge)
Step 11:
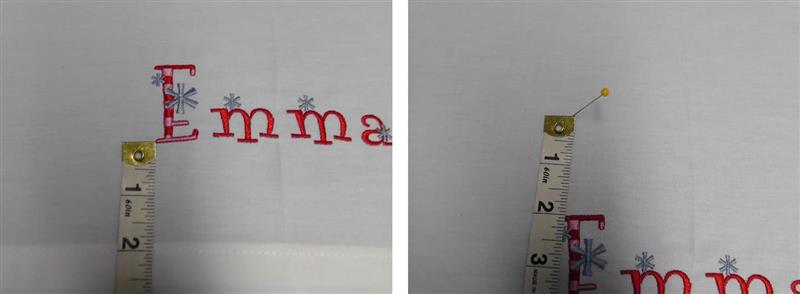
To be sure the embroidered name remains centered between the lace and themed fabric, measure the distance between the bottom of the lettering and the stitching for the pillowcase cuff. Measure the same amount from the top of the tallest letter and place a pin.
(Click Image to Enlarge)
Step 12:
Measure from the bottom edge of the pillowcase to the last pin placed and note the measurement. Measure the width of the pillowcase (these measurements will already include seam allowances).
(Click Image to Enlarge)
Step 13:
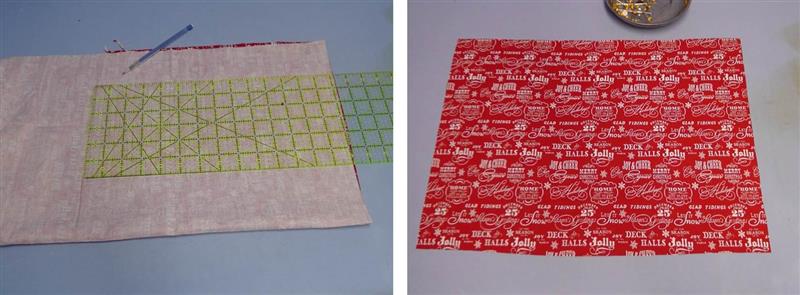
Measure and cut the themed fabric according to the measurements in step 12, adding ¼” to the length measurement for a hem to press under.
(Click Image to Enlarge)
Step 14:
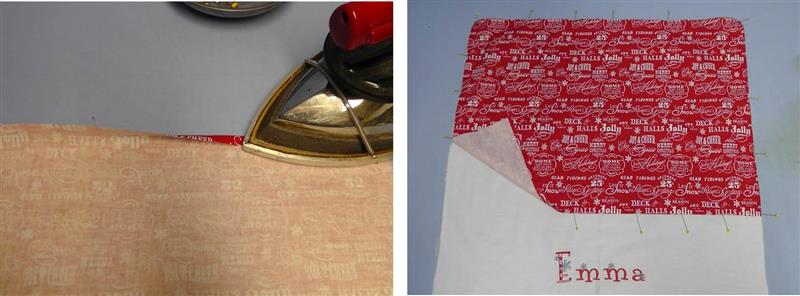
Press under the ¼” hem at the bottom of the themed fabric. Pin the themed fabric in place along all four edges, matching cut edges and having the folded edge above the name.
(Click Image to Enlarge)
Step 15:
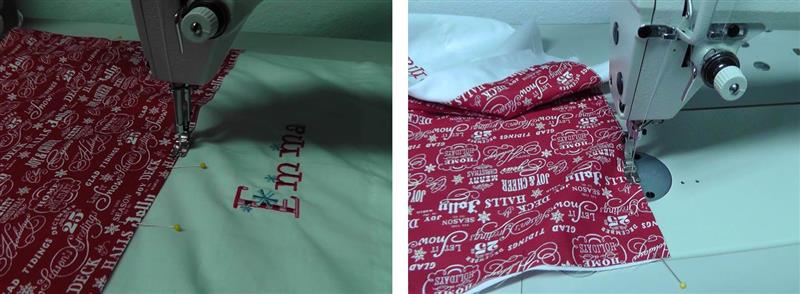
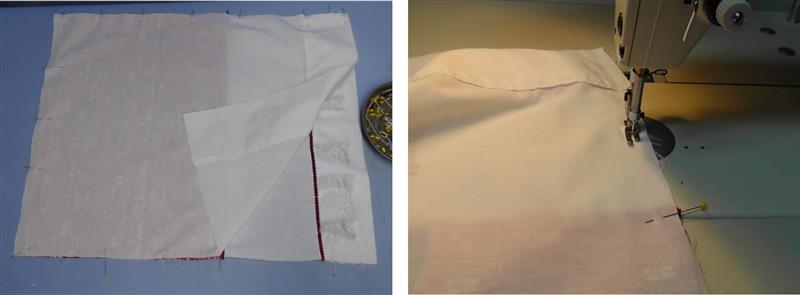
Baste along all four edges to stitch the themed fabric to the pillowcase.
(Click Image to Enlarge)
Step 16:
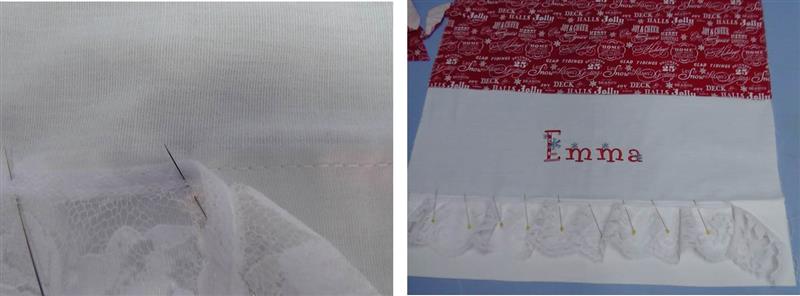
Cut one piece of lace trim slightly longer than the width measurement of the pillowcase. Center the top edge of the lace over the stitching line for the cuff of the pillowcase and pin in place.
(Click Image to Enlarge)
Step 17:
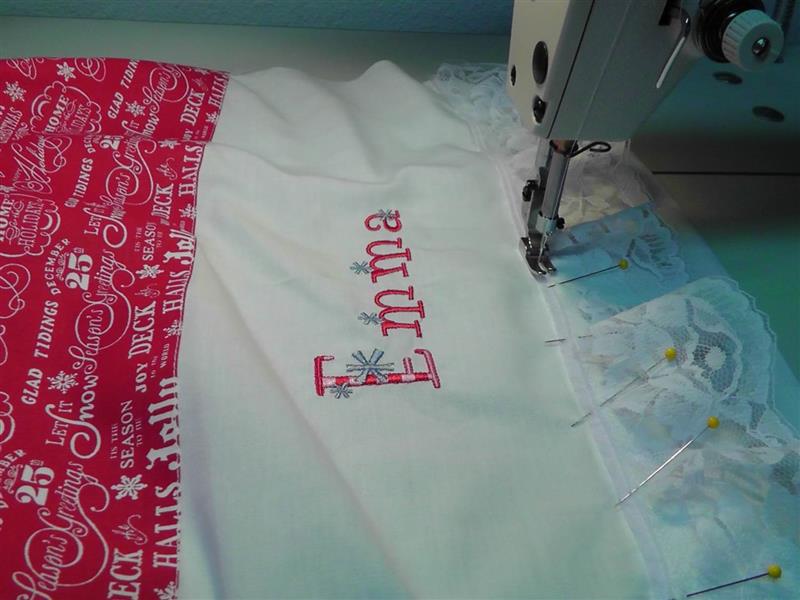
Baste the lace in place as pinned.
(Click Image to Enlarge)
Step 18:
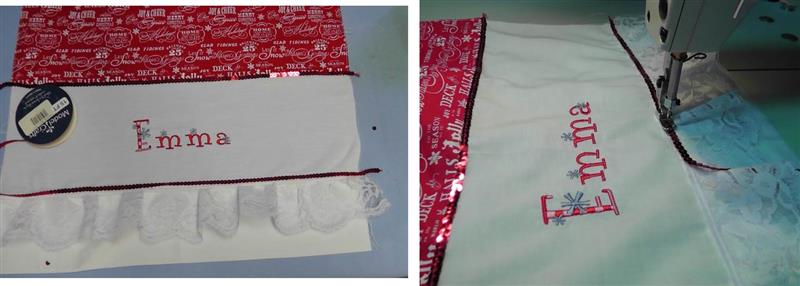
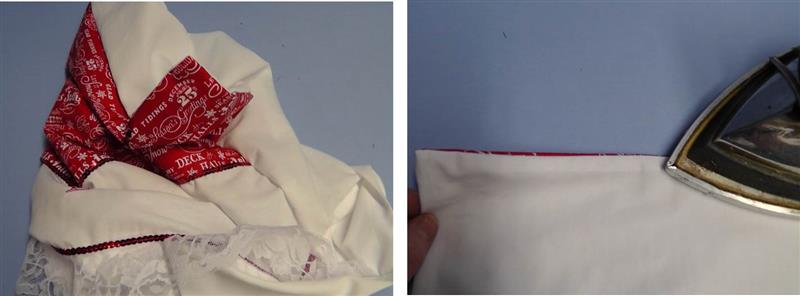
Cut two pieces of the red sequin trim slightly longer than the width measurement of the pillowcase; one to stitch over the folded edge of the themed fabric and one to be stitched over the edge of the lace. Place red embroidery thread on the machine to match the sequins. Stitch the sequins in place.
(Click Image to Enlarge)
Step 19:
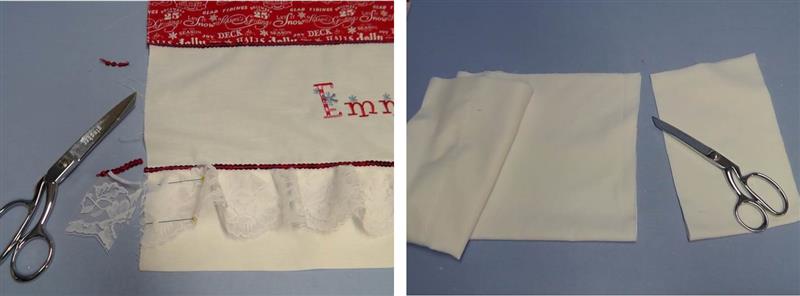
Trim off the excess lace and sequin trims even with the edge of the pillowcase cut edge. Measure and cut off the same amount from the pillowcase back at the bottom that was cut off the front.
(Click Image to Enlarge)
Step 20:
With right sides together, pin the pillowcase back to the pillowcase front, matching cuffs, bottoms and sides. Place the pins along the bottom and each side, leaving the cuff edge unpinned. Sew along each side and bottom, stitching the front and back pillowcase fabrics together.
(Click Image to Enlarge)
Step 21:
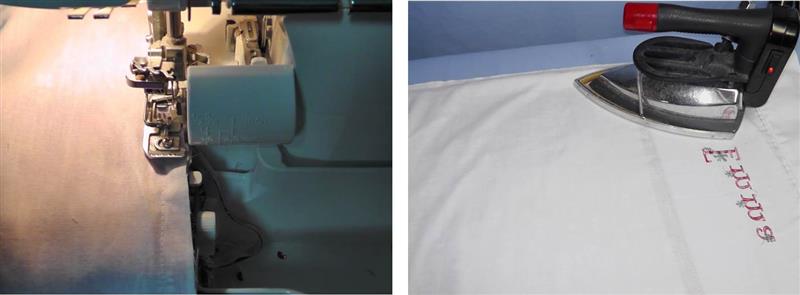
Serge to finish the seam allowances. Press the seams and the body of the pillowcase.
(Click Image to Enlarge)
Step 22:
Turn the pillowcase right side out. Press along the seams well, rolling the front slightly to the back side.
(Click Image to Enlarge)
Step 23:
Follow the same steps for creating other pillowcases.
(Click Image to Enlarge)
Step 24:
The pillowcases fold flat for easy storage from year to year.
(Click Image to Enlarge)
Step 25:
To enjoy the pillowcases, simply insert the pillow into the open end of the pillow case.
(Click Image to Enlarge)
Step 26:
What a great gift idea for a special child in your life. Adapt the themed fabrics and trims to personalize them to the child.
(Click Image to Enlarge)
Step 27:
These pillowcases will be a wonderful reminder each year of your special and thoughtful gift.
Ramona Baird has been in the embroidery industry for over 23 years. She and her husband owned a commercial and retail embroidery store in Arizona for many years. She is an experienced digitizer having been mentored by award-winners Pat Williams and Lindee Goodall. Ramona is a contributor to “Creative Machine Embroidery” magazine having 5 covers to her credit. Ramona has worked for Wilcom America and served many years as Education Director for the American Sewing Guild. With a degree in fashion design, she is able to design and execute patterns which Pat Williams says are “out of the box” in creativity and application. Ramona likes to challenge the boundaries of embroidery and bring new and exciting designs, ideas, and projects to EmbroideryDesigns.com. She wants embroiderers of all levels to increase their skills and enjoyment in using their embroidery machine for gift-making and personal pleasure.