Border OptionsHugging border, circle, square, or rectangle — with a 3mm satin stitch.
Backing OptionsAvailable with iron-on, sew-on, or velcro backing.
Fast ShippingShipped quickly from the USA.
Free Online Tools
Powerful embroidery utilities that save time and prevent costly mistakes.
Stitch AssistantRECOMMENDED
Get the exact stabilizer, machine settings, needle, and thread color sequence for every embroidery design you purchase — based on that design's stitch density, dimensions, and color count.
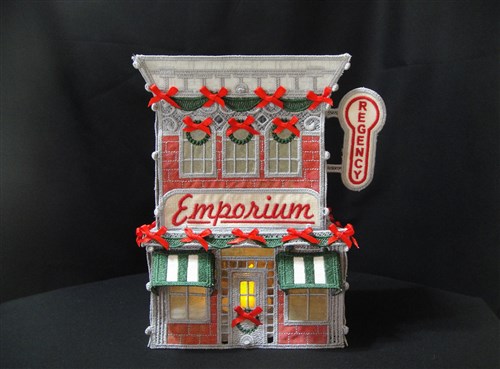
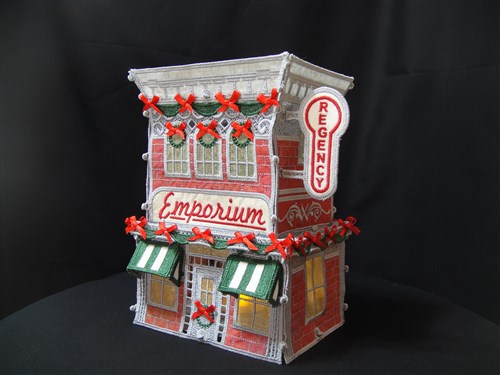
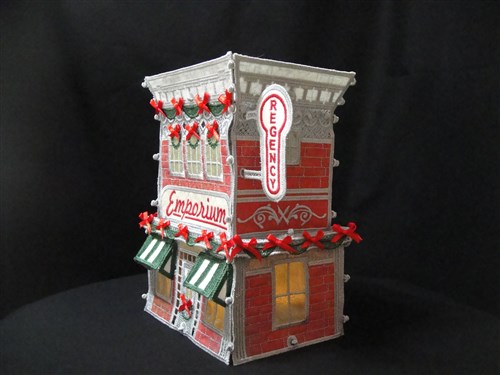
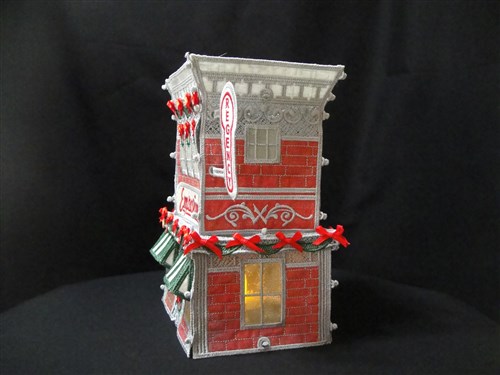
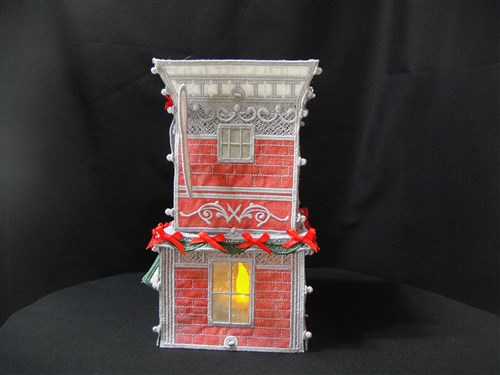
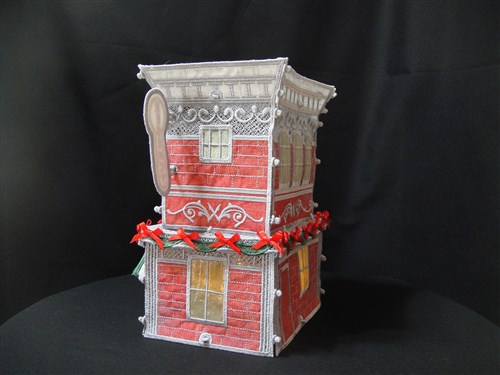
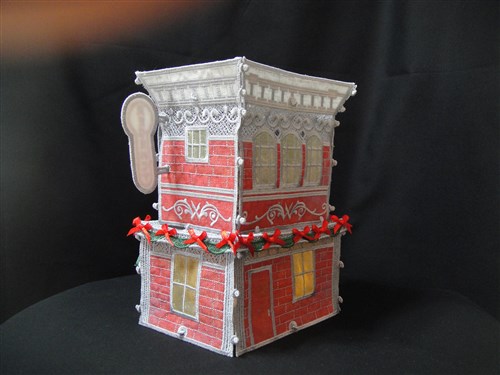
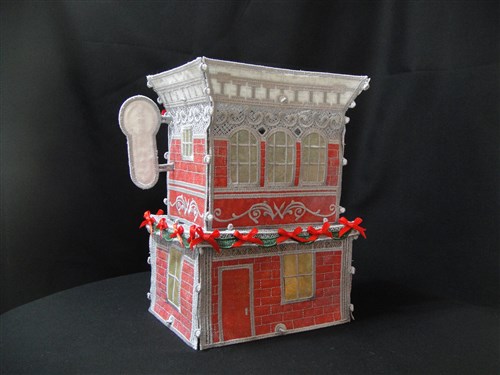
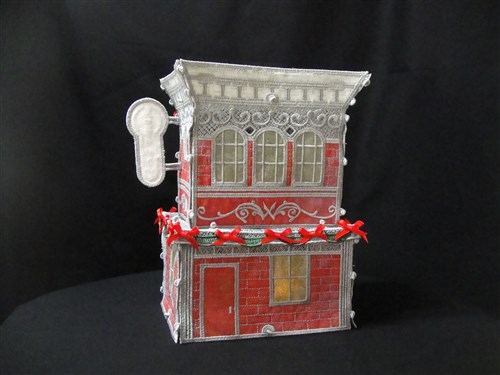
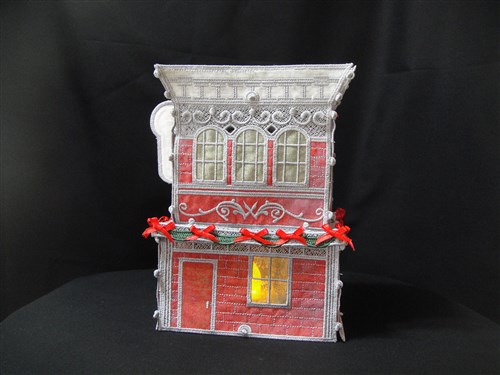
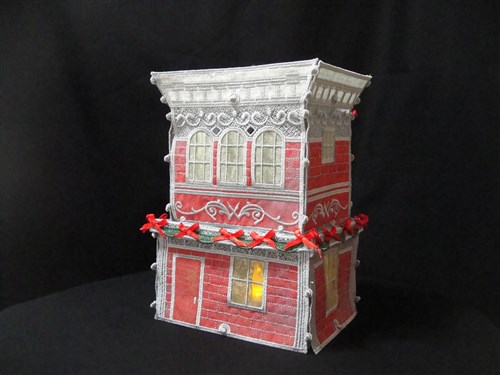
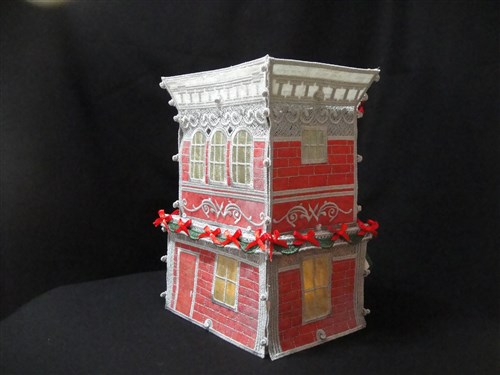
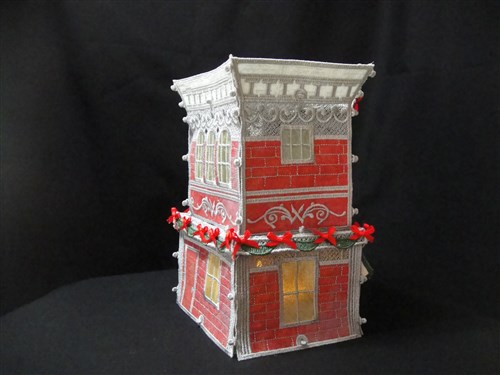
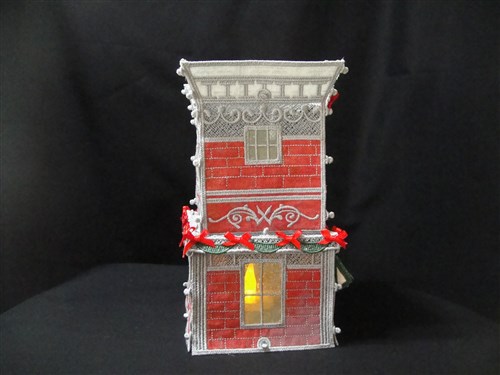
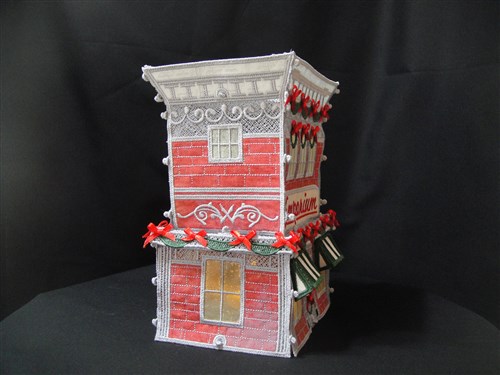
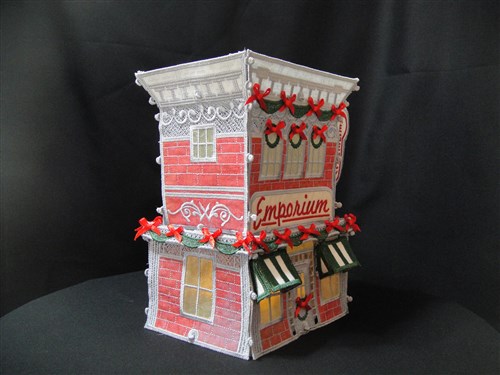
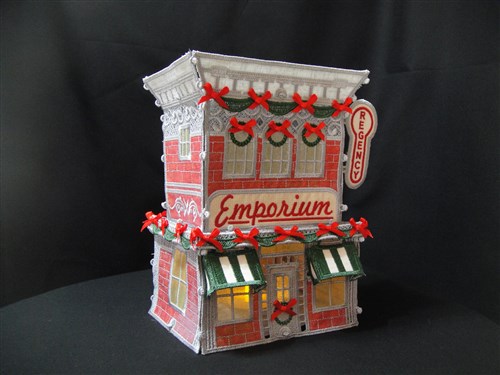
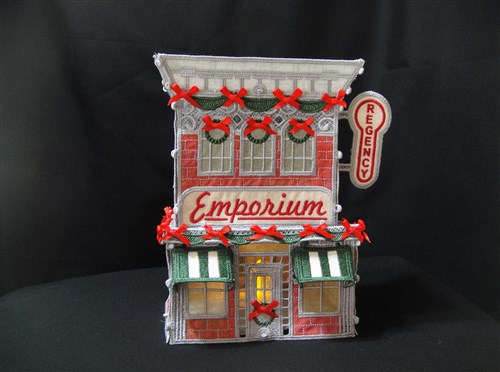
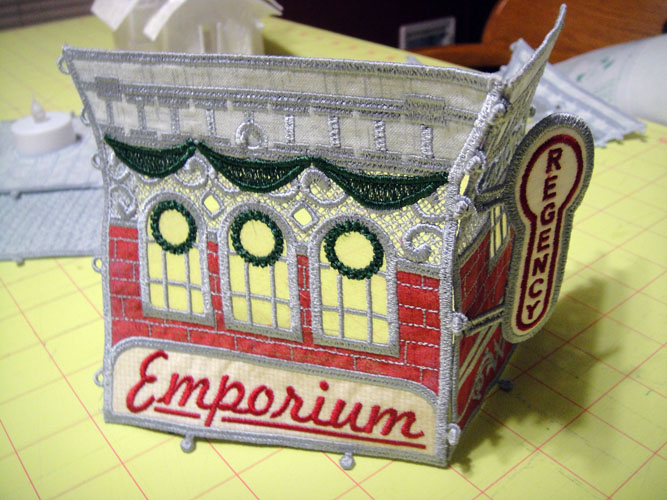
Create a charming two-story Victorian Emporium for your Christmas village. This intricate applique piece adds a touch of elegance and holiday spirit to your festive decorations. Step-by-step instructions are included.
Step
of
Applique Victorian Emporium Decoration
By Pat Williams
As this emporium is done in colored thread we want to talk about bobbins. Most embroidery
machines required a lighter weight thread in the bobbin such as 60 or 90 wt. Therefore
it is recommended that you purchase pre-wound bobbins in the color you will be sewing
the lace portion of this emporium. As an alternative you can purchase 60 wt. thread
to match your top thread and wind your bobbins from that. Using regular 40 wt. embroidery
thread to wind the bobbins will result in a lace that is too thick. Do use polyester
thread for the top thread in this project. Rayon is too soft for this type of work.
Use two layers of fibrous water soluble stabilizer for all hoopings.
Step 1:
Prepare your fabric for the appliques by cutting 3 strips of the emporium fabric
6” x 22”; cut one strip 6” x 22” of the grey; 1 small strip
approximately 6” x 3” for the front sign of tan fabric; 1 rectangle
of white fabric 4” x 3” for the side sign. Spray these pieces with Magic
Sizing or Best Press and iron; do this 3 or 4 times to each piece. The more sizing
you add to each of these fabrics will result in less fraying of the applique fabric
and will also make them easier to cut. After adding the sizing, back each of these
pieces with Pellon Craft Fuse 808 following the manufacturer’s instructions.
You will also need a strip of yellow organza. You do not have to pre-treat or apply
stabilizer to the organza.
Step 2:
All of the sections of the emporium are made in the same manner. We will go step
by step through this first section and then following the color charts for each
other section you will follow apply the same techniques. Load design FSLEUF into
your machine. Have grey polyester thread in the top and bobbin of the machine.
Step 3:
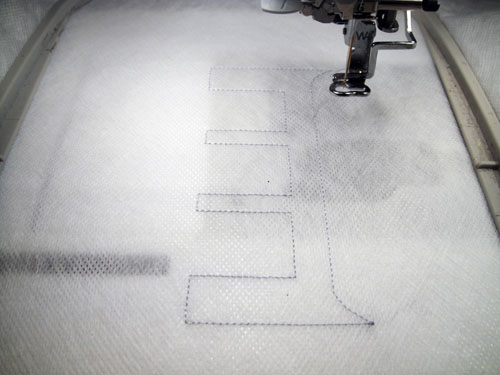
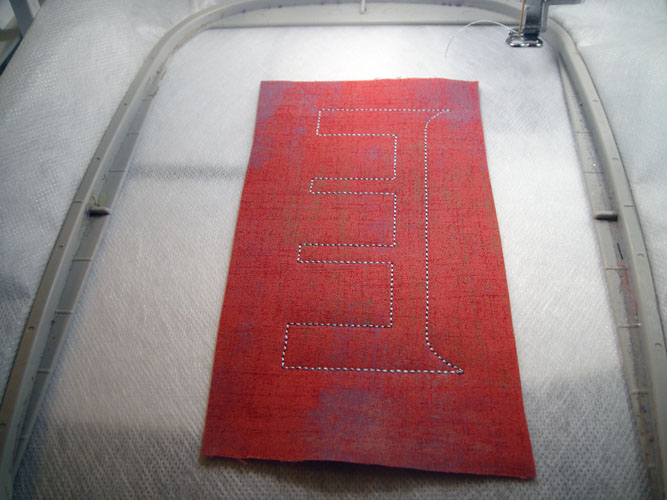
Hoop two layers of fibrous water soluble stabilizer and run the 1st color stop which
is an outline of the main section of the emporium.
Step 4:
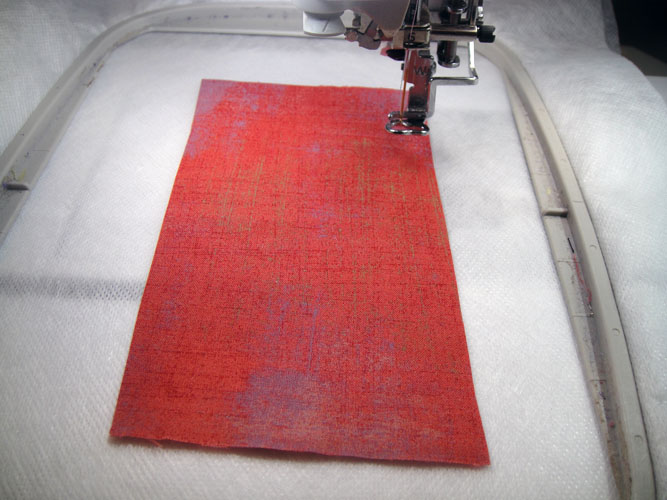
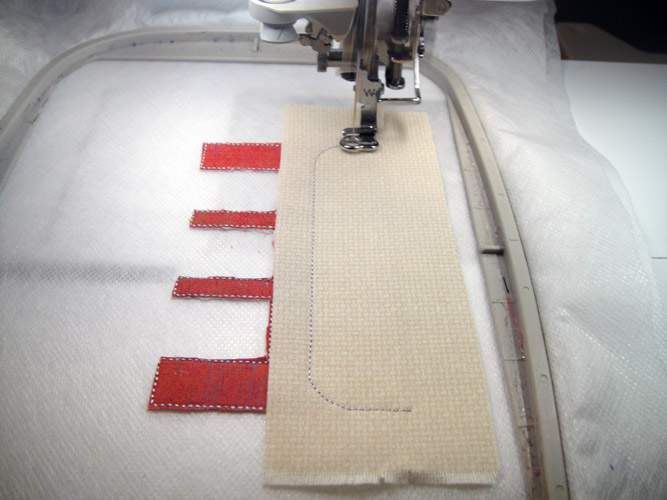
Cut a 6” x 3.5” strip off of your main fabric, spray the back with adhesive
spray and place over the outline just sewn.
(Click Image to Enlarge)
Step 5:
Run color stop 2 to tack down the main fabric.
(Click Image to Enlarge)
Step 6:
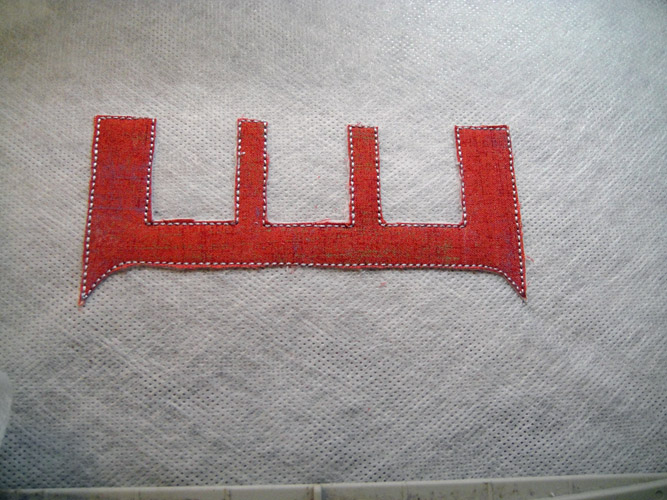
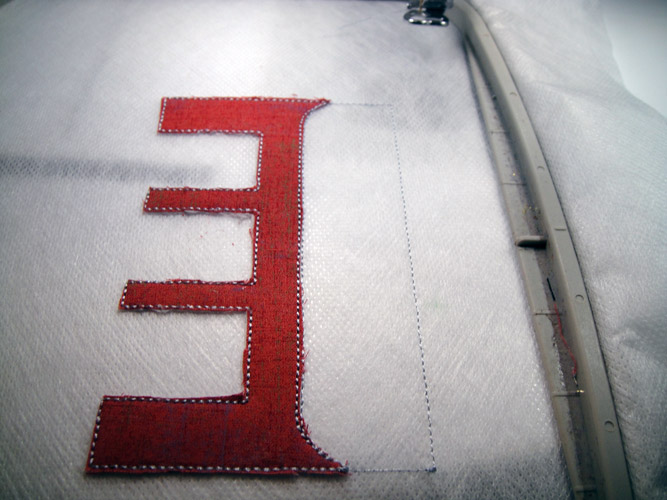
Remove the hoop from the machine. Do not unhoop. Trim the excess fabric away from
the outline as close as possible.
(Click Image to Enlarge)
Step 7:
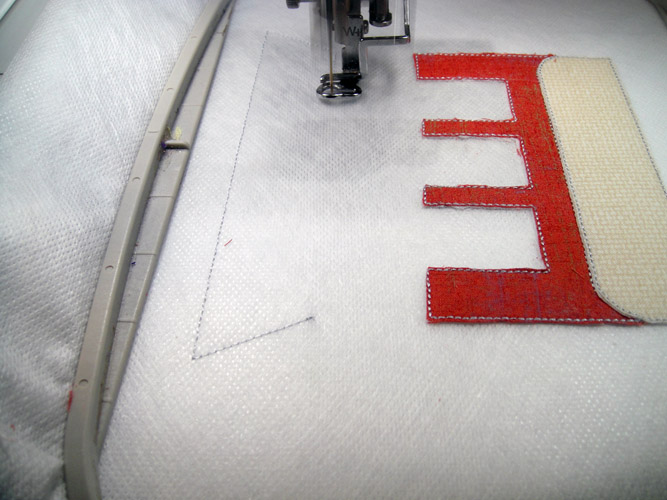
Return the hoop to the machine and run color stop 3 for the outline of the sign.
(Click Image to Enlarge)
Step 8:
Spray your sign fabric with adhesive spray and place over the outline. Run color
stop 4 to tack down the sign fabric. Trim away the excess sign fabric as close as
possible to the outline stitches.
(Click Image to Enlarge)
Step 9:
Run color stop 5 for the outline of the fascia at the top of the building. Spray
with adhesive and place the grey fabric over the outline. Run color stop 6 for the
tack down and trim.
(Click Image to Enlarge)
Step 10:
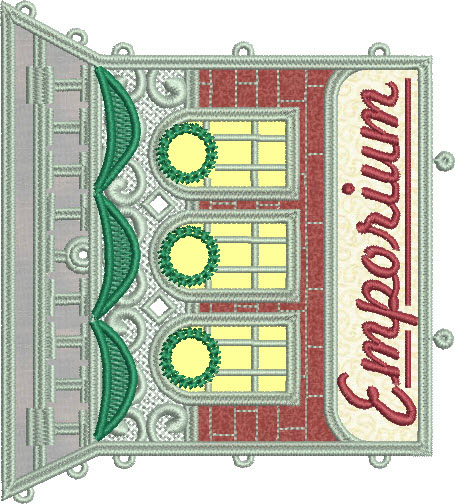
Use color stops 7 through 12 to apply the three windows in organza in the same manner.
(Click Image to Enlarge)
Step 11:
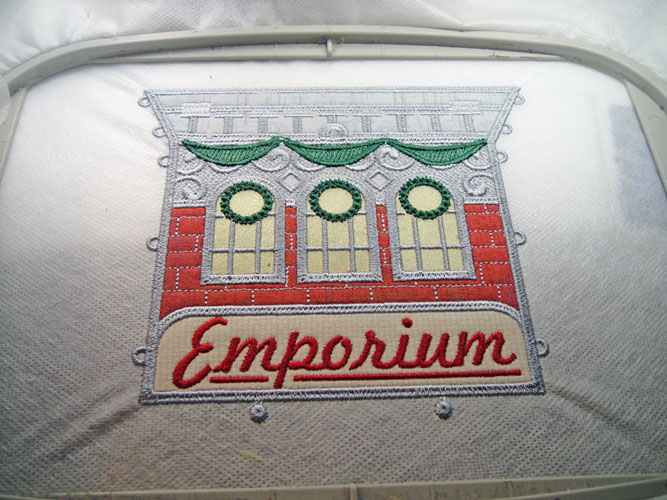
Color stop 13 will run all of the lace and borders of this top emporium section.
Step 12:
Color stop 14, switch to green thread on the top, you may leave in the grey bobbin
to stitch the banners and wreaths.
Step 13:
Color stop 15 switch to red thread to embroider the lettering on the sign.
(Click Image to Enlarge)
Step 14:
Roughly trim the shop section from the stabilizer. On the back of the work trim
any thread tails that may fall under the lace when the piece is wet so they won’t
show through the lace and window sections.
(Click Image to Enlarge)
Step 15:
Hold the completed shop section under running hot water to remove the stabilizer.
Just hold it under the water long enough to open up the lace work and holes in the
piece. We want some stabilizer left in the project to provide stiffness. Place the
section on a smooth cotton towel, blot and let dry thoroughly.
(Click Image to Enlarge)
Step 16:
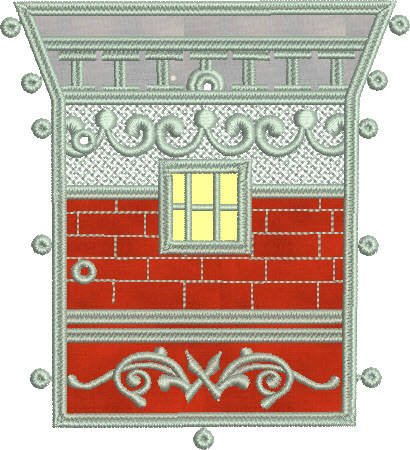
For the back top of the shop load design FSLEUB into the machine and complete as
follows;
1. Outline for brick colored fabric; spray fabric with adhesive and apply over outline
2. Tack down main fabric – trim fabric
3. Outline for first window – spray and place organza over outline
4. Tack down for first window – stitch and trim
5. Outline for second window – spray and place organza over outline
6. Tack down for second window – stitch and trim
7. Outline for third window
8. Tack down for third window – stitch and trim
9. Outline for fascia – spray and place grey fabric
10. Tack down for fascia – stitch and trim
11. Stitch lace and borders to complete shop section
12. Trim from stabilizer, hold and running water and lay on a smooth cotton towel
to dry.
Step 17:
For the upper left side of the shop load FSLEULS into your machine.
1. Outline for main fabric – spray fabric with adhesive spray and place over
outline
2. Tack down for main fabric – stitch and trim
3. Outline for window – spray and place organza over outline
4. Tack down for window – stitch and trim
5. Outline for fascia – spray and apply grey fabric
6. Tack down for fascia – stitch and trim
7. Stitch lace and borders to complete section
8. Trim from stabilizer, hold under running water and lay on a smooth cotton towel
to dry.
Step 18:
For the upper right side of the shop load FSLEURS into your machine.
1. Outline for main fabric – spray fabric with adhesive spray and place over
outline
2. Tack down for main fabric – stitch and trim
3. Outline for window – spray and place organza over outline
4. Tack down for window – stitch and trim
5. Outline for fascia – spray and apply grey fabric
6. Tack down for fascia – stitch and trim
7. Stitch lace and borders to complete section
8. Trim from stabilizer, hold under running water and lay on a smooth cotton towel
to dry.
Step 19:
(Click Image to Enlarge)
For the lower front of the shop load design FSLELF into your machine.
1. Outline for main fabric – spray brick fabric with adhesive spray and place
over the outline.
2. Tack down for main fabric – stitch and trim
3. Outline for window – spray and apply organza
4. Tack for window – stitch and trim
5. Outline for window – spray and apply organza
6. Tack down for window – stitch and trim
7. Outline for window – spray and apply organza
8. Tack down for window – stitch and trim
9. Outline for window – spray and apply organza
10. Tack down for window – stitch and trim
11. Outline for window – spray and apply organza
12. Tack down for window – stitch and trim
13. Lace work and borders of section – stitch
14. Load green thread in top of machine – stitch wreath
15. Trim from stabilizer, hold under running water and lay on a smooth cotton towel
to dry
Step 20:
(Click Image to Enlarge)
For the lower back of the shop load design FSLELB into your machine.
1. Outline for main fabric – spray brick fabric with adhesive and place over
the outline
2. Tack down for main fabric – stitch and trim
3. Outline for window – spray organza and apply over the outline
4. Tack down for window – stitch and trim
5. Lace work and borders - stitch
6. Trim from stabilizer, hold under running water and lay on a smooth cotton towel
to dry
Step 21:
For the lower sides of the shop and for two awnings – Load design FSLELS into
your machine.
1. Outline for main fabric – spray brick fabric with adhesive and place over
outline
2. Tack down for main fabric – stitch and trim
3. Outline for window –spray organza and apply over outline
4. Tack down for window – stitch and trim
5. Stitch lace and borders
6. Change to green thread on top – stitch outline for center awning section
– spray white fabric with adhesive and apply over outline
7. Tack down for center awning section – stitch and trim
8. Outline for side section of awning – spray white fabric with adhesive and
apply over outline
9. Tack down for side section of awning – stitch and trim
10. Outline for second side section of awning – spray white fabric with adhesive
and apply over outline
11. Tack down for second side section of awning – stitch and trim
12. Stitch this last color stop to complete the awning
13. Trim from the stabilizer, hold under running water to remove the stabilizer
and lay on a smooth cotton towel to dry
Step 22:
Repeat step 21 in its entirety to make the second lower side and awning
Step 23:
To make the roof and side sign load design file FSLERF into your machine. Load the
grey thread back into the top of the machine.
1. Outline for roof – spray grey fabric with adhesive and place over outline
2. Tack down for roof fabric –Stitch and trim
3. Stitch this color stop to complete the roof
4. Outline for sign – apply spray to white fabric and lay over the outline
5. Tack down for sign fabric – stitch and trim fabric
6. Stitch color stop 6 to stitch the lace posts on the sign
7. Switch to red thread on the top of the machine for the lettering
8. Switch back to grey thread on top; remove the hoop from the machine and spray
a plain piece of white fabric with no craft fuse applied – and place it over
the back of the sign. Run this color stop 8 to tack down that fabric. Remove the
hoop from the machine and trim the sign back fabric as close as possible to the
tack down stitches
9. Run this last color stop to complete the sign
10. Trim from the stabilizer, hold under running water to remove the stabilizer
and lay on a smooth cotton towel to dry
(Click Image to Enlarge)
Step 24:
Load design FSLEFL to make the floor
1. Outline for floor – apply spray adhesive to grey fabric and lay over the
outline
2. Tack down for floor – stitch and trim the outline edges of the fabric and
trim out the center hole for the flameless candle; do not trim the water soluble
stabilizer from the hole, just cut the fabric and its fused backing from the hole
3. Stitch the final color stop to complete the floor
4. Trim from the stabilizer, hold under running water to remove the stabilizer and
lay on a smooth cotton towel to dry.
Step 25:
Load design FSLEMF to make the center floor and fascia
1. No appliques are used in this center section. Stitch the grey thread to stitch
out the lace and fascia
2. Switch to green thread in the top of the machine to stitch the banners
3. Trim from the stabilizer, hold under running water to remove the stabilizer and
lay on a smooth cotton towel to dry
(Click Image to Enlarge)
Step 26:
As the middle floor dries you are going to want it to have the edges folded to form
the fascia that goes around the center as the building, so each time you pass it
on the counter fold in the fascia borders so that when you flip it over the edges
will be bent down like this picture. You will start doing this with the center part
of the middle floor laying on the towel and the folded edges on top, just keep folding
them while it is damp so that eventually the edges will hold up the middle floor
as it dries.
(Click Image to Enlarge)
Step 27:
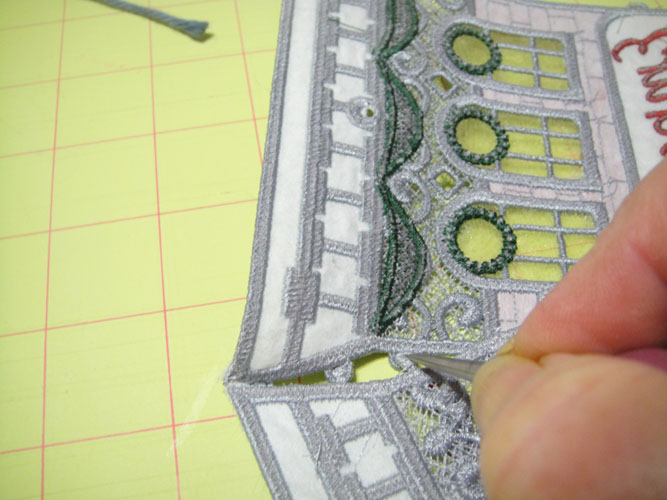
Before we start assembling the house use an awl or small knitting needle to slightly
stretch the loops and eyelets in the pieces. Do this gently to avoid breaking the
loops, but slightly stretching them, which breaks down the sizing a little makes
the house easier to assemble.
(Click Image to Enlarge)
Step 28:
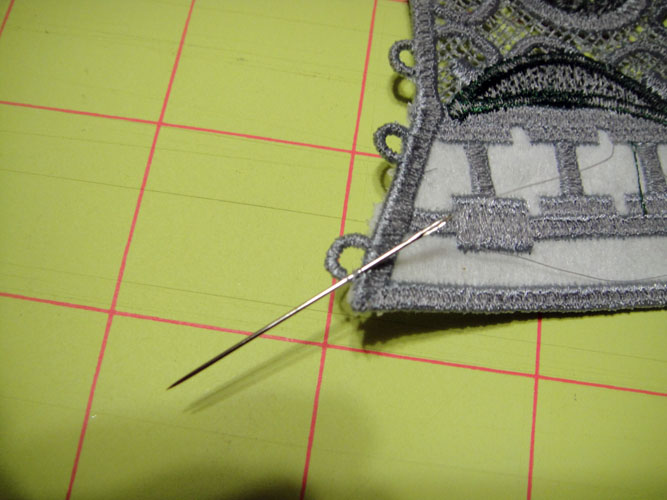
If you do break a loop you can thread a hand needle with matching thread and join
it again with a few stitches.
(Click Image to Enlarge)
Step 29:
Select the right side of the upper story. You can identify the right side as it
is the one that has an eyelet in the lace and in the brick section close to the
left hand side. Open up the eyelet in the brick section by pushing your awl through
it.
(Click Image to Enlarge)
Step 30:
Lay the sign on top of the right side of the upper story and push the buttons through
the eyelets with the awl or other pointed instrument.
(Click Image to Enlarge)
Step 31:
Lay the front of the upper story next to the right side of the upper story face
side down.
(Click Image to Enlarge)
Step 32:
Align the loops and buttons along the side with the buttons lying over the tops
of the loops. Stabilize the button by pressing it down with an awl or other pointed
instrument while lifting up the front of the building with your other hand. This
will insert the button through the loop. All buttons will be inserted through the
loops this way throughout the assembly of the emporium.
(Click Image to Enlarge)
Step 33:
This is how the two pieces will look joined together with the buttons through the
loops on the outside of the emporium.
(Click Image to Enlarge)
Step 34:
Join the right side wall to the back wall and then add the left side wall to the
other pieces.
(Click Image to Enlarge)
Step 35:
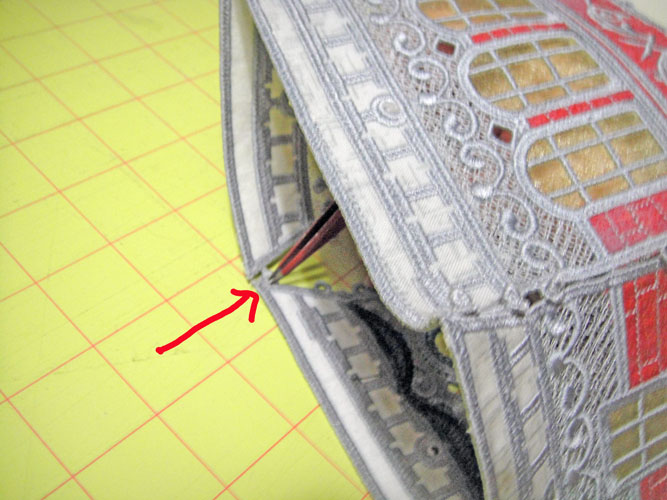
To join the final two pieces together you will have to work from inside the upper
story of the emporium, but the procedure is the same. Lay the buttons on top of
the loops and push on them to insert them through the loops.
(Click Image to Enlarge)
Step 36:
Fold the sides of the awning pieces and insert into the eyelets shown on the lower
front of the store.
Step 37:
Join the four sides of the lower story together. Is does not matter which piece
is the right or left side, they are interchangeable.
(Click Image to Enlarge)
Step 38:
Insert the flameless tea light into the hole in the floor.
(Click Image to Enlarge)
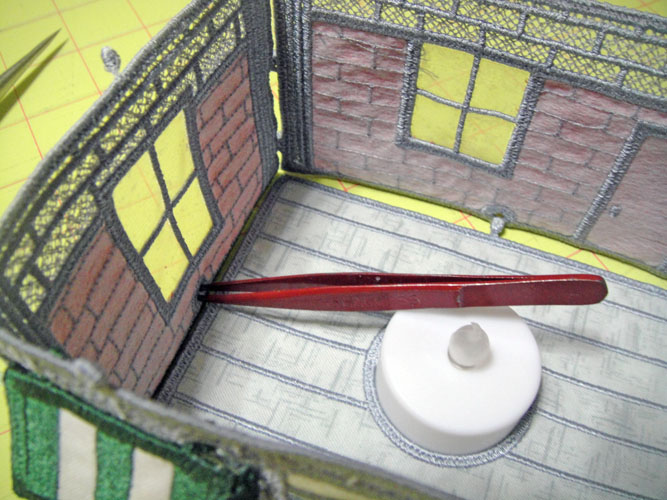
Step 39:
Insert the 4 buttons through the eyelets at the base of the lower story walls. I
used splinter tweezers to do this.
(Click Image to Enlarge)
Step 40:
With a hand needle and your grey polyester thread whip stitch the four corners of
the fascia together.
(Click Image to Enlarge)
Step 41:
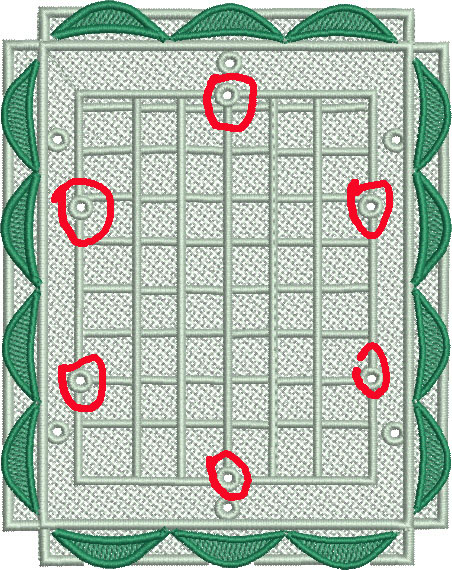
Locate the six inner eyelets on the middle floor section.
(Click Image to Enlarge)
Step 42:
Insert the 6 buttons on the upper story through these eyelets.
(Click Image to Enlarge)
Step 43:
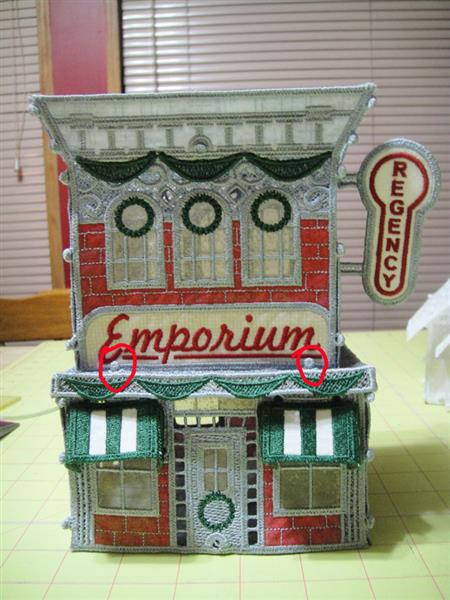
Insert the 4 buttons on the roof through the 4 eyelets at the base of the upper
story flange.
(Click Image to Enlarge)
Step 44:
Insert the 6 buttons on the lower story through the remaining eyelets on the middle
floor.
(Click Image to Enlarge)
Step 45:
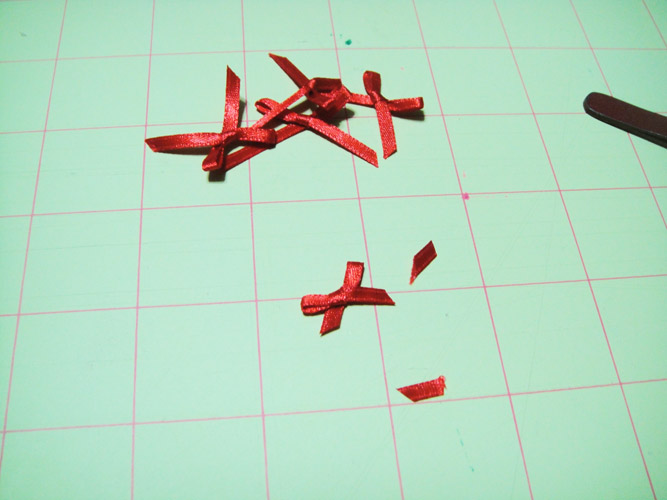
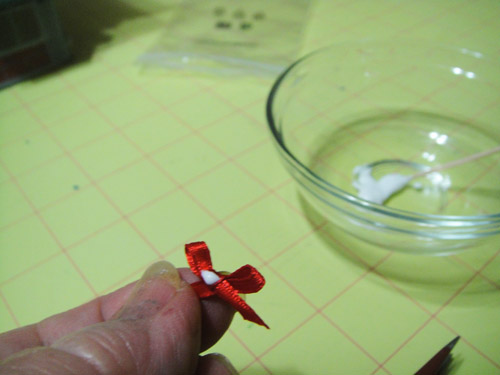
The miniature tree bows from Hobby Lobby were a touch too large for our emporium,
so I pulled the tails of the bows to downsize the loops a little and trimmed the
tails.
(Click Image to Enlarge)
Step 46:
Apply a drop of tacky glue to the knot of each ribbon.
Step 47:
Glue the ribbons to the tops of the 3 wreaths in the top widows and on the door.
Glue a ribbon between each green banner section. Congratulations your Victorian
Emporium is complete!
Award winning Digitizer, Embroidery Educator, Author and a Consultant to the Industry, Pat Williams has 30 years of experience in the embroidery industry. Pat has won multiple awards for her digitizing expertise including the 2007 Impressions Awards Grand Championship, Best of Show as well as the 1st and 2nd Place Awards. Pat’s love of digitizing has afforded her the opportunity to write numerous articles for Impressions magazine in the United States and Images Magazine in Europe. In 2001 Pat was named “Embroidery Educator of the Year.” For many years Pat taught digitizing seminars at the ISS Shows in Long Beach, CA and for Compucon software. She now resides in Tucson, AZ.