Live Chat
Embroidery Designs
Welcome, Embroiderer
Login
In the Hoop Classic Log Cabin Pillow Cover
{{mainImageAlt || (productInfo._source && productInfo._source.name) || ''}}

In the Hoop Classic Log Cabin Pillow Cover Embroidery Project

By   Pat Williams   on   May 25, 2023
  • SKILL LEVELExperienced
  • TIME REQUIRED05:00
Description

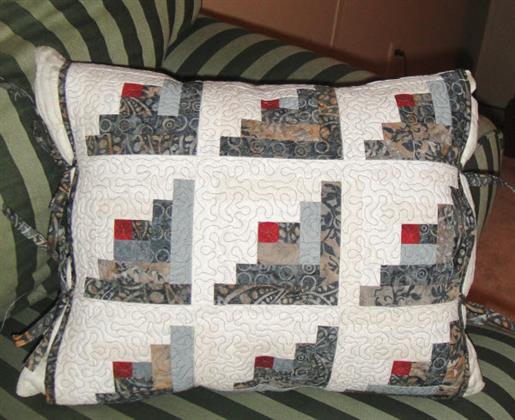
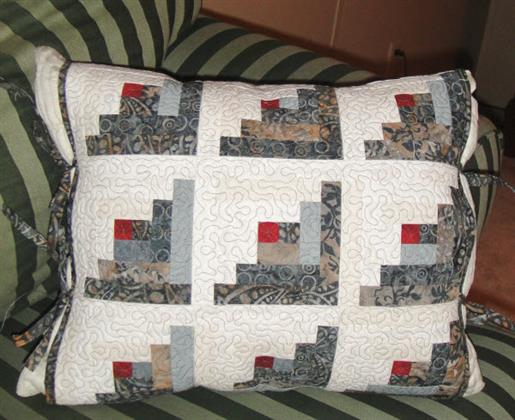
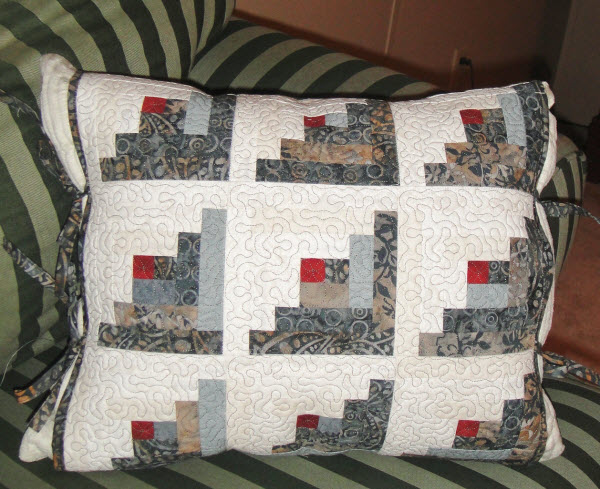
The versatile Classic Log Cabin In the Hoop quilt block is used here to make a pillow cover. You can make anything with this block from the pillow cover, table runner, table topper, wall hanging or a full sized quilt! What a great stash buster.

Step of

Materials

Project Preview Video

Materials
  • As this is a stash buster it is difficult to give exact amounts of fabrics for these blocks. It takes 22 inches of light colored fabrics and 22” of dark fabrics to make one block plus a red 1.5” square for the center.
  • To make this project you will need a total of 5.5 yards of 1 ¼” light colored strips and 5.5 yards of dark colored 1 ¼” strips. One strip of red fabric 1 ¼” wide sub cut into nine 1 ¼” squares.
  • 2 16” squares of fabric for the back of the pillow cover
  • 2 42” strips of 1 1/2” fabric for binding
  • 3 42” strips of 1 1/2” fabric for ties
  • 2 42” strips of 1 1/4” for sashing
  • 9 7” squares, can be all one color or of various scraps to be the back fabric for the blocks
  • 1 ¾ yards of Battilizer® which is a combination of stabilizer and low loft batting or enough poly-mesh stabilizer and low loft batting to cut 9 12” squares
  • 6” or greater embroidery hoop
  • Regular sewing thread for assembly
  • Neutral polyester embroidery thread
  • Invisible thread
  • Water soluble thread
  • Embroidery thread in a contrasting color for the quilting of your blocks, in spool and bobbin
  • Rotary cutter mat
  • Spray adhesive
  • Scotch tape
  • Rotary cutter
  • Quilter’s ruler with ¼” marking lines
  • Trimmer by George (a special guide for cutting In The Hoop Quilt squares)
  • File folder or other light weight cardboard
  • Pillow to be recycled 16” square
  • Sewing machine

  • Designs used in this project

    Final Product: What You Will Create

    Preface:
    General Instructions:
     
    As the digitized file for this block is comprised of running stitch lines you can easily enlarge this block to any size your machine and hoops will allow. You will need to adjust the width of your strips proportionately to the enlargement of the block. All blocks for this project are made in the same manner, but you may change the placement of the various colored strips in each block as long as you keep strips 4, 5, 8, 9, 12, 13 in light color fabrics and blocks 2, 3, 6, 7, 10 and 11 in dark colored fabrics.
    The center square is traditionally red to represent the hearth of the home. If it is done in yellow it represents keeping a light in the window.
     
    The layout in this diagram shows the number sequence of each strip. (Classic Log Cabin Layout)
     
    The Classic Log Cabin quilt block is very versatile, a quick search of the internet for images of log cabin quilts will show you all of the ways in which it can be arranged to form many different patterns.
     
    We will use several types of threads to assemble this block in the hoop.
    Regular sewing thread will be used to assemble your blocks into the project at your regular sewing machine.
    Invisible thread is used in your regular sewing machine to apply sashing without disturbing the embroidered quilt pattern
    Neutral polyester embroidery thread is used to seam the strips in the embroidery hoop.
    A contrasting embroidery thread is used to stitch the quilting stitches in the embroidery machine. This may be rayon or polyester and should be a color that looks nice on both your light and dark strips
    Water soluble thread is used in the construction of the quilt block in the embroidery hoop. This thread is used for tack down and basting stitches that we want to have disappear when the project is washed.
     
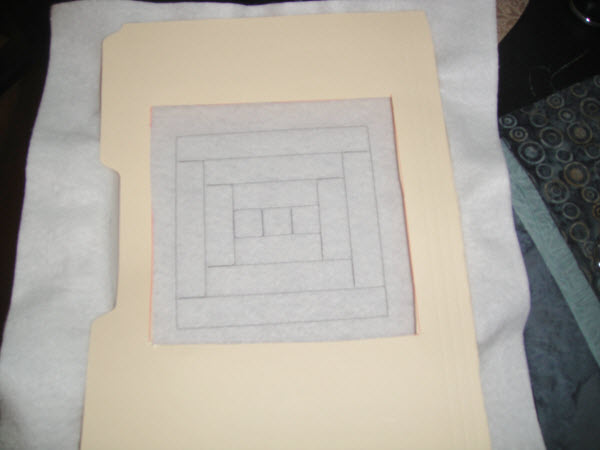
    Before beginning the blocks, take a file folder and cut it along its back spine to give you a single piece of lightweight cardboard. Then cut out a six inch square in the middle of one piece. This will make a hoop protector to lay over your hoop when spraying the Battilizer® with adhesive spray. Adhesive spray can be removed from your hoop with “Goo-be-Gone” or Dissolve-It, but using the cardboard keeps the hoop from becoming too sticky.
     

    Block Assembly

    Step 1 and 2:
    1.Hoop a 12” square of Battilizer® in a 6” or larger embroidery hoop. If using stabilizer and low loft batting, hoop the poly mesh stabilizer in the bottom of the hoop with the low-loft batting on top.
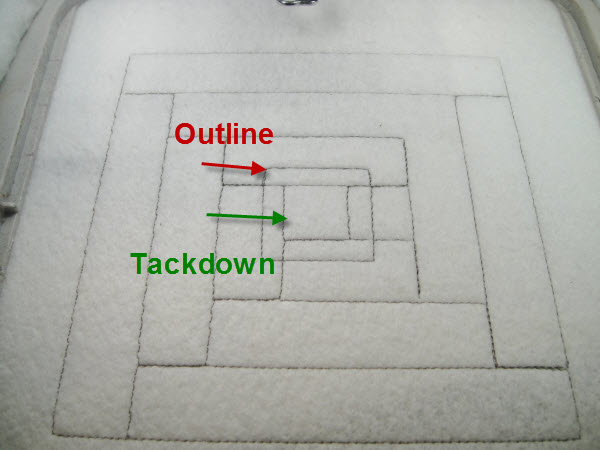
    2.With neutral thread in the top of your embroidery machine and in the bobbin stitch color sequence one. This is an outline of your design. All lines stitched are the seam lines for your strips and are not placement lines except the center square has two outlines. The outside center square lines are the placement lines for your center square. (Fig 2)

    (Click Image to Enlarge)


    Step 3:
    Remove the embroidery hoop from the machine. Lay the cardboard hoop protector over the hoop and spray the Battilizer® with adhesive spray. The use of the adhesive spray will hold down all of your strips as they are sewn avoiding having to use a tack down stitch for every strip. Do not skip this step. (Fig 3)

    (Click Image to Enlarge)


    Step 4:
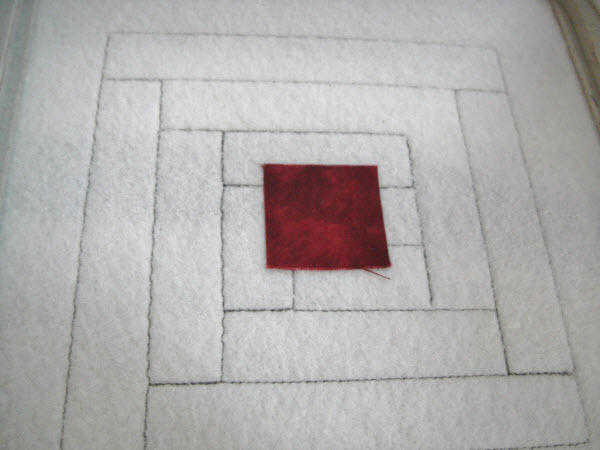
    Carefully place your 1 ¼” square exactly on the placement lines. Exact placement of this square is important as the placements of all subsequent strips are based upon it. (Fig 4)

    (Click Image to Enlarge)


    Step 5:
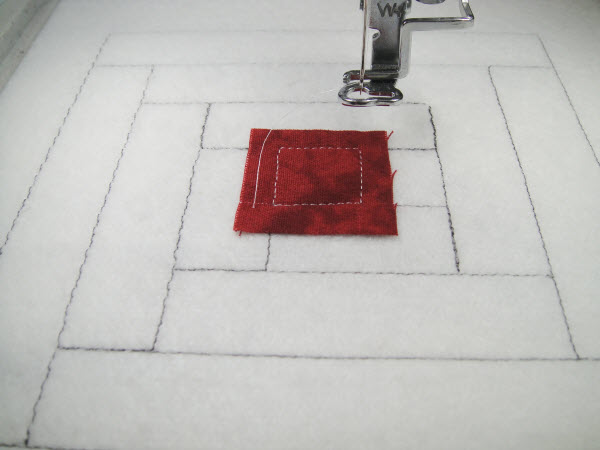
    Put water soluble thread in the top of the machine only and stitch the tack down for the red square. (Fig 5)

    (Click Image to Enlarge)


    Step 6:
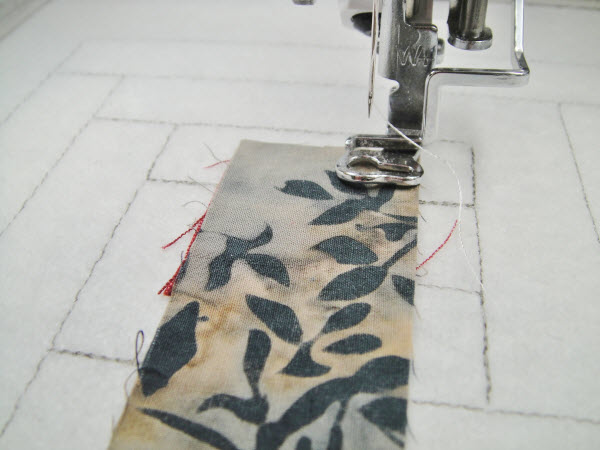
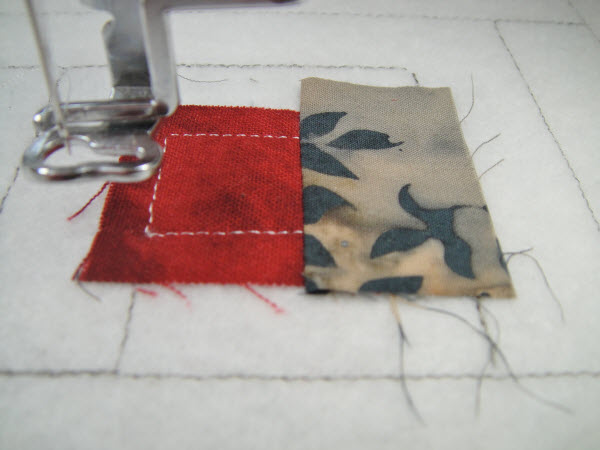
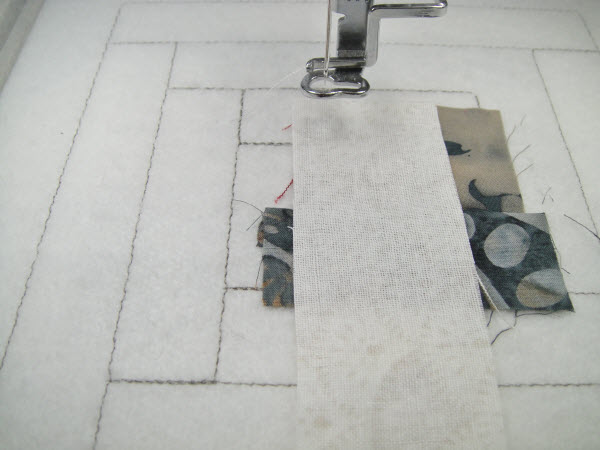
    Put neutral thread in the top of the embroidery machine. Place your first dark strip face down on top of the red square. Stitch color sequence to sew down the dark strip. (Fig 6)

    (Click Image to Enlarge)


    Step 7:
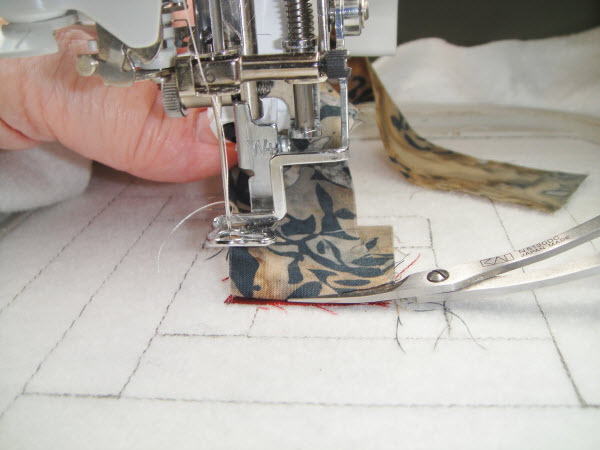
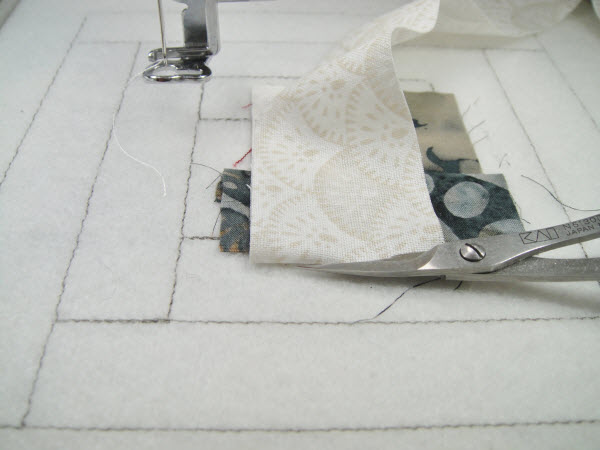
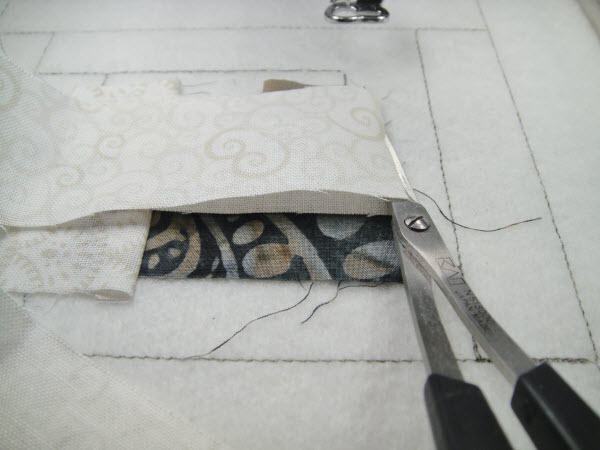
    Fold back the strip end over the stitched portion of the strip and trim it with sharp scissors, even with the bottom edge of the red square. (Fig 7)

    (Click Image to Enlarge)


    Step 8:
    Finger press strip 2 open and smooth over the spray adhesive treated batting. (Fig 8)

    (Click Image to Enlarge)


    Step 9:
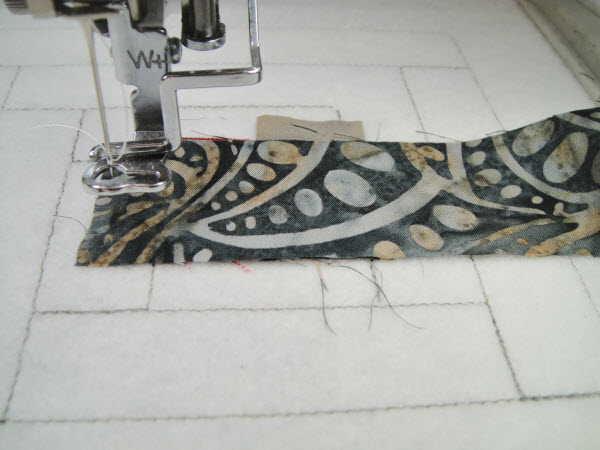
    Lay a dark fabric strip face down over the red square and the second strip, lining up along the bottom edge of the red square and stitch the seam line. (Fig 9)

    (Click Image to Enlarge)


    Step 10:
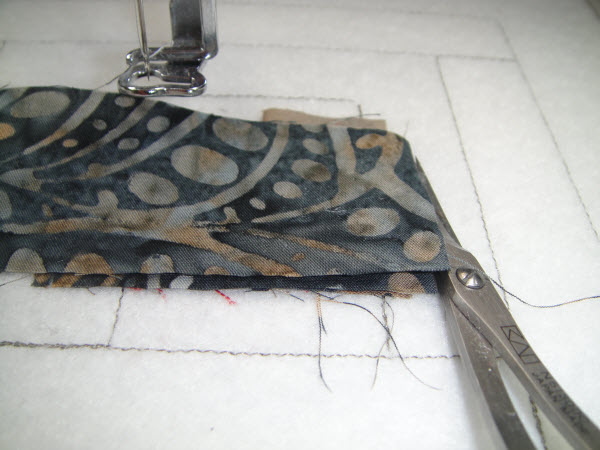
    Fold the seam strip over itself and trim the right side edge even with strip 2. (Fig 10)

    (Click Image to Enlarge)


    Step 11:
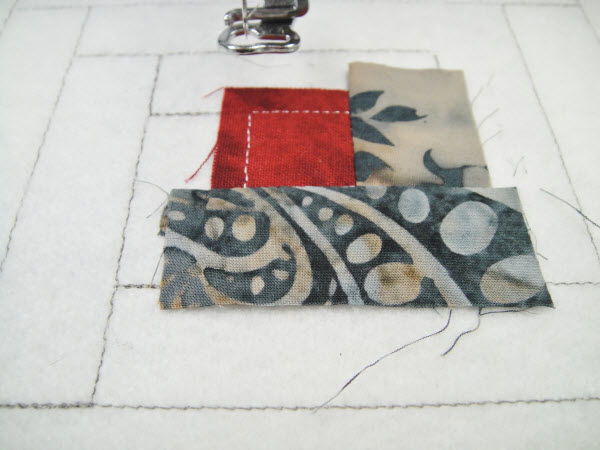
    Finger press Strip 3 over the batting. (Fig 11)

    (Click Image to Enlarge)


    Step 12:
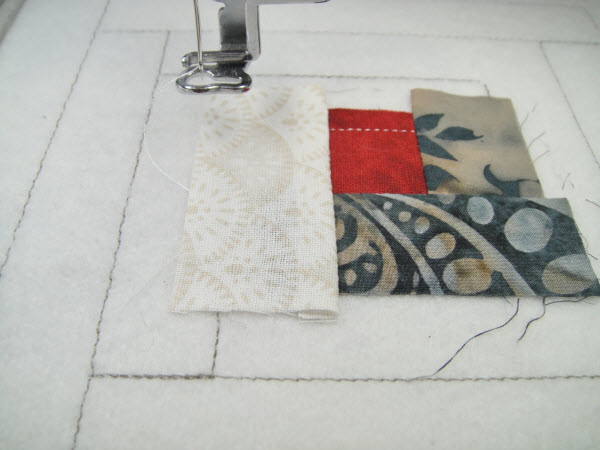
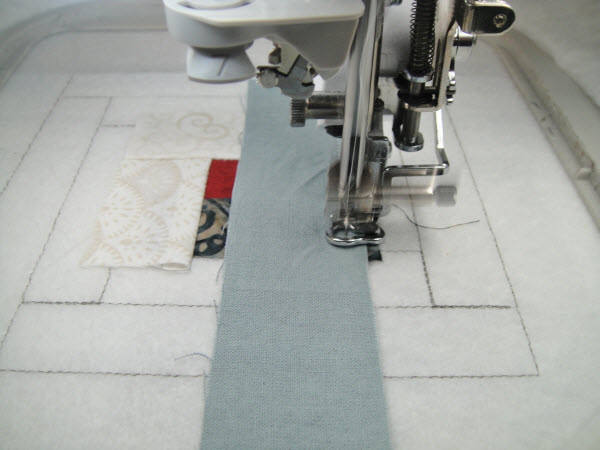
    Lay a light color strip over the center block and over strip 3 aligning the left edge with the red block 1. Stitch the seam line (Fig 12)

    (Click Image to Enlarge)


    Step 13:
    Flip back the strip and trim the edges even with or slightly below the bottom of strip 3. (Fig 13)

    (Click Image to Enlarge)


    Step 14:
    Fold out the strip and finger press to the batting. (Fig 14)

    (Click Image to Enlarge)


    Step 15:
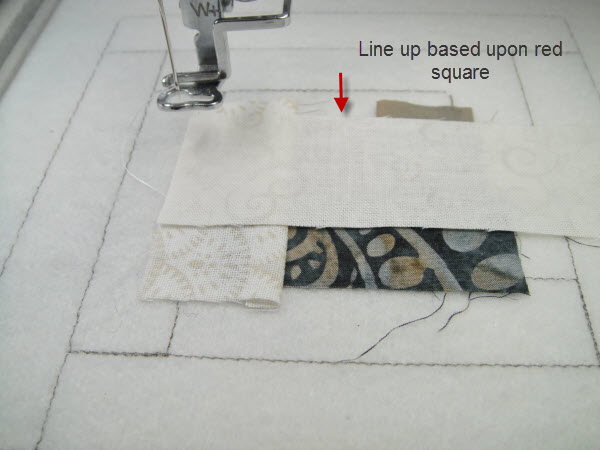
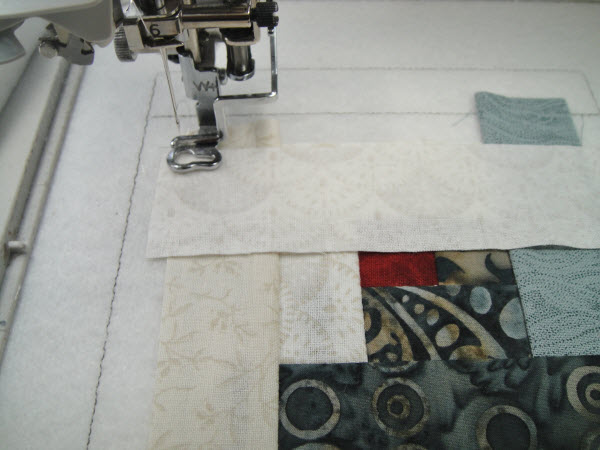
    As you lay down fabric strip 5 you will see that you don’t really have a straight line to line up all the way across as the side strips previously applied are looking a little higher than the red square. Use the red square as your guide for this strip. In all subsequent strips place the edge of the strip straight on a line using the center strip of the H that gets formed as your placement guide. Lay strip 5 face down and sew the seam line. (Fig 15)

    (Click Image to Enlarge)


    Step 16:
    Trim Strip 5 and Finger press open as in the previous strips. (Fig 16)

    (Click Image to Enlarge)


    Step 17:
    With strip 6 we are back to dark strips, place strip 6 face down aligning the edge with the edge of strip 2. Stitch, trim and flip over as on the previous strips. (Fig 17)

    (Click Image to Enlarge)


    Step 18:
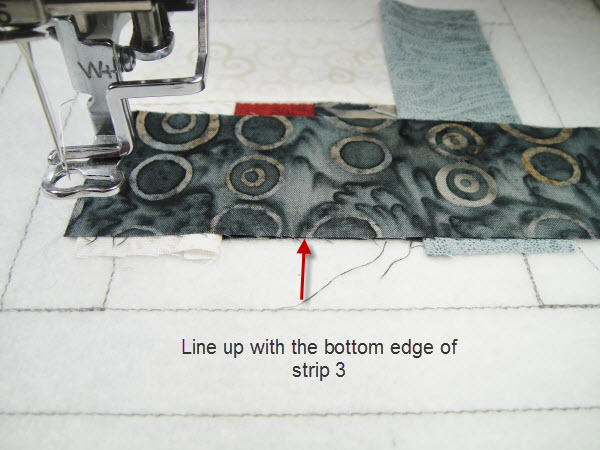
    Strip 7 is a dark strip, align with the bottom edge of strip 3, stitch, trim and finger press open. (Fig 18)

    (Click Image to Enlarge)


    Step 19:
    Continue in a like manner adding light strips to the left and top sides and dark strips to the right and bottoms sides of the block. (Fig 19)

    (Click Image to Enlarge)


    Step 20:
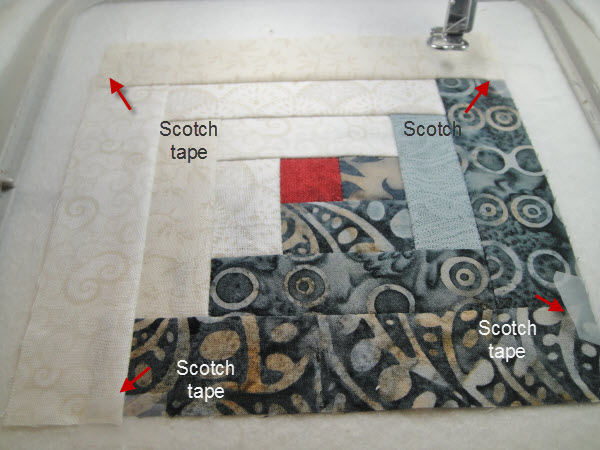
    At the four corners of the quilt block there will be small unstitched ¼” edges. We need to place a little piece of scotch tape over those unstitched areas to keep the presser foot from flipping up those pieces. So this is important. Place scotch tape over the unstitched areas. (Fig 20)

    (Click Image to Enlarge)


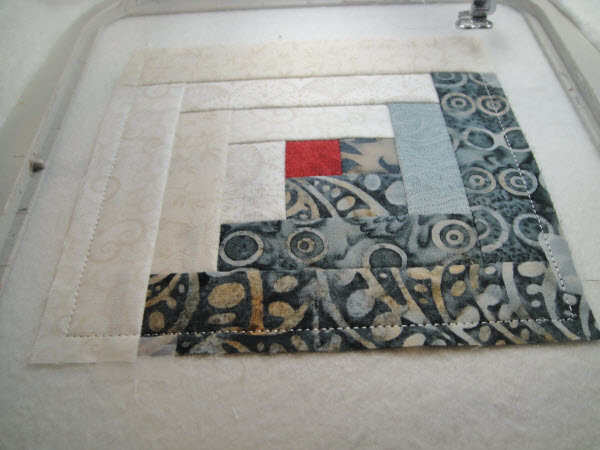
    Step 21, 22 and 23:
    21.Put water soluble thread in the top of your machine.
    22.Stitch the tack down line around the whole block
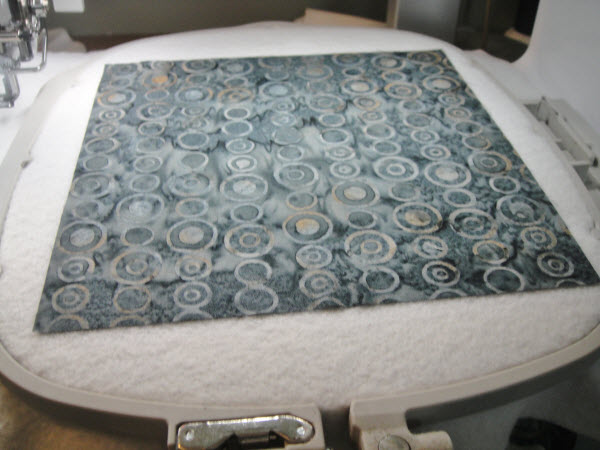
    23.Remove the hoop from the machine, spray spray adhesive on the wrong side of a 7” backing square. Place over the outlines, exceeding the outlines by at least a ½” on all sides and smooth on to the back of the batting. (Fig 21)

    (Click Image to Enlarge)


    Step 24 and 25:
    24.Continuing with the water soluble thread stitch the tack down stitch to hold the backing in place.
    25.Change to your contrasting thread in both the top and bobbin in the machine.(Fig 22)

    (Click Image to Enlarge)


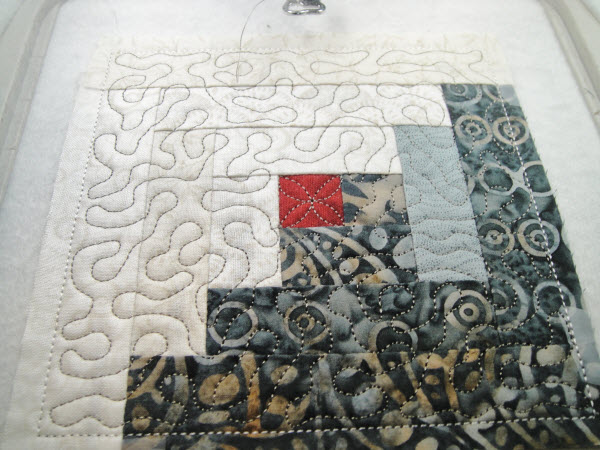
    Step 26 and 27:
    26.Bring the bobbin thread to the top by feeding the top thread through the presser foot; holding on to the top thread press the needle up button on your machine twice; this will bring the bobbin thread to the top; stitch a few stitches while holding onto the bobbin and top thread; stitch a few stitches; stop the machine; trim the thread ends; restart the machine and sew the quilting stitches. (Fig 23)
    27.Make 8 more blocks.

    (Click Image to Enlarge)


    Assembly Instructions:

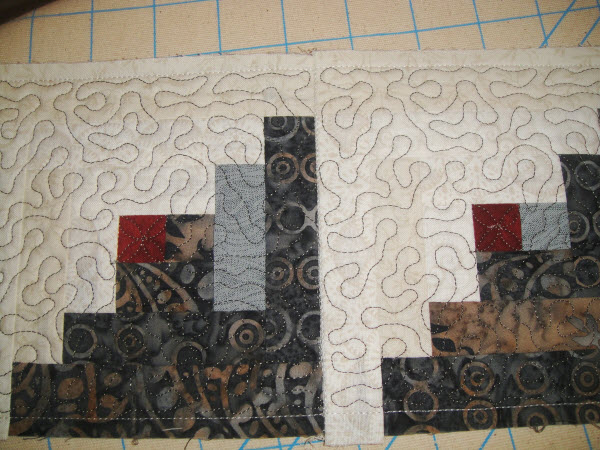
    There are two different methods for assembling In the Hoop quilt blocks. One method, where sashing is shown on the top and back of the quilt, is demonstrated in our projects on Log Cabin and Court House Steps Table Topper. That is the easiest method of joining these types of blocks.
     
    For the Classic Log Cabin Pillow Cover we are demonstrating the second method which does not require sashing on the top of the quilt blocks.
     
    Step 1:
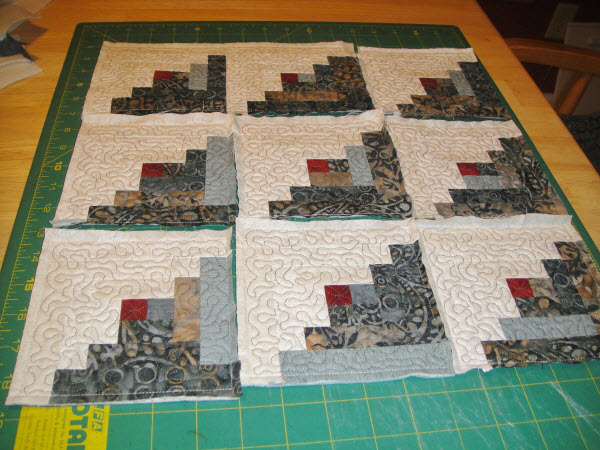
    Lay out your quilt squares  – yours won’t be trimmed as these are- but you will want to lay them out as you will need to know the order that they will be trimmed and sewn. The edges of the blocks that make up the outside edges of the quilt will be trimmed differently than the inside edges of the blocks. (Fig 24)

    (Click Image to Enlarge)


    Step 2:
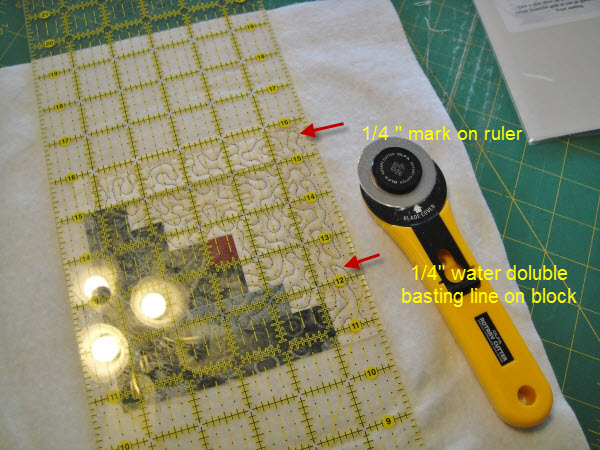
    The top left hand block has two outside edges, one on the left of the block and one on the top of the block. To trim these two edges simply place the quilter’s ruler so that the ¼” line on the ruler and the water soluble thread outline on the block line up. Cut away excess backing and fabric. (Fig 25)

    (Click Image to Enlarge)


    Step 3:
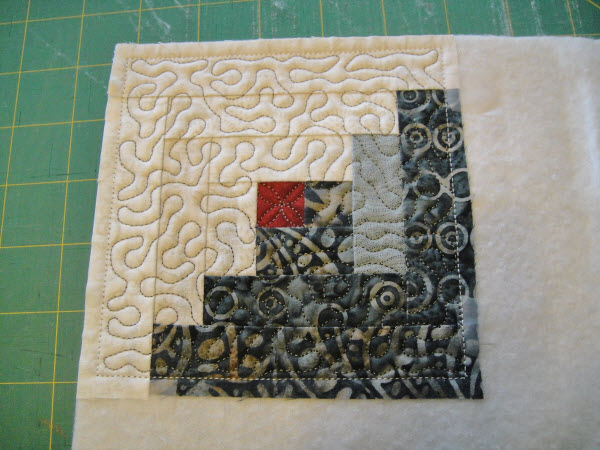
    Do this on both the top and left side of the quilt block. (Fig 26)

    (Click Image to Enlarge)


    Step 4:
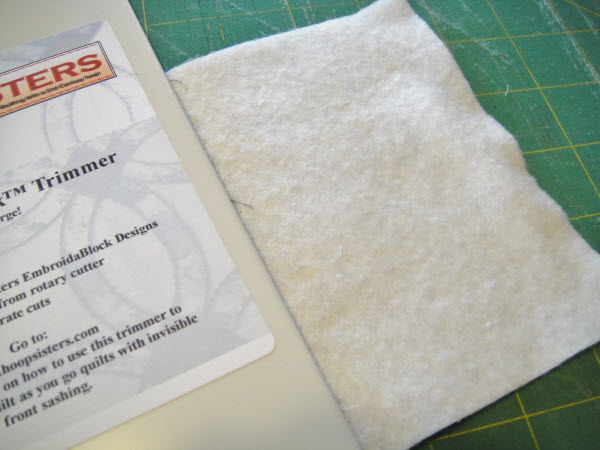
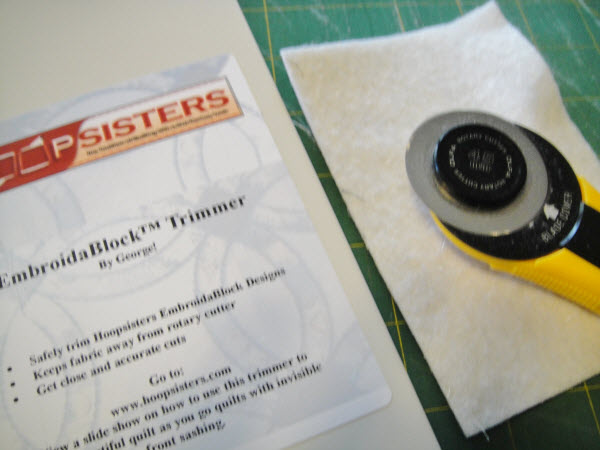
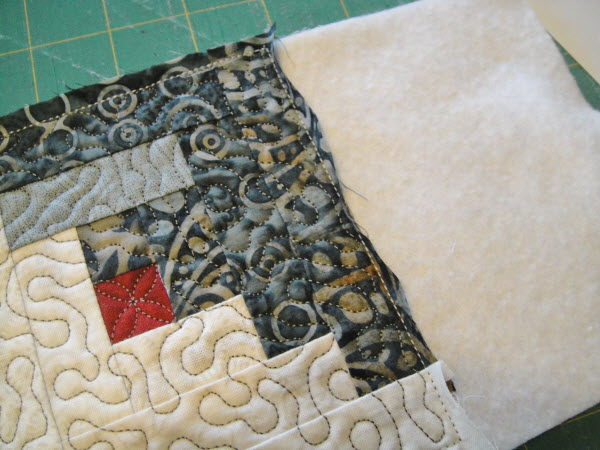
    For the two inside edges of the quilt block we will remove both the batting and backing fabric from the seam allowance. This is done with the Trimmer by George trimming guide as follows.
     
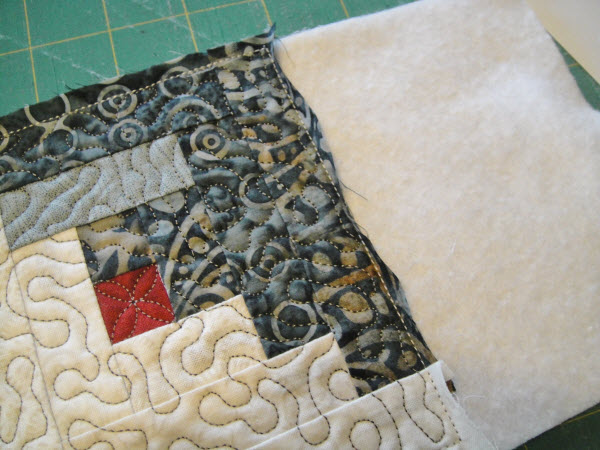
    i)Lift the seam allowance away from the spray adhesive on the batting and finger press towards the block. (Fig 27)

    (Click Image to Enlarge)


    ii)Slide the lip of the Trimmer by George under the top seam allowance and flip over onto the block. (Fig 28)
    iii)Be sure to check that none of the top block seam allowance is exposed as the next step would make an erroneous cut in it.

    (Click Image to Enlarge)


    iv)With the rotary cutter, cut away the excess batting and backing. ( Fig 29)
    v)Repeat for the bottom edge of the quilt block removing both the batting and backing with the Trimmer by George and a Rotary Cutter.

    (Click Image to Enlarge)


    Steps 5-9:
    5.Place the trimmed piece back into position on your layout as you will want to keep track of where each piece will be placed.
    6.On the middle block trim the top edge to ¼” through all layers, remove the excess batting and backing from the sides and bottom seam allowances.
    7.On the right hand block trim the top and right edges to ¼” though all layers. Trim the batting and backing from the seam allowances on the left and bottom edges.
    8.For the blocks in the second row trim the left edge of the left block and the right edge of the right block to ¼” through all layers. Remove the batting and the backing from all other seam allowances in this row.
    9.For the third row - Left hand block, trim ¼” though all layers on the left hand and bottom edges. Middle block – trim the bottom edge to ¼” through all layers. Right hand block trim the bottom and right hand edge to ¼” though all layers. Remove the batting and the backing fabric with the Trimmer by George on all the other edges. ( Fig 30)

    (Click Image to Enlarge)


    Step 10 and 11:
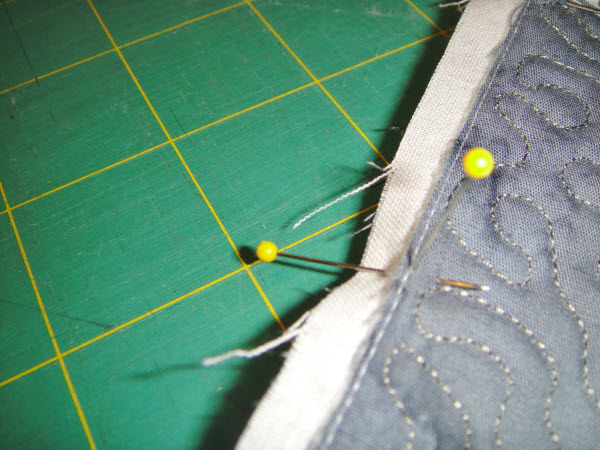
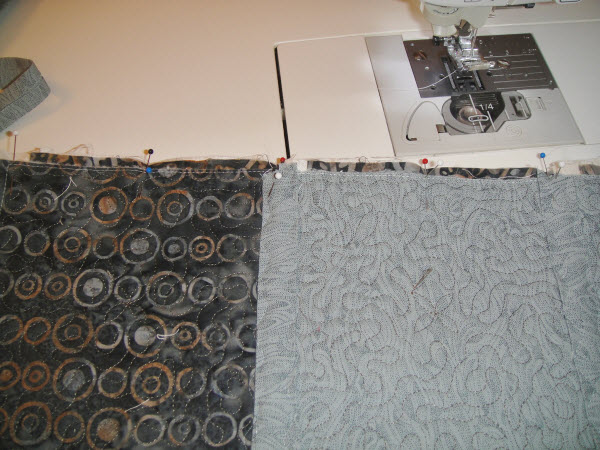
    10.Place the top two blocks right sides together to sew the inside seam. To insure that the seams line up we will use a double pinning method. This method will be used on all blocks.
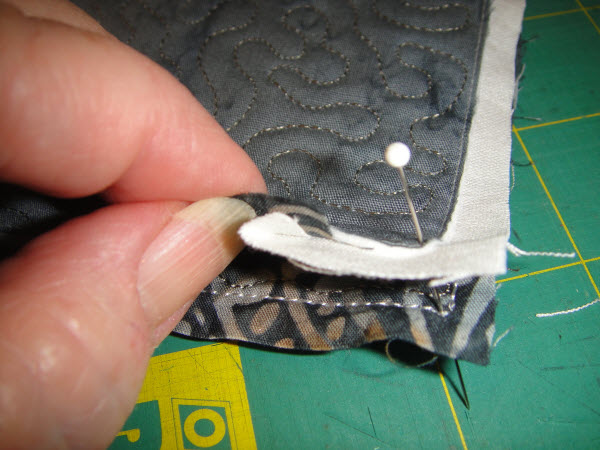
    11.Place a straight pin vertically though the exact corner of the water soluble tack down stitch of the top block. Place the pin vertically through the same position of the bottom block. This lines up the two blocks at the corner. (Fig 31)

    (Click Image to Enlarge)


    Step 12:
    Using the vertical pin to keep the two blocks aligned, place a horizontal pin right next to the vertical pin. (Fig 32)

    (Click Image to Enlarge)


    Step 13 and 14:
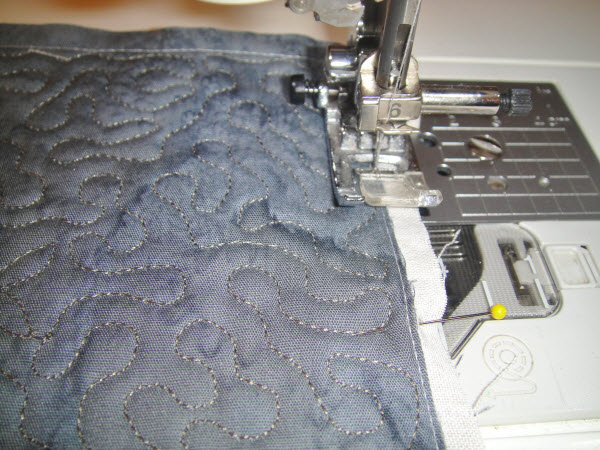
    13.Place pins in the same manner at the other corner of the block and in the center of the block. Remove the vertical pins.
    14.With regular sewing thread in your sewing machine, stitch the two blocks together. Make your seam just a thread width inside the water soluble thread tack down stitch. ( Fig 33)

    (Click Image to Enlarge)


    Step 15:
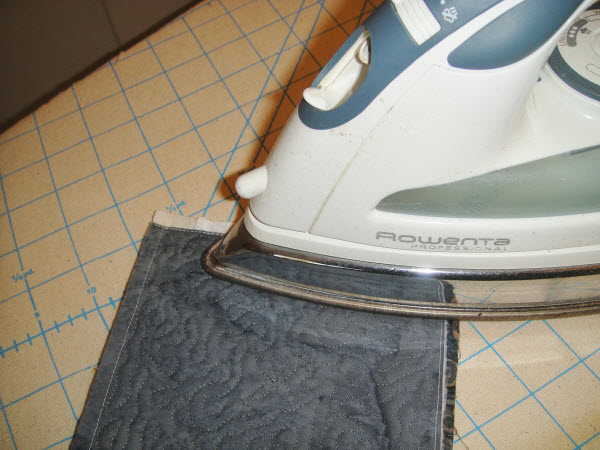
    With a steam iron, press the seam just made together. (Fig 34)

    (Click Image to Enlarge)


    Step 16:
    Then Press it open (Fig 35)

    (Click Image to Enlarge)


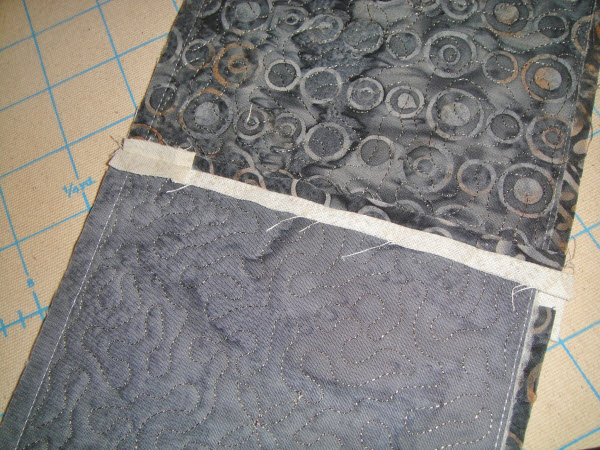
    Step 17:
    The press it from the right side (Fig 36)

    (Click Image to Enlarge)


    Step 18, 19 and 20:
    18.Repeat steps 10 through 17 until you have three rows of blocks consisting of three blocks each.
    19.You will now apply the sashing to the back of the blocks in the rows before you join the rows together.
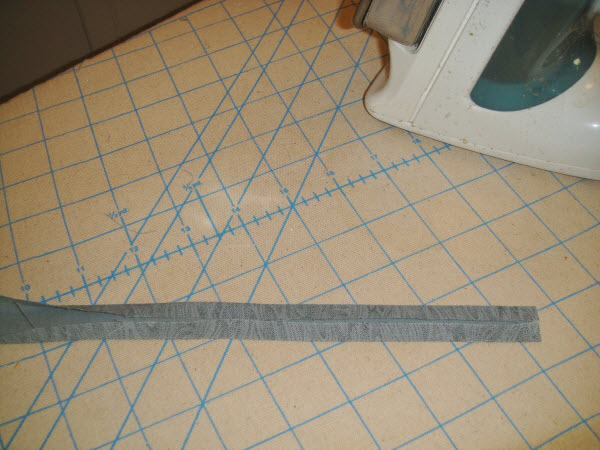
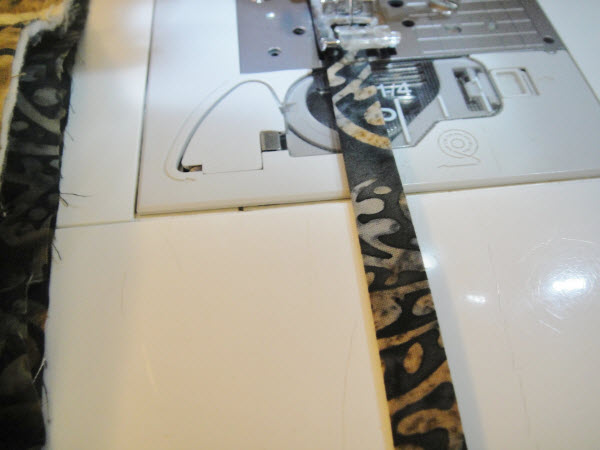
    20.Cut two 42” long strips of sashing 1 ¼” wide. Fold the long edges of the strips to the center and press.  (Fig 37)

    (Click Image to Enlarge)


    Step 21:
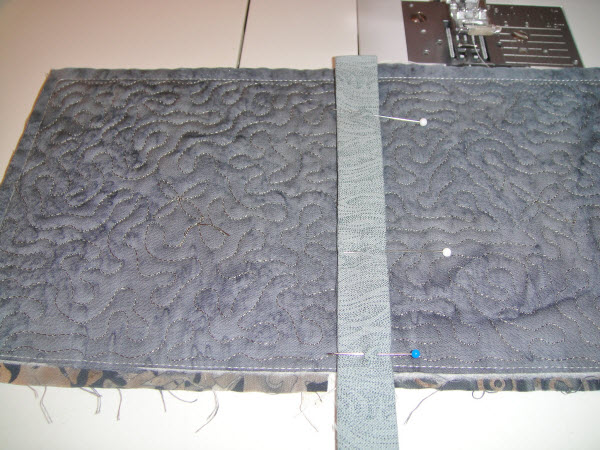
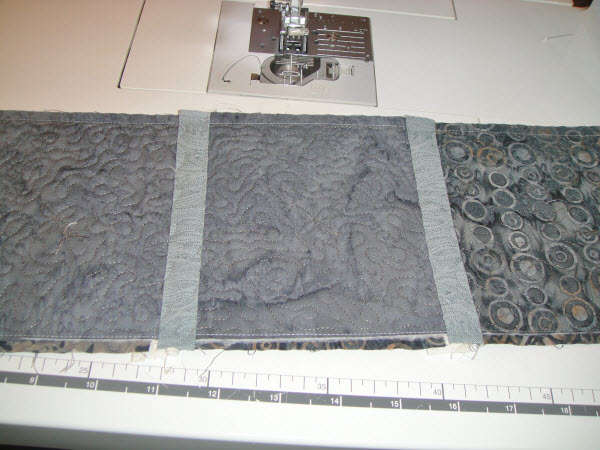
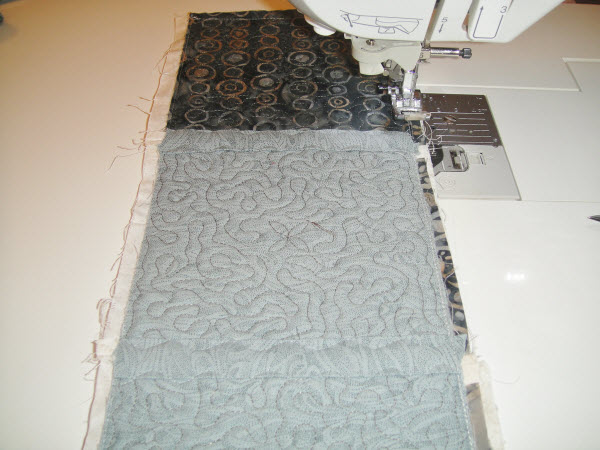
    With invisible thread in the top and bottom of your sewing machine, using a Serpentine stitch, stitch each edge of the sashing strip over the seam line on the back of two blocks. Leave a ¼” at the top and bottom of the block free. (Fig 38)

    (Click Image to Enlarge)


    Step 22:
    Repeat step 21 to cover all seams between the blocks in all three rows of blocks. (Fig 39)

    (Click Image to Enlarge)


    Step 23:
    Place regular thread in the top and bobbin of your machine. You now sew the three rows of blocks together using the double pinning method to ensure they line up properly. (Fig 40)

    (Click Image to Enlarge)


    Step 24, 25 and 26:
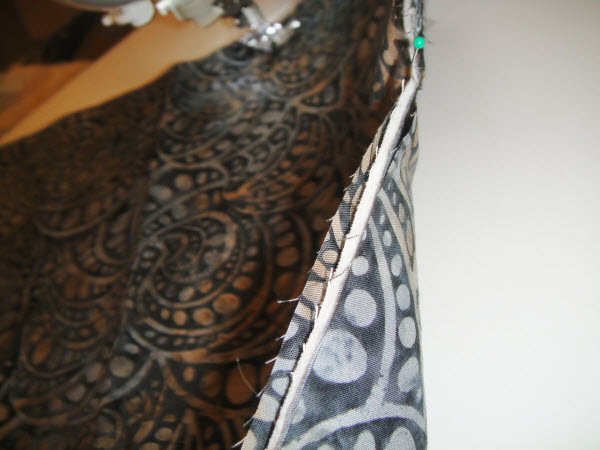
    24.Press the two rows of joining strips, pressing them first closed, then press them open, and then press them from the top, to be sure your project is as flat as possible.
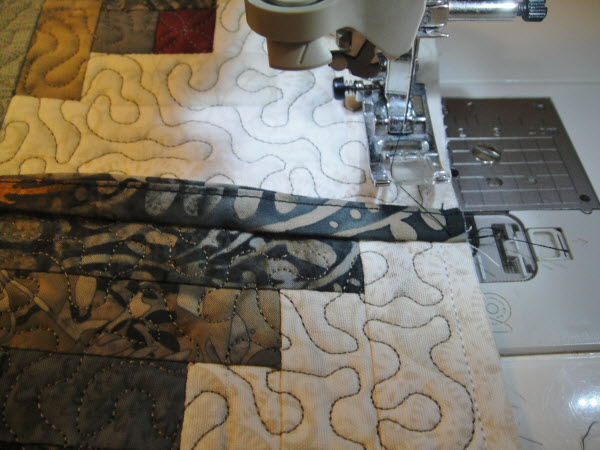
    25.With invisible thread apply sashing over the long seams you have just made using a Serpentine stitch as before.
    26.Lay your completed block top on two layers of the fabric for the back of your pillow cover. And cut it to the same size as the cover front.  (If your pillow is very plump you may want to cut the pillow backing fabric the same width of the pillow front, but add a couple of inches in length to allow a little more room to go over the pillow.) (Fig 41)

    (Click Image to Enlarge)


    Step 27:
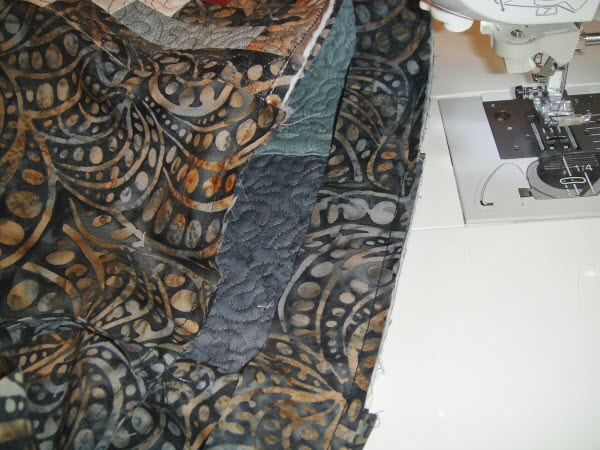
    Place one piece of the pillow cover back fabric on each side of the top edge of the quilted blocks, right sides of the backing fabric facing the quilted blocks. Stitch in a ¼” seam. (Fig 42)

    (Click Image to Enlarge)


    Steps 28-31:
    28.Turn the project right side out.
    29.Press the seams.
    30.Cut 5 42” strips of fabric 1 ½” wide. Two will be used for the binding; three will be used for the ties.
    31.To prepare the ties, fold the long edges to the center of the strip and press, then fold along the edges of the strips together and press again. With regular thread sew the edges of the strips together. Cut into eight 12” lengths. ( Fig 43)

    (Click Image to Enlarge)


    Step 32:
    Place a tie on the pillow cover front at where the top and second row meet and another where the second and third row meet on both sides of the pillow cover front. (Fig 44)

    (Click Image to Enlarge)


    Step 33 and 34:
    33.Place four corresponding ties to the back of the pillow cover. Tack them all down
    34.Enclose the edges of both the quilted front and fabric back of the pillow cover in binding following the instructions is our article of “Binding an In the Hoop Quilt Project” article. (Fig 45)

    (Click Image to Enlarge)


    Step 35:
    Insert your pillow and tie the ties into bows. (Fig 46)

    (Click Image to Enlarge)


    Congratulations your project is complete!
     
    For the love of embroidery…
    Pat Williams
    Meet the Author: Pat Williams
    Pat Williams
    Award winning Digitizer, Embroidery Educator, Author and a Consultant to the Industry, Pat Williams has 30 years of experience in the embroidery industry. Pat has won multiple awards for her digitizing expertise including the 2007 Impressions Awards Grand Championship, Best of Show as well as the 1st and 2nd Place Awards. Pat’s love of digitizing has afforded her the opportunity to write numerous articles for Impressions magazine in the United States and Images Magazine in Europe. In 2001 Pat was named “Embroidery Educator of the Year.” For many years Pat taught digitizing seminars at the ISS Shows in Long Beach, CA and for Compucon software. She now resides in Tucson, AZ.
    More From This Author
    Link is Broken, Please check the URL
    Exclusive Embroidery Offers!
    Copyright © {{ currentDate | date:'yyyy'}} - EmbroideryDesigns.com

    GET 50% OFF! ×