Border OptionsHugging border, circle, square, or rectangle — with a 3mm satin stitch.
Backing OptionsAvailable with iron-on, sew-on, or velcro backing.
Fast ShippingShipped quickly from the USA.
Free Online Tools
Powerful embroidery utilities that save time and prevent costly mistakes.
Stitch AssistantRECOMMENDED
Get the exact stabilizer, machine settings, needle, and thread color sequence for every embroidery design you purchase — based on that design's stitch density, dimensions, and color count.
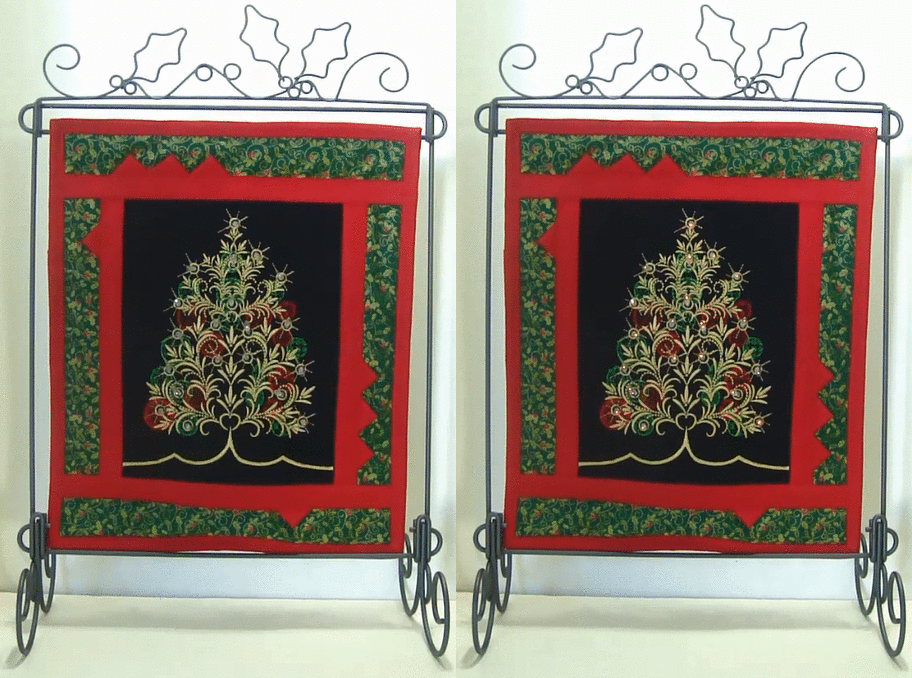
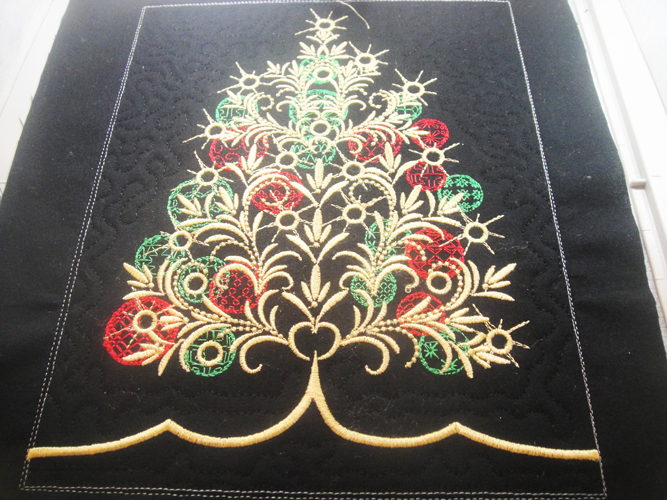
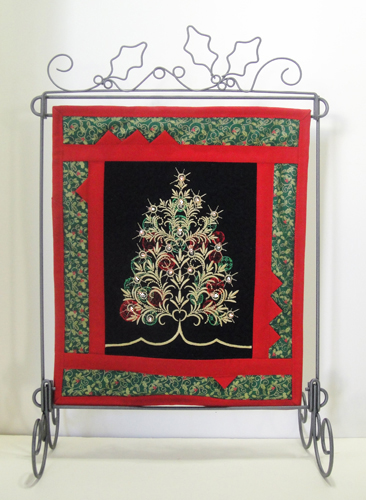
This charming mini quilt features a beautifully decorated Christmas tree that twinkles with Tiny Lites®, perfect for adding festive cheer to your home. Ideal for Christmas décor or as a thoughtful gift. Step-by-step instructions are included.
Step
of
Quilt Twinkling Christmas Tree Mini Quilt
By Pat Williams
The most difficult part of making this wall hanging is completing all the parts of the quilt before you insert the lights. But do so. You don’t want to stretch out the eyelets too much by inserting and removing the lights before you are finished. It would be difficult to add the binding and the hanging sleeve if the lights were already inserted.
Step 1:
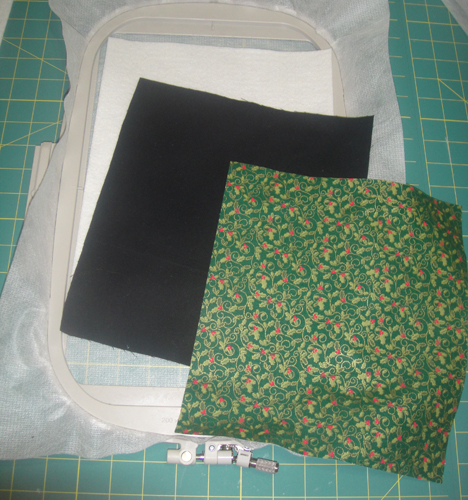
Hoop poly mesh stabilizer tautly in your hoop (Note: the design is sized for a 12” x 7” hoop a 12” x 8” hoop was used in making the sample therefore the spacing around the design may look a little larger in the photos than in your hoop.) Cut a 9” in width by 10” in height piece of black quilting cotton, a Christmas print and batting.
Step 2:
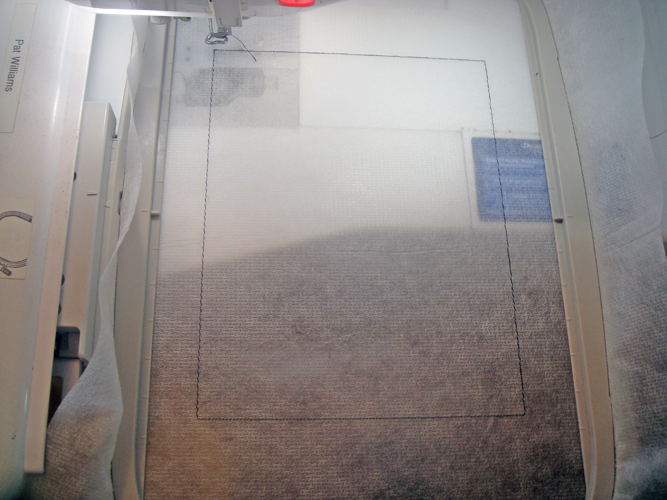
Run color stop (CS) 1 in black as a placement line for your fabrics.
(Click Image to Enlarge)
Step 3:
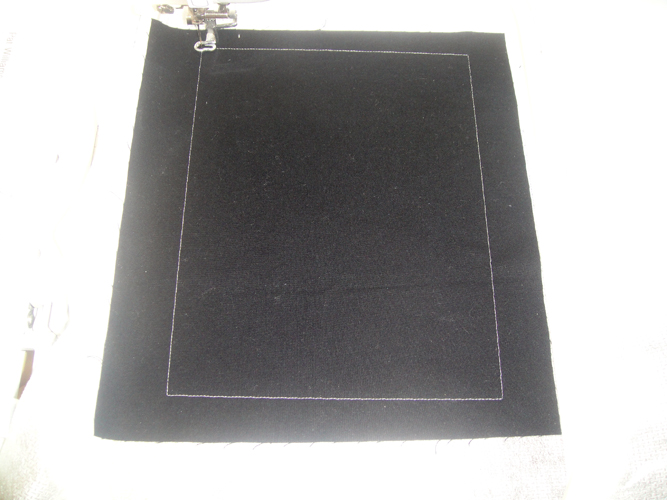
Spray adhesive on the black fabric, position over the placement line so that the fabric exceeds the outlines by ½” on all sides; run CS 2 in water soluble thread to tack down the fabric.
(Click Image to Enlarge)
Step 4:
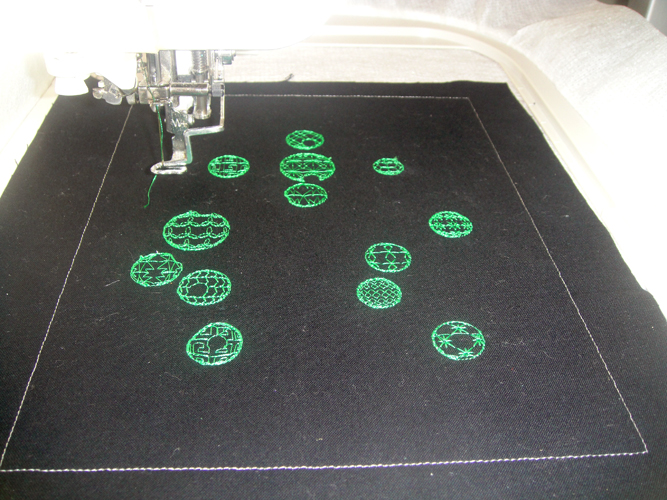
Run CS 3 in green to stitch the ornaments.
(Click Image to Enlarge)
Step 5:
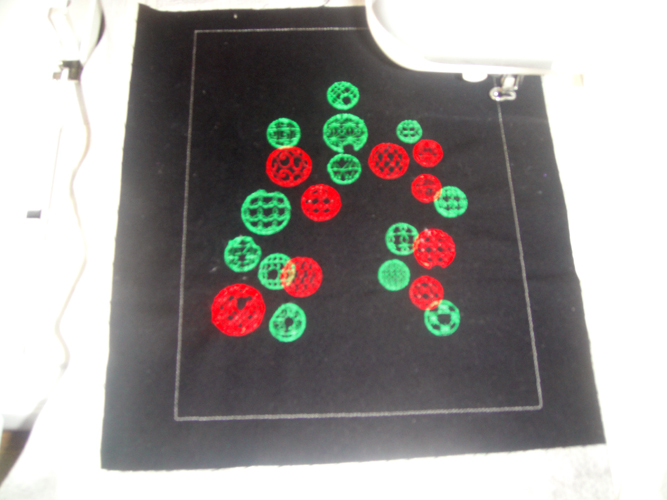
Run CS 4 in red to stitch the ornaments.
(Click Image to Enlarge)
Step 6:
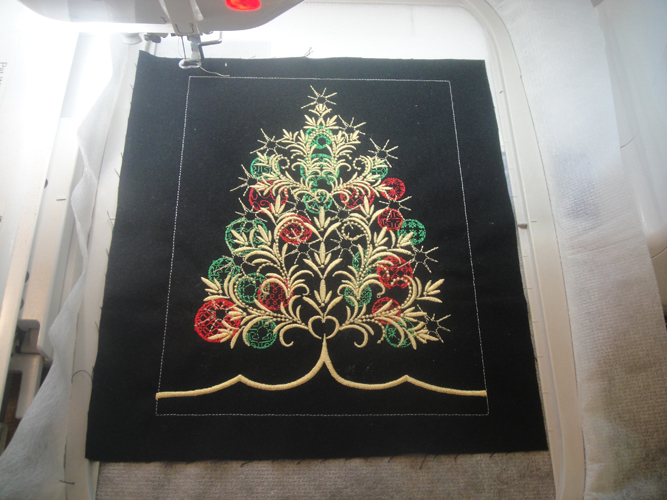
Run CS 5 in Vegas gold to stitch the light rays and the tree.
(Click Image to Enlarge)
Step 7:
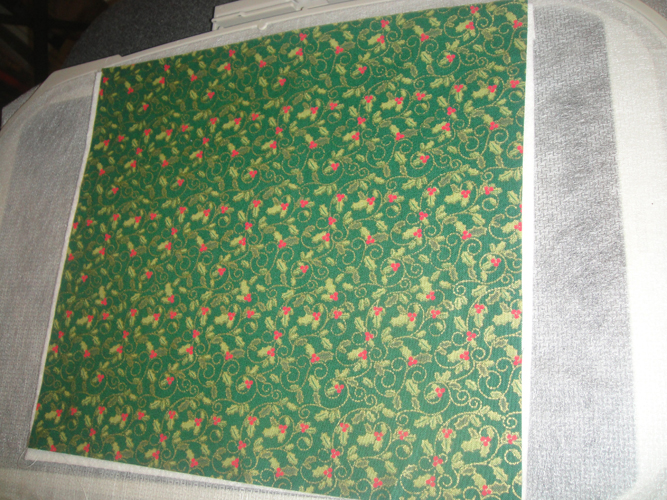
Remove the hoop from the machine; do not unhoop; turn the hoop face down on a flat surface; spray adhesive on the batting and place over the outlines on the back of the embroidery so that the batting exceeds the outlines by ½” in all directions; spray adhesive on the wrong side of the Christmas print and place over the batting.
(Click Image to Enlarge)
Step 8:
Run CS 6 in water soluble thread to tack all layers of the quilt sandwich together. This pictures is a perfect example of why we use water soluble thread. The inside white stitching line is the first row of tack down stitches. The outside line of the water soluble thread is the row of tack down stitches just sewn. In the design those two lines of stitches are perfectly aligned, but the embroidery stitches have by nature drawn up the fabric. You will now use the outline row of stitches as your guideline for all the future steps which may allow the initial tack down stitches to show in the project. In a few more steps you will be shown how to remove those water soluble stitches.
(Click Image to Enlarge)
Step 9:
Run CS 7 in black to quilt the block; run CS 8 in Vegas Gold to sew the eyelets.
(Click Image to Enlarge)
Step 10:
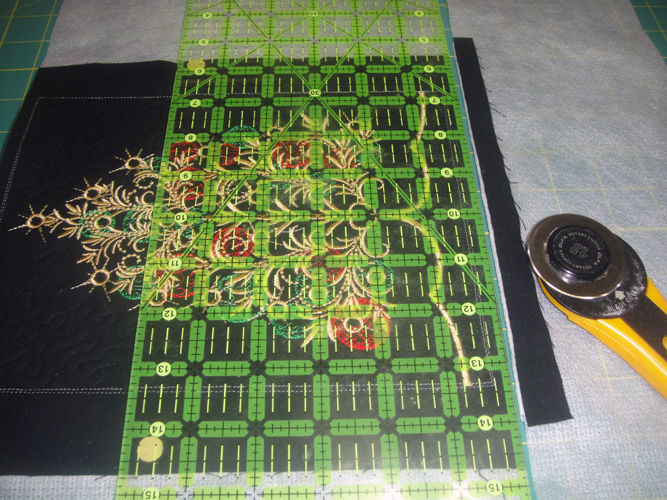
Remove the block from the hoop; using a quilting ruler lay the ¼” mark on the ruler along the outside water soluble thread line and trim all sides of the quilt block to ¼”.
(Click Image to Enlarge)
Step 11:
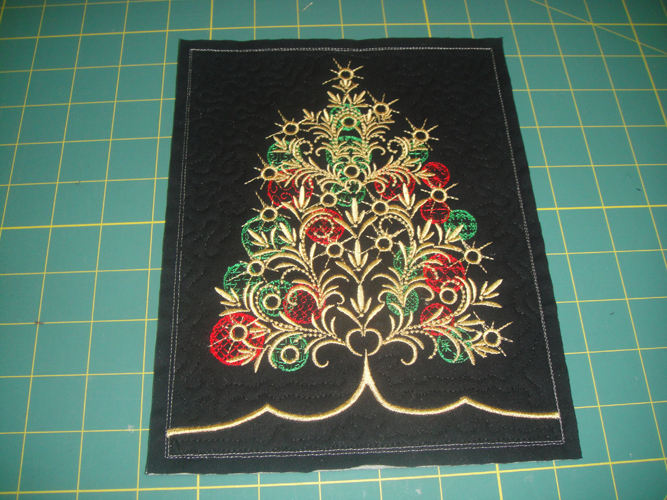
Your completed quilt block will look like this.
(Click Image to Enlarge)
Step 12:
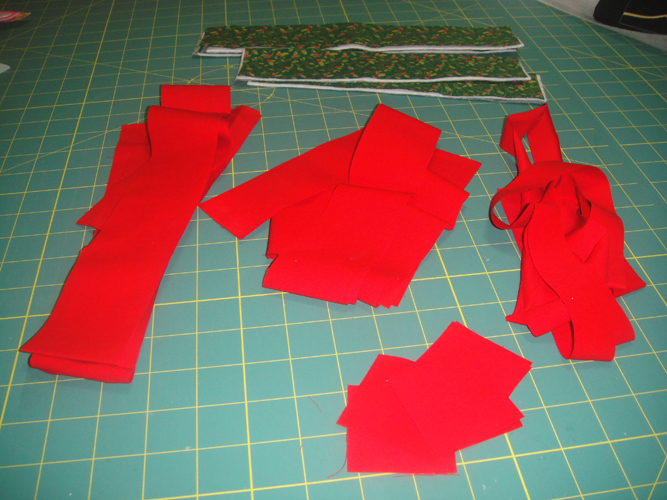
Cut for the borders:
4 Christmas print rectangles 2” x 10”
4 Christmas print rectangles 2” x 12”
2 Batting rectangles 2” x 10”
2 Batting rectangles 2” x 12”
For sashing and binding cut:
2 red sashing strips 2” wide and the width of the fabric
2 red sashing strips 1” wide and the width of the fabric
1 red strip 2” wide sub-cut 8 2” squares for prairie points
2 red 2 ¼” strips or desired width for binding
(Click Image to Enlarge)
Step 13:
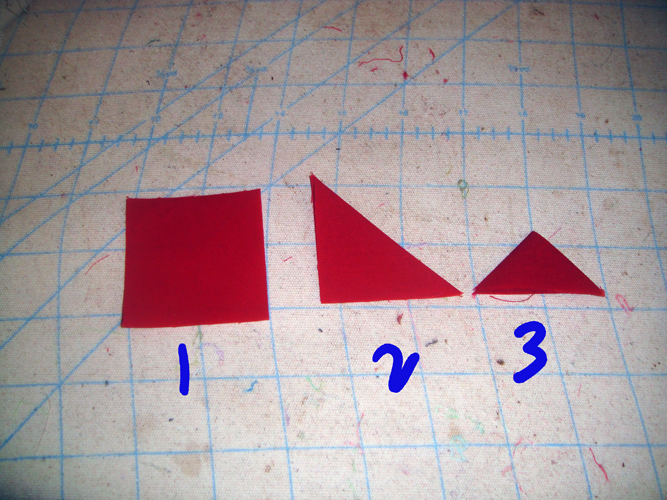
Press the prairie point squares with Magic Sizing; fold in half diagonally and press; fold in half diagonally and press again.
(Click Image to Enlarge)
Step 14:
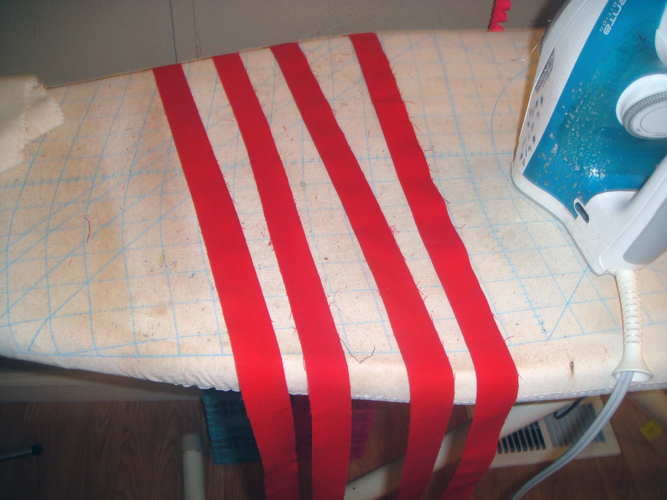
Press the 1” sashing strips with Magic Sizing; spray the 2” sashing strips with Magic Sizing fold in half lengthwise and press.
(Click Image to Enlarge)
Step 15:
Layer the border strips with the appropriate batting strips so that you have one border strip face down; the batting; one border strip face up; baste these quilt sandwiches together down both sides at your sewing machine or hold them together with spray adhesive.
(Click Image to Enlarge)
Step 16:
(Click Image to Enlarge)
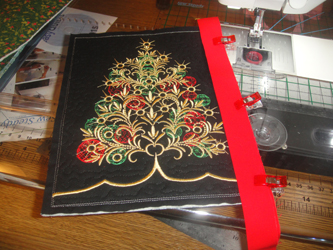
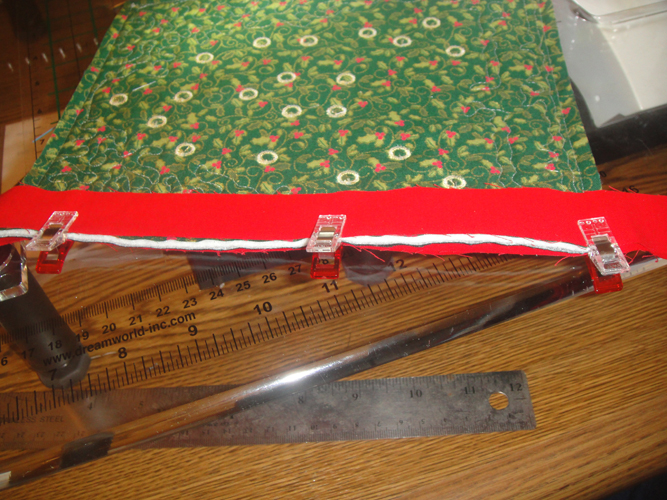
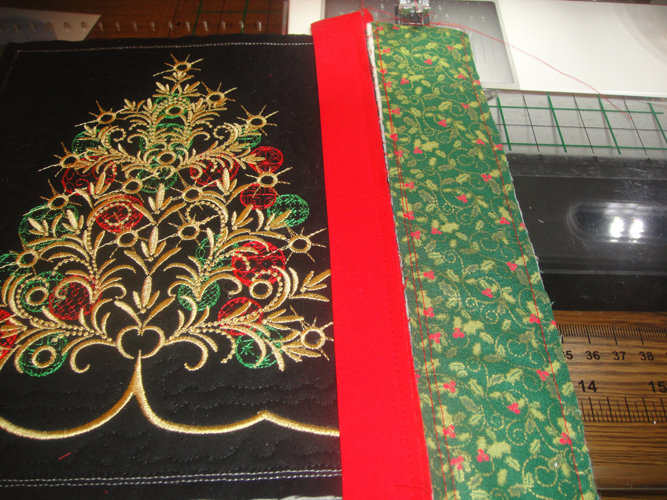
Clip a folded 2” strip to the front of the quilt block having the side raw edges even; have the sashing strip extend a little beyond the top and the bottom of the quilt block.
Step 17:
At the same time clip the 1” sashing strip to the back of the quilt block so that your block will look like this picture with the folded 2” strip clipped to the front and the 1” strip clipped to the back.
(Click Image to Enlarge)
Step 18:
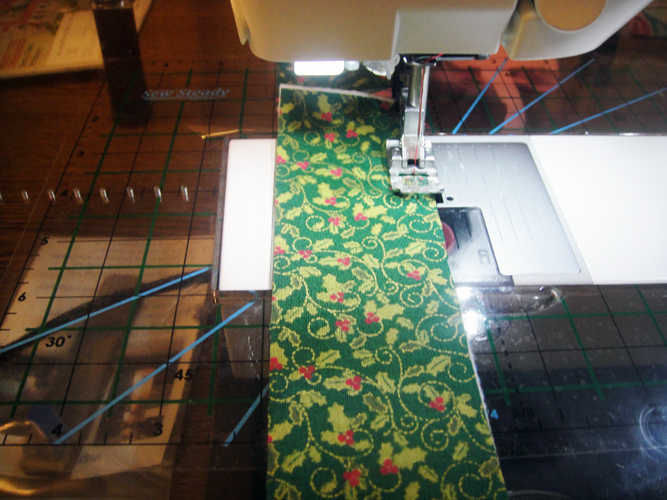
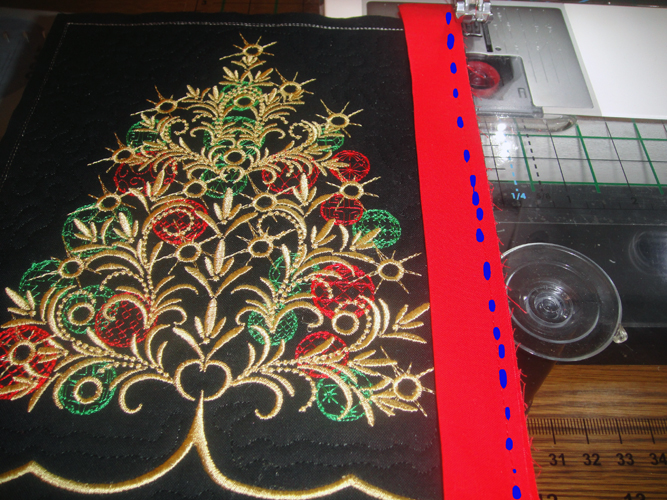
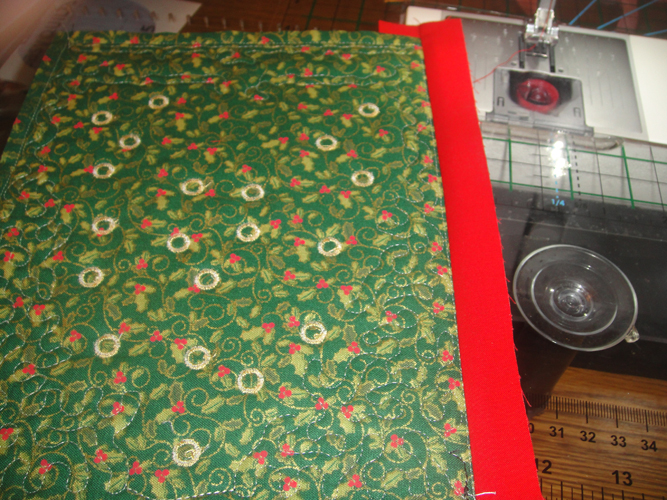
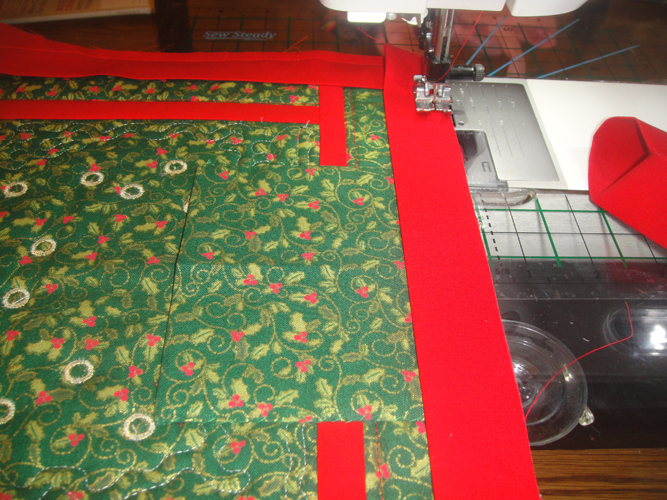
Maintaining accurate seam allowances is important when applying the sashing. If your walking foot will attach to a ¼” foot that is the best choice. If not, use your walking foot and use a guideline on your needle plate or the foot to ensure a ¼” seam. Use a 3mm straight stitch length and seam the two sashing strips to one side of the quilt block.
(Click Image to Enlarge)
Step 19:
Press the 1” back strip out away from the block.
(Click Image to Enlarge)
Step 20:
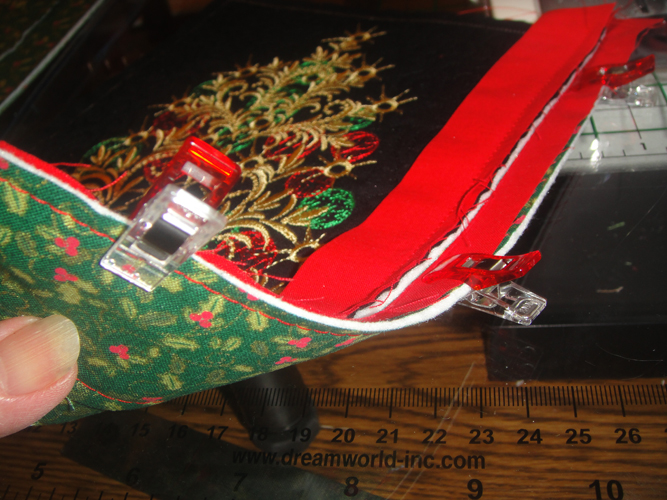
Clip the 1” back strip to a 2” x 10” border section; stitch with a ¼” seam allowance down the length of the border.
(Click Image to Enlarge)
Step 21:
When you open out the border section the two seam allowances should just butt together without overlapping or gaps.
(Click Image to Enlarge)
Step 22:
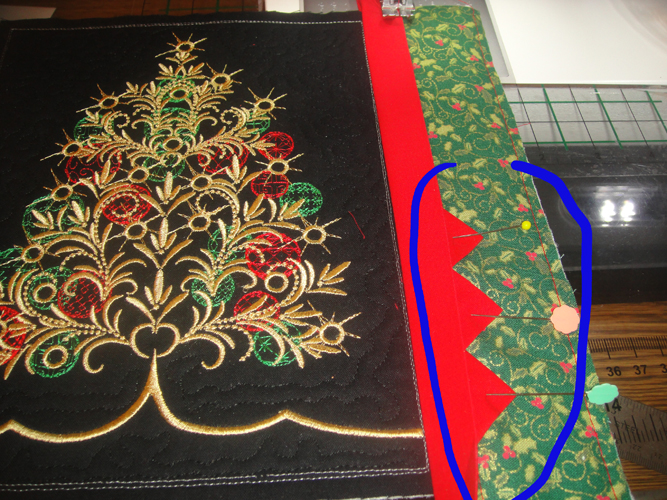
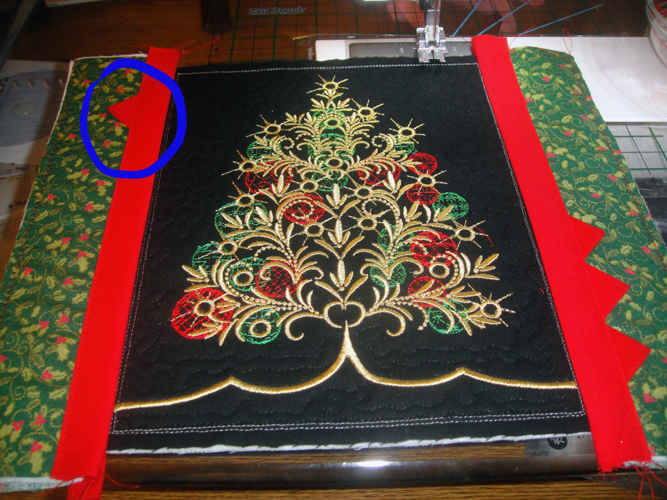
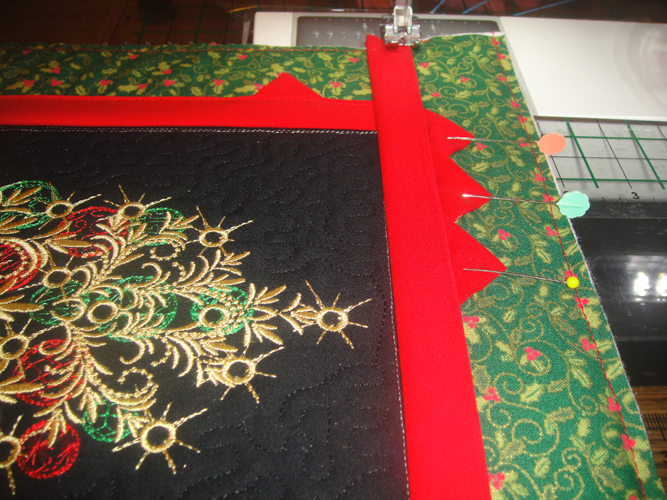
Pin three prairie points into position; placement is optional; in the sample measure up ¾” from the bottom edge of the quilt block; overlap the prairie points ¾”, the bottoms of the prairie points are even with the seam allowance of the border strip; fold the 2" folded sashing strip over the top and edge stitch into place.
(Click Image to Enlarge)
Step 23:
Attach the left border following Steps 16 through 22 only this time only one prairie point was added ¾” below the top of the quilted block.
(Click Image to Enlarge)
Step 24:
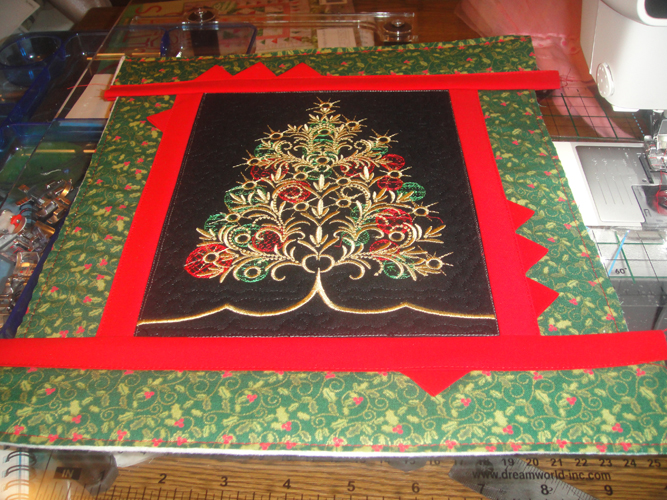
Trim the border and sashings strips at the top and bottom of the quilt block to be even with the quilted block.
(Click Image to Enlarge)
Step 25:
Attach the top border across the width of the quilt following steps 16 through 22; 3 prairie points were attached so that the 1st prairie point was about even with the side sashing strip; the other two prairie points overlap the 1st one and each other ¾”.
(Click Image to Enlarge)
Step 26:
Attach the top border in the same way; the single prairie point is position 3”4” from the inside edge of the side sashing strip.
(Click Image to Enlarge)
Step 27:
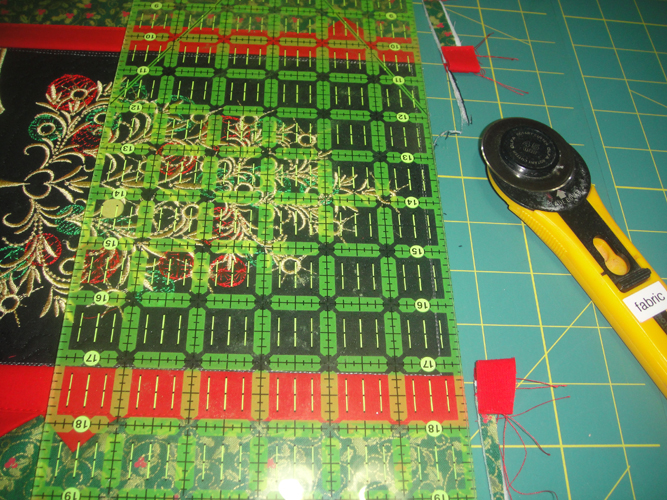
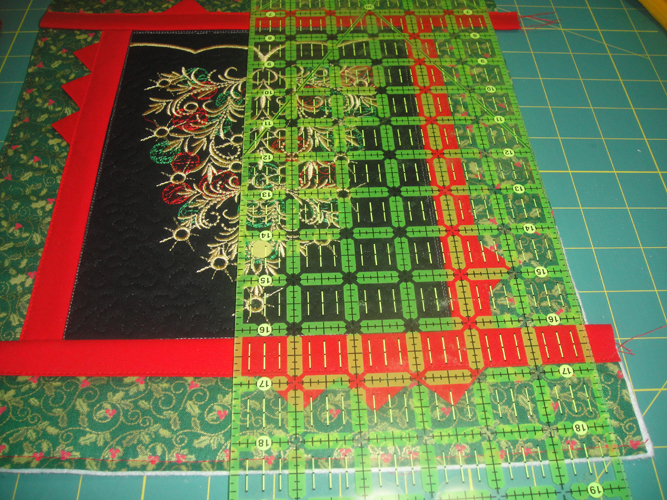
With a rotary cutter and quilter’s ruler square up and trim the excess top and bottom border strips and sashing. After all the borders are attached
dip the corner of a sponge in hot water and rub any exposed water soluble
thread and it will disappear. Once the water soluble thread disappears
the bobbin thread may be hanging loose on the back of the quilt block so just
cut that off.
(Click Image to Enlarge)
Step 28:
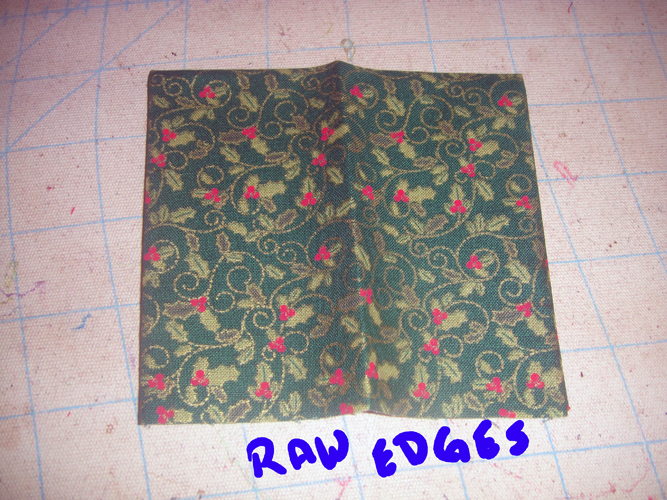
To make a pocket to hold the battery pack cut a 5” x 8” rectangle of the Christmas print; fold it in half crosswise right sides together; stitch a ¼” seam down each side leaving the bottom open; turn right side out and press; fold in half lengthwise and press to mark the center.
(Click Image to Enlarge)
Step 29:
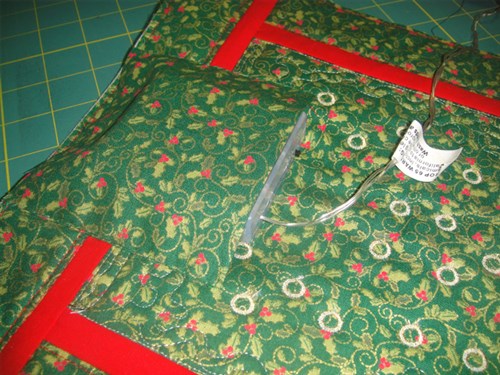
Aligning the center fold on the pocket with the center fold on the quilt; pin the pocket to the back of the quilt with the raw edge of the pocket at the bottom and the folded edge to towards the top of the quilt; hand stitch each side of the pocket to the quilt with a slip stitch. The battery pack shown in the pocket at this time was just me checking to see that it would fit – do not insert yours yet.
(Click Image to Enlarge)
Step 30:
Sewing tip; from our esteemed project maker Ramona Baird, running your thread through beeswax and then ironing the thread will keep it from tangling and knotting while doing your hand stitches.
(Click Image to Enlarge)
Step 31:
Apply binding around the quilt using your favorite method making sure the bottom edge of the pocket is held down by the binding. See our article on Binding a Small Embroidery Project.
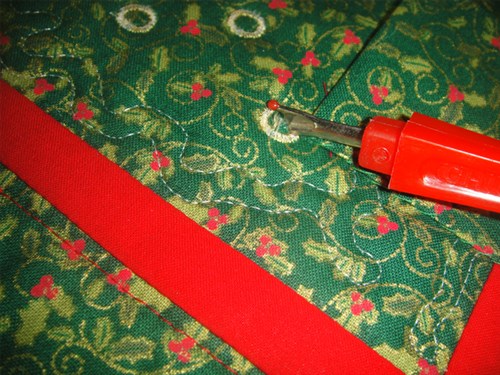
Opening the eyelets to insert the lights is a two part process; please be sure your seam ripper and scissors are sharp to the point, dull tools are dangerous and can cause you to have to push too hard causing errors. Insert your seam ripper in one edge of the eyelet circle and slide across to the other side of the eyelet.
(Click Image to Enlarge)
Step 34:
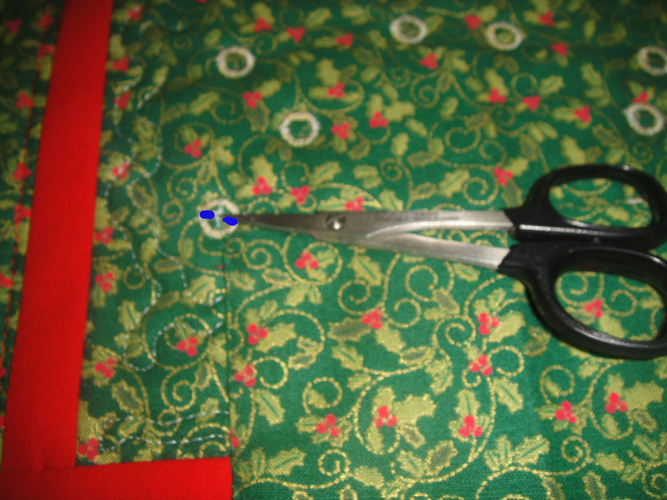
Slip the scissors into the slit just made; clip the center of each side of the slit all the way to the inner edge if the eyelet in effect cutting an X into each eyelet.
(Click Image to Enlarge)
Step 35:
(Click Image to Enlarge)
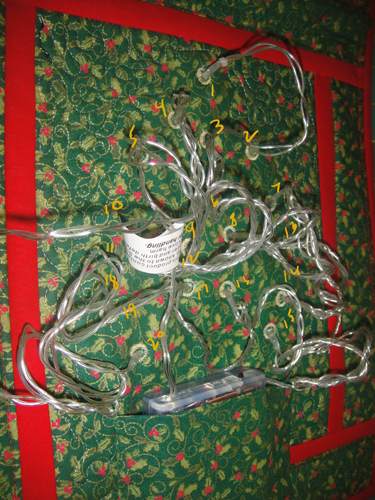
Insert the lights into the eyelets by pushing the blub completely through the openings starting with the light at the top end of the string and working your way down through the eyelets. You don’t have to have them in the exact order I had them, but this worked out well for me; slide the battery pack into the pocket with the on/off switch to the top of the pocket.
Step 36:
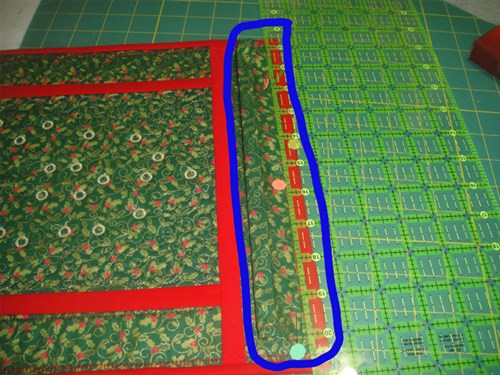
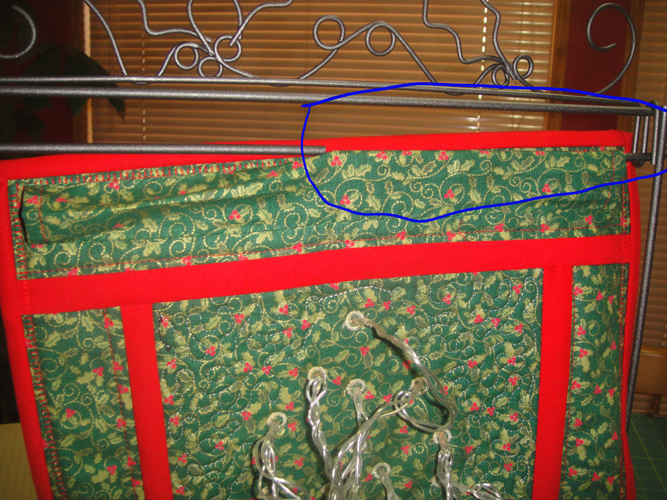
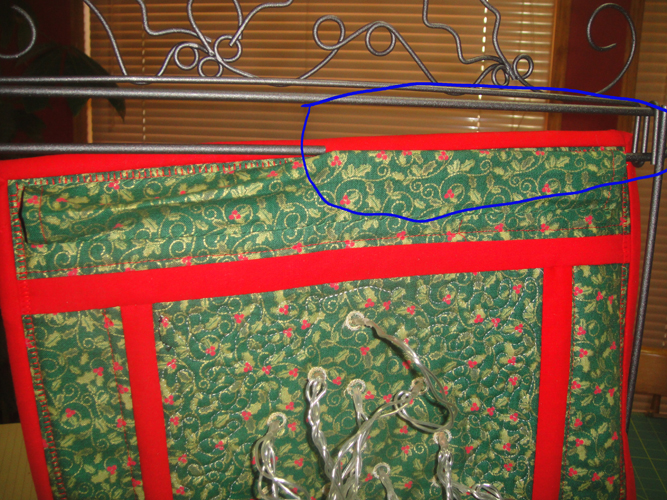
The Ackfeld Quilt Frame has a split rod for hanging the quilt; slide one end of the quilt onto the rod.
(Click Image to Enlarge)
Step 37:
Gather the quilt onto the first side until you can slip the other edge if the hanging sleeve onto the other section of the rod; straighten the quilt.
(Click Image to Enlarge)
Step 38:
(Click Image to Enlarge)
Congratulations your Twinkling Lights Christmas Tree Mini Quilt is complete!
Award winning Digitizer, Embroidery Educator, Author and a Consultant to the Industry, Pat Williams has 30 years of experience in the embroidery industry. Pat has won multiple awards for her digitizing expertise including the 2007 Impressions Awards Grand Championship, Best of Show as well as the 1st and 2nd Place Awards. Pat’s love of digitizing has afforded her the opportunity to write numerous articles for Impressions magazine in the United States and Images Magazine in Europe. In 2001 Pat was named “Embroidery Educator of the Year.” For many years Pat taught digitizing seminars at the ISS Shows in Long Beach, CA and for Compucon software. She now resides in Tucson, AZ.