Featuring the Classic Log Cabin and Court House Steps quilt blocks that are pieced and quilted in the hoop, you can quickly make a table topper for yourself or for a gift as you reduce the size of that fabric stash!
Embroidery thread for quilting and bobbin to match
Fabrics: Since you will be using fabrics from your stash – it is difficult to give exact yardage for these blocks but you will need approximately 42” of 1.25” strips for each block. 6 different fabrics were used in the sample. You will need approximately:
1 40” strip 1.25” wide of red fabric for block centers - use the remainder in the blocks
7 40” strips 1.25” wide of light fabrics
3 40” strips 1.25” wide of medium fabrics
3 40” strips 1.25 of dark fabrics
2 40” strips 1.25 of a high contrast fabric
1 yard of backing fabric cut into 12 7” squares. In the sample the backing squares were randomly cut from the stash fabrics used in the quilt front. You can do that or use 1 yard of a fabric of your choice to cut the backing squares.
3 strips 1.75” wide for front sashing
3 strips 2” wide for back sashing
3 strips 1.5” wide for binding
2 yards of Battilizer® (A combination quilt batting and stabilizer), or enough low loft quilt batting and poly-mesh or no-show backing to cut 12 12” squares depending on backing width.
Embroidery Machine
6” square or larger hoop (if using a larger hoop you will need additional Battilizer ® or low loft quilt batting and stabilizer to accommodate 12 hoopings.
Spray Adhesive
Scotch Tape
Sewing Machine with a walking foot or walking foot attachment
Invisible Thread on spool and bobbin to match for your sewing machine
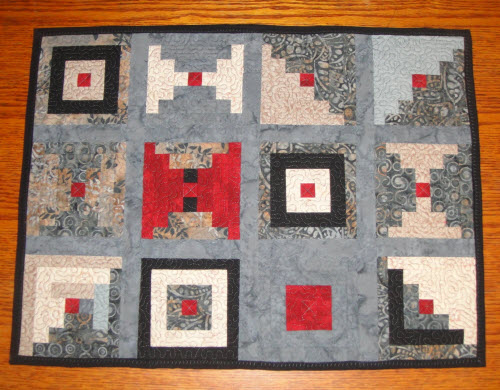
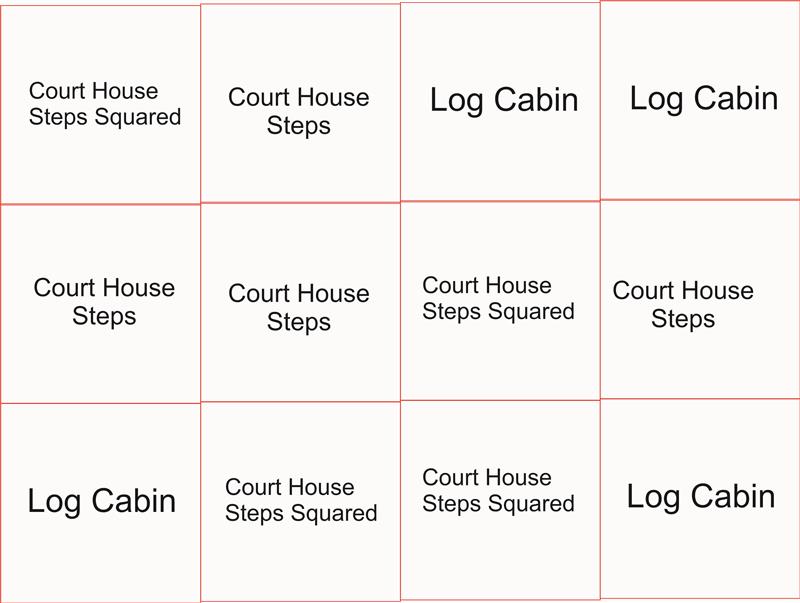
This table topper is made of twelve 5” pieced and quilted in the hoop quilt blocks. The finished size is 21 1.4" x 16 1/4". The blocks used are the Classic Log Cabin and the Court House Steps quilt blocks. In some blocks the Court House Steps block becomes the Court House Squared Quilt block by changing the placement of the various colored fabrics.
Step 1:
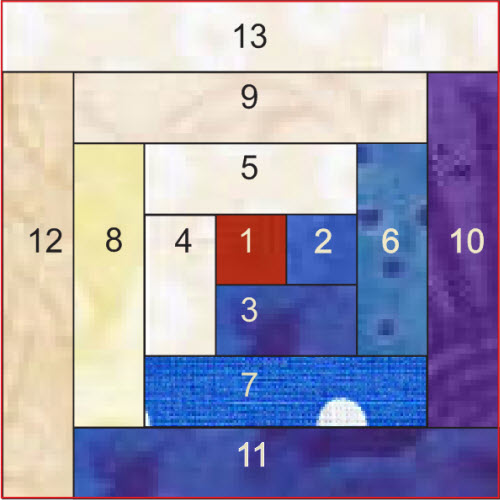
The layout for the Classic Log Cabin is shown here. See the project on Classic Log Cabin Blocks for assembly instructions for this block.
(Click Image to Enlarge)
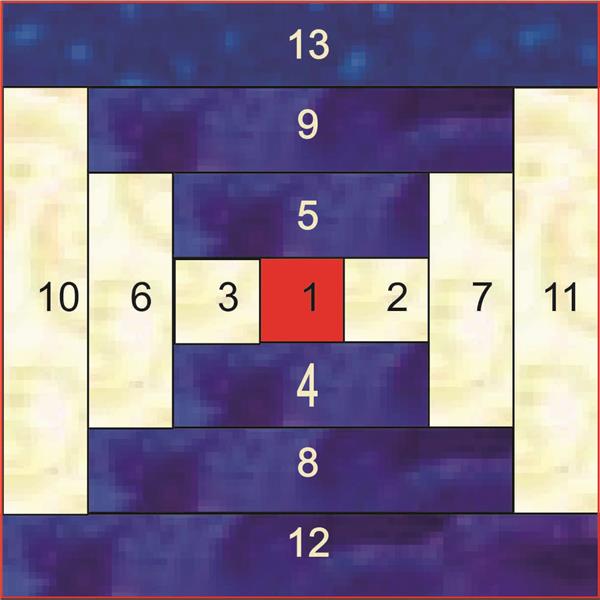
Step 2:
The
layout for the Court House Steps is shown here.
(Click Image to Enlarge)
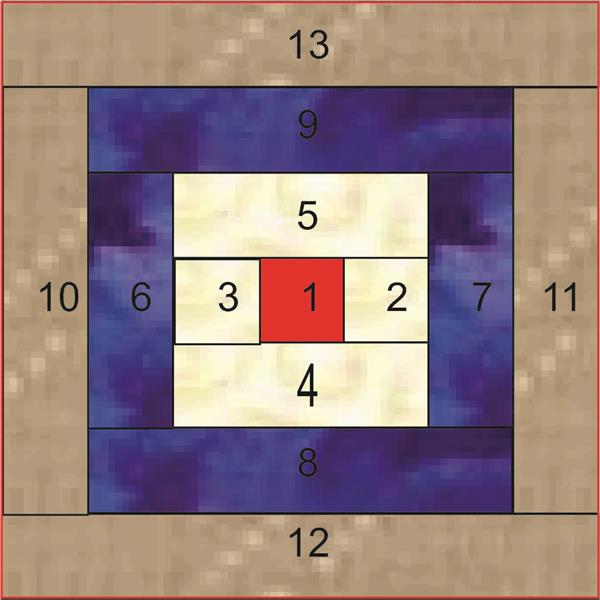
Step 3:
This is the layout for the Court House Steps Squared block. See the project for Court House Steps for assembly instructions for these blocks.
(Click Image to Enlarge)
Step 4:
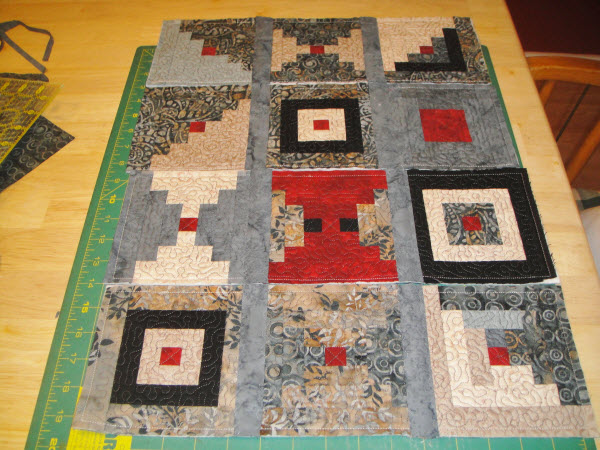
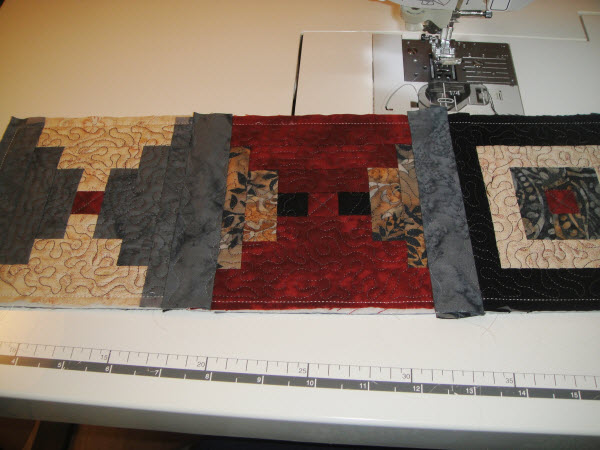
The layout for the Stash Buster Table Topper is pictured here.
(Click Image to Enlarge)
Step 5:
In the pictured sample red fabric was used for the center
squares of all blocks. It is said the
red squares represent the hearth of the home. If you wish you may use a yellow fabric in the center squares, this is
to represent a light in the window.
Step 6:
Make 4 Log Cabin blocks in fabrics of your
choice.
Step 7:
Make 4 Court House Step Squared blocks in the
fabrics of your choice.
Step 8:
Make 7 Court House Step blocks in the fabrics of
your choice.
Step 9:
You can use the layout
as pictured or move them around to suit your own taste.
(Click Image to Enlarge)
Step 10:
Prepare the sashing for the back of the quilt by cutting three strips of fabric 2” wide across the width of your fabric -40”. Fold the ½” in on each side of the strip to meet in the middle and press.
Step 11:
Cut three 1 ¾” inch strips across the width of your fabric and fold edges to meet in the center and press.
Step 12:
First we will assemble the three rows of your table topper. Applying sashing as we go. Then we will assemble the three rows into the table topper.
Step 13:
With regular sewing thread in the top and bottom of your sewing machine butt the first two blocks together. Do not overlap the edges.
(Click Image to Enlarge)
Step 14:
With your widest zigzag setting zigzag over the butted edges.
(Click Image to Enlarge)
Step 15:
Repeat Step 14 to add the other two blocks to this row.
Step 16:
Join remaining blocks in the same fashion forming three rows of 4 blocks. Do not join the rows to each other yet.
Step 17:
You will now apply the sashing to the back and
then the front of the rows by.
Step 18:
Load invisible thread in the top and bobbin of your sewing machine.
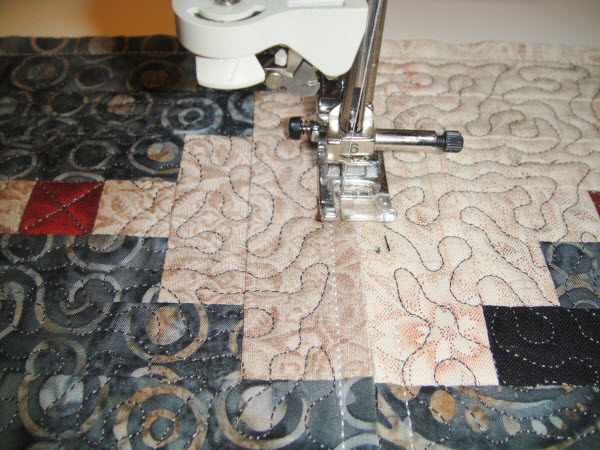
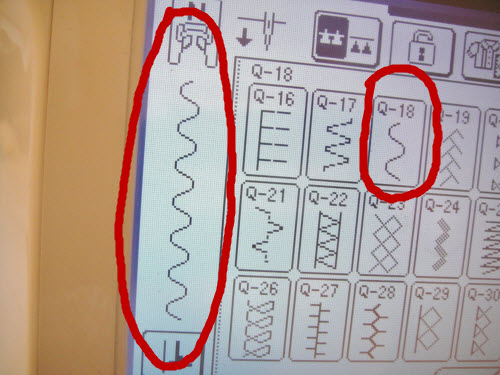
Step 19:
Set your machine to a Serpentine stitch.
(Click Image to Enlarge)
Step 20:
Place the row of quilt squares face
down on your sewing machine.
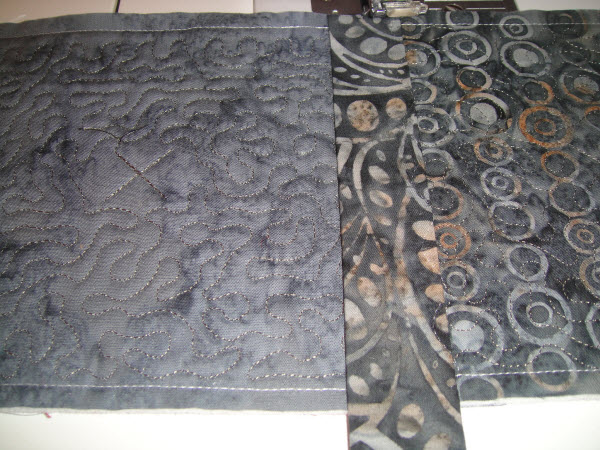
Step 21:
Align the strip of back sashing over the butted seams between two blocks.
(Click Image to Enlarge)
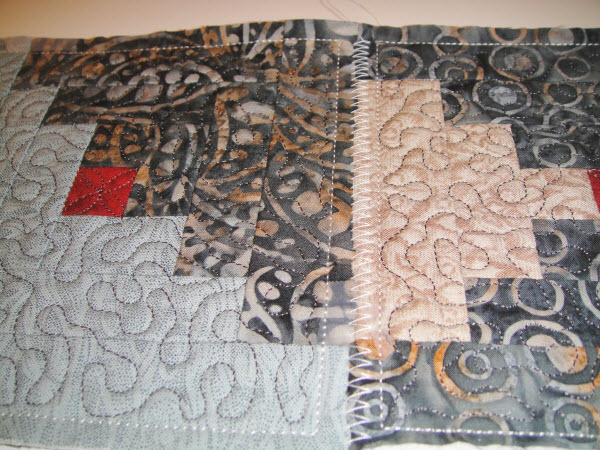
Step 22:
Stitch each side of the back stashing strip with the Serpentine stitch.
Step 23:
Repeat to cover the zigzag stitch between all blocks on the separate rows of your table topper.
Step 24:
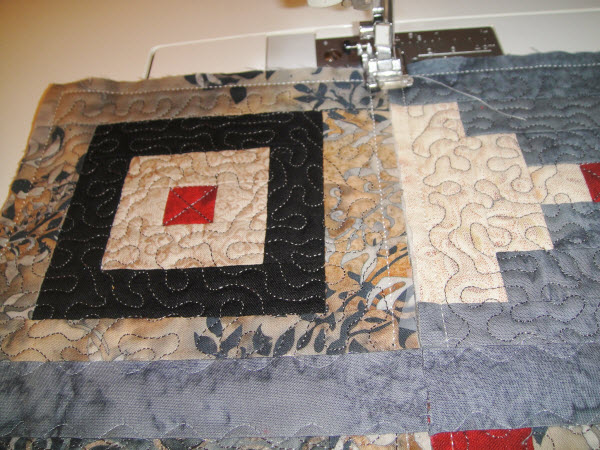
Turn the rows over and apply the front sashing strips to the blocks in the same manner.
(Click Image to Enlarge)
Step 25:
When apply the sashing to the fronts and the backs, be sure that the center fold of the sashing in placed over the line created by the two blocks being butted together.
(Click Image to Enlarge)
Step 26:
You will now stitch the rows together to make the table topper.
Step 27:
Change the thread in your sewing machine back to regular thread in the top and in the bobbin.
Step 28:
Butt two rows together and zigzag with your widest zigzag to join the rows together.
(Click Image to Enlarge)
Step 29:
Repeat to add the third row to your table topper.
Step 30:
Change your thread to invisible thread on the top and in the bobbin of your machine.
Step 31:
Apply back sashing strips over the long seams created by joining the rows with a Serpentine stitch.
Step 32:
Turn the table topper right side up and apply the front sashing strips in the same manner.
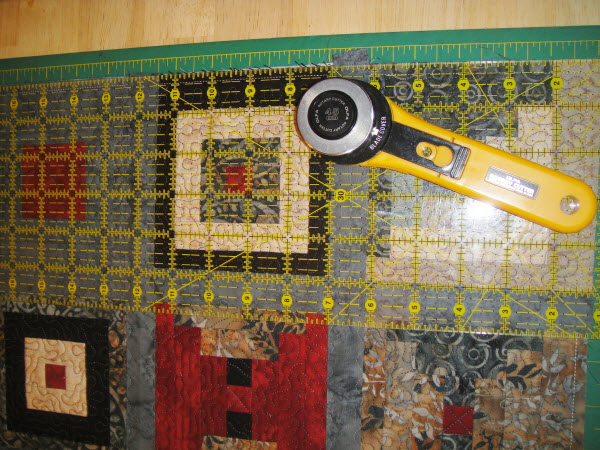
Step 33:
Align the ¼” line of a clear ruler along the water soluble
stitching of the blocks and trim the edges of the table topper.
(Click Image to Enlarge)
Step 34:
Apply binding to the quilt.As this quilt has ¼” seam allowance you will
want to cut your binding strips 1 ½” wide. If you wish to miter the corners in your binding see our free article on Binding In The Hoop Quilt Projects.
Step 35:
Congratulations,
your table topper is complete.
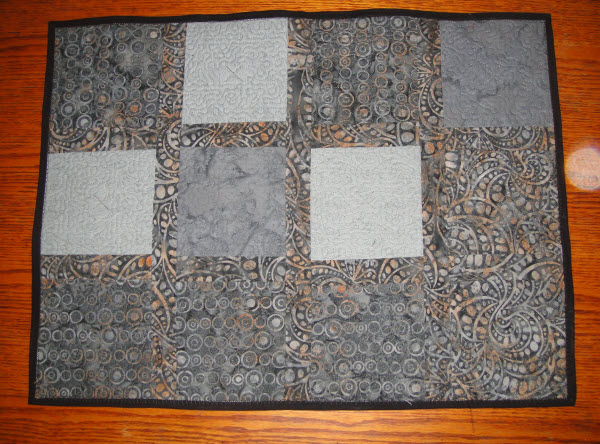
Step 36:
Stash
fabrics were randomly used for the back of the quilt blocks in this
sample.You never know what interesting
arrangement of back squares that you will come up with.
Award winning Digitizer, Embroidery Educator, Author and a Consultant to the Industry, Pat Williams has 30 years of experience in the embroidery industry. Pat has won multiple awards for her digitizing expertise including the 2007 Impressions Awards Grand Championship, Best of Show as well as the 1st and 2nd Place Awards. Pat’s love of digitizing has afforded her the opportunity to write numerous articles for Impressions magazine in the United States and Images Magazine in Europe. In 2001 Pat was named “Embroidery Educator of the Year.” For many years Pat taught digitizing seminars at the ISS Shows in Long Beach, CA and for Compucon software. She now resides in Tucson, AZ.